You must be logged in to rate content!
6 minute read
Foglight Angel Eyes v2.0
Compliments of 30yrVeteran @ bimmerfest.com
7-27-2010
I made some angel eyes for my foglights a while back, but wasn't very happy with them. Made them with a plastic rod that you use to open and close your blinds. They were too small in diameter, hexagon shaped and just weren't bright enough.
So I went back to the drawing board...
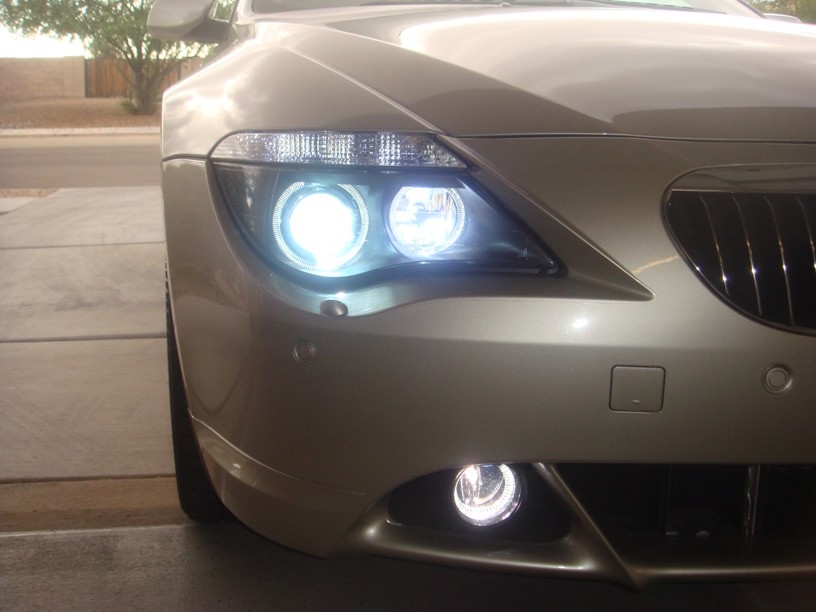
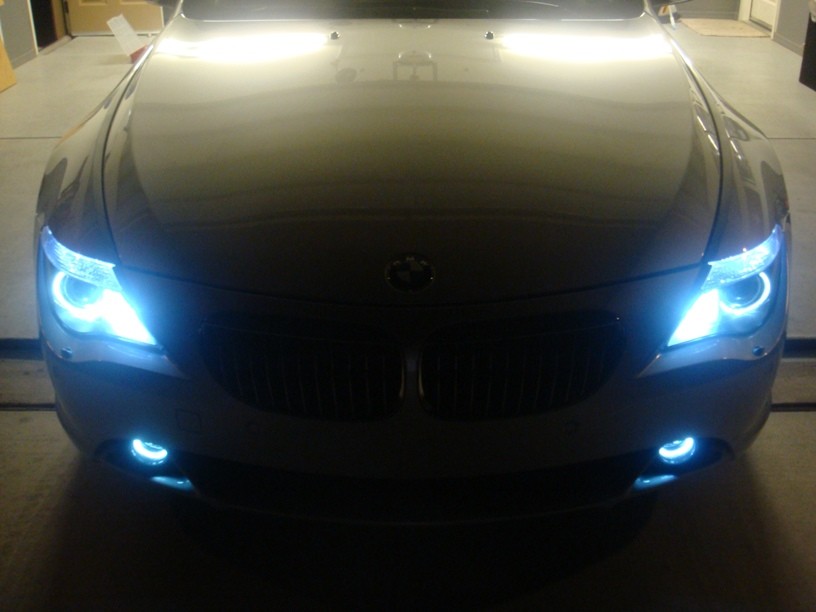
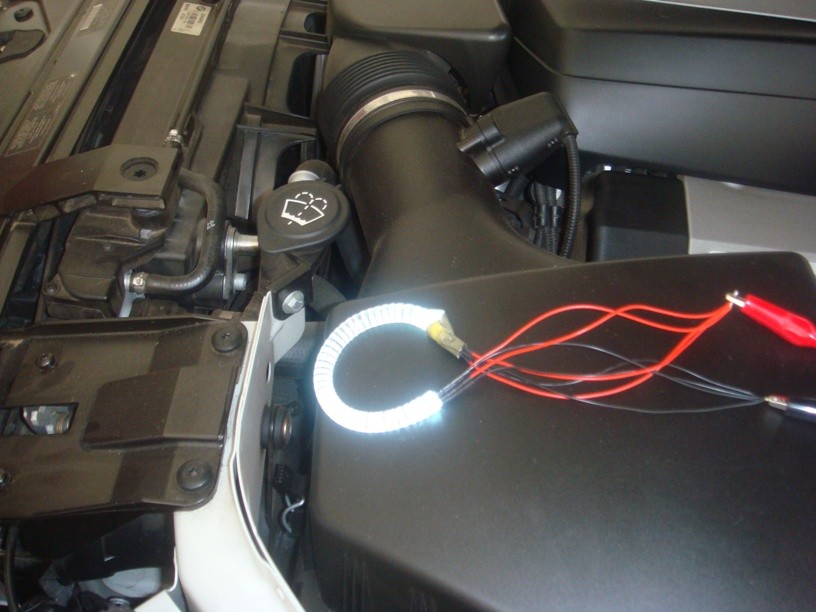
As you can see in the pictures, the new ones are as bright/brighter than the MTEC v2's in the headlight angel eyes. I bought 6 feet of 1/2" acrylic rod from a local plastics supply shop and ordered some "super bright white" LED's from ebay. I was able to put 4 LEDs in each eye, so this time I got the desired light output. I think it looks pretty sweet for a $15 investment and 4 hrs of work.
Here's some DIY info.
Required materials/tools:
- A lid from some Pace Picante sauce (so buy some Doritos too) and a scrap piece of wood
- Dremel with plastic cutting wheel
- 8 each miniature LEDs
- 8" lengths of 1/2" acrylic plastic rod
- superglue
- 18 gauge wire
- heatshrink and a few wire connectors/quick disconnects
- drill
- zip ties
- black silicone sealant
- Screw your Pace Picante sauce lid to a piece of wood.
- Set your oven to 325 degrees.
- Have some Doritos and Picante sauce while you wait 
- Drop a couple 8" lengths of the plastic rod in the oven on a piece of aluminum foil.
- After about 5 min, put some gloves on, grab one and quickly wrap it around the lid.
- The rods will shrink about an inch from the heat and end up being about 7", which is the perfect length.
- Using a Dremel, bore out 2 small holes on each end of the angel eye so that the LEDs fit all the way in.
- Then use the Dremel with a thin plastic cutting wheel and cut small grooves all the way around. The best way I found to do this was to clamp the Dremel to the workbench and adjust the height until I could just run the rod under it. Then every cut would be the same depth.
- Put a drop of superglue in each LED hole and then insert the 4 LEDs. Use some duct tape or something to hold them in place till they dry. The superglue not only holds them in, but seals the LED to the plastic so maximum light is tranferred through the tube.
- After the superglue dries, put heatshrink over the wires on each side and onto the plastic rod just far enough to hide the LEDs.
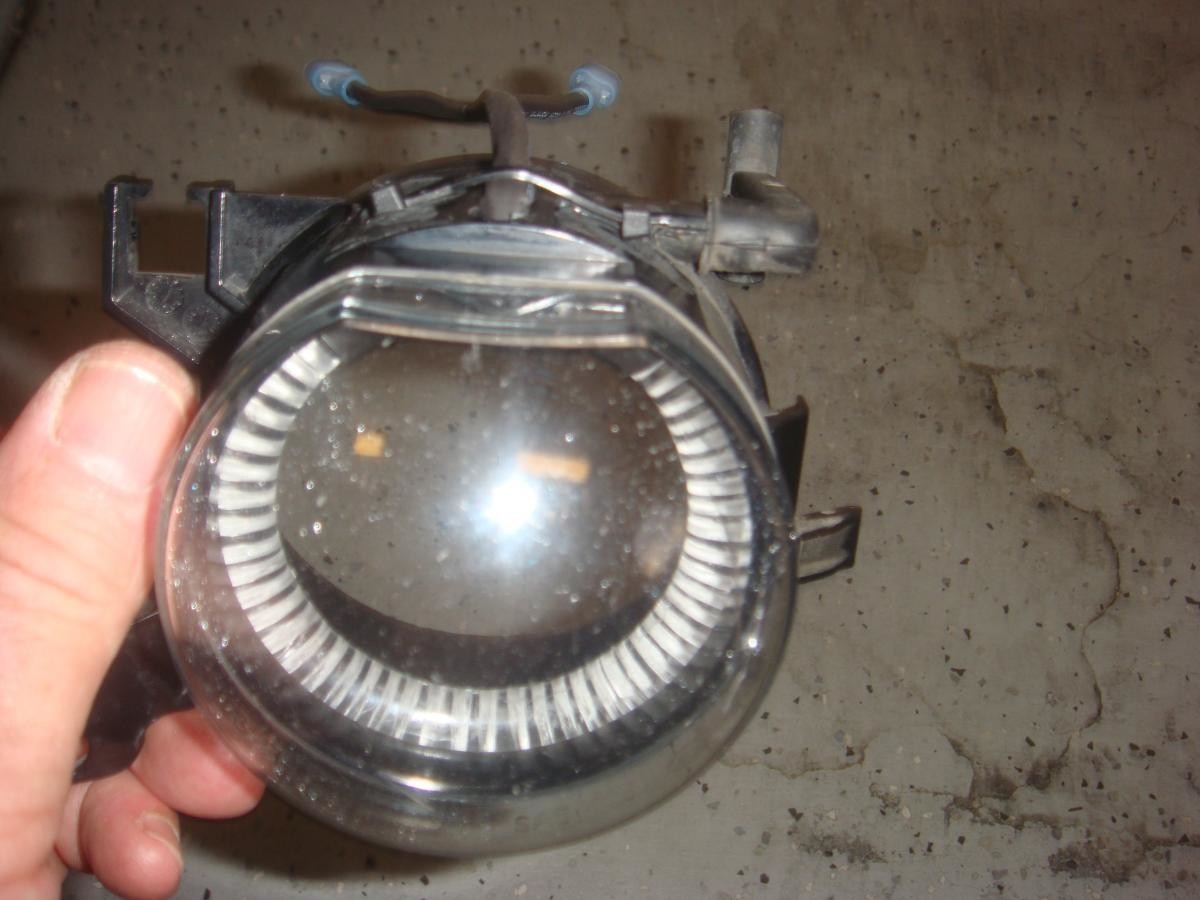
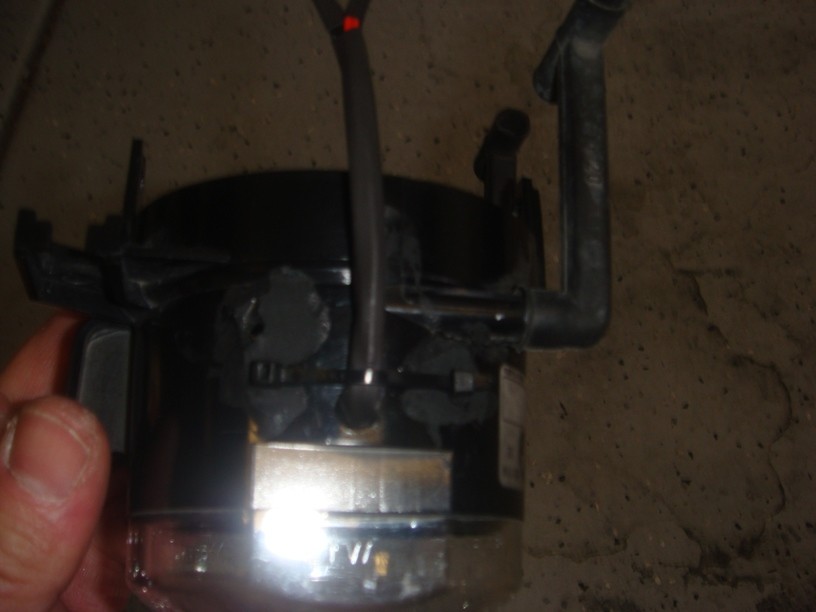
- Here comes the scary part lol. Drill about a 1/4" hole in the top of the foglight housing and 2 small holes (just large enough to loop a small zip tie through) just behind and to the left and right of the larger hole about an inch apart.
- Push the angel eye into the housing until it's up against the front lip of the black portion of the housiing and route the wires up through the 1/4" hole. The eye is just a little larger then the inside of the housing, so it will fit tightly once inserted.
- Bend the wires toward the back of the housing and loop a zip tie through the 2 small holes to hold the wires firmly in place.
- Put some black silcone over the spots you drilled and around the wires so the housing will be waterproof and won't fog up on you.
- Wire the LEDs to your headlight angel eyes or an accessory power feed, whatever you prefer. Use quick disconnects near the light so you can disconnect them easily if you need to pull the nose off again for something.
- Sit back and admire your work with the rest of your Doritos and dip.
If any of you are crazy enough to try this and need some clarification on something, let me know.
End results below...

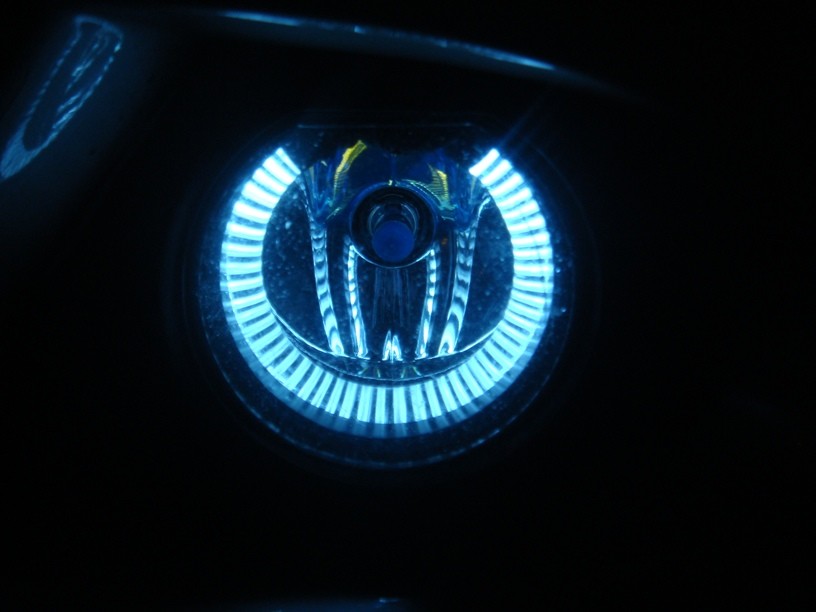
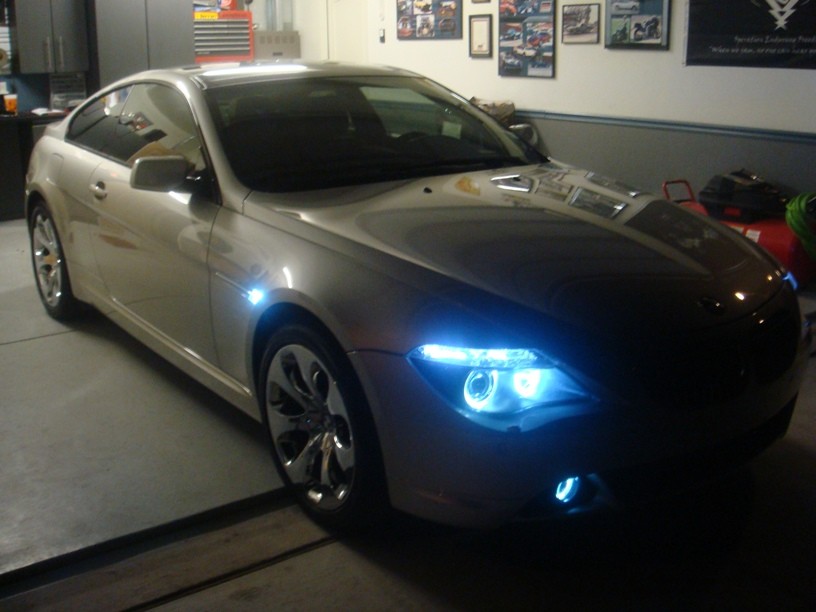
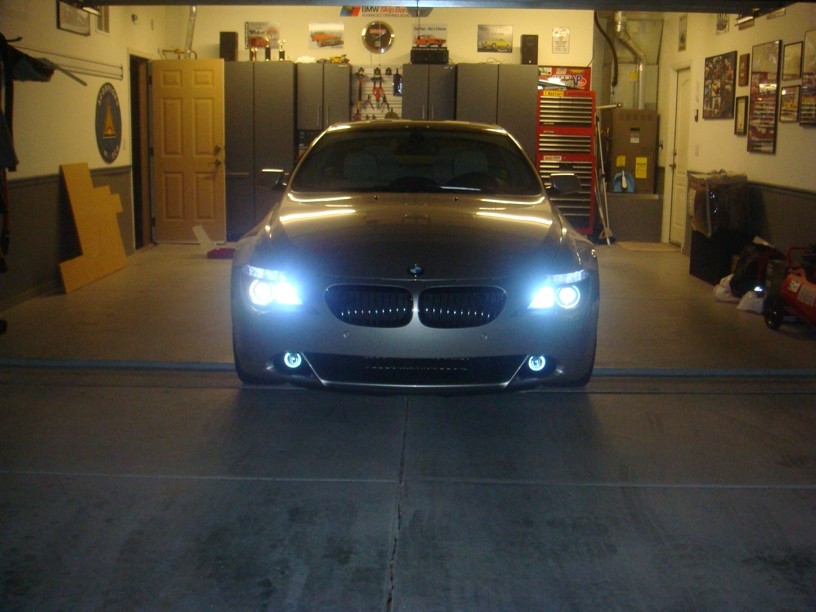
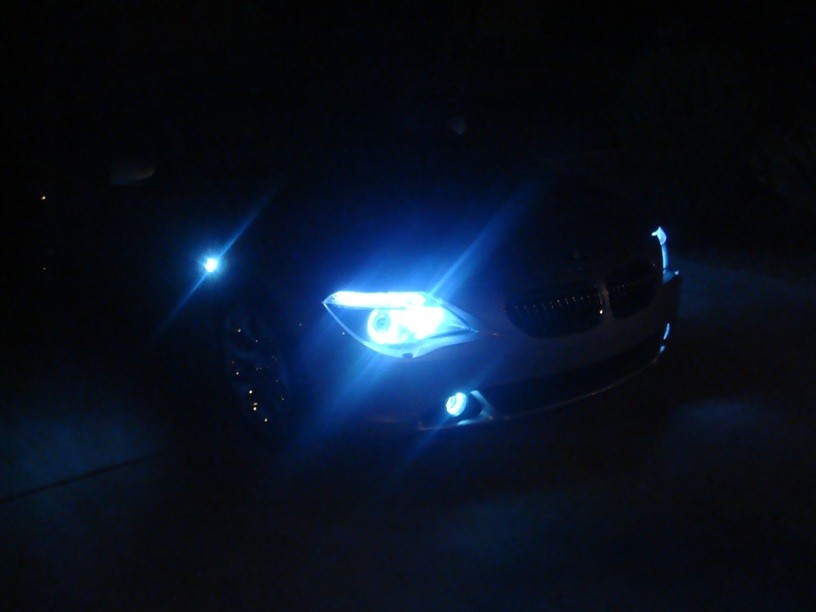
Heres the results!
Most of these pics are with the headlights and foglights off. Wish my camera wasn't so crappy though...