- Column lock - Volvo part number V30887387 - cost as of July 2013 $153.78
- Shear bolts, 2 - Volvo part number V30621314 - cost $26.34 for the pair
- Ignition key
- Metric sockets
- #40 star head socket - about $6.00 at Auto-Zone
- 3/8 extensions
- Ratchet wrench, 3/8 drive
- #2 Philips screw drivers, long and short
- Straight blade screwdriver
- Flashlight
- Hammer
- Sharp center punch
- NEW 1/8 inch drill bit
- Drill motor
- Easy-out for "7/64 inch bit"
- magnet
- Small mirror
You must be logged in to rate content!
13 minute read
Steering lock replacement, 2004 Volvo V40
Compliments of rusty car guy @ http://www.instructables.com
It seems to be a very common problem on Volvos.
Everything is fine until suddenly you can't turn the ignition key to start the car.
A repair by the dealer could cost you up to $700.00.
However, with a new column lock, a few tools and a couple hours you can save yourself $500.00!
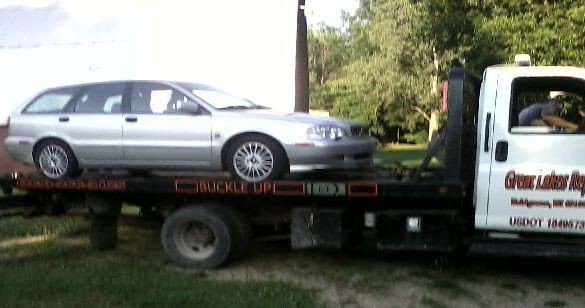
Step 1: Tools and parts
Here are the tools you need to do this job:
Metric sockets
#40 star head socket - about $6.00 at Auto-Zone
3/8 extensions
Ratchet wrench, 3/8 drive
#2 Philips screw drivers, long and short
Straight blade screwdriver
Flashlight
Hammer
Sharp center punch
NEW 1/8 inch drill bit
Drill motor
Easy-out for "7/64 inch bit"
magnet
Small mirror
Column lock - Volvo part number V30887387 - cost as of July 2013 $153.78
Shear bolts, 2 - Volvo part number V30621314 - cost $26.34 for the pair
You will also need the ignition key
Step 2: The Problem
On this particular (120K miles) Volvo, my wife left work and tried to start the car - no luck.
Absolutely no warning, the key would turn to position #1 and #2 but it would not turn to the cranking position.
At least in position #2 the column is unlocked and you can steer the vehicle.
I have read on the forums that sometimes you cannot turn the key from the lock position which would make the repair more difficult.
For this vehicle I was able to re-use the key cylinder which saved the $150.00 expense of having a new cylinder coded to our existing key. This part would have taken several days to order.
As it was I was able to order a new lock from Maple Hill Volvo in Kalamazoo Michigan on a Thursday morning and pick it up the next afternoon.
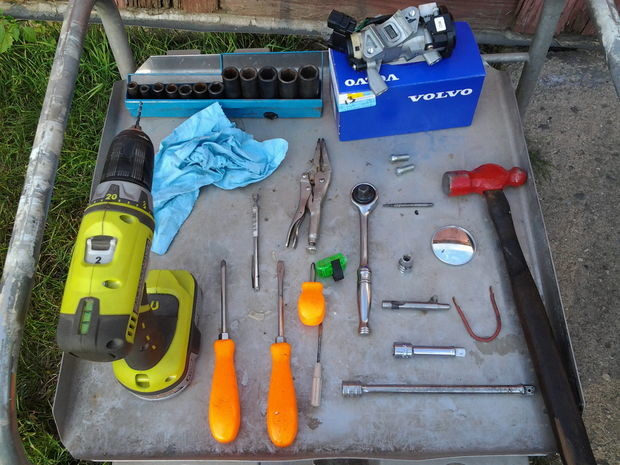
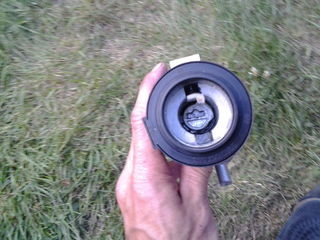
The dealer will want to know if you have Shift Lock. This is a cable that runs from the shifter to the column lock and prevents you from removing the key unless the car is in park - see the square button at the top right of the photo? It says "Shift Lock".
In the other photo you can see the cable attached to the lock with a single screw.
Note:
You should disconnect the battery when you do this job. That will disable your radio which will then ask for the "CODE" once the battery is re-connected. If you don't know the code already ask the dealer to provide it for you - they will need the VIN of the vehicle and the radio type, ours is an HU55 - it has an AM-FM with C/D player. it is a 4 digit code, the numbers are 1-6, for example our code is 5121.
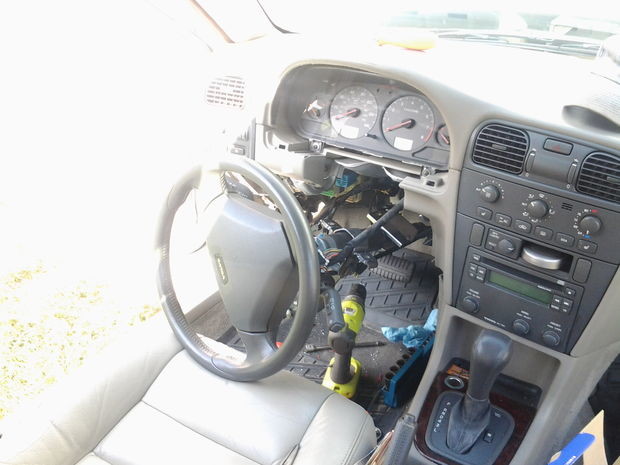
Step 3: Disassembly
OK, you have your tools and the parts.
Now you need to get at the broken piece.
First disconnect the negative battery cable - there's no sense causing a short.
You do NOT need to remove the air bag or the turn and wiper controls.
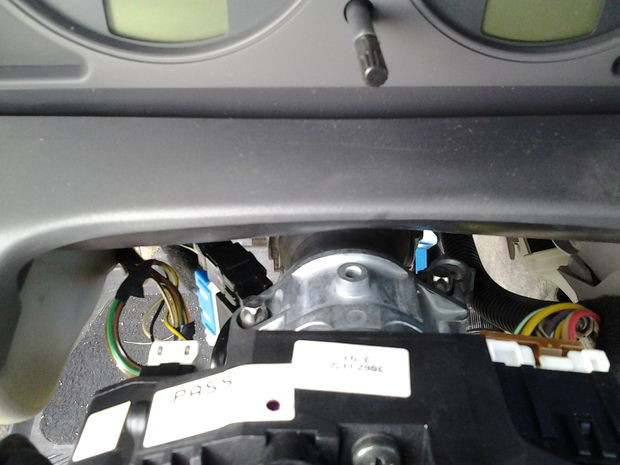
You will need to remove the plastic covers on the column, the close out panel under the dash, the speedometer bezel and drop the column down.
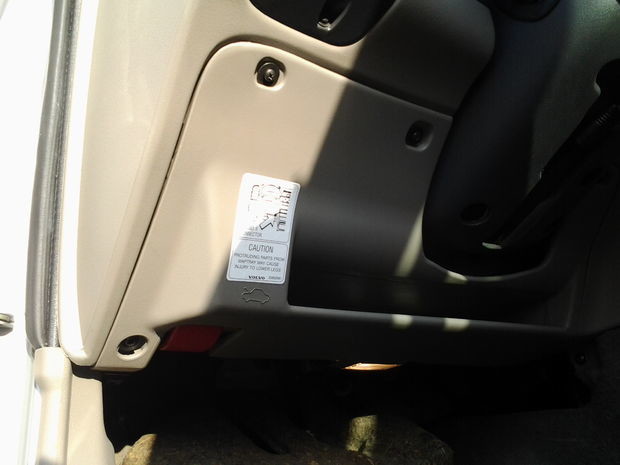
In the first photo you see some of the screws on the panel under the dash. There's a cover over the screw down by the hood release.
To remove this panel after you unscrew it, lift up on the left side then pull toward you. When that side is loose, pull it toward you as you move it toward the outside of the car to release the right side
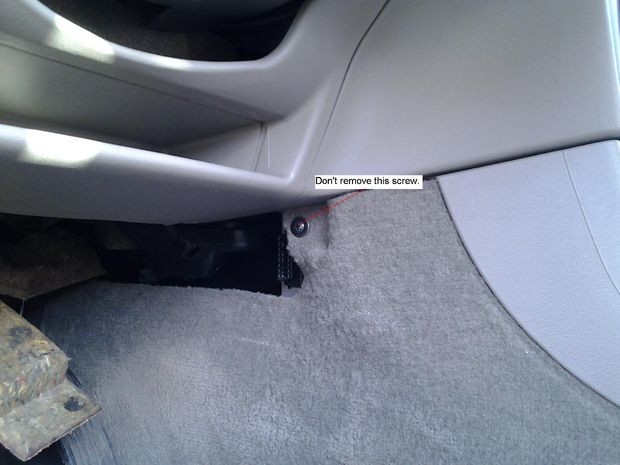
Below this panel, down by the pedals, is a fiber panel held by 2 clips as shown in the photo - squeeze them and pull down, then disconnect the 2 wires to the courtesy light on the panel.
Step 4: Disassembly continued
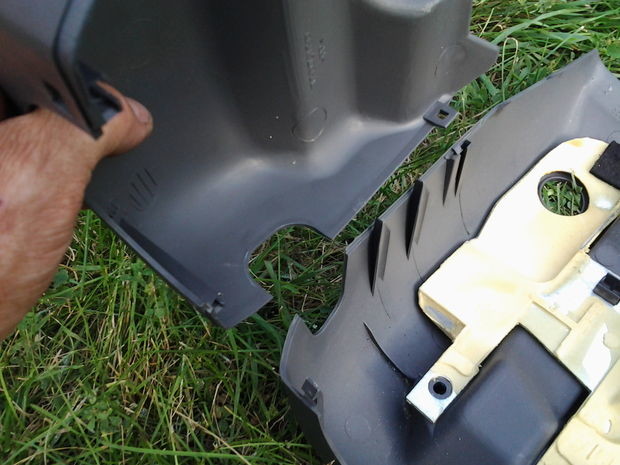


To remove the column upper and lower cover.
There are 3 philips screws that hold the lower cover to the bottom of the column.
After you remove them turn the steering wheel so that you can access the tabs on the front of the 2 parts.
Use your straight screw driver to push in on the rectangular tabs to release the top from the bottom, then carefully pry on either side to release the tabs there - see the photos.
Lower the column using the "tilt" lever and you should be able to get the top part off easily.
The bottom will take a bit more work to get it off from the key cylinder face and it's rubber gasket.
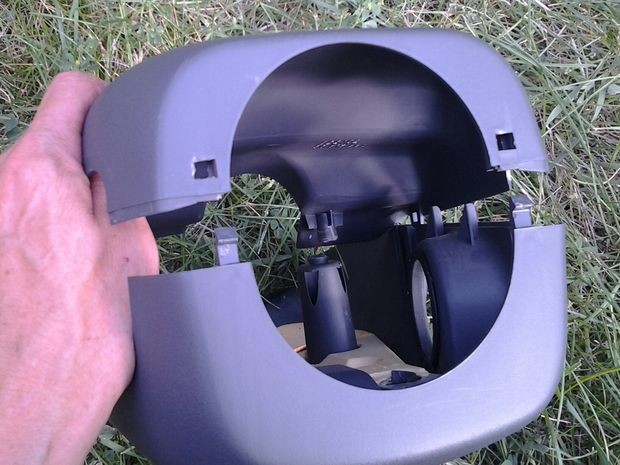
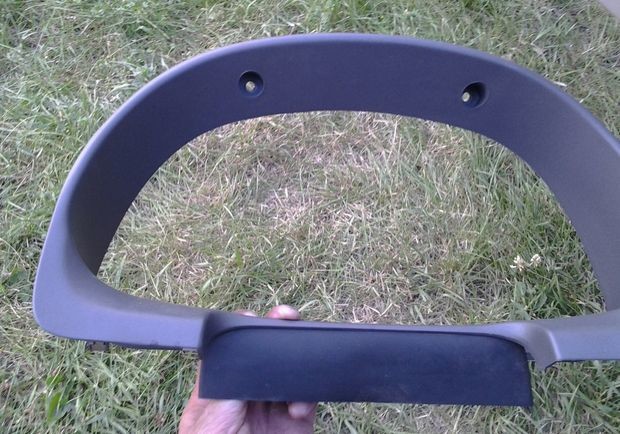
To remove the speedometer bezel take out the 2 screws at the top which you can see, then pull straight out on the bottom to release the clips.
Now is also a good time to remove the 3 screws that hold the black plastic turn signal and wiper controls to the lock.
Turn the steering wheel to gain access to the 2 lower ones and the one at the top center.
You can do it after the column is dropped but it is much harder to turn the steering wheel at that point.
Step 5: Drop the column
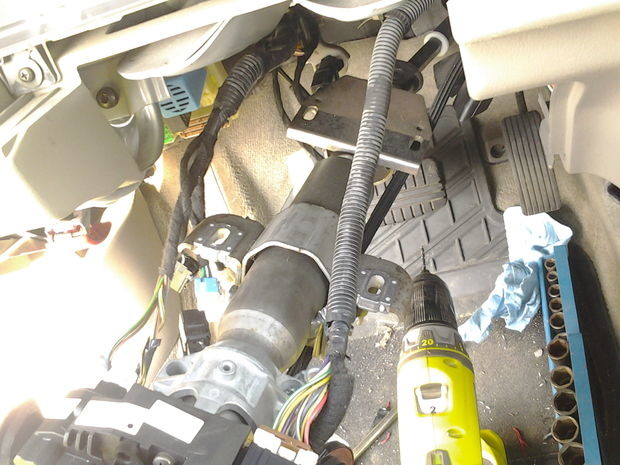
Now you need to drop the column from the dash.
There are 4 bolts that hold the column in place.
In the photo you can see 4 slotted holes - that's where the bolts are.
The column has a couple of universal joints in it so once you remove the bolts it will easily drop.
Leave the wiring attached to the dash bracket and rest the wheel on the seat.
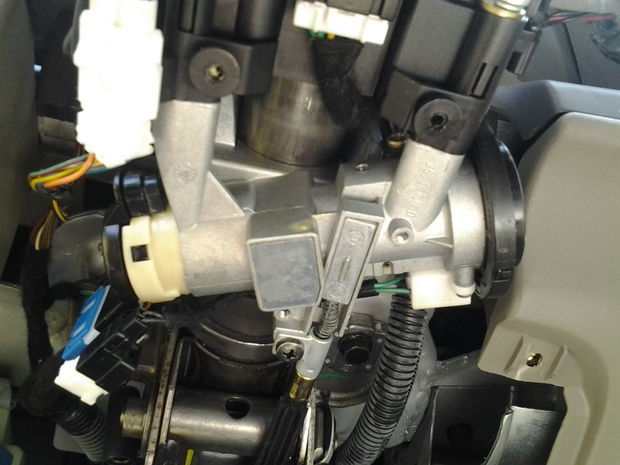
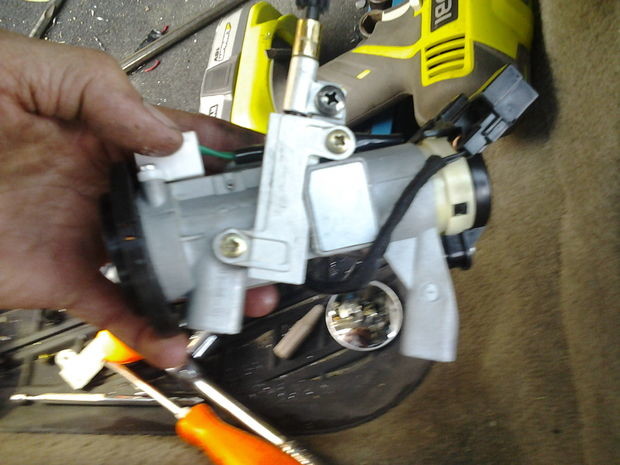
Step 6: Removing the column lock

Finally we have access to the lock itself.
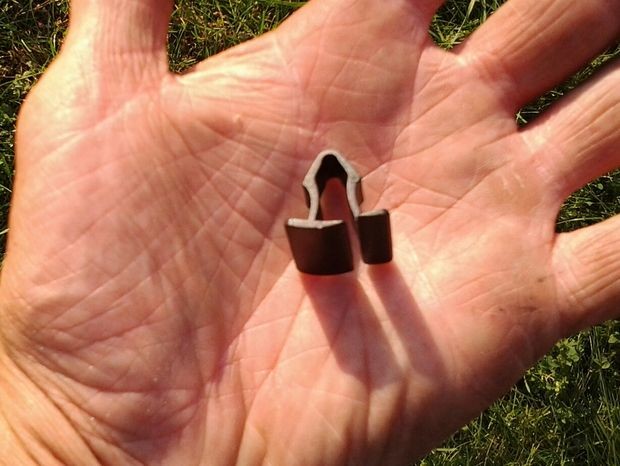
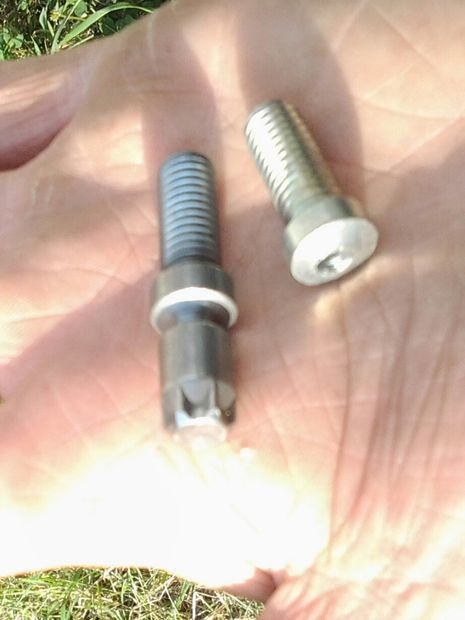
This piece is clamped under the column and held in place by an upper die cast part and 2 special bolts.
When these bolts are installed the heads snap off. this makes it difficult to steal the vehicle and a pain to change the lock.
See the photo of the new bolt on the left and the old bolt (which I have drilled and removed)
You have to drill into the top of the bolt to remove it.
This isn't as hard as it sounds since the metal is quite soft.
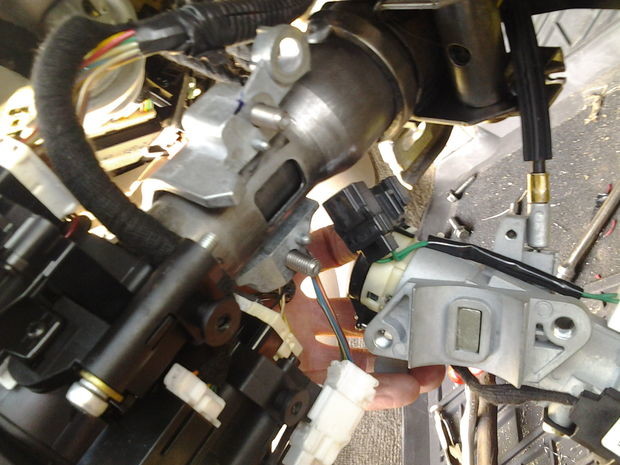
There are also 3 screws and 2 connectors to remove.
Remove the connectors first. They are on the left (outboard) end of the lock. You'll see a plastic part which is the actual ignition switch.
They have tabs to squeeze which will release them. You can only put them in one place on the switch so there's no need to mark where they go.
If you didn't already do it, remove the 3 screws holding the turn signal and wiper controls to the lock.
Third photo shows the 2 lower screws, there is also one top center.
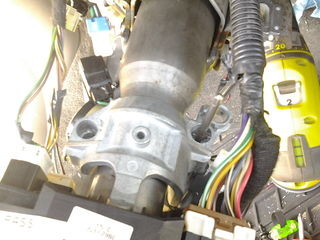
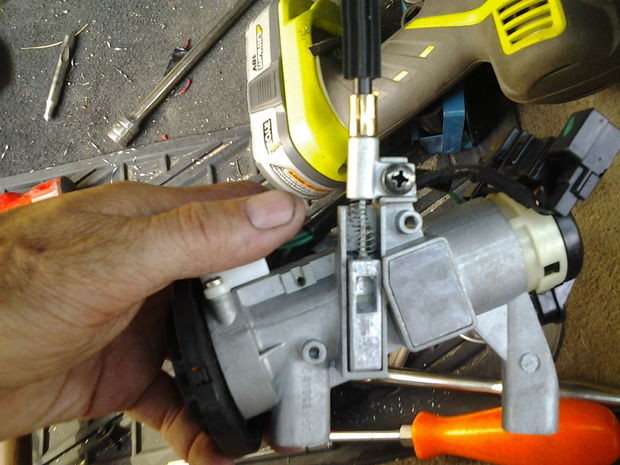
I used a block of wood about 12 inches long to support under the column to the floor to keep it steady as I drilled.
Using a sharp center punch and the hammer make a center mark on the top of the bolt.
Using your new, sharp, drill bit, drill straight down into the bolt at least 1/2 inch.
Use slow speed, you should see a long metal shaving curling away from the bit.
Second photo shows where the bolts are located. I had already removed the left one.
The right one has been drilled and the easy-out is inserted.
Use the magnet to remove shavings so the easy-out will work properly.
If you don't know what an easy-out is, (you're fortunate) let me explain.
it is a tool for removing broken bolts.
Made from hardened steel it is tapered and has spiral teeth on the side.
The trick is that the spiral is reverse of the threads on the bolt, so as you twist it into the hole you've drilled it will, (god willing) grip the hole and unscrew the broken bolt.
In this case it worked like a charm, the bolts came out easily, so easily I couldn't believe it.
In the last photo you see the bolt and easy-out held by the long nose vise-grips i used to turn it.
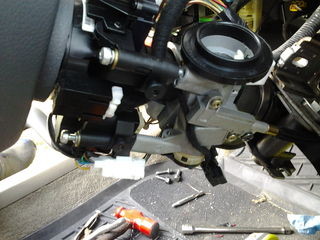
Step 7: Lock Cable
Now that lock is unbolted from the column, the lock cable needs to be disconnected.
The first photo shows the bottom of the lock with cable attached.
Remove the 2 gold screws holding the cover in place - photo 2 shows the new lock with cover.
Notice the recess on the block attached to the end of the cable - RE-INSTALL IT THIS WAY.
there is a different recess on the other side.
Remove the black screw to detach the cable.
Step 8: Key cylinder
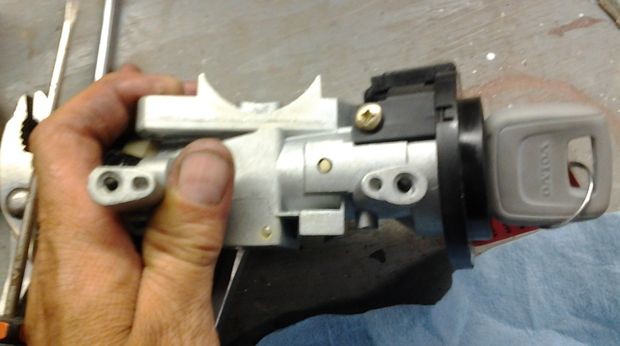
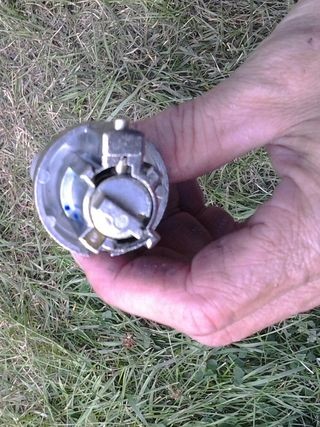
I actually did this step with the lock still attached to the column, but it's easier to understand out of the car.
You need the key to do this.
Insert the key and turn it to the #1 position.
Use a tool to press in on the gold button shown in the middle of the first photo.
Pull on the key and the cylinder/key assembly will slide out.
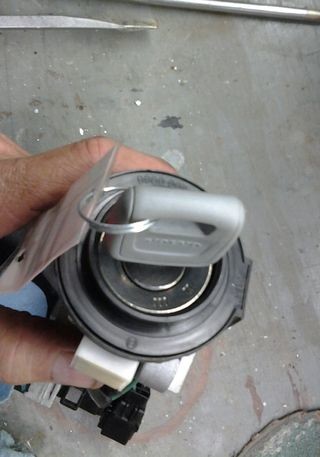
To re-install the cylinder into the new column lock:
Using your flat blade screw driver, reach into the lock and make sure the mechanism is all the way to the left (the lock position) - see the rectangular recess in photo 2?
Then turn the mechanism one "click" to the right (the #1 position).
Now make sure the key is at the #1 position on the cylinder - look at the face of the cylinder, the positions are marked - photo.
From photo 2, you can see that there is a slot inside the lock that corresponds with part of the cylinder. Opposite that slot is a white plastic piece which you will have to push aside as you slide the cylinder in place.
If you have the lock and the cylinder both in the #1 position they will easily slide together the gold button will snap into place.
Done.
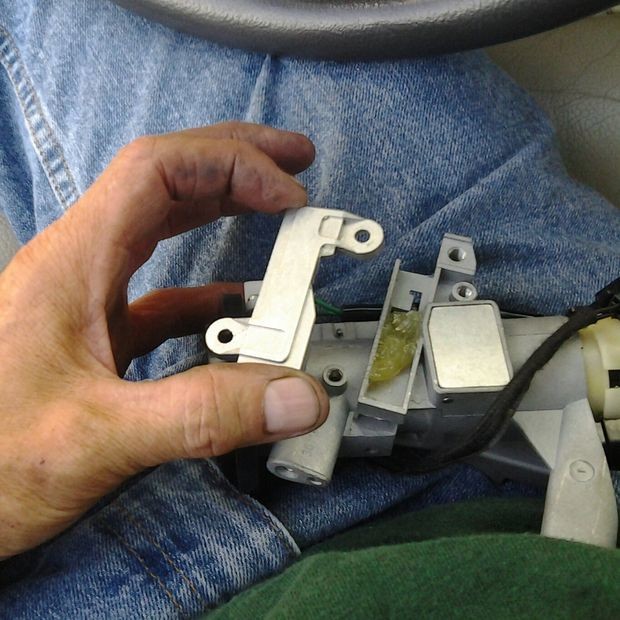
Step 9: Re-install the column lock

We're almost there.
Photo 1 shows column side of the new lock with the cable attached.
On the left of the photo you see the column itself - notice the rectangular opening on the tube. It corresponds with the rectangular area on the lock.
You can also see the upper part of the lock with the bolts already in place.
Fit the lock to the column. It should fit tightly to the tube.
Start and tighten the bolts by hand, then use the star head socket and your ratchet to snug them up - DON'T BREAK THE HEADS OFF YET.
You should be able to start and hand-tighten the 2 lower turn/wiper control screws also.
Now plug in the connectors for the ignition switch.
Re-connect the battery cable.
Start the car to confirm your repair was successful.
Confirm that the vehicle will shift out of PARK and that you can remove the key as normal.
Step 10: Wrapping up
The photo shows the column already back up in place and the bezel for the speedometer installed.
I'd suggest you do put the column up.
I suggest you don't re-attach the bezel yet.
Anyway, you can see the heads of the bolts.
Have a look to make sure no wires are loose or pinched and the the lock cable is routed OK.
After you have once again confirmed that the car will start and operate normally, use the ratchet and socket to fully tighten and break off the heads of the bolts.
Tighten the 3 screws holding the turn/wiper control.
Now it's just a matter of re-installing the panels you removed.
The lower column cover may give you a bit of trouble getting it over the lock cylinder while keeping the rubber seal in place, but you'll manage.
Lastly, enter the radio code.
So that's it.
Bask in the praise of your significant other and revel in the knowledge that you saved yourself a boatload of money by doing it yourself!