You must be logged in to rate content!
5 minute read
Halogen to OEM Bi-Xenons swap (plug-and-play HID conversion)
Compliments of theshadow27 @ forums.swedespeed.com
5-11-2011
WARNING: This modification potentially caused WMM failure after around 2 years of operation, even with DRL disable, probably due to the lack of an auxiliary additional ground point. If you follow this procedure, you MUST add a ground point by tapping or cutting the brown ground wire (pin 4 on the connector) and physically screwing it to the chassis like this - which defeats the purpose of plug-and-play ![]()
---------- Original Post -------------
If you have an 05-06 and want the new body style LED city lights, or have any year (05+) with halogens and want factory Bi-Xenons, this how-to describes how to drop in a pair of 07+ (facelift) bi-xenons. This applies to S40s and V50s, but I see no reason it shouldn't work on C30's and C70s (new) either. The process is extremely simple, though expensive, *almost* direct swap. A few drawbacks worth mentioning:
- There are possible fitment issues using the 07+ lights in the 05-06 (pre-facelift) body? Need clarification here.
- Will set you back $1600 if you get new units from the stealership
- Road following and auto-leveling won't work. Yes, I've looked, no, there is no workaround
- For direct swap with no additional parts, you MUST get DRLs disabled. If you are comfortable building a KBOWE and cracking open a headlight housing, there are much less expensive ways to retrofit bi-xenons
That said, if you've got the cash (or the time to find used parts) and don't mind loosing your DRLs, like I promised this is a super simple process - 2 steps!! (well, four if you count getting the housings and installing them in the car). It is almost impossible to detect the modification and it does not prevent the lights from being re-installed in a car that came with OEM HIDs (i.e. you can sell them w/o having to undo anything).
On to the guide!
We are going to use a piece of wire to connect pins 4 and 10 inside the housing. You'll need a piece of wire 16 gauge or higher (i.e. 16, 14, 12AWG) about 8" (20cm) long. I used brown, to match the factory wires, but color really doesn't mater.
Step 1 is to make the connection to pin 10, the low-beam ground. The best place to get this is the brown wire in the 4 pin connector that plugs into the factory ballast (the metal back cover). You can get at it by unclipping the back cover/ballast and pulling it away from the housing - no need to unplug anything. In the spirit of "super simple", I've used a 3M quick tap:
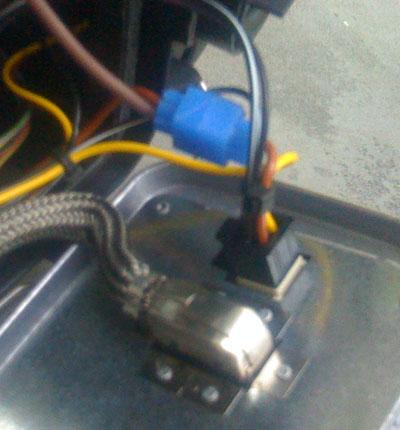
But don't let that discourage you from doing it properly (cut brown wire, use butt connector).
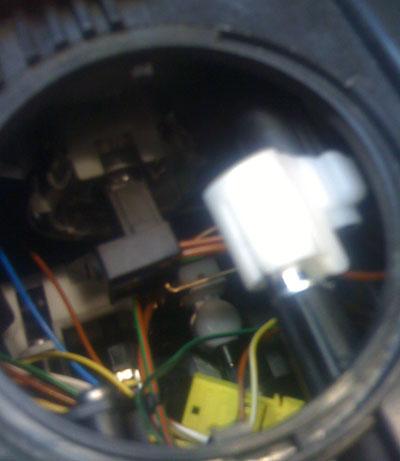
Step 2 is to connect your new wire to the high-beam ground (pin 4). The easiest place to make this connection is on the high-beam connector, which you can get at by removing the small twist-off circular cover on the top of the light assembly:
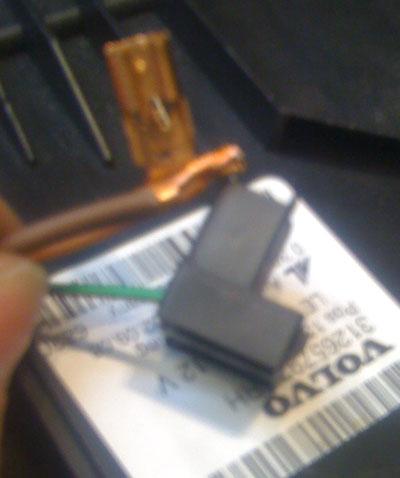
I pulled the QD out from the plastic holder and crimped my wire on:
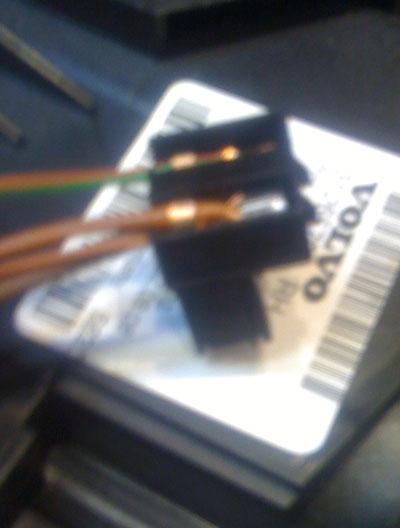
Then re-installed it like so
However if you have less patience than me you can use a 3-way butt (alright) or a quick-tap (worst).
And that's it! Put the covers back on, pull your old headlights out, plug the new headlights in, and you've got a set of plug-and-play bi-xenons, with working turn signal, LED city light, side marker, and high beam flapper!
Cheers to carreragt7 for letting me borrow his headlights ![]()
Jacob