You must be logged in to rate content!
19 minute read
How to integrate "GROM MOST" AUX/USB/Bluetooth/Ipod/MP3/etc. unit
Compliments of daim @ forums.swedespeed.com
3-15-2012
Hi!
As written in this thread, I've fitted a GROM MST3 MOST unit into my non USB-capable High Performance radio.
Important to keep in mind:
This only works if you have a single CD unit! Means: no exchanger!
It MAY be, that you need a software correction from Volvo, in order to remove the MOST security patch (only via dealership possible!) - this depends on the country you are in!
GROM doesn't deliver an installation guide and refers to the BMW 3 series (E90) installation. This doesn't apply completely to Volvo, as the colours are different on a Volvo. You also have to remove a fair bit more to do so... Don't worry though - no special skills are required. Only a few tools:
1. bone tool
2. torx driver
3. slotted screwdriver
So let's start...
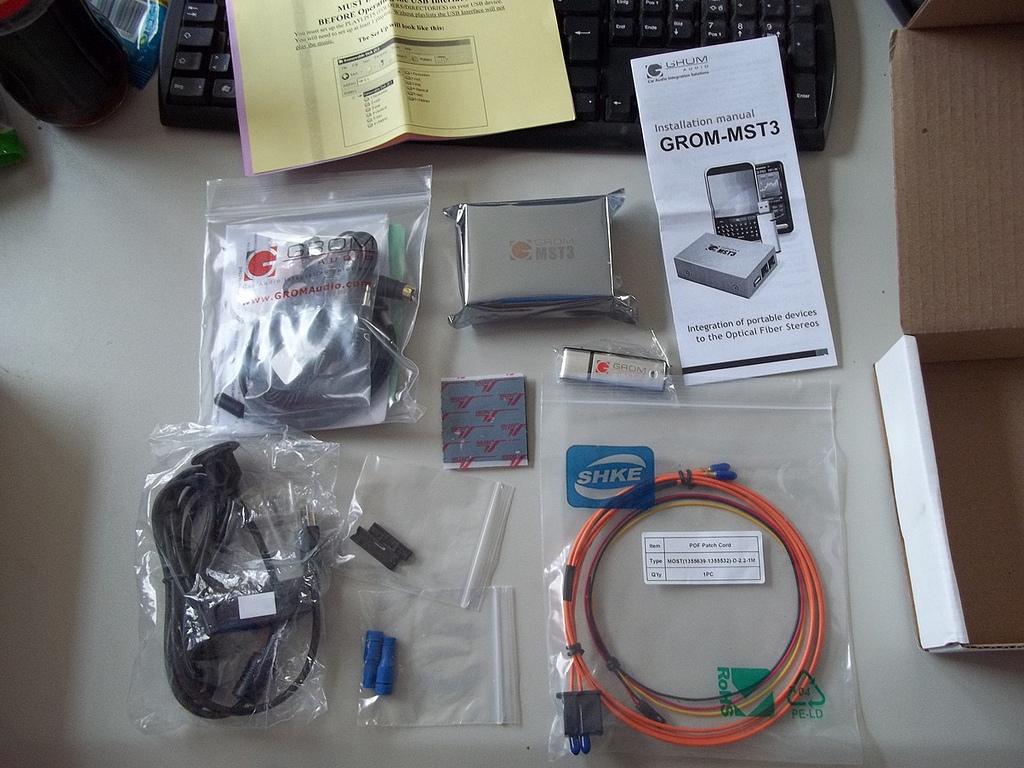
First, make sure you have all that, what should be included in the basic kit:
1. GROM box with 1 USB connector, 2 "multi-pin" plugs and the POF (plastic optical fiber) plug - rear sticker MUST say VOLSO!
2. little connector with 2/3 cables (mine came with 1x red, 1x black & 1x orange/yellow)
3. velcro pad
4. USB cable with male and female connectors
5. POF cables (two) coupled by a plug at the end
6. black POF connector
7. GROM 2GB USB stick
I ordered the basic kit + the Bluetooth dongle.
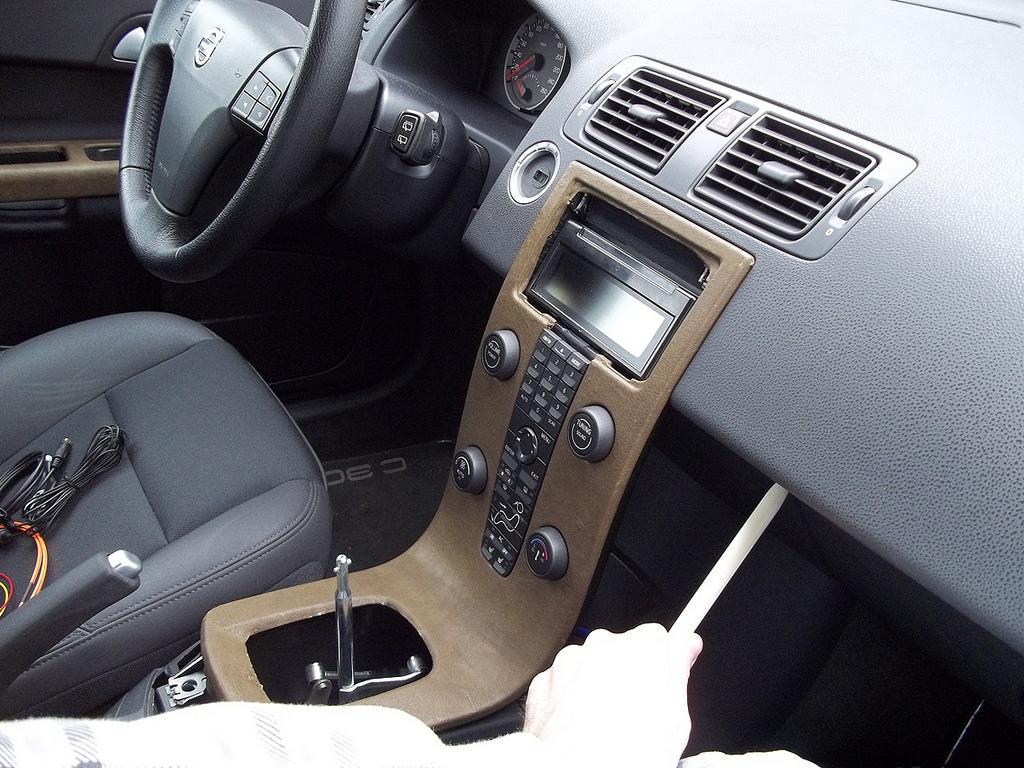
Here is what you should start off with ![]()
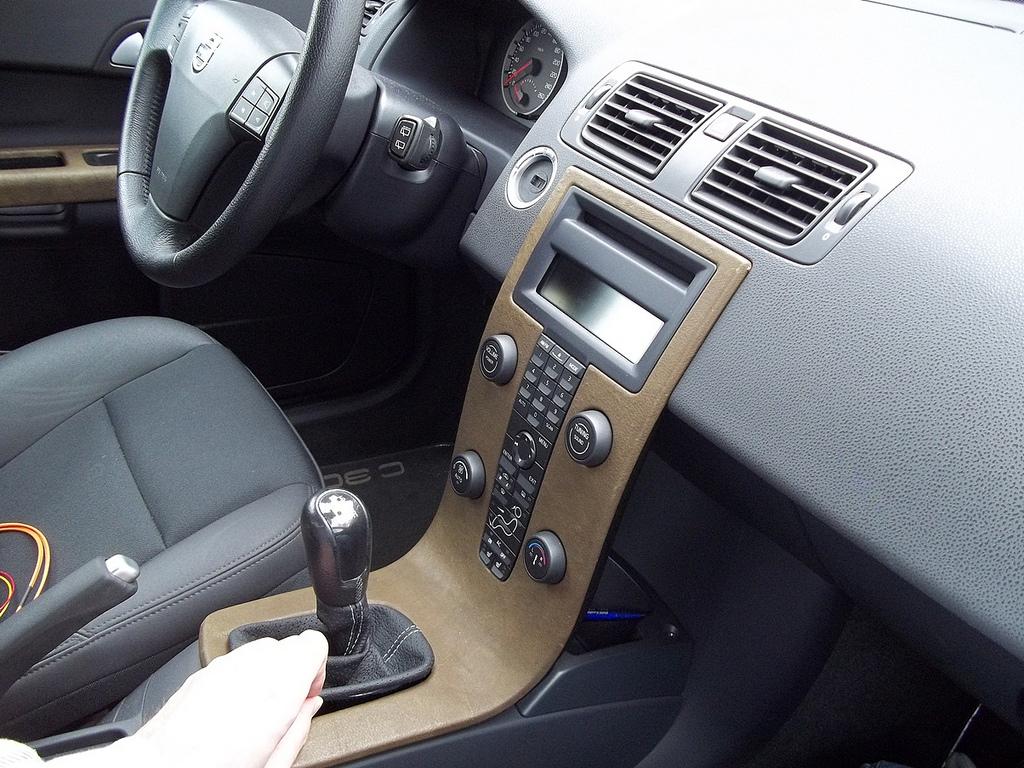
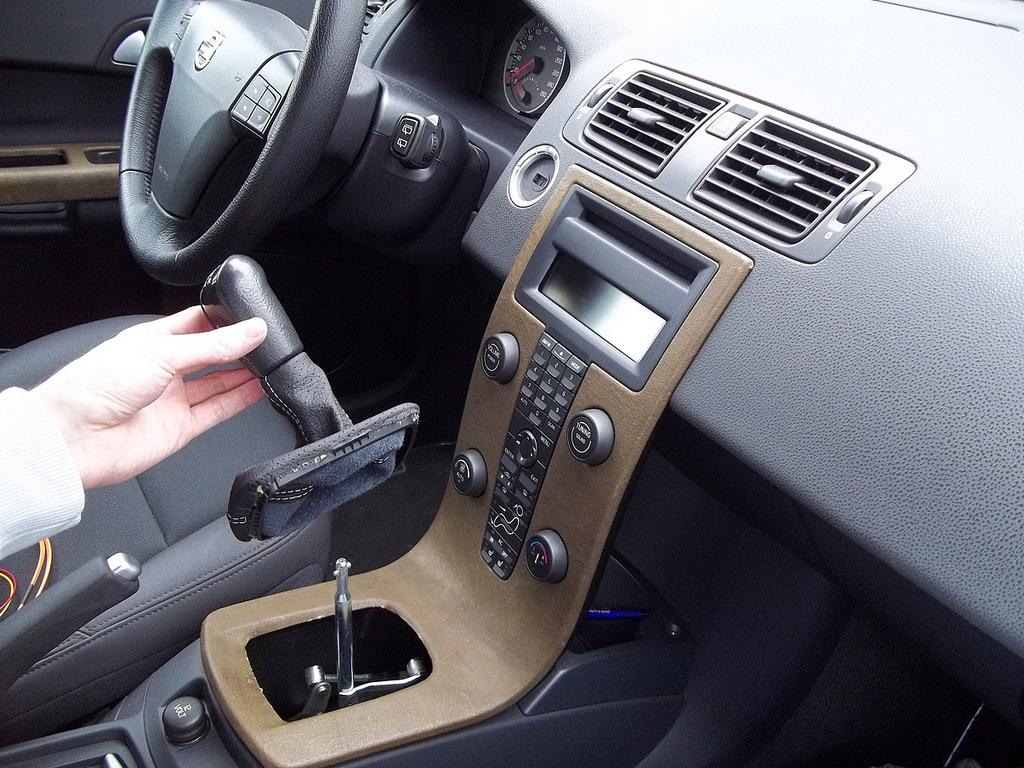
Installation guide:
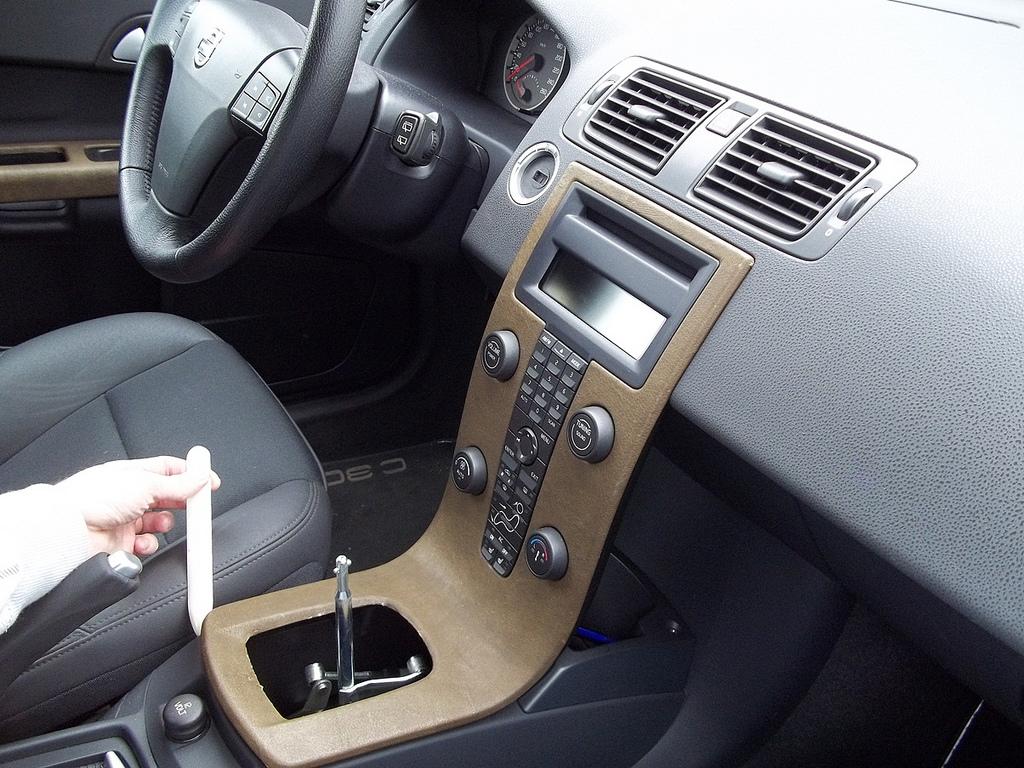
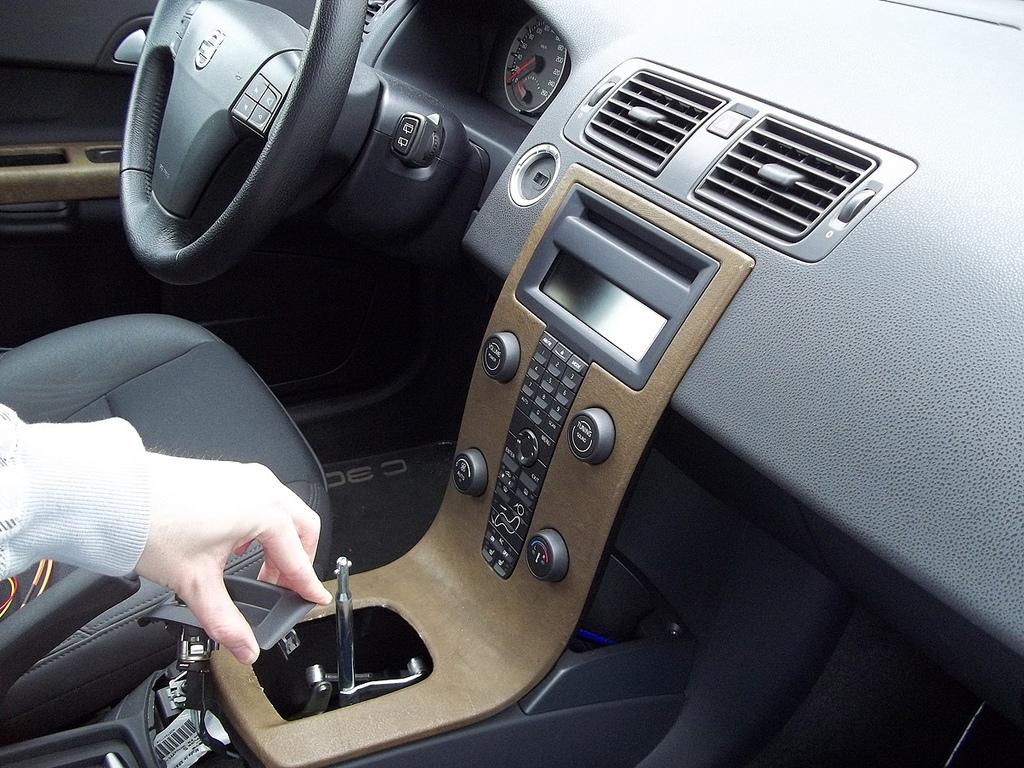
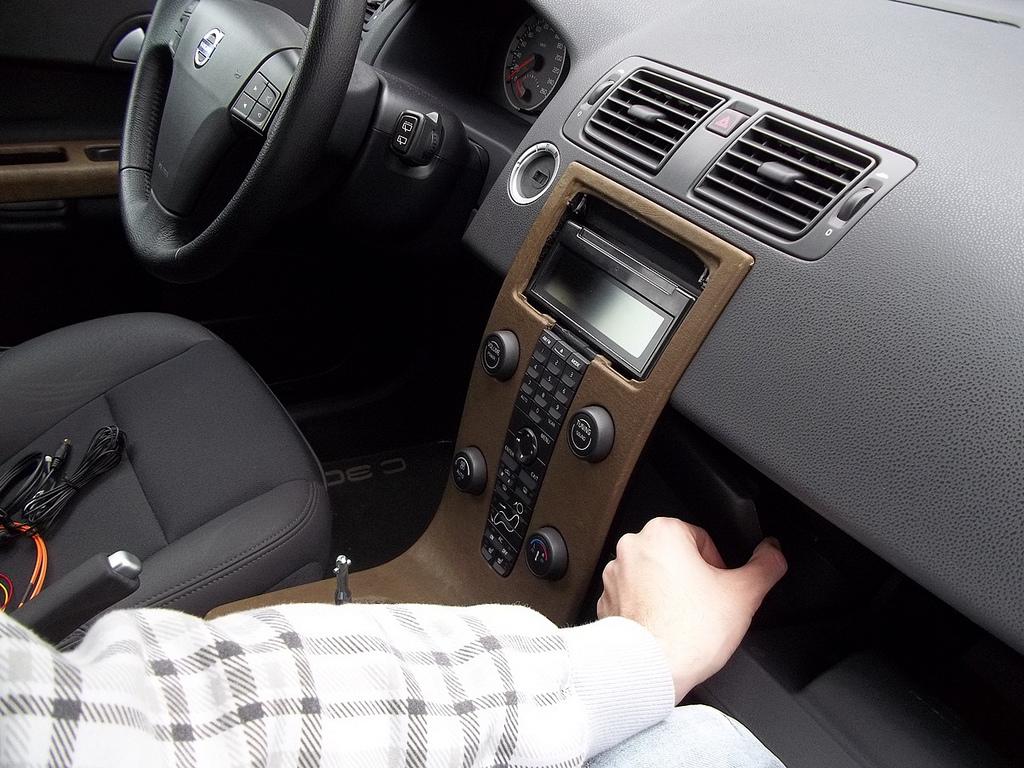
First step is to take the interior apart in order to get to the connectors. Start off with the shift knob (if manual!). Compress from above and twist ANTI-clockwise by about 90-100°. Before lifting it off, unclip the boot (start on the side and carefully pry it apart - or use your bone tool). WARNING! If you have an aluminium waterfall, don't force it! Lift it off and put it byside (I always put the things in the boot/trunk, in order to keep a little space inside):

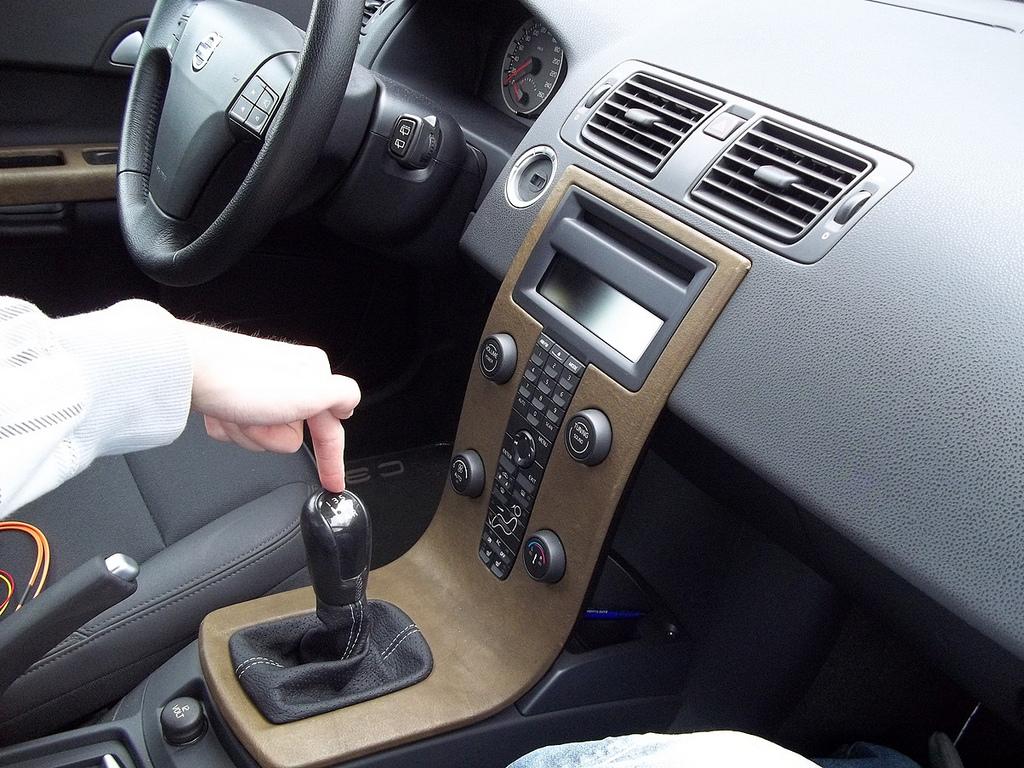
Next step is to remove (on pre-2008 models) the 12V plug/cig-lighter bracket. This is only clipped in. Either use a bone tool and wedge it apart or use your fingers. It CAN sit very tight! Carefully remove it and unplug the 12V connector. Undo the two screws (torx) covered by that bracket and put carefully in a pot or bag, so you don't lose them:
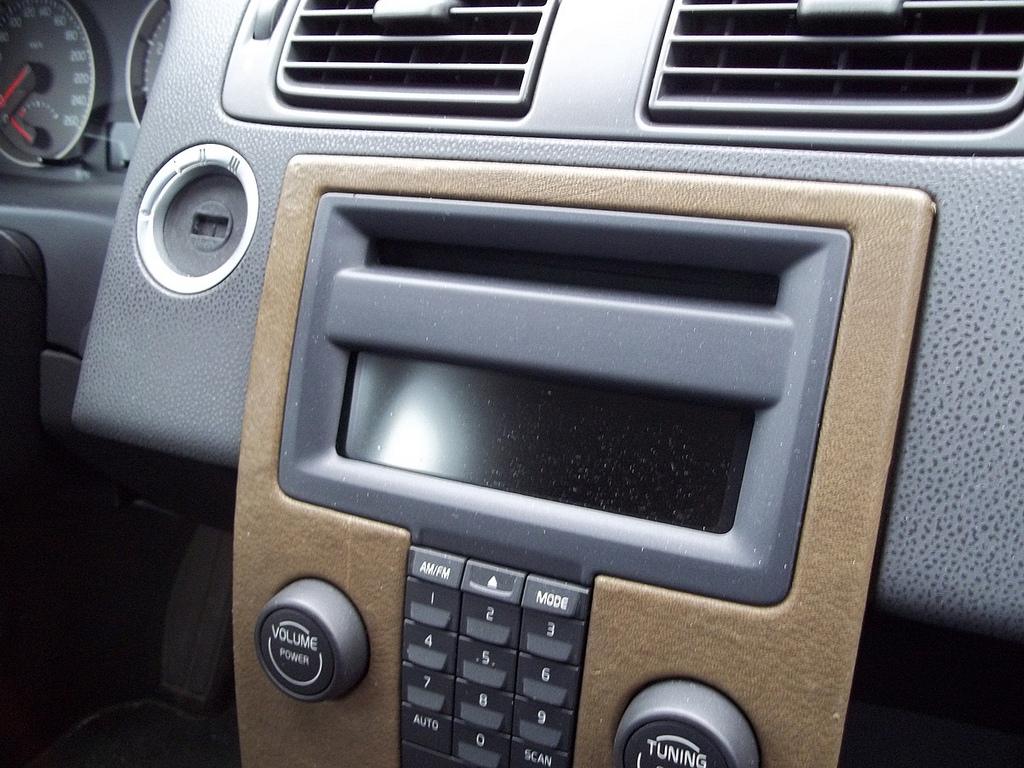
Next step is a little more fiddly. You'll need to remove the CD-insert/display surrounding cover at the top. To do so, use a stable/sturdy slotted screwdriver and poke this in left and right of the CD opening. You can feel the correct position. Carefully press and the surrounding will come out a little. Do this on both sides and then pull a little more firm:
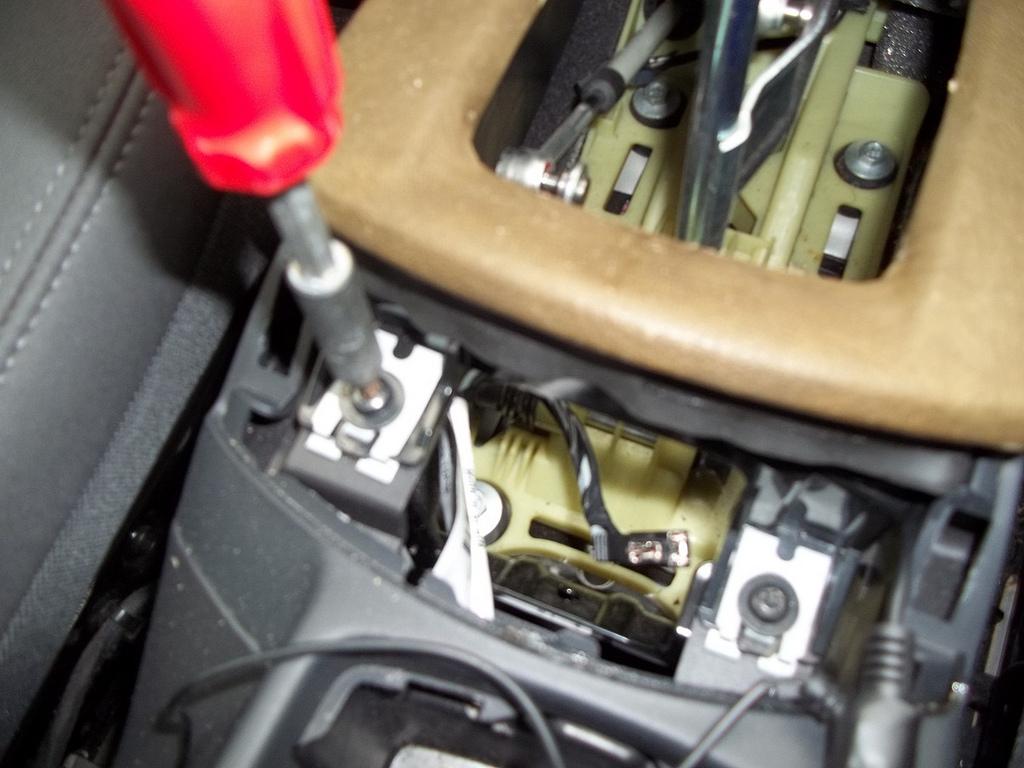
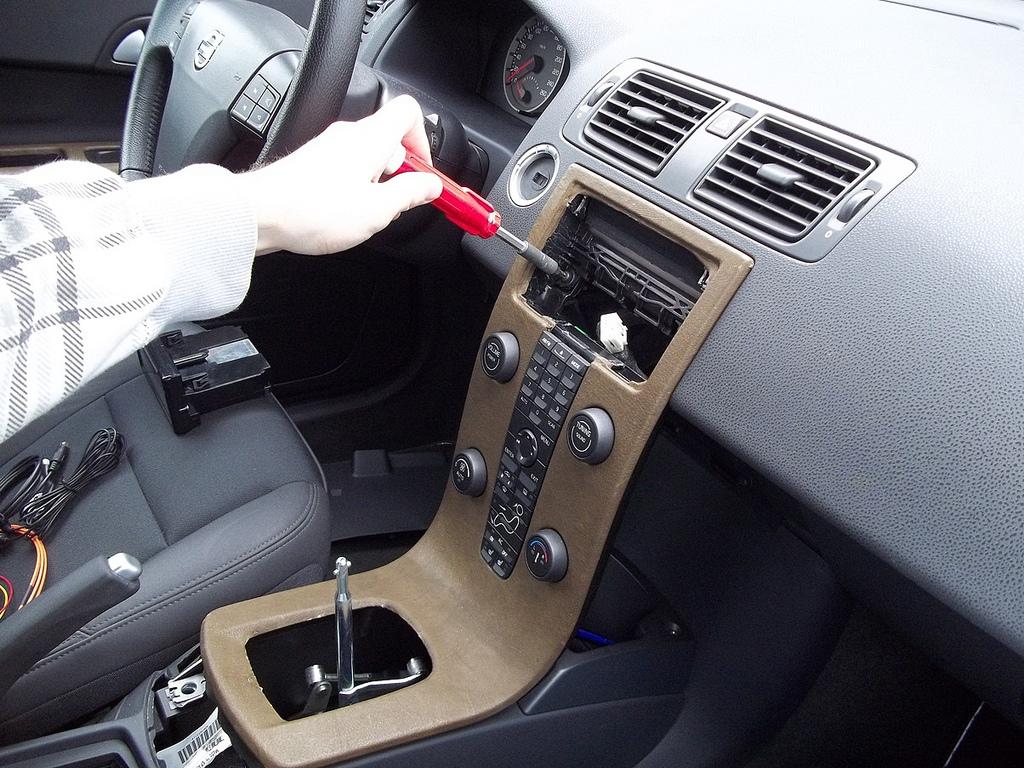
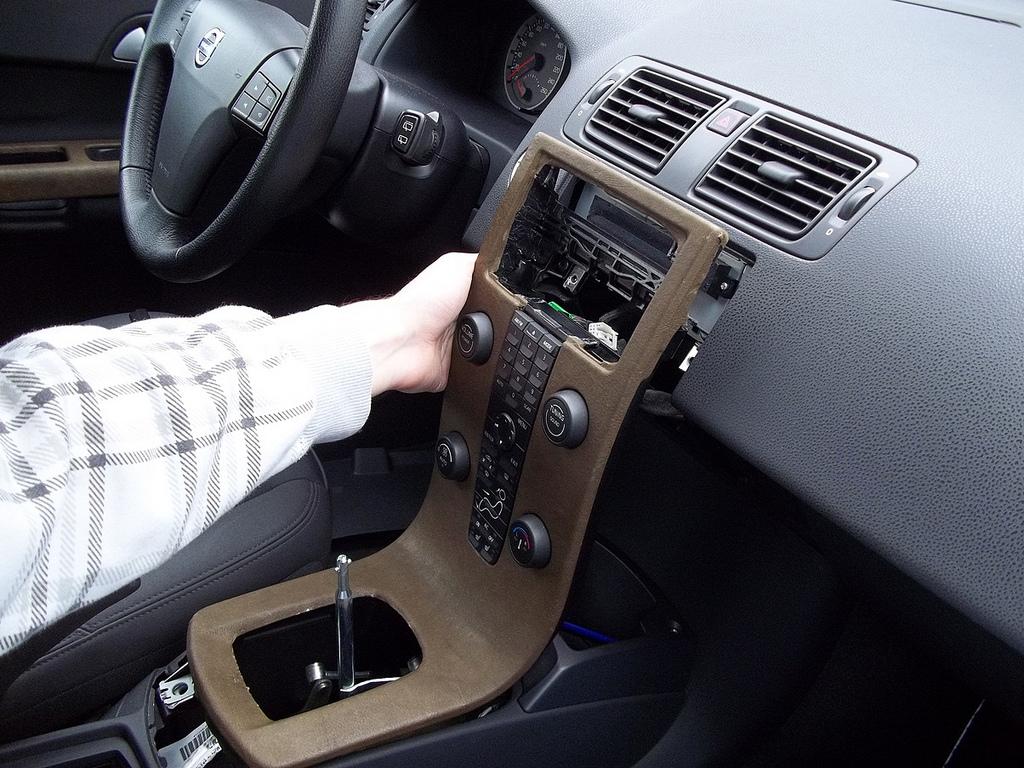
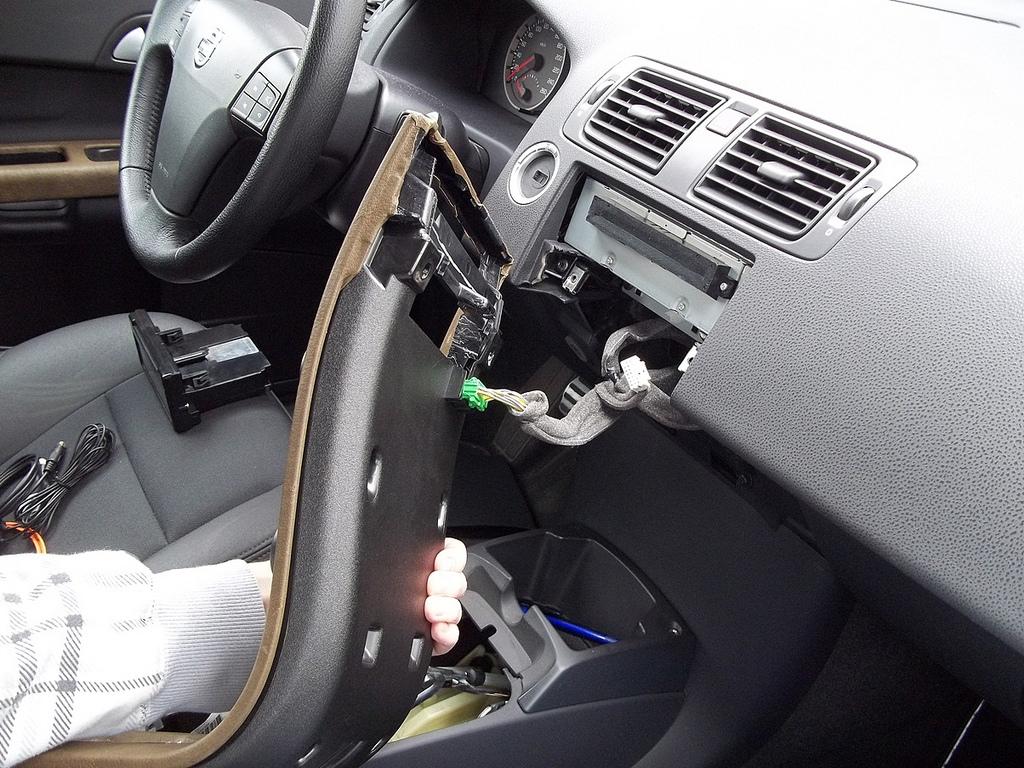
Now we have to remove the lower plate/cover behind the waterfall. Here you'll need your bone tool. It is only clipped in, so open the glove pocket and insert the bone tool between the back panel and the carrier and remove:

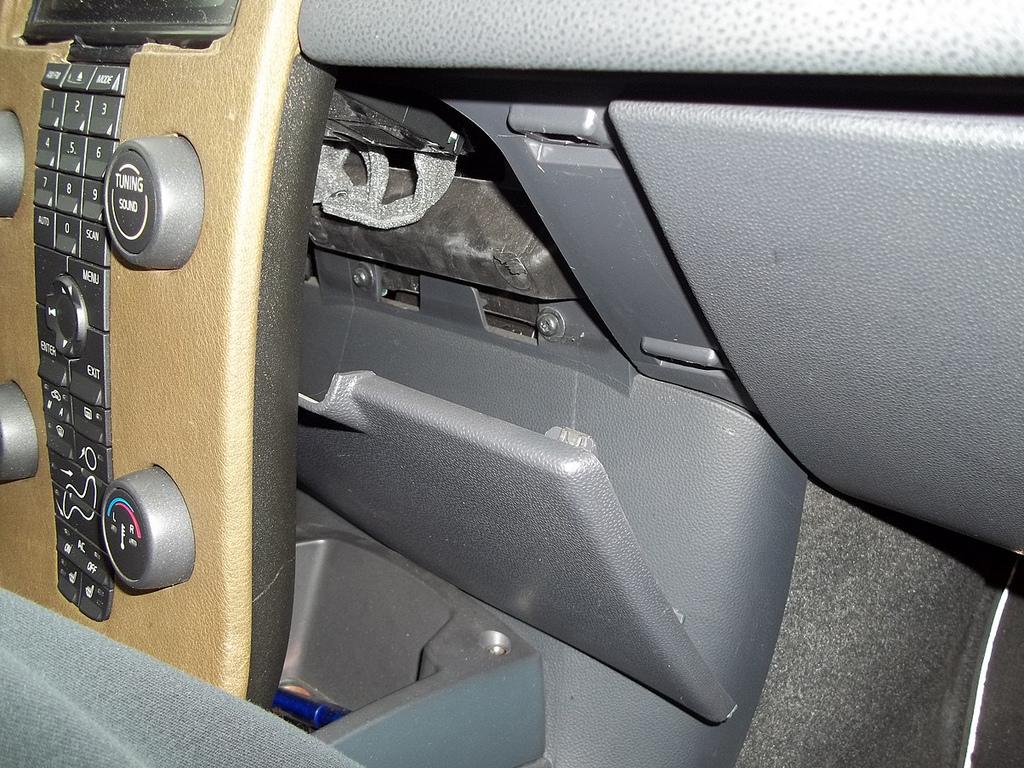
When that has been removed, you can remove the display. This is held in place by two clips and a "guide slit". Put your hand behind the waterfall and work your way upwards until you can feel the rear of the display. A little bit of force is required to push it out from behind. When out, unclip both plugs. WARNING! Do NOT bend, twist or stretch the thick orange cables. These are POFs!!! Put display safely down! These cost a good bit of cash! Remove the two torx from behind the display:
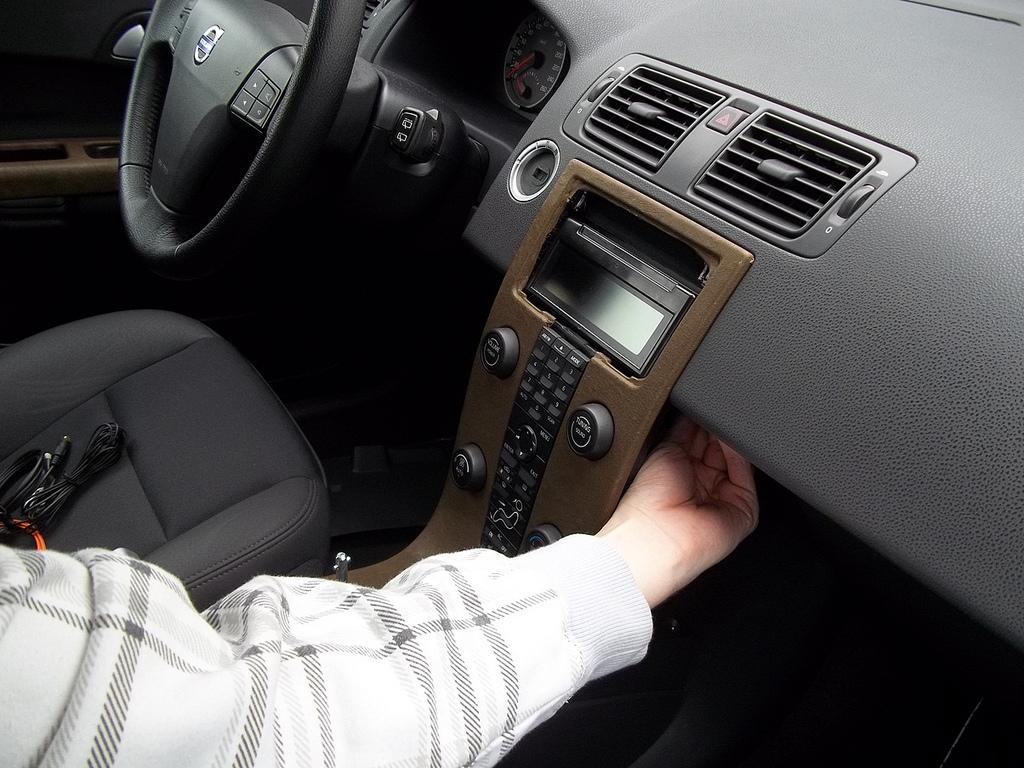

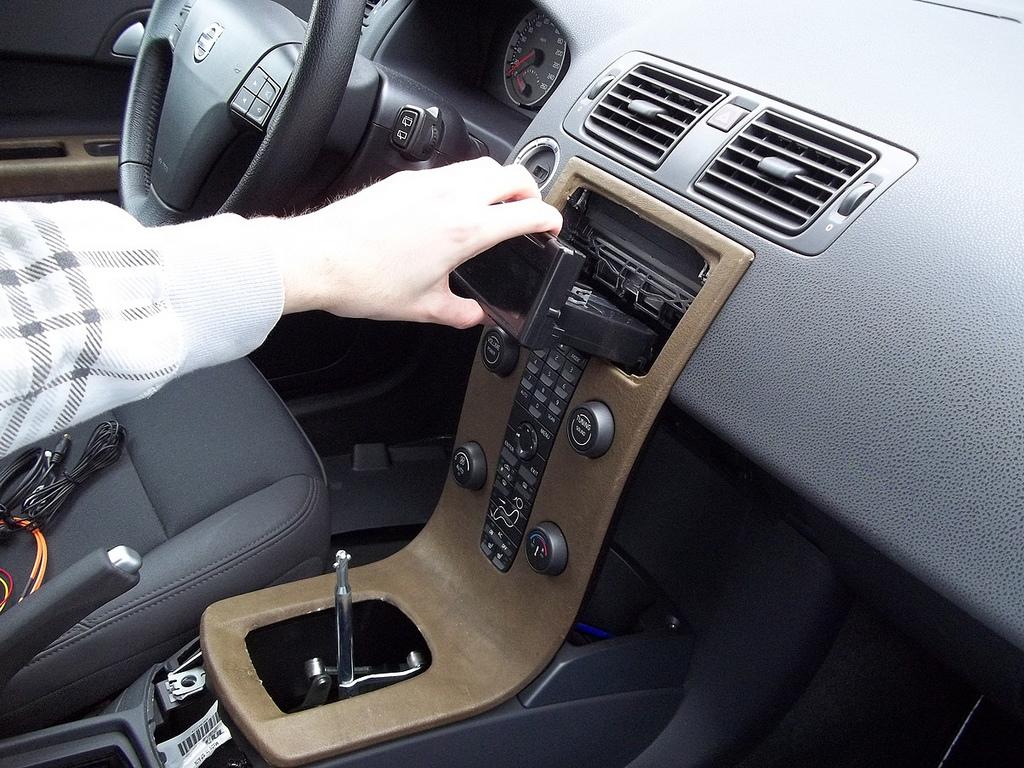
Once the screws have been removed, you can take the waterfall out of it's position. Be careful and lift off gently and unplug the green connector:
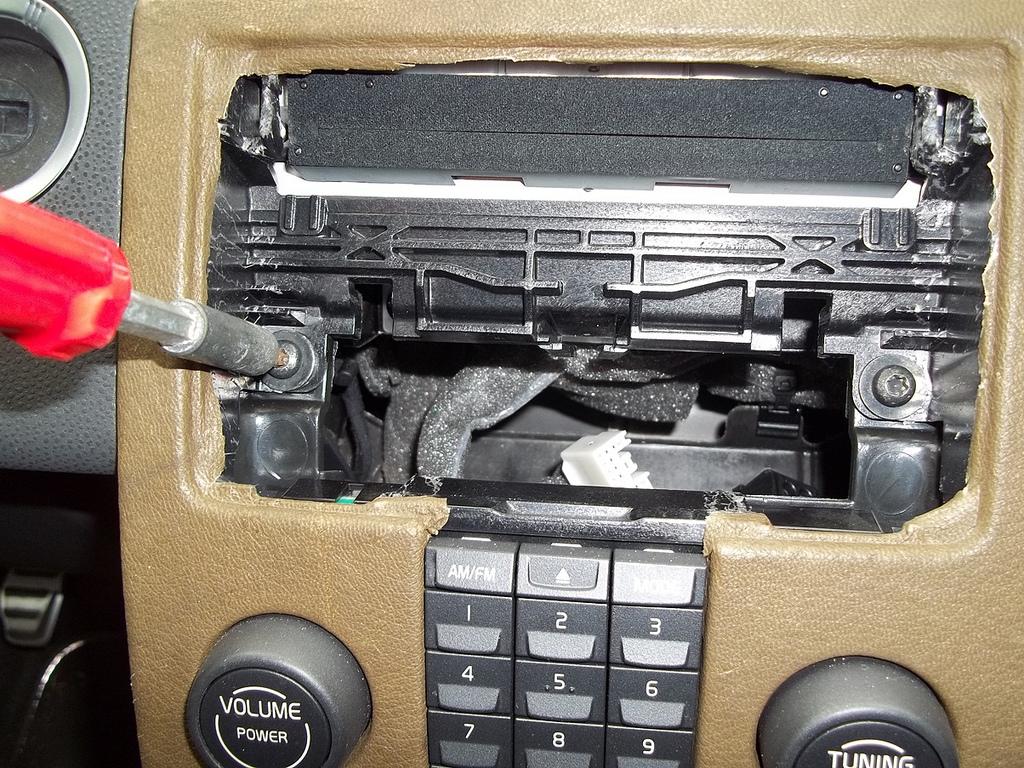
This isn't enough yet! ![]() Next is the CD player/slot thingey. This is held in place by two more torx screws. Remove and don't worry, the hole looks smaller than the CD player is, but that still goes through with no issues. Again, be careful! There are again POFs at the back! Also, depending on age/model/etc. a little plastic clip can be inserted underneath the CD player. This needs to be removed!
Next is the CD player/slot thingey. This is held in place by two more torx screws. Remove and don't worry, the hole looks smaller than the CD player is, but that still goes through with no issues. Again, be careful! There are again POFs at the back! Also, depending on age/model/etc. a little plastic clip can be inserted underneath the CD player. This needs to be removed!
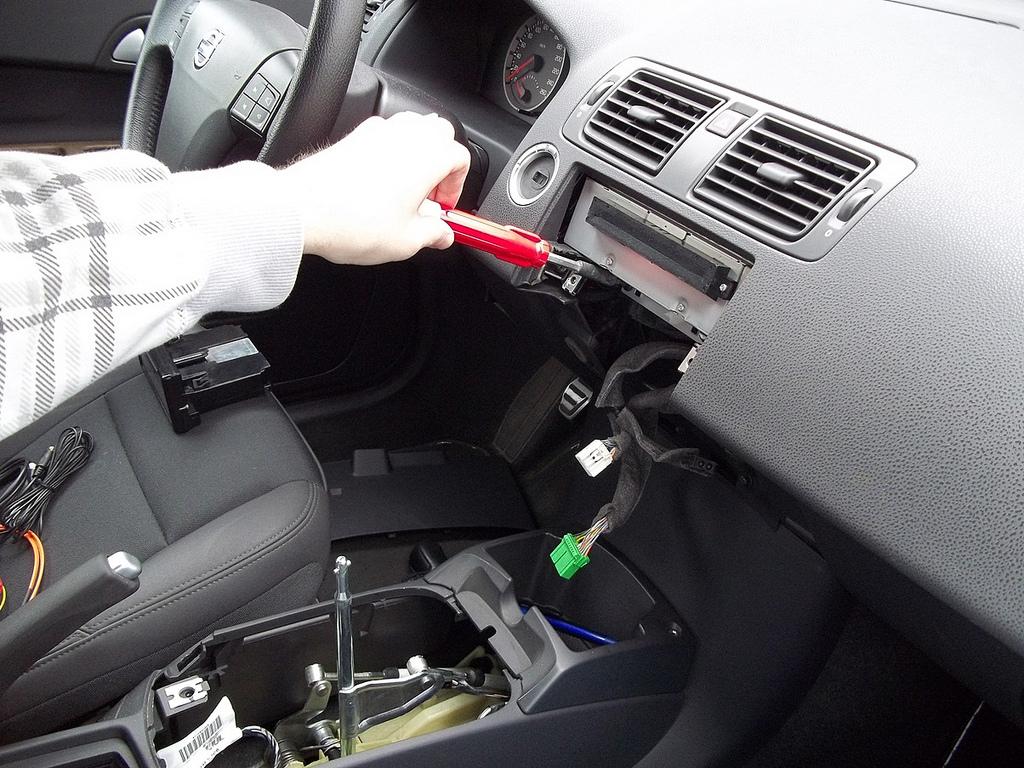
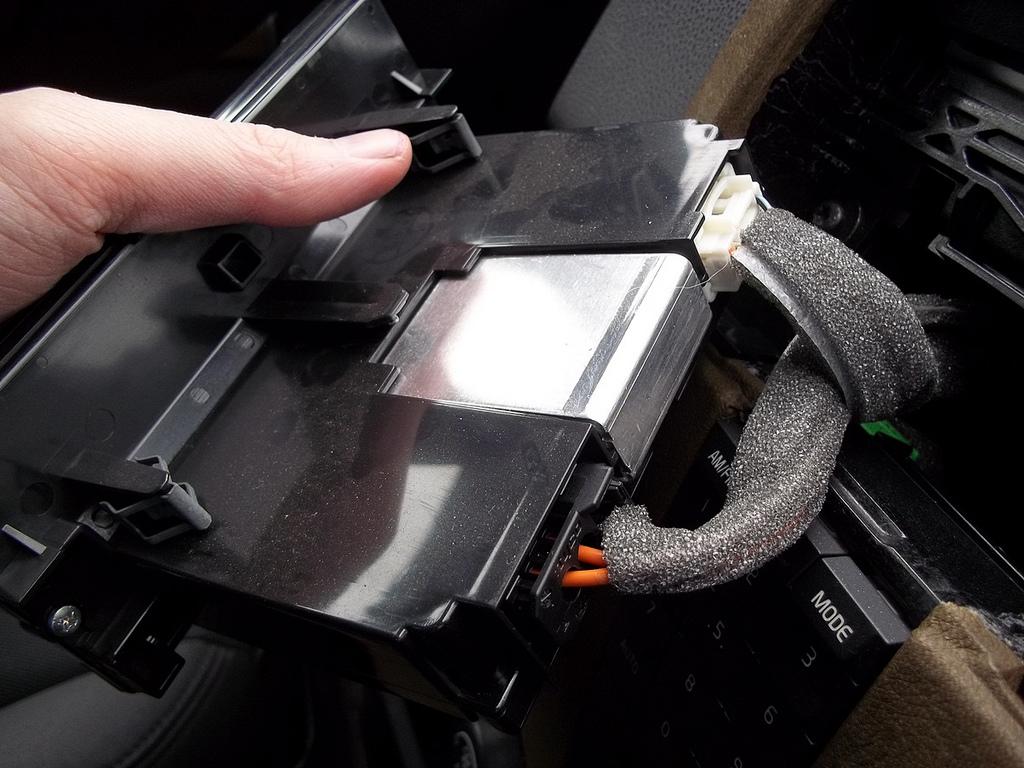
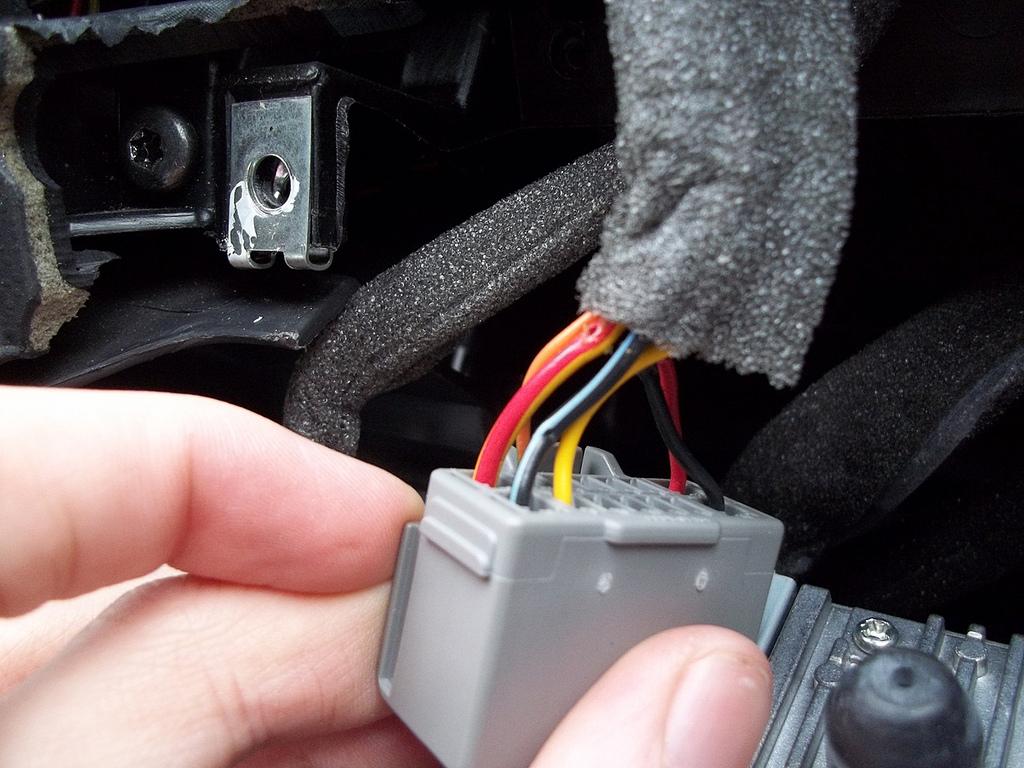
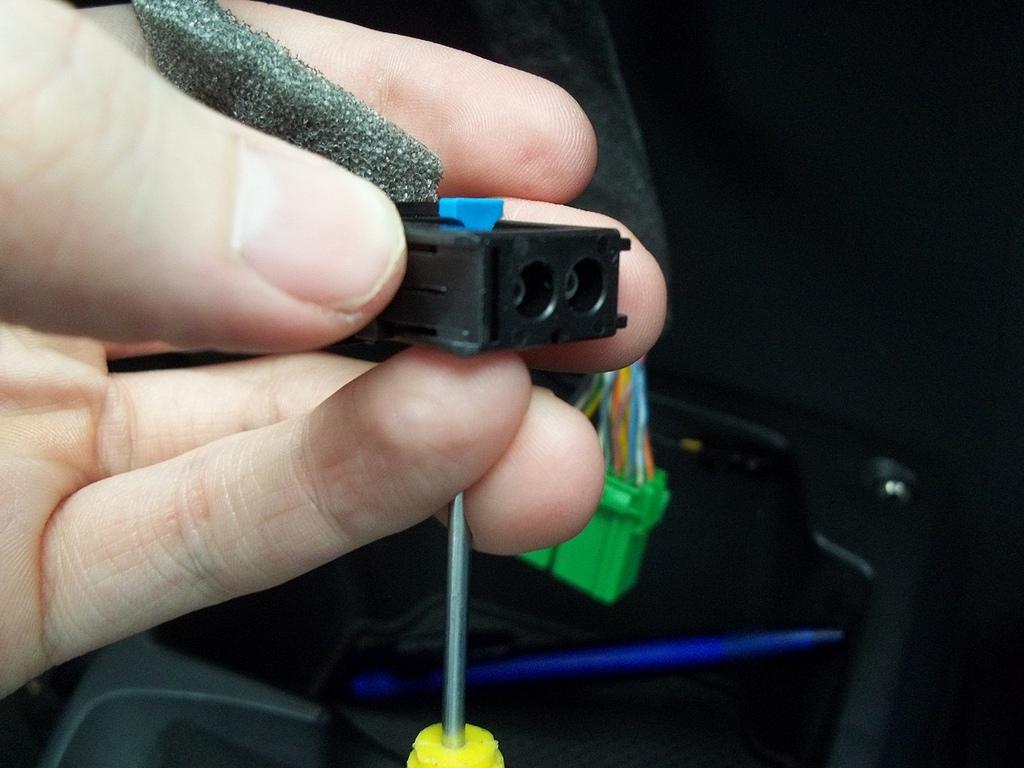
On the CD player are three plugs. The black one, with two orange "cables" (POF). A white one with 2 large black cables (ground) and the grey one with lots of pretty colours! ![]()
Against the GROM instructions, locate the yellow/red (for red) and black/light blue (for black) cables and attach via the tap ons (not tampons! ![]() ) to the cables. The orange/yellow cable in the GROM kit is NOT required! I left it on the connector, just taped it up so it didn't get caught up anywhere!
) to the cables. The orange/yellow cable in the GROM kit is NOT required! I left it on the connector, just taped it up so it didn't get caught up anywhere!
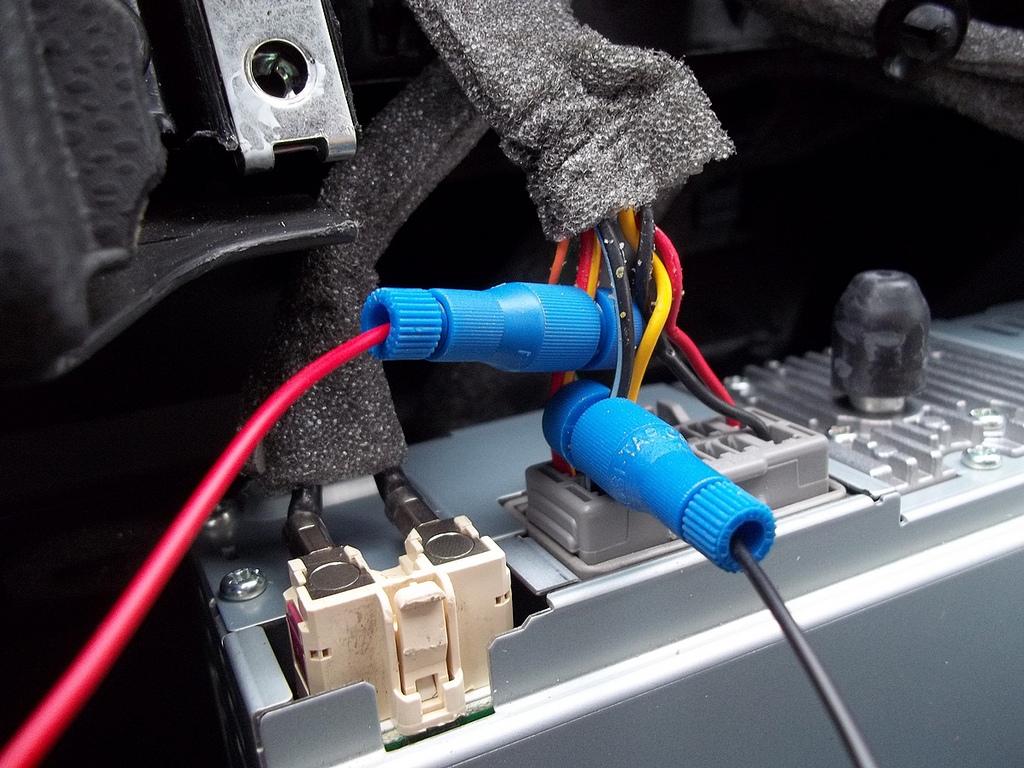
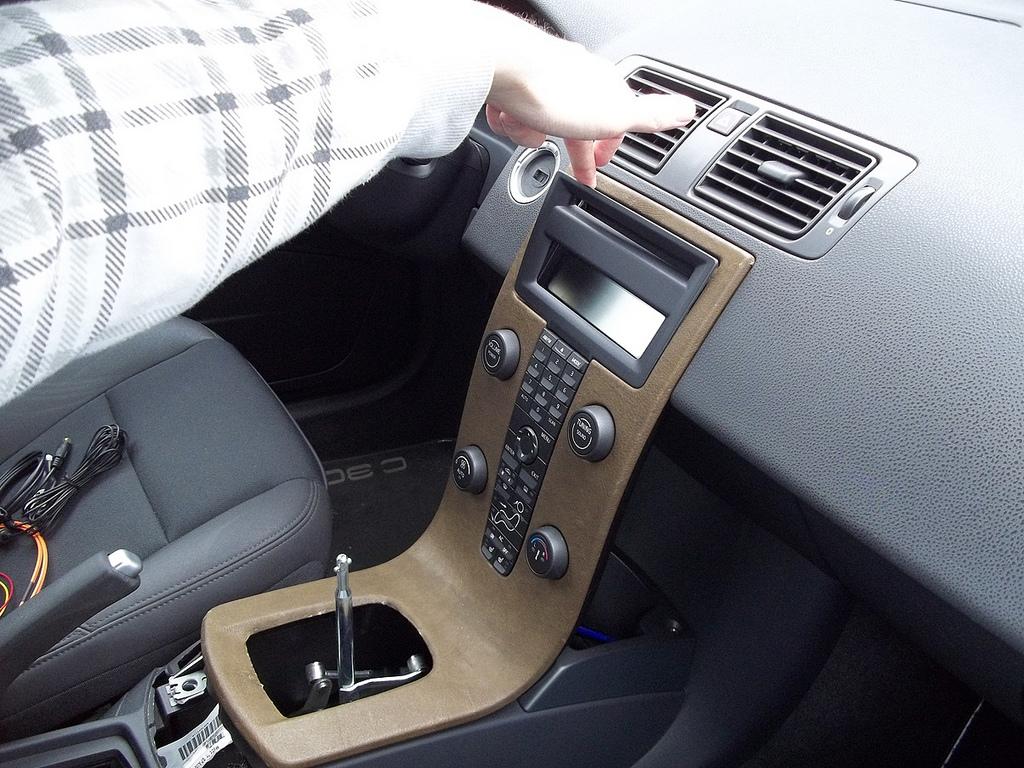
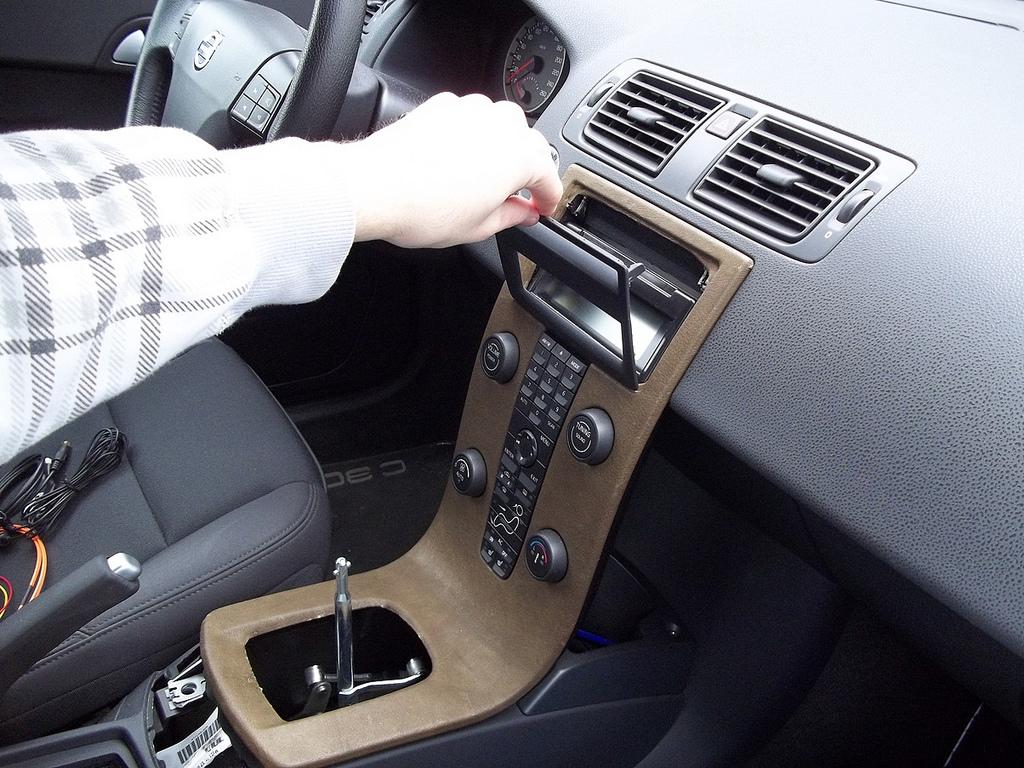
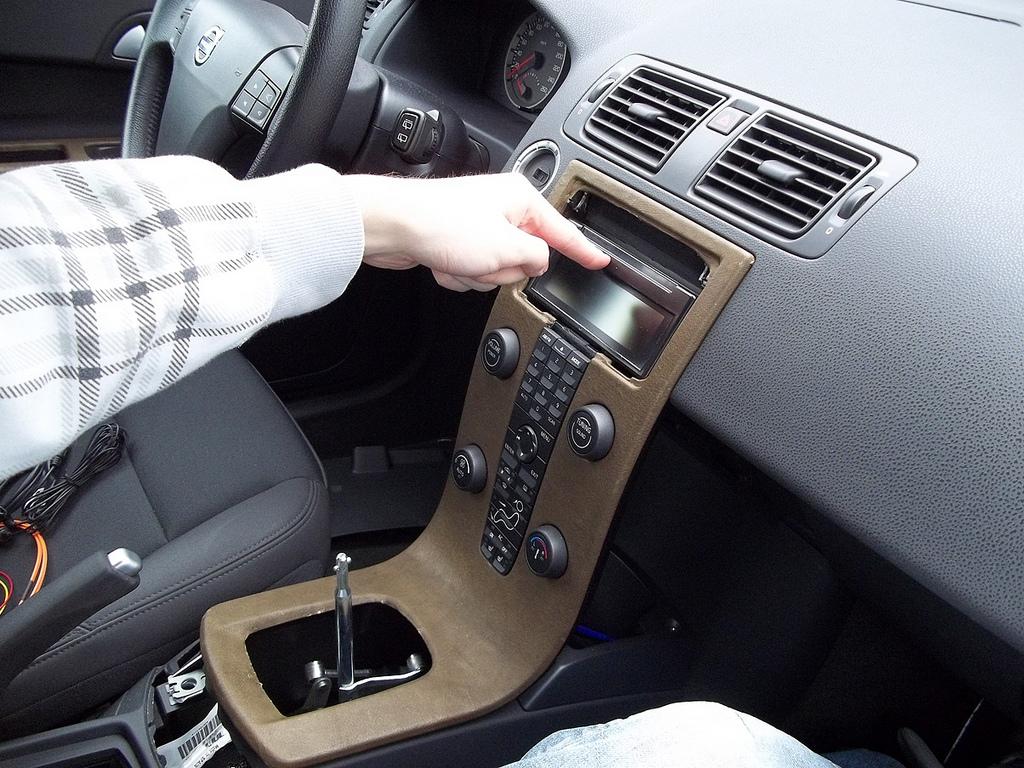
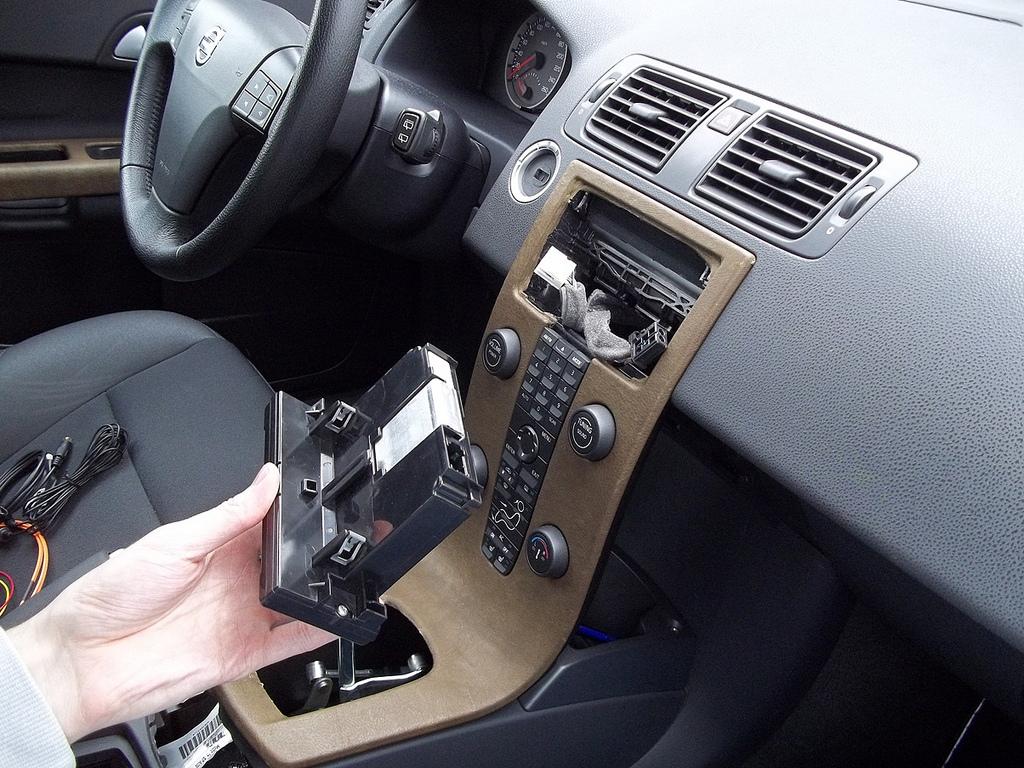
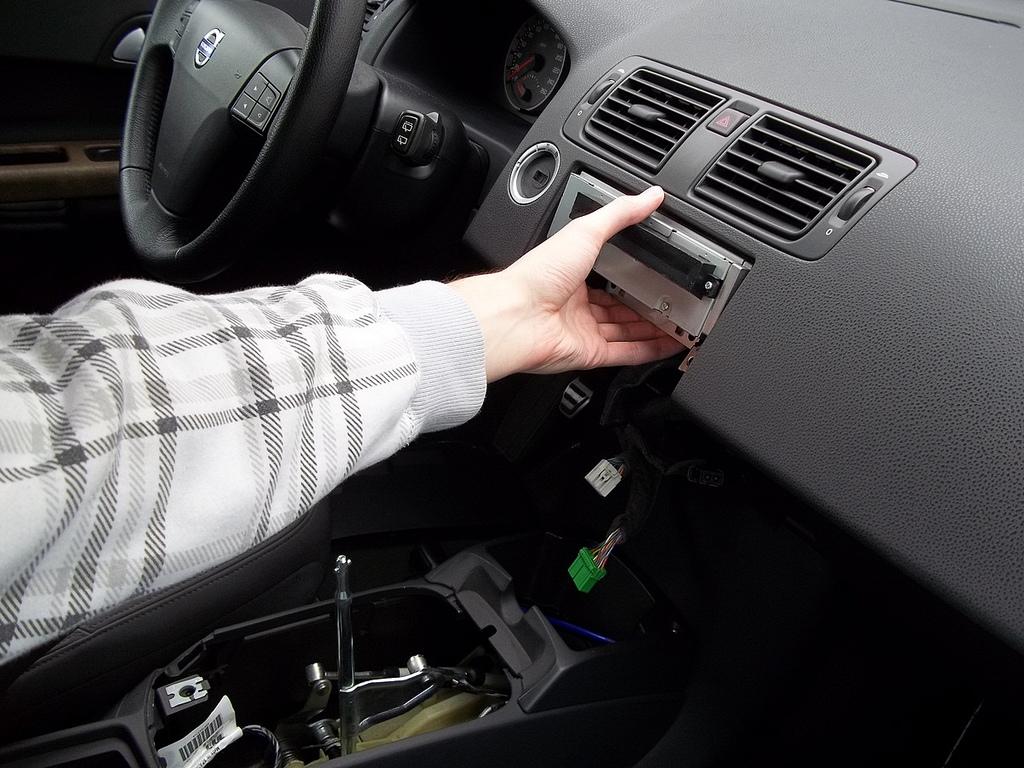
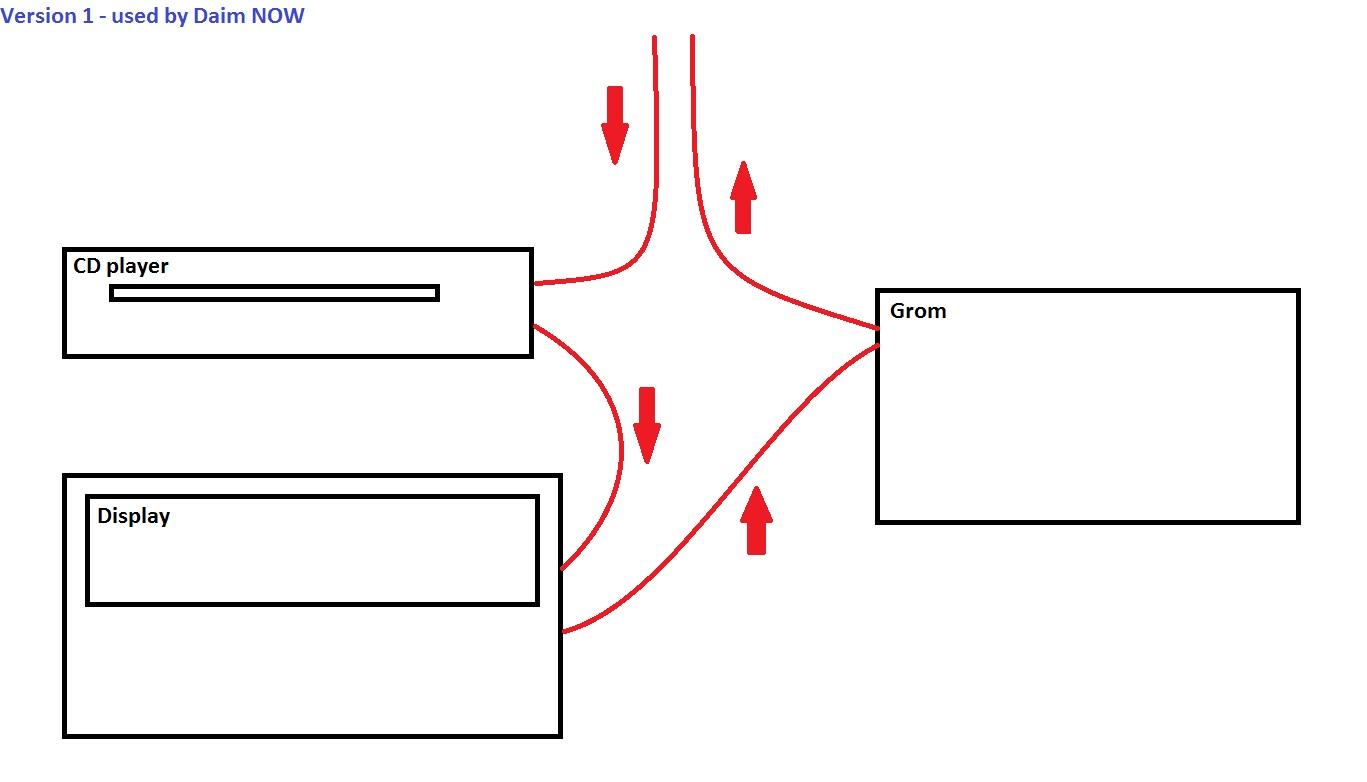
Very carefully push the CD player back into it's position and screw in again (no pictures required for that I guess ![]() ). The next step is to connect the POF cables. I found it easier to attach them to the display's plug. This is now a little fiddley so please bear with me!
). The next step is to connect the POF cables. I found it easier to attach them to the display's plug. This is now a little fiddley so please bear with me!
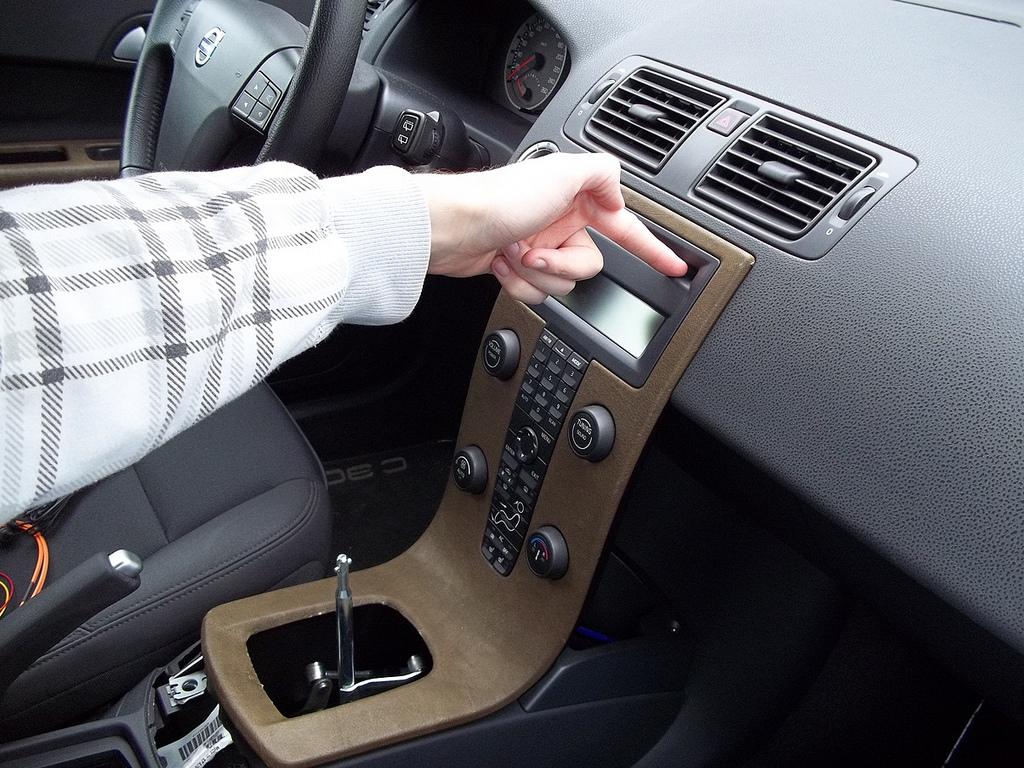
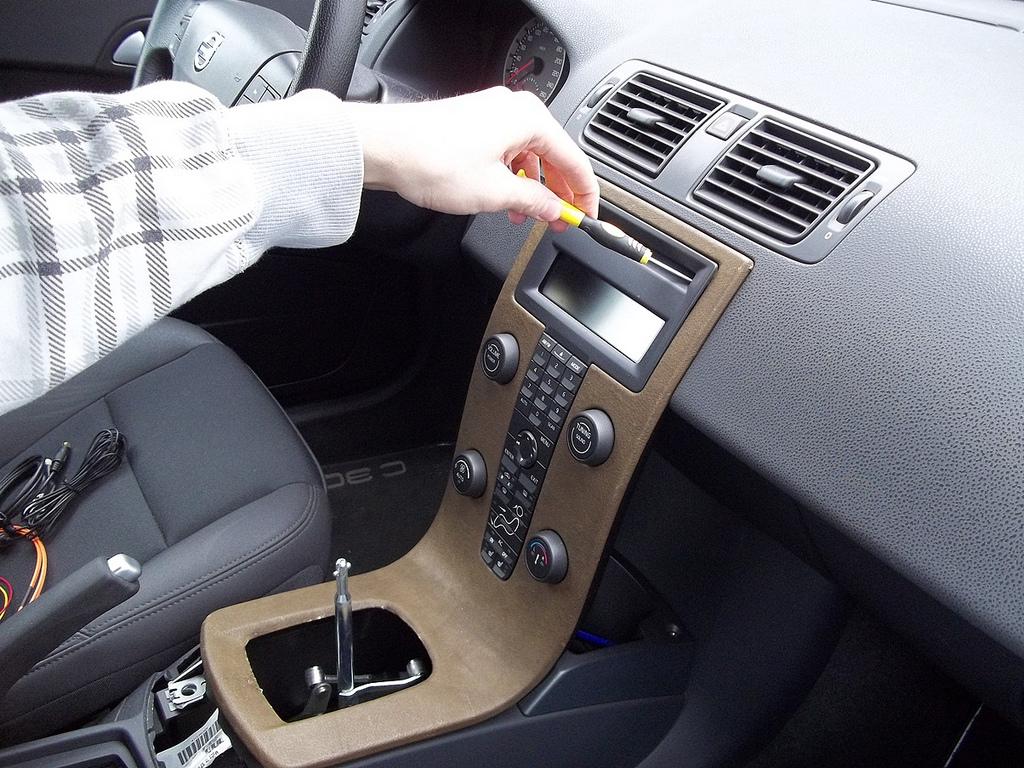
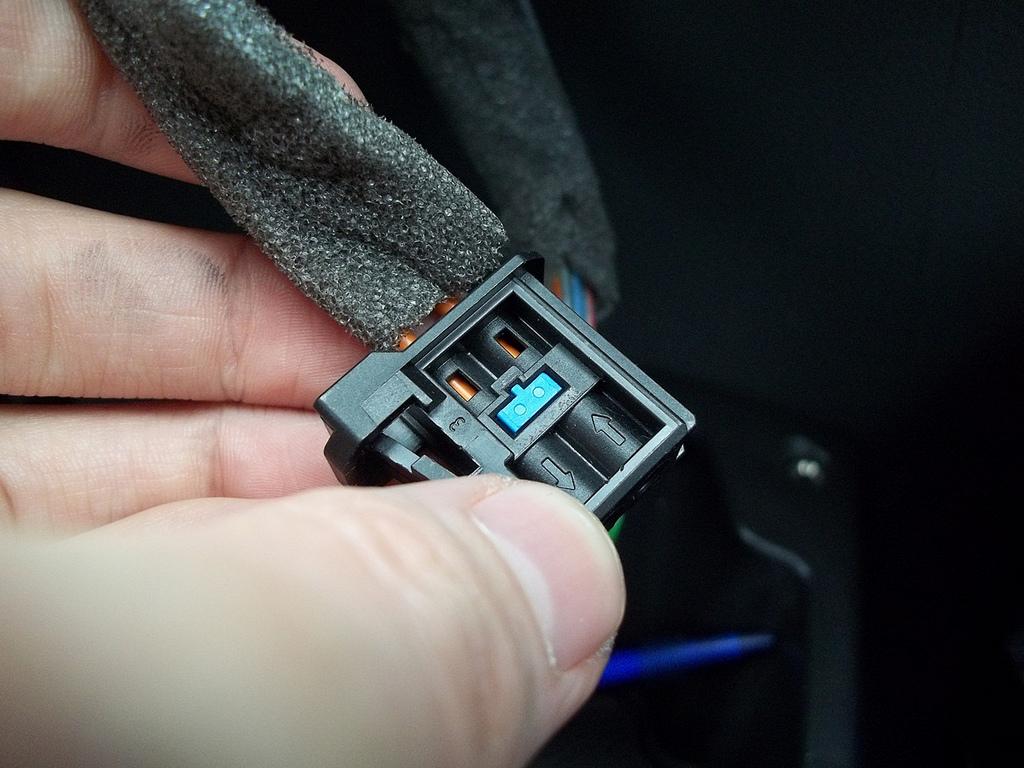
Right, locate the connector with the orange POFs and remove the little blue tab. Using a little slotted driver, push it through and instantly grab it! These are a pain to find again!!!
Carefully pry out the "ingoing" POF (as can be seen on the plug itself -> see arrows) and replace with the "outgoing" POF from the GROM unit. Reinsert "blue T" into plug to secure the POFs.

From here on, I didn't do any other pictures (DOH!) but never the less, it is all easy to explain. Connect the two remaining POFs via the little black connector and secure via using the second part of the clip.
Now you have basically completed the system! BEFORE refitting everything, check that it works! Plug all parts together (even if not in the correct position!). Select "CD" (either via CD button or MODE button) and see if you can play from the provided (and hopefully correct set up) USB stick. You should instantly get music from the stick.
If (!) you have the trouble, that the music only plays for say 10-15 seconds and then cuts out, turning off radio and co, then you need the MOST security command set to "OFF". This can vary from model year to model year and country to country. Before you phone your local Volvo workshop, contact Volvo HQ first and inform them of what you wish to do... They can say "yes" or "no". Normal answer is: "It can't be done from factory, but is possible at the workshops". Some workshops (for example in the UK) can't/won't do so... I paid around ~€25 (US prices will be half that!) for this to be deactivated...
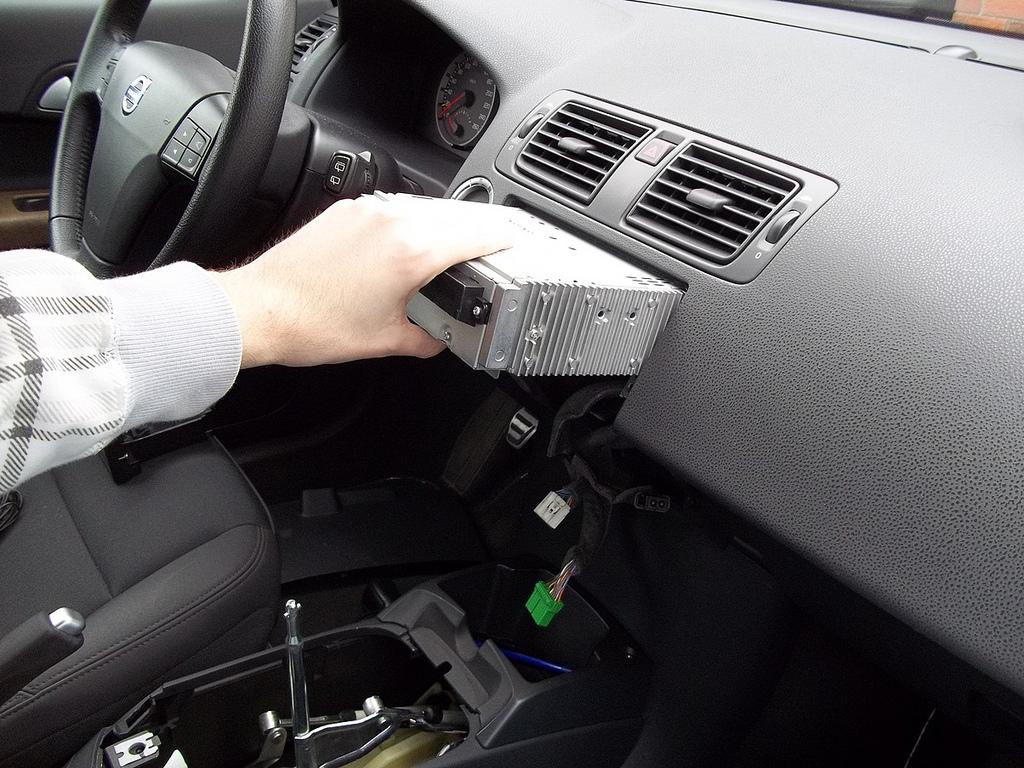
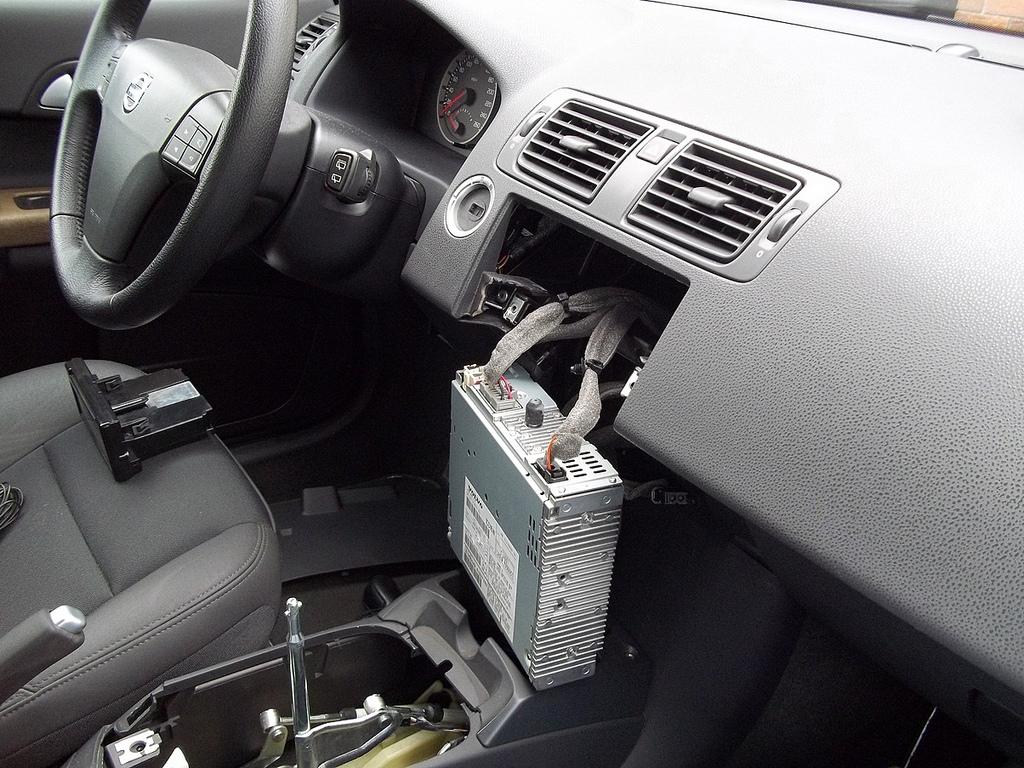
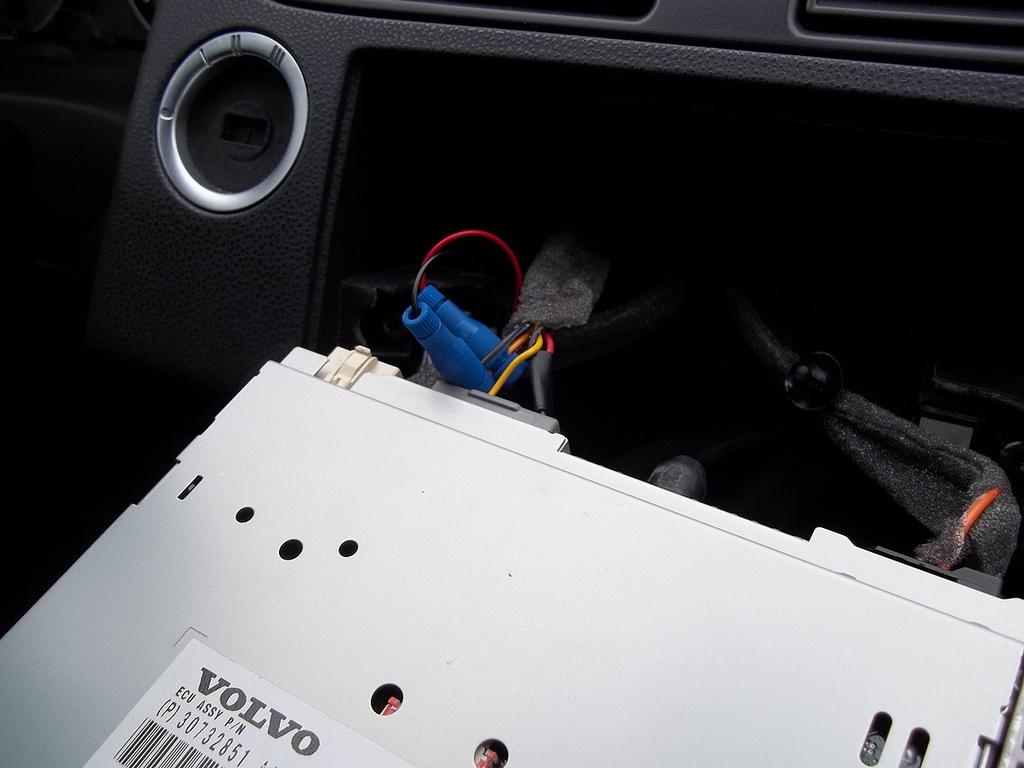
Should you be one of the lucky ones, where it works instantly, put it back together. Best position for the GROM unit to be stored, is, when you look from the driver's seat (LHD) towards the glove pocket, in the little open corner (at least it was open on my C30 - which is equal to S40/V50/C70). Carefully "wedge" it in there and reassemble the same way as dismantle.
A little tip!
The USB cable can easily end in the armrest compartment. For that you'll have to undo the 4 screws for the center console. Two under the radio area (you will see them instantly) and two in the arm rest. Open lid, remove rubber mat and wedge bone tone between the plastic insert (visible) and the casing. Once all four screws have been removed, pull the console to the rear of the car. It will unclip at the front and you can lift it up.
That would be the installation guide for the GROM USB unit. The bluetooth dongle isn't had to install. Can be done at the same time. I placed the dongle itself next to the gear stick inside that area. As mine has loads of space in there, I stuck it to the side with the velcro pad. The microphone cable in my car leads along the top edge of the headliner down the passenger (LHD) side A-column, under the glovepocket to the connector inside the center console... Really easy installation ![]()
Good thing is: except the microphone, ALL things are hidden. No extra displays (Parrot), no cables heading anywhere (AUX/Ipod via AUX) and it all works via the radio controls...
My opinion:
For the cash, an expensive/costy little extra, but definately worth the cash. There are of course a few pros with it and a few cons...
Pro:
- full integration into the system... No more cables dangling anywhere
- GOOD quality sound, if played via MP3
- easy control, once you know how to use it
Con:
- nearly every song starts with a "buuup" or "crrrrrsh" (I guess that is probably the MP3 song quality)
- you can't see what track exactly is playing (only "1:09" -> 1st playlist, 9th song)
- you can't fast forward a song (either listen to it or next)
- when random is on, it will only random the songs in the playlist you are in
I guess the cons can be sorted out via GROM unit software updates (there are regular updates - free of charge! - which can improve the features) or with better quality MP3s.
Even though - according to my list - more cons than pros exist, it is still a good product and worth the cash! For people who don't want to have to touch their MP3 player, solder something into the amp or bodge this that and the other, it is a great thing! It can also be removed quickly, if you intend on selling the car and upgrading etc. At the same time, it provides future upgrade possibilities (Ipod, AUX, bla bla), which aren't possible on pre-2008 cars.
Yes, it does kill off the CD BUT you've got to consider:
500 songs on a 2 GB stick vs. 20 songs per CD (if normal CD player). I prefer to have only one stick with me rather than 25 CDs ![]()
It will work on High Performance and normal "Performance". Premium/Dynaudio is not (yet) supported!
I wouldn't consider it an FM transmitter technic hard wiring. More so like the Volvo original system for the USB connection. You add a full working unit into the existing circuits.
On my screen I get the standard things, just altered a little bit:
Playlist and tracknumber are shown together instead of duration of song. I.e. 1:09 doesn't mean 1 minute and 9 seconds. It means - with the GROM unit: 1st playlist and 9th song. 2:23 = 2nd playlist, 23rd song and so on.
The track name isn't displayed! It doesn't say what song is playing, nor other things. I'm hoping GROM can do something for that.
3-17-2012
I'm really shocked, what quality music my High Performance radio can play since I've put the GROM unit into it... WOW!
All those fine details... That what I neither heard on my computer stereo, nor on phone (headphones), AUX in or via CD is now there. Music to a new degree!!!
Not being stupid, this is my honesty! The whole system seems transformed! Like day and night. Fine accoustic notes have come into it. No other possible medias could do this... I'm really happy with it all! A little costy, but really really good!
Those who have an older P1 Volvo should really look into this!
Oh, and Bluetooth phone quality is great! At 160 km/h (100 mph) everything could be understood well!!! My HTC HD2 (old thing) couples instantly... Range is easily into my house! My car is currently about 20 ft away... I am stick connected to it ![]()
3-30-2012
That is where I had the "crunch" noise. I had it there at first, but in order to get the system working easier, I move it after the display (when you look at the lines).
Here two possibilities:

4-20-2012
Long go no hear ![]()
Now I'm back with it again... So, I've had the issue, that my GROM box would "crash" and that you can't select anything... Well I this time filmed it all...:
Wonder what GROM will say when they see it... Is rather annoying. Everythig else works great, just this "crash mode" every so often...
Oh, and yeah, my center console has changed... It is now Java Brown Metallic instead of being covered with moose leather ![]()
7-31-2012
Did a quick video as I can't really describe as well as it is ![]()
8-3-2012
Okay, well, as I was mentioned as an especially ![]() I'll add my few Euro-Cents to this
I'll add my few Euro-Cents to this ![]()
Well, at first I was a little "annoyed" as nowhere was stated, that you needed to get the MOST Security changed. This didn't cost much (I paid €23!). After that it worked well. The only thing being, that it would crash every so often (you then can't choose any songs anymore and the only controls which work are "Volume" and changing back to radio (then all radio buttons worked) and back to the GROM again). This seems to be now gone, since I got the newest software (hex-11).
Installation is easy (if you know where you need to wire it up) and it all works well. The sound quality is, as has been said here, fantastic and beats the Volvo CD quality by miles. Even the finest little details can be heard. The High Performance system (which I have) then sounds like a Dynaudio (Premium) on standard CDs. It sounds weird, but yes, on MP3 via USB it simply sounds like a totally different system.
Now, the verdict:
is it worth the hassle?
I personally can't say a definite "YES" or "NO". Why? Because my opinion doesn't have to confirm with other peoples... After knowing what went on so far (I've had mine fitted since about March) I would have waited a little bit, simply being so many bugs at the time. But as GROM have really kneed into this, I would say YES, I would buy it and fit it!
My total costs are around €380 (max) as there wasn't much needed. I think Travis and Dimitry (two employees at GROM) are great in their help and work...
The last few things will probably be solved in the next few weeks ![]()
Nice detail!
Posted by Diggymart on 1/1/20 @ 3:58:54 AM