You must be logged in to rate content!
8 minute read

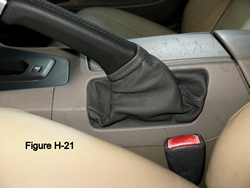
Handbrake Boot Replacement
2001 Volvo S60 2.4T
(Should Apply to Model Years 2001-2005)
Removing and Disassembling the Handbrake Boot:
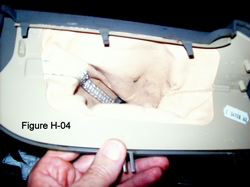
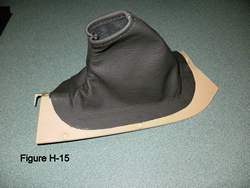
(1) Remove the handbrake boot assembly (which consists of the boot and two plastic pieces that surround the handbrake), as follows: Using a flat-headed screwdriver (or similar), pry upward at various points around the circumference of the boot cover, where it joins with the center console
You’ll be able to feel when it’s coming loose, and where are the best places to pry.
(2) Once the cover is free, pry the lip of the boot over the edge of the handbrake handle. From there the whole boot assembly will slide right off of the handbrake handle. It’s easier if you pull up on the lever.


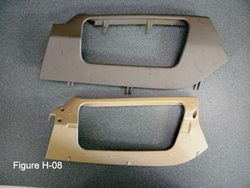
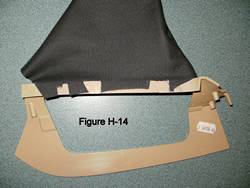
(3) Now, turn the boot assembly over. You will see the inner and out boot covers. The outer cover is grey, while the inner cover is tan.
The handbrake boot is sandwiched between the two covers and stapled to the inner cover. Using a small flat-headed screwdriver, separate the inner and outer boot covers by prying the pieces apart at the plastic welds (like small spot welds). They will come apart easily as you break the welds.

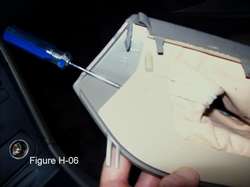
(4) Pry out the staples which hold the boot to the inner cover.
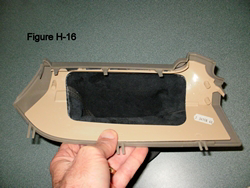
(5) Finally, you are left with the inner and outer handbrake covers Page 3 of 10
The new handbrake boot will have to be glued to the inner cover. Then the inner cover will have to be glued back together with the outer cover. In preparation for this, rough up the plastic surfaces to be glued with #80 grit sandpaper, and wipe them off with lacquer thinner.
Installing the New Redline Handbrake Boot:
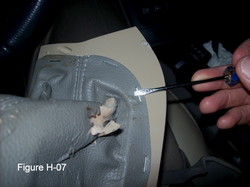
(6) To install the new handbrake boot back onto the inner boot cover you will need to use an alternative to the staples used in manufacturing. I found a good “super glue” type of adhesive works fairly well for gluing leather to plastic. I recommend something like “Aleene’s Super Gel Brush-On Adhesive” or “Super Glue’s Future Glue Gel”, both of which can be found at crafts stores or building supply stores. As mentioned above, taking a little #80 grit sandpaper to the surface, and wiping it clean with lacquer thinner will help the glue get a good hold.
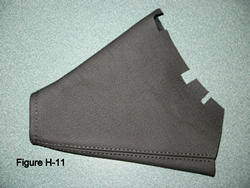
(7) One edge of the new handbrake boot has several “cut-outs”.
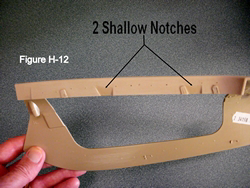
This is a good indicator how to orient the boot on the plastic inner cover. Along the top inside edge of the cover you will see two shallow notches.
Those two notches in the plastic inner cover will line up (more or less) with the cut-outs along the edge of the leather boot.
Initially, just glue the leather boot to the plastic cover in this location (along the edge with the notches), and let it dry.
Do this by applying the glue quickly to the inside edge of the leather boot, a few inches at a time, and affixing it to plastic cover. By the way, it seems to work best to line up the deepest point of the two notches in the boot with the edge of the plastic cover.
This initial positioning of the boot along the edge of the plastic inner cover is critical, because it will determine how the rest of the boot lines up on the cover. Continue gluing the boot to the cover, two or three inches at a time, until you get the entire circumference of the boot glued securely to the plastic surface.
(8) Now, glue the inner cover back together with the outer cover, as follows. As we did before, sand the outer boot cover (in the area where it will be glued to the inner boot cover) with #80 grit sandpaper and clean it off with lacquer thinner. This is important because we will be using a hot glue gun for this gluing process because we have some bigger gaps to fill. The glue will need a good, clean, and course surface to give it the best chance for a strong adhesion. Although I have not tried it, an epoxy compound of some sort may work, as well.
Study the inner and outer plastic covers to see where you want to apply the hot glue. You will have to do this gluing process quickly and all in one shot. In other words, you will have to apply all the glue at one time, and then squeeze the two pieces together.
Use plenty of glue from the glue gun (again, you have some good size gaps to fill), and apply it quickly, before the glue starts to solidify. Once you get the two pieces together, apply plenty of pressure to make sure the inner cover is seated tightly in place.
Keep squeezing the two pieces together until you are sure the glue has hardened sufficiently, which should take about 5 or 6 minutes.
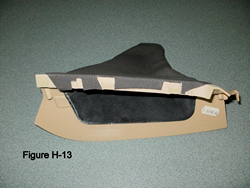
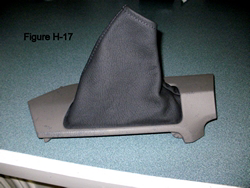
Finally, take the glue gun and run a bead of glue around the edge of the inner cover (where possible) for an extra bit of adhesion. The finished product should look something like this:
(9) Before you install the boot there is one more step: Take a pair of scissors and trim off any excess material (especially at the seams) from the inside of the opening of the boot. Since the new leather boot is thicker than the old imitation leather boot, this will make it easier when you have to fit the top of the boot into the narrow slot just under the handbrake handle.
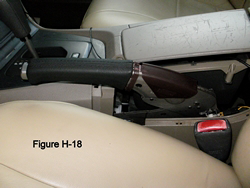
(10) Now, let’s put the handbrake boot assembly back in place. Raise the handbrake up to its normal engaged position (to make it easier to get the boot on), then slide the boot over the handbrake handle.
Work the top of the boot into the narrow channel just below the bottom of the handle, and make sure it is seated properly.

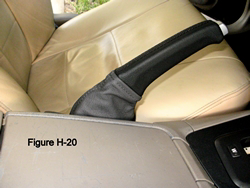
(11) Locate the boot cover alignment pins into their slots, maneuver the cover down into position, and snap it into place. Finally, adjust the leather folds to your liking. Congratulations! You are done.