You must be logged in to rate content!
7 minute(s) of a 720 minute read
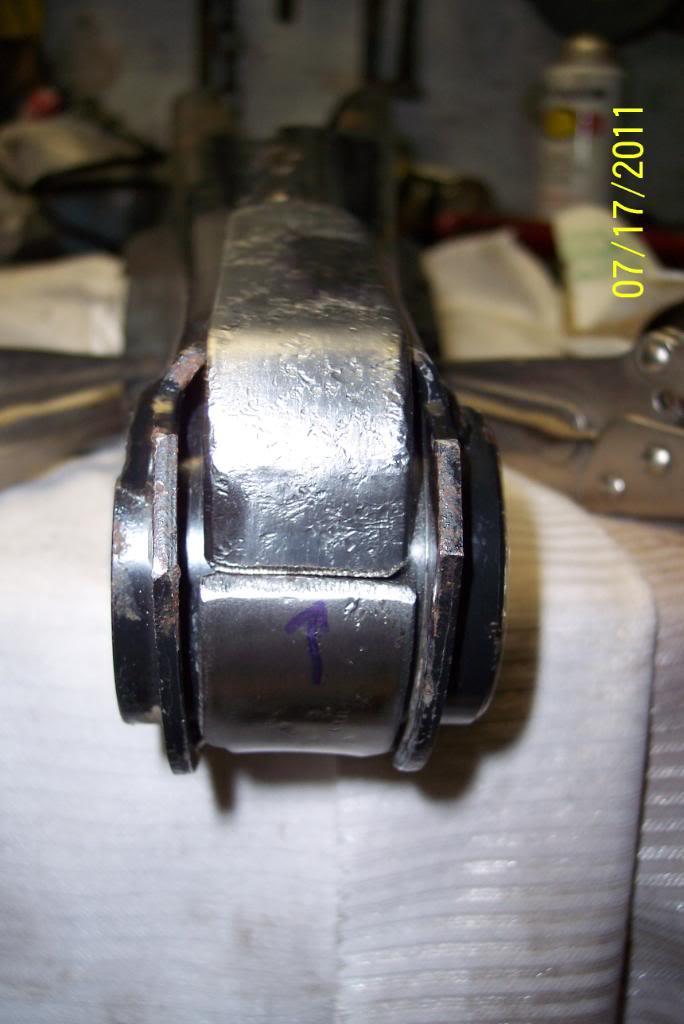
7-17-2011
Well, after a rethink, I have changed the bottom, front small end bracing. Instead of being welded on the inside of the small end LTA slot, I made another to be welded on the outside of the bottom small end. I like this way better as it fits the slot in LTA better. And offers more strength IMO.Where it wraps around the eyelet, it'll be welded on both sides to the eyelt & LTA.
Then there will be a short piece welded over the butt joint of where the top & bottom braces meet, and it'll be welded on both ends & sides, & to the other two pieces. That ought to hold the eyelet it there, By Golly!
I'll take all this stuff back to the welder tomorrow morning. Hopefully it'll get welded by Thursday or so... Pics....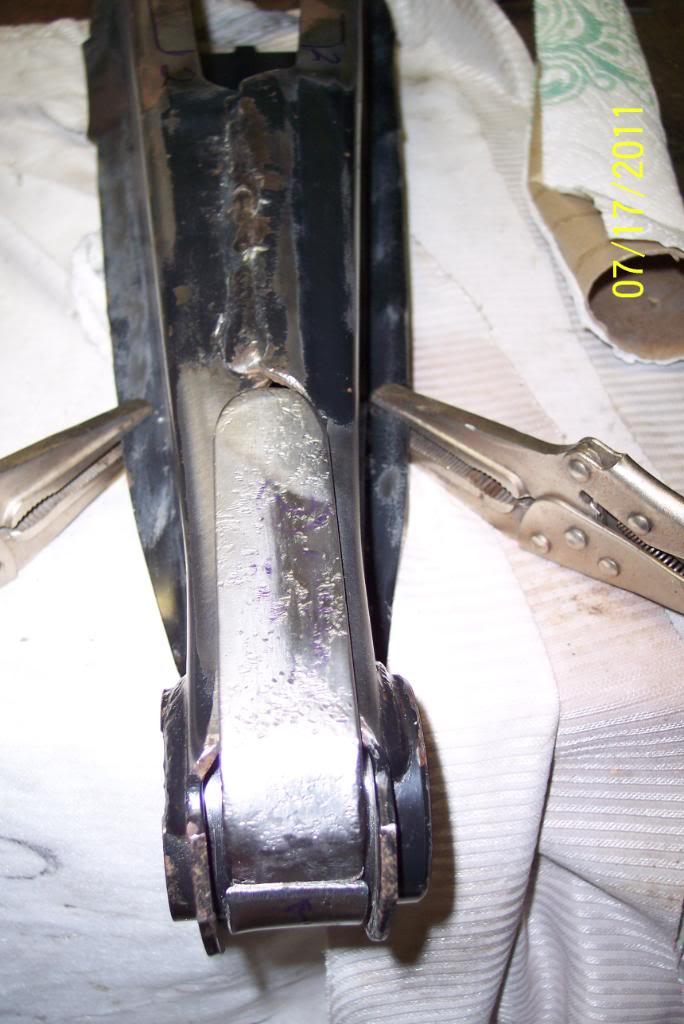
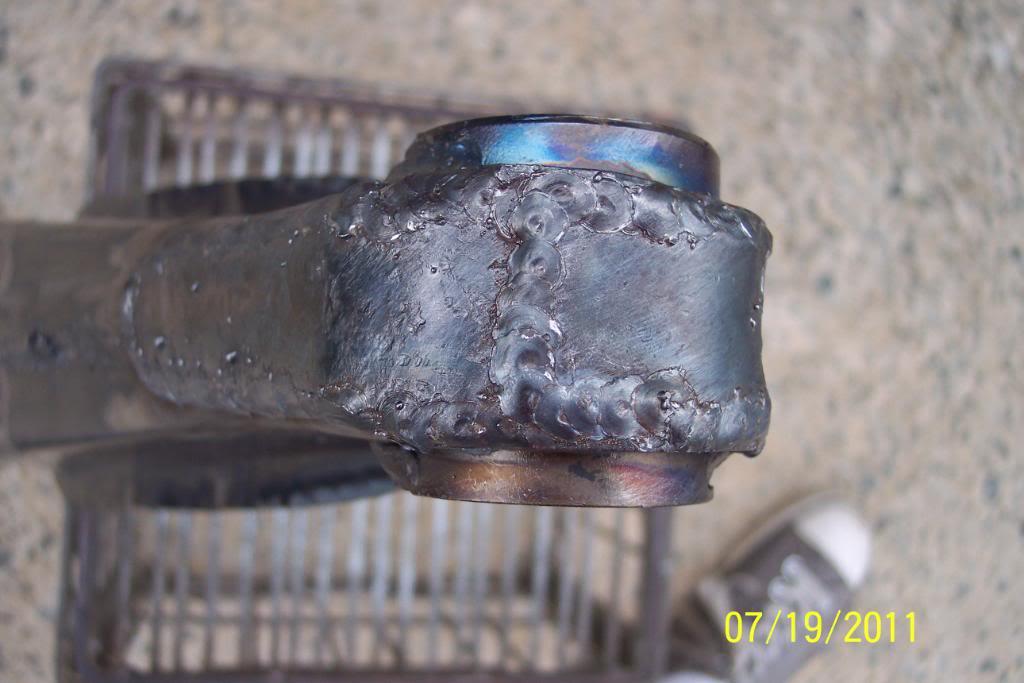
7/19/11
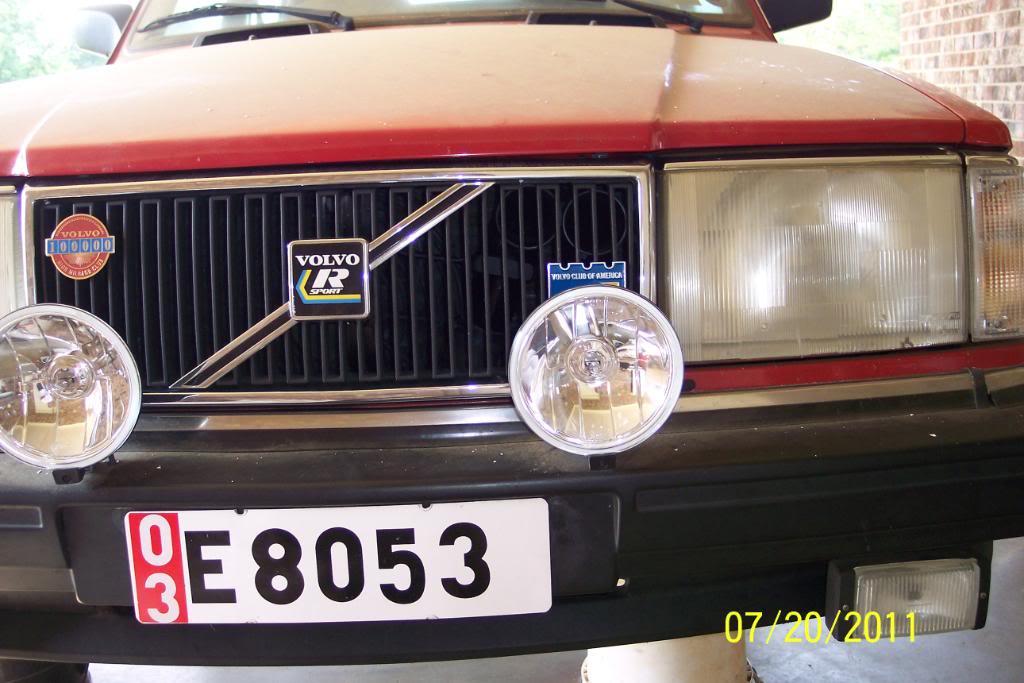
While all the License dael was back in '97, it's still cheaper to do the speed limit. I'd only consider acting up, in the country, in sparely populated area. Not many left either.
Got lucky & LTA are weldd & back in my possession. Here's pics of the fully welded/braced LTA. I think they'll take anything I can dish out...and then some.
The final braces weighed about 2.75 lb. The OEM LTAs weighed about 9 lbs.
They now weigh 12.5 pounds each. Both weigh figures acheived on Bathroom scales though. So just the welds weigh about 1.25-1.5 lb..
That for those that were curious as to what everything weighed, and now weighs.
Pics below: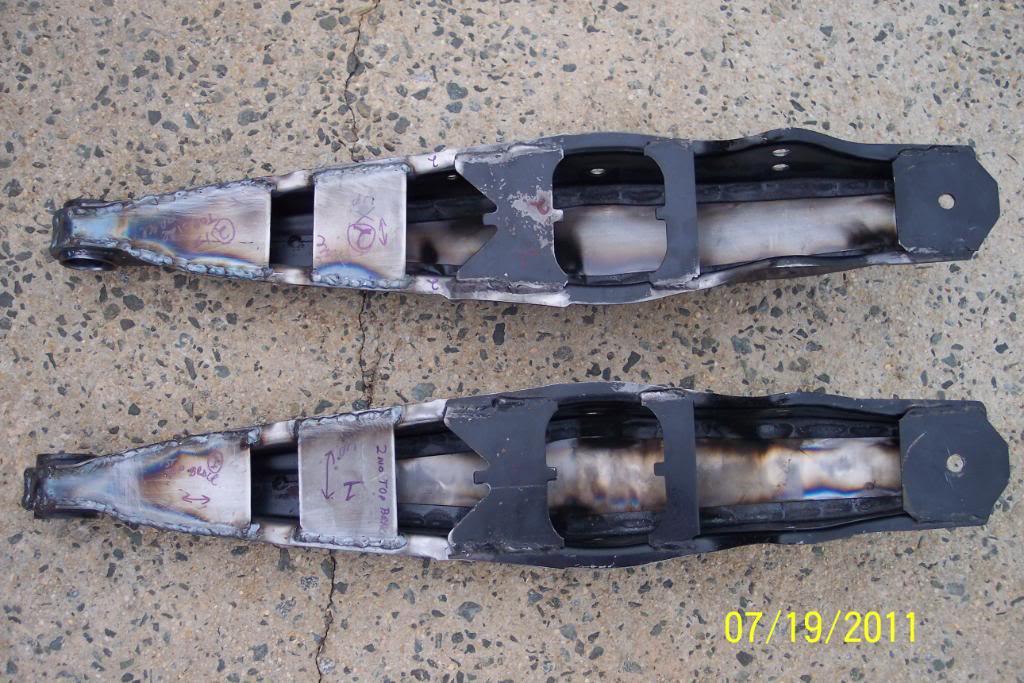
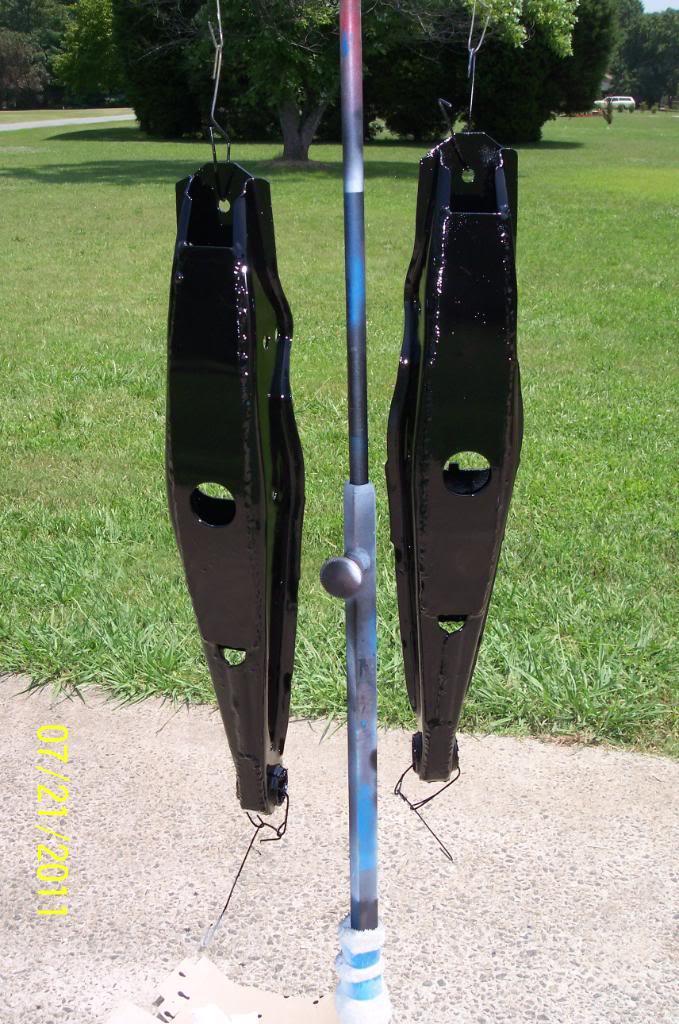
Small end's bottom brace.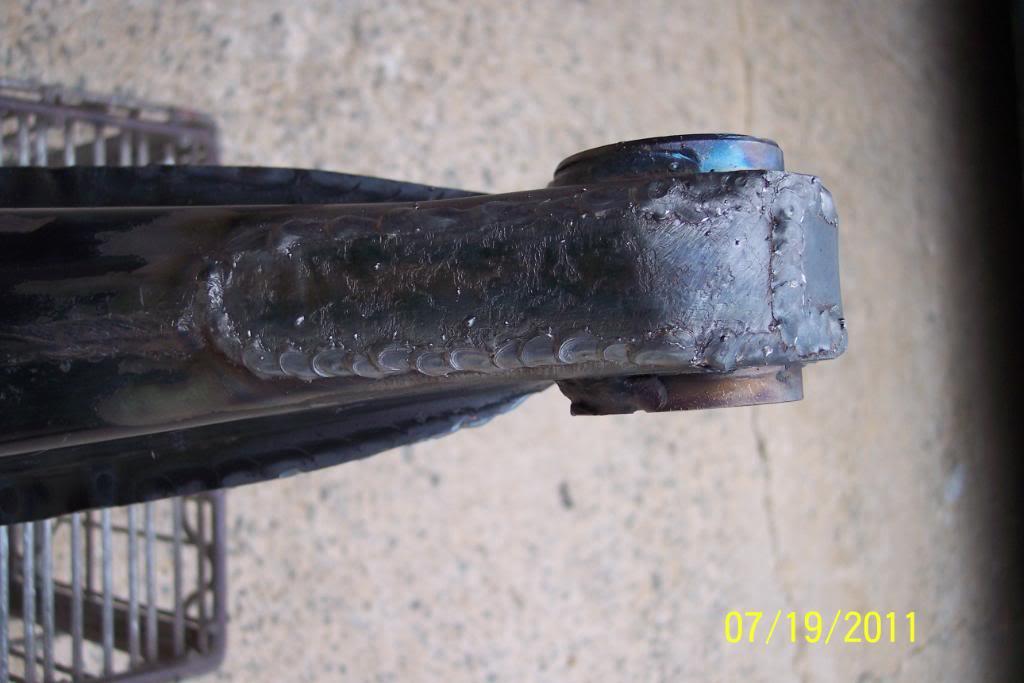
Small end's top side brace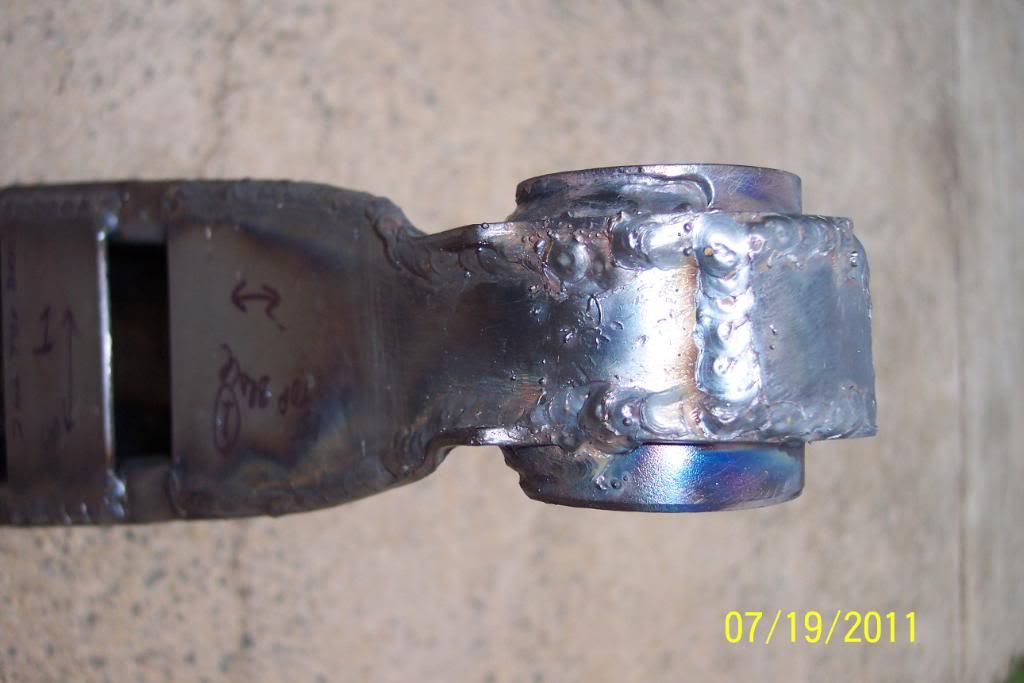
Bottom brace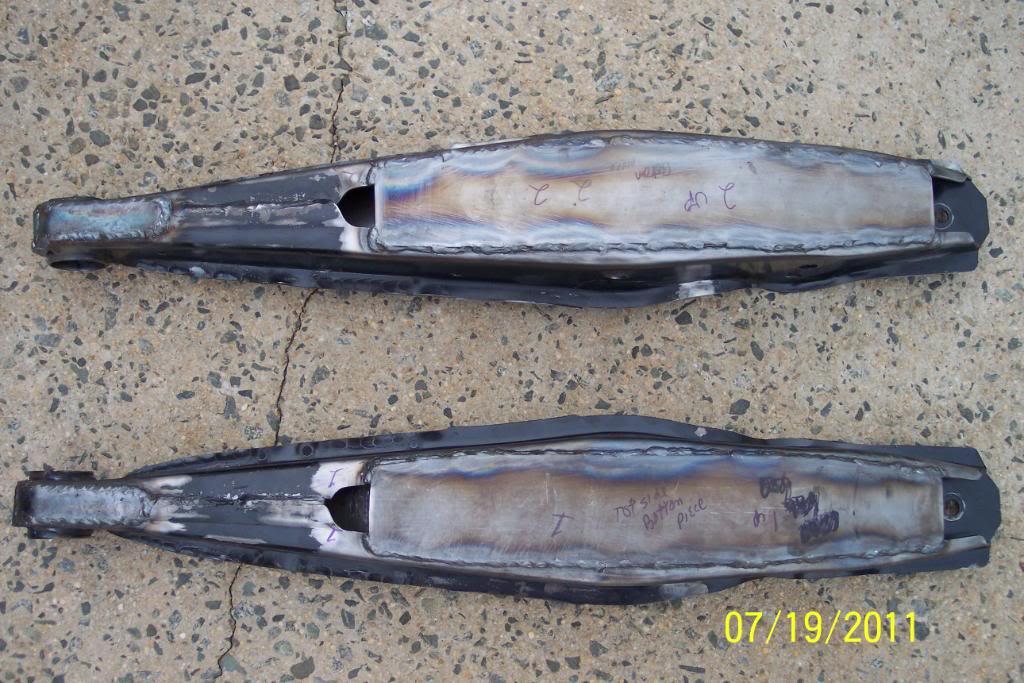
After I debur & paint them, I muight be able t weigh them on more accurate scales ,at the shipper I use .
7/20/11
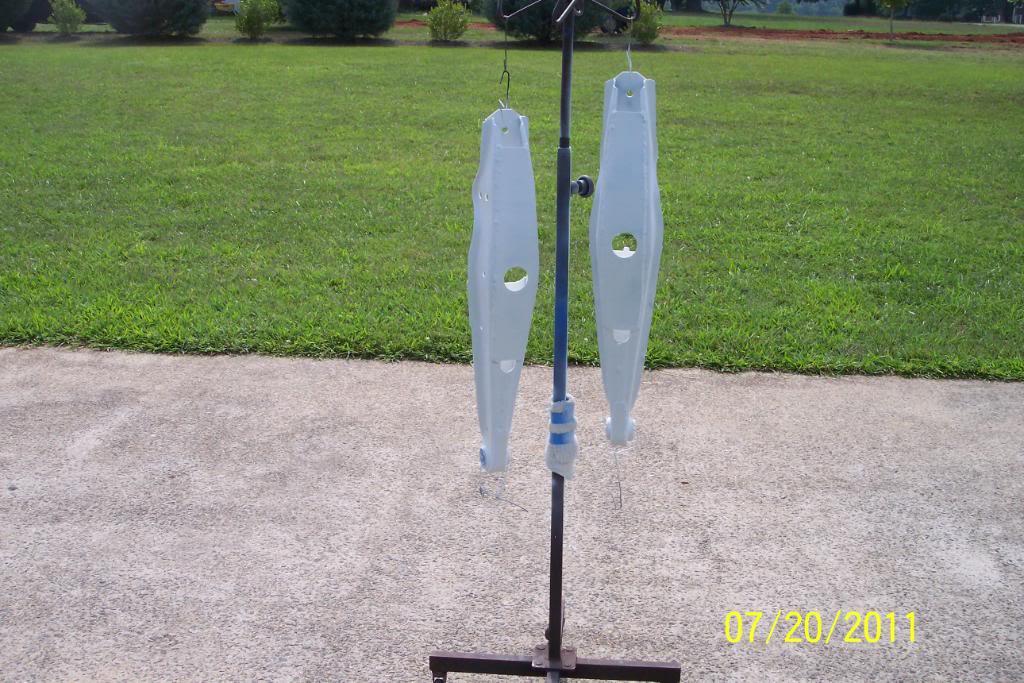
I cut & chamfered the access/weep hole in the bottom brace in shock mounting area of bottom. I used a hole saw. Looks good to me.....
Cleaned them with Brakleen & will primer them with Rustoleulm white primer, then paint & undercoat ,em
Pics of weep hole.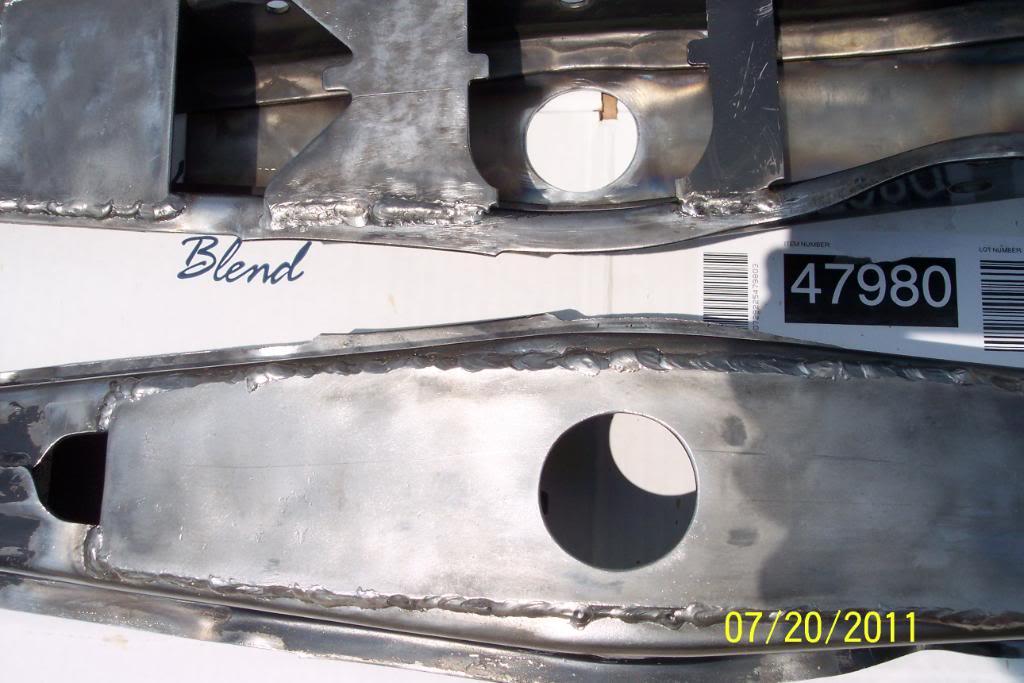

It's also for access to bottom of shock during shock installation. It's no larger than the hole in the YoshiFab bottom braces.
Got them cleaned & primed with Rustoleum White Bare Metal Primer.............. Might paint them light grey as John V Outside Agitator suggested. Dunno yet...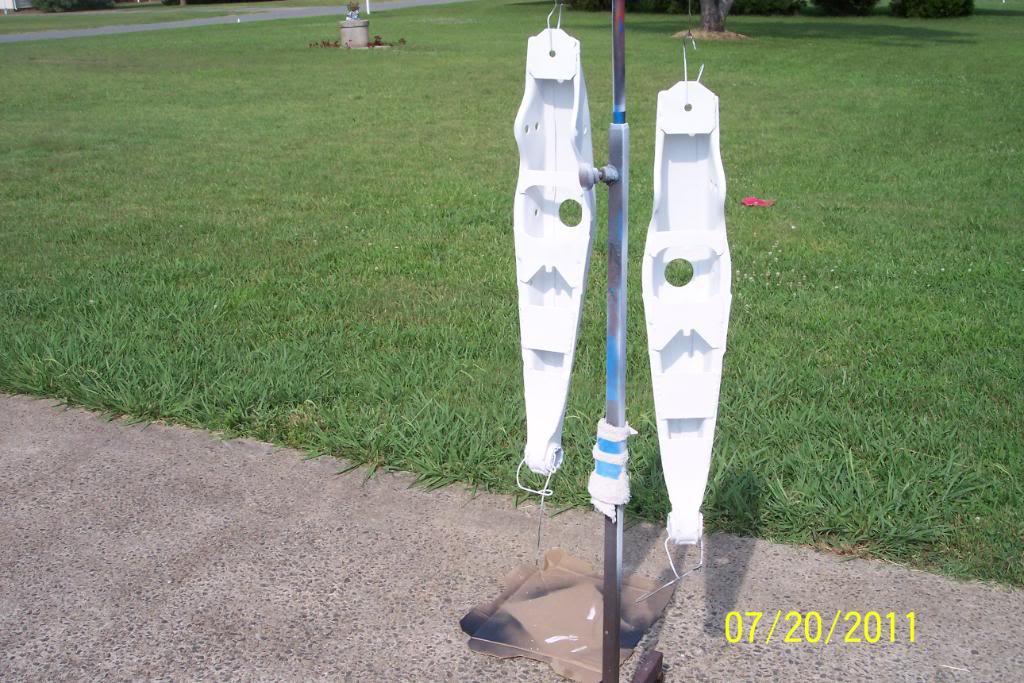
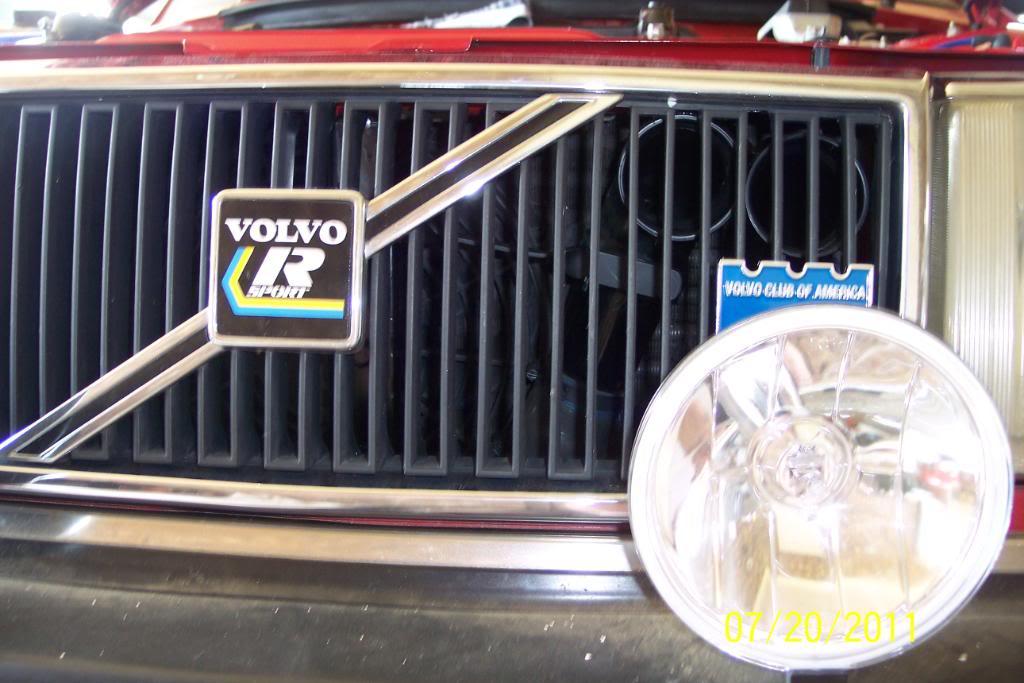
OK, I dropped back the other day, and removed & painted the 2nd CAI I made. And cleaned off the modded OEM Intake pipe. Also found a looonger black tie wrap for each one, for a neater appearance.
Anyone know if paint wil stick to the Turbo Silicone Hose? I'd like to paint it flat black also, but unsure if the paint would disssolve/damage the Silicone Hose.
But.. for now..looks like a little neater/cleaner install now. And when grille is installed is almost invisible. I'm thinking about removing the VCOA plaque, or moving it to another place on grille.Pics..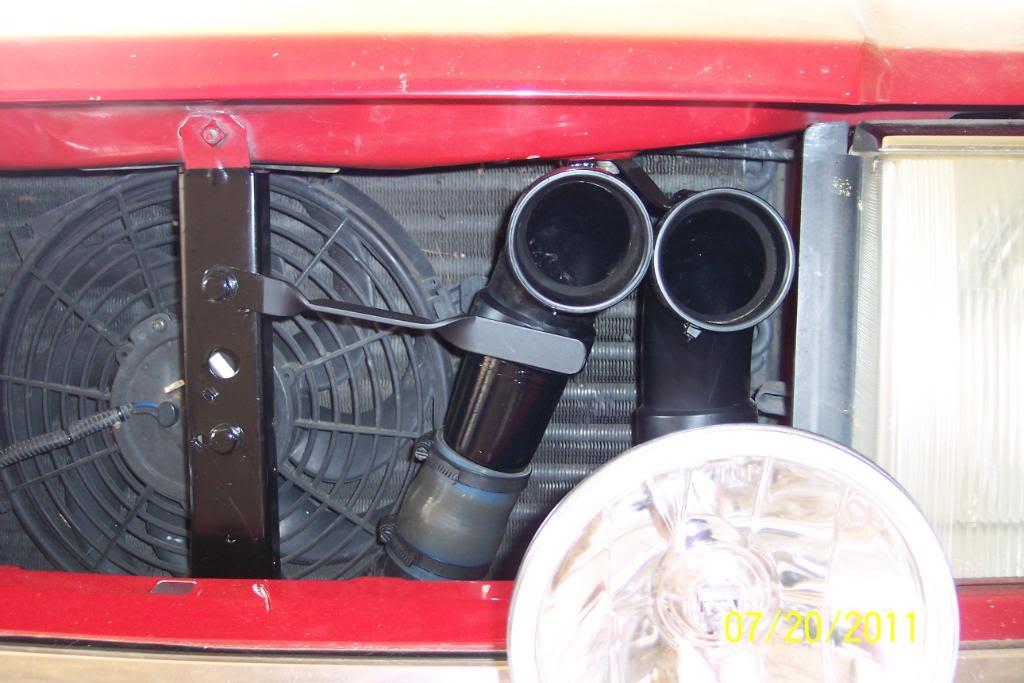
7/21/11
I painted the LTAs....... Black...at... High Noon, ...for a Western Effect.
I like to paint all my parts except the engine and brake calipers ,with Rustoluem Spray Paint.
I used Rustoleum Semi-Gloss Black over the Rustoleum Bare Metal Primer on the LTAs .
Since all the extra bracing makes it very difficult to get spray the paint on the backside of the top braces and down into the small end, I used the World Famous "S.T.I.R. Method of Spray Painting" . I'm sure you're all very familiar of the S.T.I.R method right?
Luckily the small hole in the taper end, and my round weep hole did give me enough of a place to shoot paint through them & it helped a bit.
I expecting that the coat of primer plus the S.T.I.R. Method coat may make it a little difficult to weasel the shock, it's spacer & the diff bushing in. I'll have to wait till they dry, to see.
Yep, the LTAs are now, as black as a Jug full of Midnight....Pics...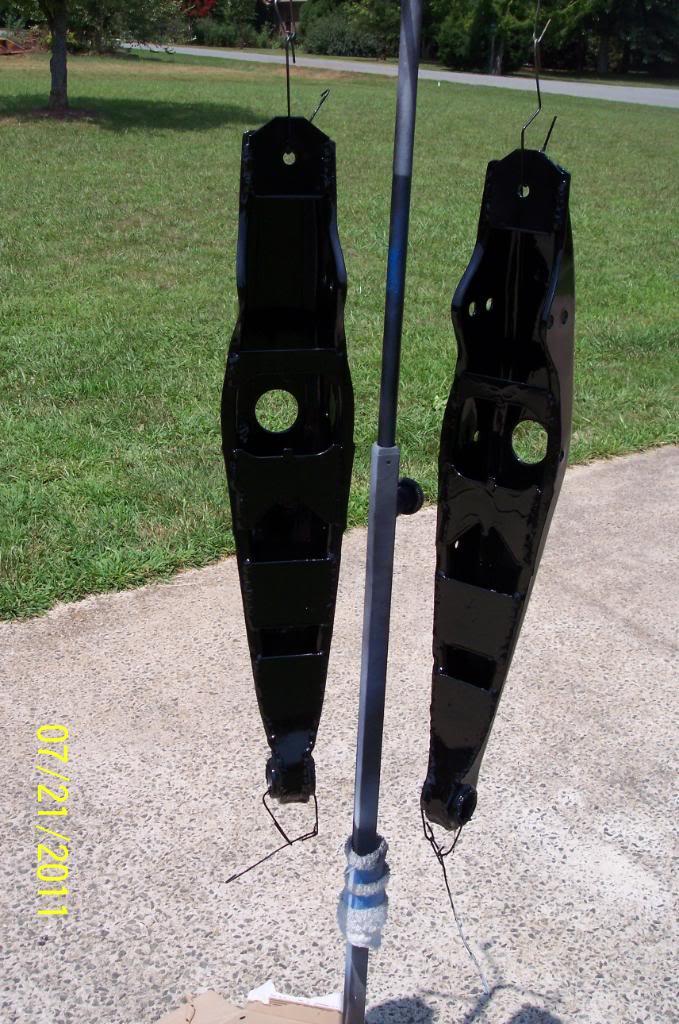
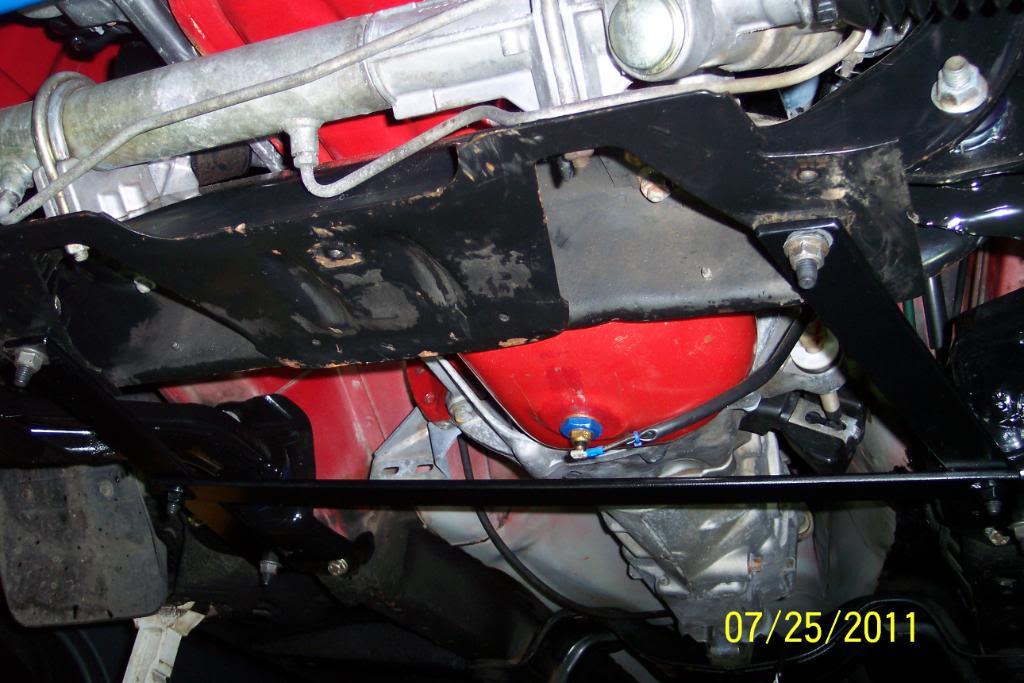
7/25/11
Well, why I've been letting the LTAs bake in the hot NC Sun to dry fully, I installed the IPD Lower Chassis Brace. It was quite an easy install & only required two 3/8" holes to be drilled. Luckily I have a right angle drill and a new bit which made it go all the easier.
And there is plenty of room to install and remove the n/a header pipe without removing the IPD Lower Chassis Brace. A big plus I think.
However, I am seriously considering sawing off the 1/4" of threaded bolt that protrudes through the brackets & the nuts, to gain an extra 1/4" of ground clearance.
I'm not very fond of the bolts sticking down 1/4" more than needed. recipe for possible problems if they hit something someday, IMO. I plan to loosen them, and put some blue LocTite on each bolt/nut also, then retighten them to 20 ft/lb as IPD suggests..
Pics below: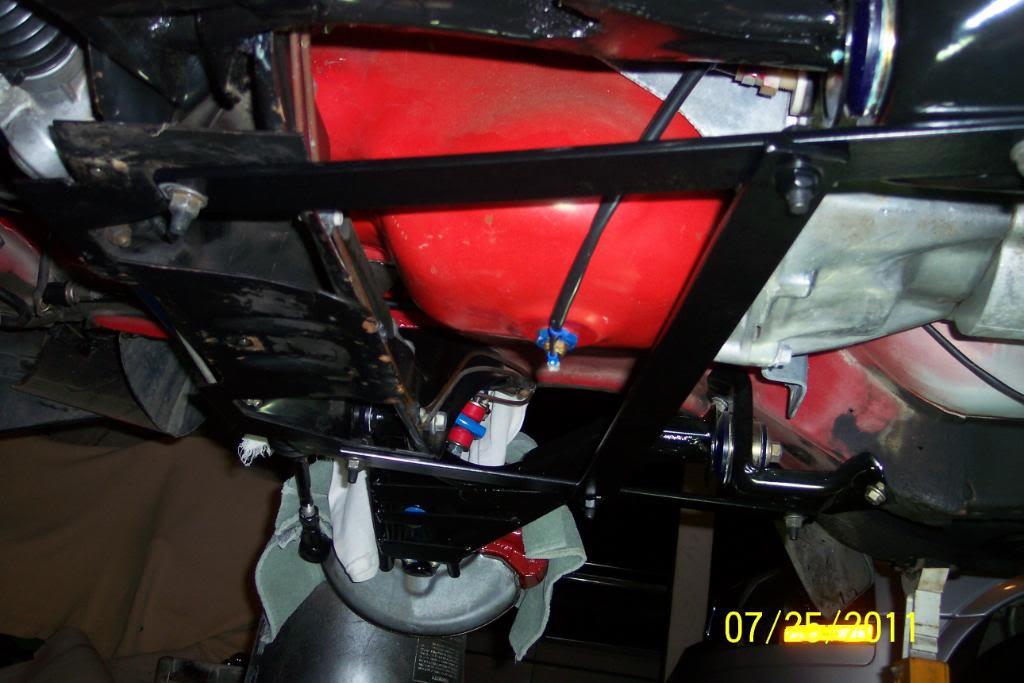

Nice build!
Posted by Diggymart on 3/30/20 @ 2:45:08 PM