You must be logged in to rate content!
6 minute(s) of a 111 minute read
5-7-2013
Team Extreme~The Volvo 1800 E Build
Compliments of 1800e @ forums.swedespeed.com
5-7-2013
First off, let me start by saying this is my first blog. I have never found anything interesting enough to blog about, but I never owned an 1800. I wanted to share with everyone my experience building my dream car. I have been working on it since January 10, 2013 and have learned a ton! I will share pictures, advice and anything else you ask. Life goes on. I'm letting everyone follow my build and hope someone finds it interesting. So here we go!

The day I brought it home! I hadn't been this happy since the day I got married. Getting the 1800 of your dreams is better than Disneyland. I took my wife's SUV to UHaul and picked up a trailer. The lights didn't work, so the guy working there wouldn't let me leave. I told him I was picking up my dream car and he said to drive like the wind. I still need to go back and thank that guy. The car wasn't running but I could tell it would with some love.
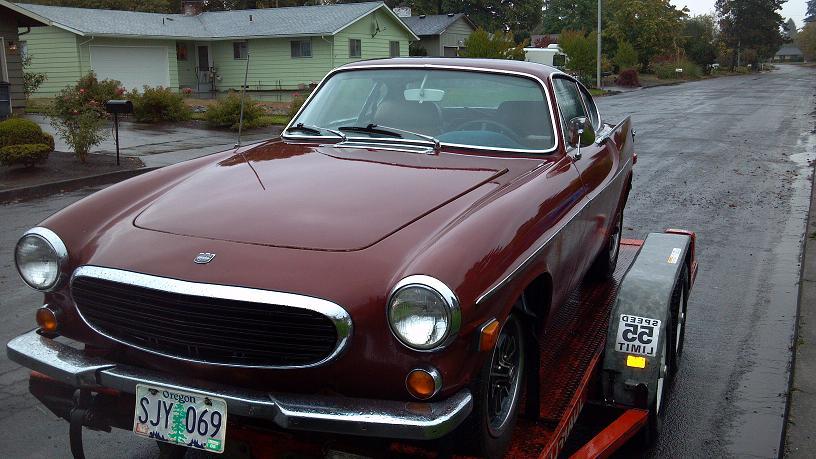
This was in October of 2012.
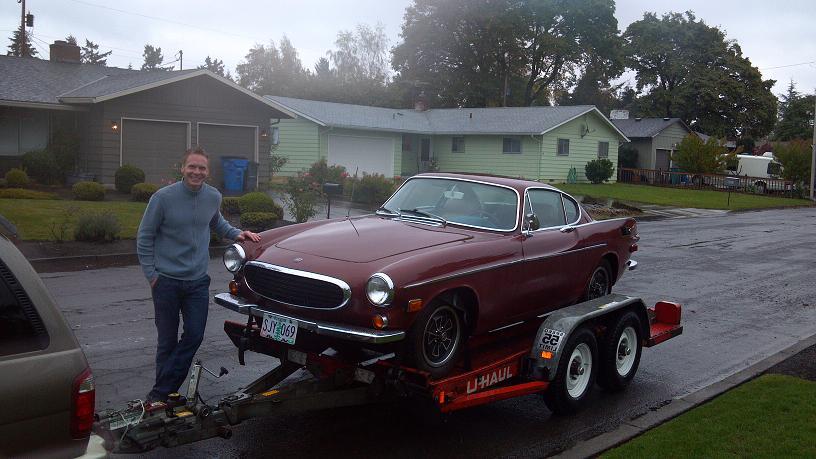
Perfectly straight!
5-8-2013
So here's the story of the car. Way back in the dark ages when I was sixteen years old, I would look in the the "For Sale" ads in the newspaper for an 1800 (hmm . . . newspaper . . . "For Sale" . . . dark ages, right?). I would call the seller, act like I had money and say I needed to test drive the car. I would drive the car with the owner and make up excuses why it wasn't the right one and leave. I drove over a dozen Volvos this way without a penny to my name. I know...I was that kid! I wanted one BADLY!
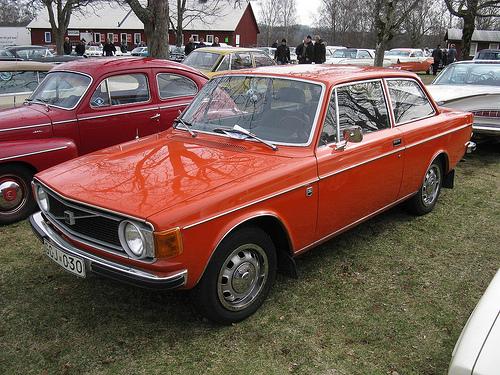
Years went by and I found a 142 for college for $500 bucks! SOLD! It had 315,000 miles on it, and I drove it throughout my college career. I sold it at the 2003 IPD garage sale to a nice guy who promised to fix it up. I miss that car so much. The Volvo bug grew and untl I NEEDED an 1800.
The 142 looked like this, but the paint didn't have as much shine.
Now we come to October of 2012. As I was putting up flyers on the post for the house I was trying to sell (I'm a real estate agent and property manager) and I was upset, really upset. I didn't think the house would sell, and I had to kick my tenants out. The tenants were great but the market was down. I was driving away and there it was in the neighbor's driveway. I jumped out of the car and took a look. The car looked very solid but I could tell it had been sitting. I didn't know the poor car had been sitting outside for 6 years until later. HA! I walked to the front door and was met by the owner's wife. She said it was for sale because they were stranded in Washougal, WA in the rain when they ran out of gas. No cell service meant a long walk for the husband. I came up with a very fair price and told my wife. We ROLLED the car up on the trailer and brought it home. Never pay top dollar for a car that doesn't run. I did, but was very lucky. The first thing I did was drop it off to my mechanic at Eagle Street Automotive. They had it running in no time. I also started buying parts like the fuel sending unit from IPD so I could tell how much gas was in the tank. Happy wife, happy life people.

Now we're at November of 2012. Kenny and the guys at Eagle Automotive replaced the battery, thermostat, cleaned the bucket of sand from the fuel tank and lines, added all new fuel lines so it didn't catch fire, breakerless ignition, fixed the rad puke tank, replaced a freeze plug that was leaking, replaced the fuel pump and fired her up for the first time! The car had a 2.5 inch stainless exhaust and it sounded great. There was about a gallon of water in the Magnaflow muffler. Thankfully it was stainless! The car wasn't running perfectly, but it was running for the first time in 6 years. I was feeling really excited about getting an old Volvo back on the road where it belonged! It would get restored and never sit again!

Here I am on the first drive around the block once I got the car back from Kenny!
After a couple drives around the block I noticed the car wasn't starting strong. It had a bad alternator. I replaced it and the belt. I needed a mechanic who knew a thing or two about the old B20E electronics and what needed more work. A gentleman by the name of Elliot who works at Voltech in Portland had it fixed in no time flat. Again, I'm sorry about the mold smell in the car. He spent hours in there and actually got sick. There was a leak around the windshield. I got the car back from Elliot in December and started saving for presents for my wife and kept the car clean in the garage for 2 weeks without work, just the occasional drive around the block. Next up was D-day! January 10th, 2013. The day it all started. More tomorrow......
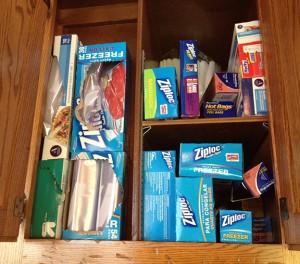
I bought tons of Zip Lock bags
And read my new favorite book front to back twice. This was more fun to read than 50 Shades of Gray...from what I hear. HA!