You must be logged in to rate content!
3 minute read

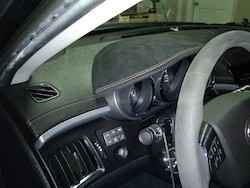
GAUGE HOOD COVER INSTALLATION CTS-V 09-15
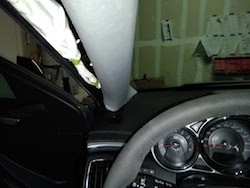
1. Disconnect the battery, then remove A-pillar trim by pulling it towards you, make sure hands are clean or wear gloves.
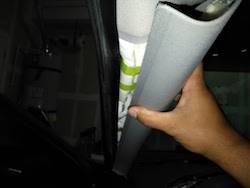
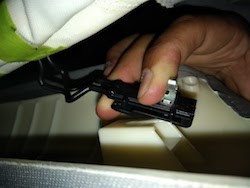
2. Be mindful of a airbag clip at the top of the trim, just slide the clip up off the trim as seen here.
3. Begin carefully popping up trim starting with the driver speaker grill which is attached to rear trim. use a trim removal tool to prevent scratching or digging.
4. Work in small sections at a time as its all one piece.
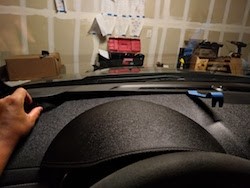
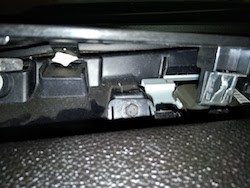
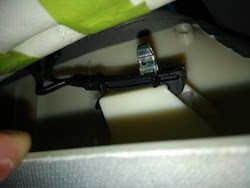
5. Here you can see the location of the single 7mm bolt that holds the guage cluster hood on, remove that as seen here.
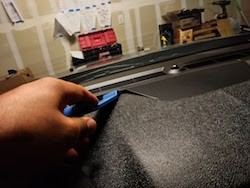
6. Simply slide the hood towards you, in a straight movement. Remove the section that will be wrapped (assembled with bolts) and proceed to wrap it in leather - align it carefully and glue it down starting on one side, making sure it's glued nice and flat. Contact cement or another glue with a longer set time will allow you to make small corrections if you notice any imperfections.
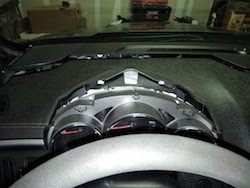
7. Slide new guage cluster into position, insert 7mm bolt and press down rear plastic trim working from one side to another finishing with the driver speaker grill.
8. Reinstall a pillar trim.jpg
9. Slide the clip back into position at the top of the A-pillar trim.
10. Press clips firmly into place insuring they are lined up inside the A-Pillar.
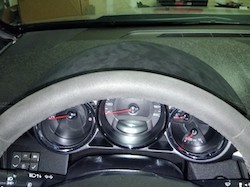
ENJOY YOUR NEW LEATHER BOOTS!
Useful tip
You have installed a product made out of genuine leather. As you know, to maintain a leather product in good condition, you should take care of it. We suggest occasionally (every 4-6 week for example) applying some leather conditioner/UV protector to keep your leather from drying up in the sun and cracking.
Redline Automotive Accessories Corp. will not be held liable for any labor, incidental or consequential damages of any kind. Proceed at your own risk.
Great DIY
Posted by Diggymart on 5/22/20 @ 2:34:20 AM