You must be logged in to rate content!
8 minute read
DIY Foot-well lighting.
Compliments of Fiat Sport @ fiat500owners.com
7-8-2014
I helped my daughter install her first Mod to her Blue Fiat Sport.
She's pretty happy with it and that makes me happy.
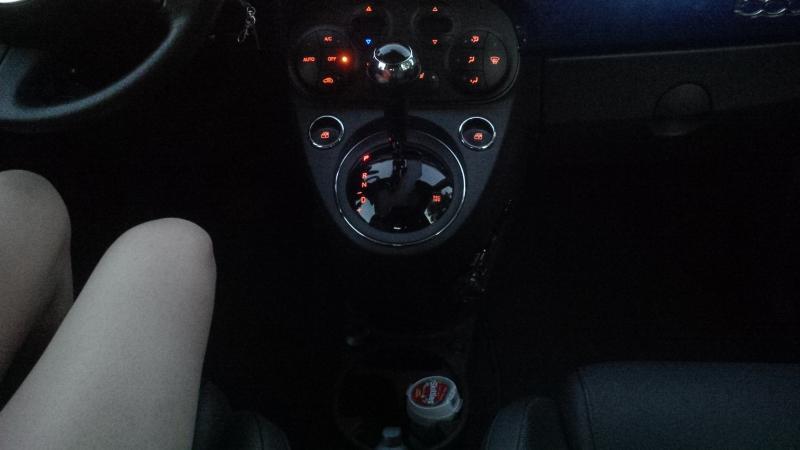
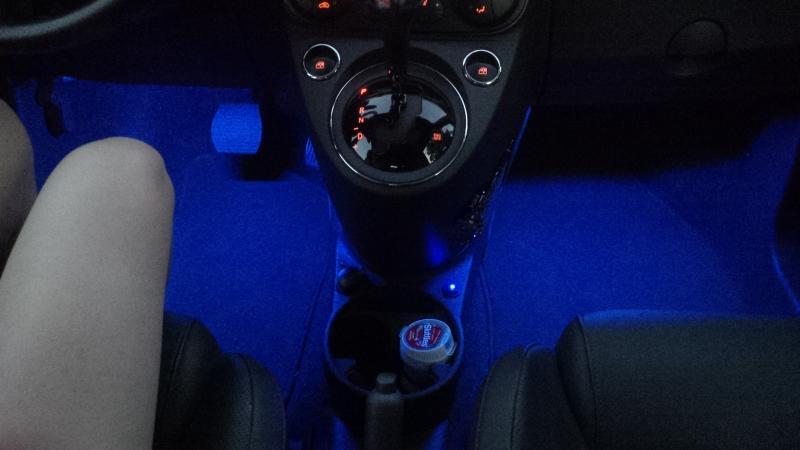
Before
After
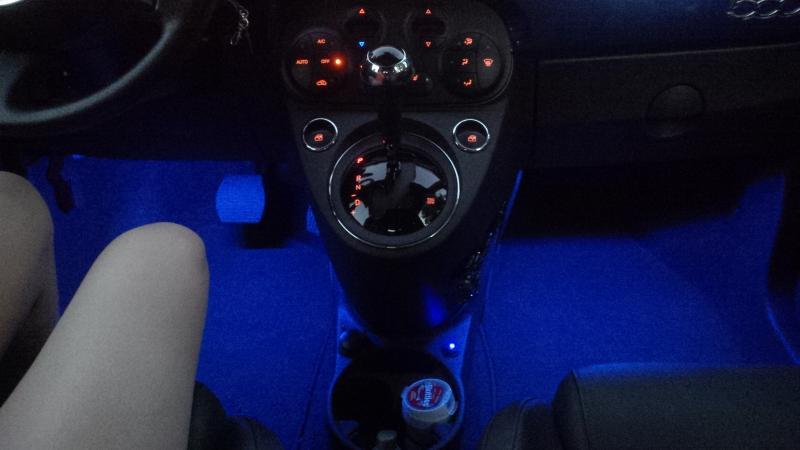
Darn near looks factory.
7-10-2014
I'll attempt to add some instructions on how to do this Mod. It isn't that hard to do......
First I went to Walmart to buy some strip LED lights. I have used these lights on the front of two pick up trucks now. The 2010 I had I sold to my dad and the lights are still working fine (getting blasted with all the elements rain, slush, salt etc.) I am very impressed with these strip lights.
Here is a link. http://www.walmart.ca/en/ip/max-led-.../6000069712215
I like these because they are a simple strip. No bulky ends on them. Some have chrome ends which make them more presentable in plain view but we are trying to hide these so the slimmer the better.
The ones in the link are green and 12" long. We found 4" long blue ones. If you can't find the 4" these lights can be cut down. Just make sure you cut on the dotted lines or they wont work. If you look at the packaging in the link above you can see two cut lines that divide the lights into three sections. Each section is 4" long totaling 12" (both lights total 24") I have seen Red, Green, Blue, Yellow, Orange and White in the long version. The only short ones I saw were blue and that is what we wanted, they might have other colors in the short, not sure. In the long version I have also seen some with a wireless remote and you can switch colors, make them pulse and strobe. Lots of potential here. there is a lot of room under the console so I'm sure the additional room required for the control box would work. Not sure if the wireless remote must be in view to the box to work however.
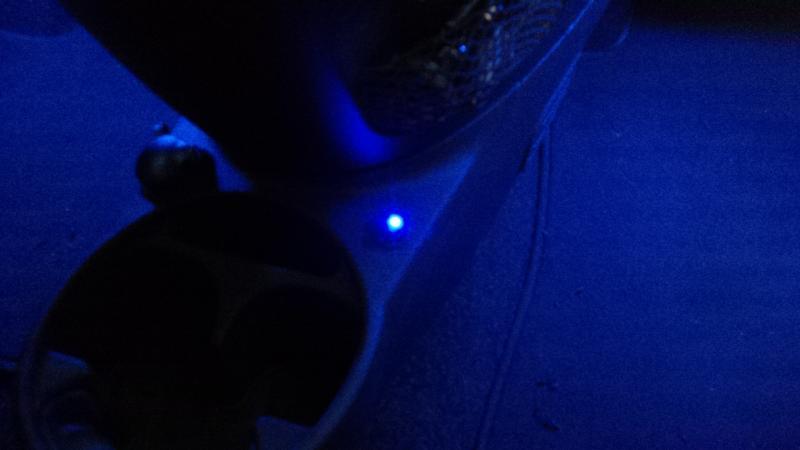
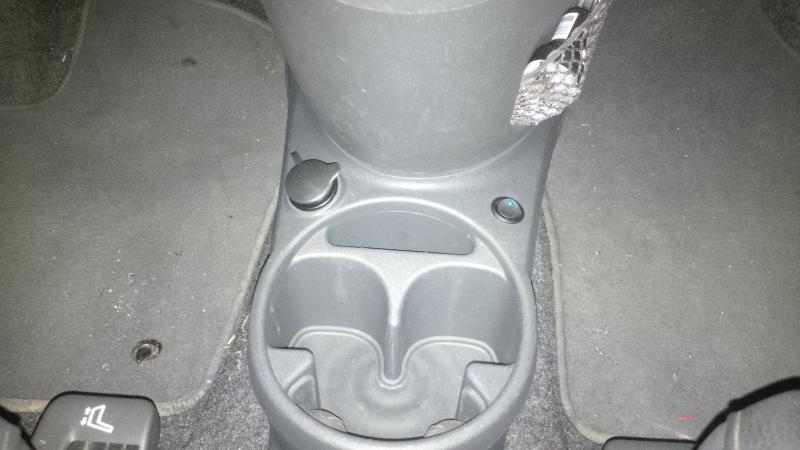
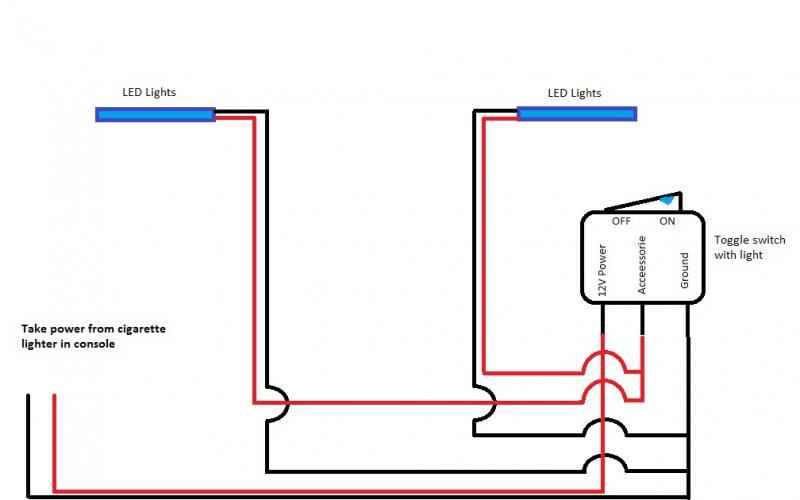
OK here is a wiring diagram.. We used a lighted toggle switch and tied the lights into the cigarette lighter circuit in the lower console. The cigarette lighter is switched with the ignition so no worries of leaving them on accidentally (you really can't see the lights in the day time at all). You could add an inline fuse to the power wire coming from the lighter if you choose.
As for mounting..... On the drivers side we used the edge of the lower air bag cover.

Use some isopropyl alcohol to clean the surface before mounting the lights. The lights come with a very good tape, peel and stick.
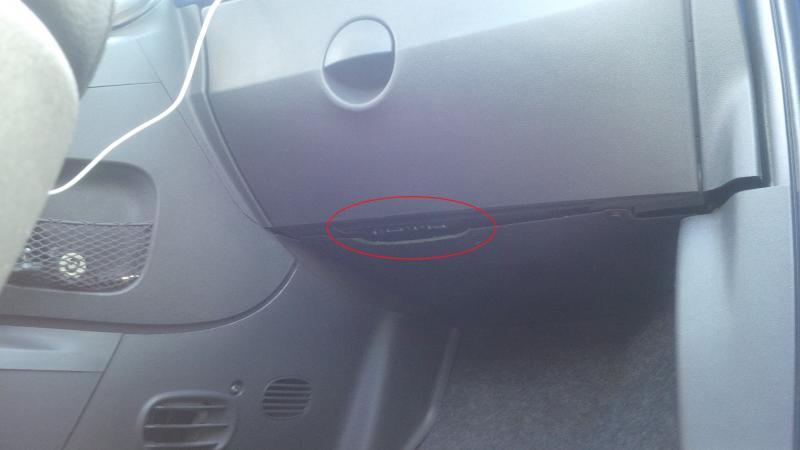
The passenger side was a little trickier. I tried to mount in the same location on the lower edge of the glove box but when you open the door it was hitting. So I went back a little further and found a surface where the lights would clear. The only problem was the felt liner under the glove box was blocking the lights. As you will notice on the passenger side you see a definite edge where the light stops.
This is being caused by this cover. I trimmed some of the cover away to let the light shine down. If the cover would stay up where it should be It would not have a shadow line at all. I could trim more away but was satisfied with the look we had. Each car may be different with the amount of sag this cover has. It removes very easily with two plastic pins for the lack of a better word. Just pull the center out of the pin and the rest will slide out.
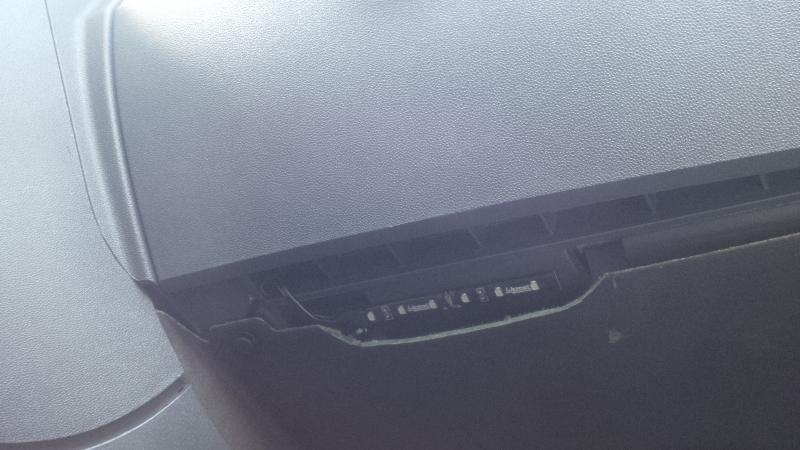
Here is the passenger side....
You can see the nice mounting surface just in front of where the light is now. Would be perfect and you wouldn't have to trim the panel but the light gets hit when the glove box opens.
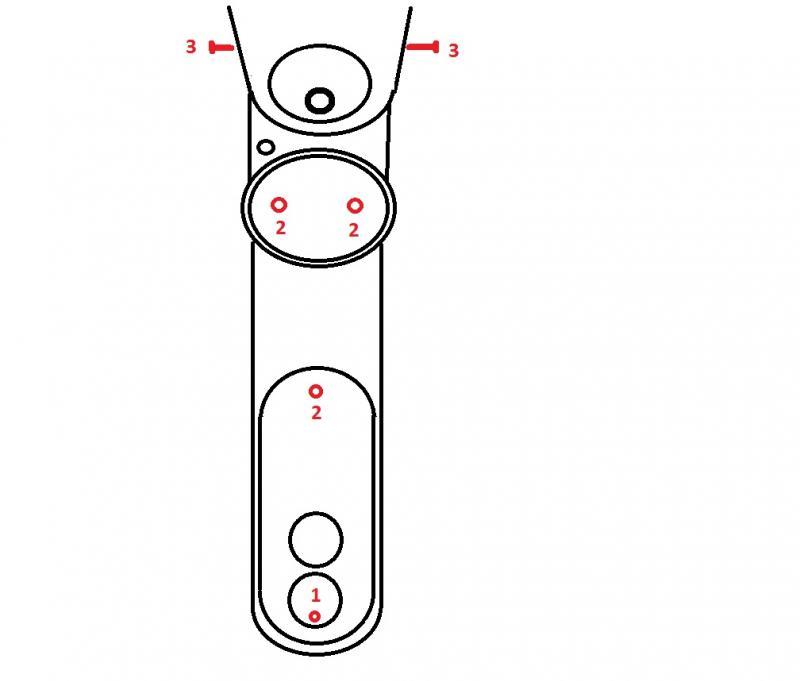
As for removal of the console... Another high tech drawing :-)....
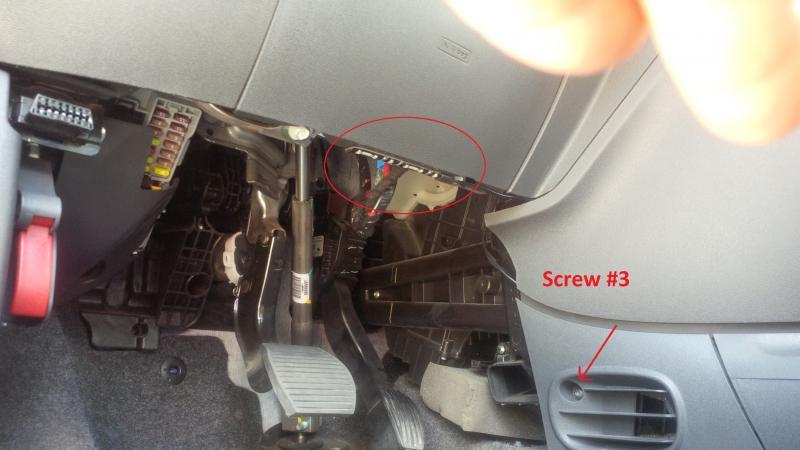
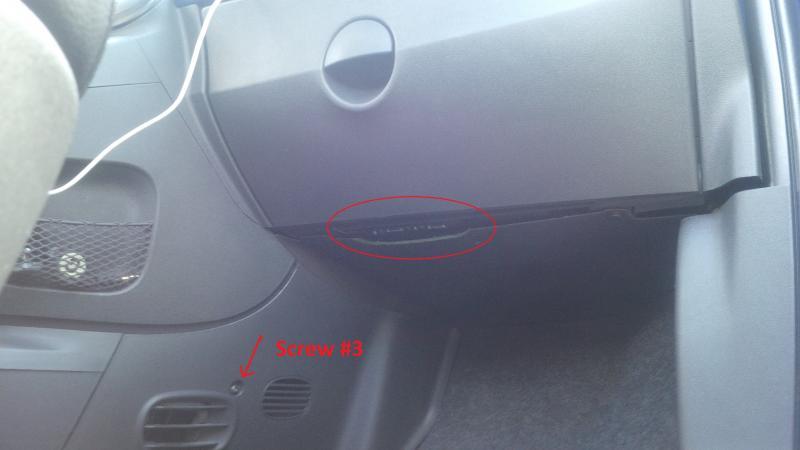
To remove the side panels remove the # 3 screws on either side of the console. they still have some clips that hold them in place but a gentle pull straight out to the left and the right will remove them (pull in the same direction as the screws come out).
Then remove both rubber inserts from the front and rear cup holders. This will reveal some nuts that hold the console into place....
The rear section has to be removed first to gain access to the front section nuts....
Remove nut#1 and gently pull straight back (to the rear of the car). Again some additional clips hold it into place. This will reveal the single # 2 nut.
Remove all three #2 nuts and the main console can then be removed. It's a bit tricky to remove with the E-Brake handle in place but it can be done. Also the lighter wiring will fight you a bit.
Once you have the console removed if you will be putting the toggle switch in the same location as we did you must pay close attention to the way the console is built.

You will notice everything is offset underneath to one side to make more room for the cigarette lighter. Also you will need to drill through two layers of plastic. Put you finger in between both layers of the plastic (it will make sense once you see the console) and find the center of the opening in there. This is where you will want to drill your hole for the switch. I used a step drill (highly recommended)
https://www.google.ca/search?sourcei...step drill bit
Drill from the top, then open up the second layer from the bottom.
Run your wiring in from either side tucking it in nice and tidy. leave your self extra wire!! This will make everything easier. You have lots of room for extra wiring under the console. Tie the wiring into your cigarette lighter harness. I used soldier and shrink tube for a nice tidy connection but there are other options you can use to tie in with.
ADDED BONUS!!! At this time I added two additional wires (one + Positive and one - Negative from the toggle switch) and placed them under the passenger side panel. Should we want to add some additional lights in the future all we have to do is remove the one side panel and tie into our "Bonus" circuit. I left insulated wire connectors on the wires so they can't ground out.
Hope this helps!!
Brent
Couldn't edit so here are the locations of Screws # 3
7-11-2014
AHHHH I forgot about the two screws under the panel with the #3 screws. Once you remove the panel with the#3 screws you will see two additional screws (one on either side). So the main front console will have 3 (#2 nuts) to remove and 2 screws as well.
Sorry about that.
10-4-2014
Well we are at it again! The Blue Sport is gone so we had to start all over again. This time we stepped it up a notch!! Same install procedure but this time we have multiple colors, fad bright to dim all Via Remote. Auto sequence , fade through the colors and strobe to name a few cool features.
Click for Video.....
http://s21.photobucket.com/user/HHighfly/media/Katie/Benito/NewinteriorLEDs_zpsa88f001b.mp4.html