You must be logged in to rate content!
4 minute read
Installing led front and rear emblems
Compliments of PAZZO @ fiat500owners.com
5-6-2013
***These instructions are based on the SPORT model. For POP and LOUNGE models the fog lights are located closer to the centre of the bumper.
***Before installation, use battery supplied to check for LED function.
INSTALLING FRONT EMBLEM (time 30mins)
You will need: Car jack, 17mm deep socket, 10mm socket, philips driver, torx30 driver and 2-3ft of straight, thin, stiff wire(a coat hanger will do)as a fishing tool.
1. Lift the car and remove the front left wheel.
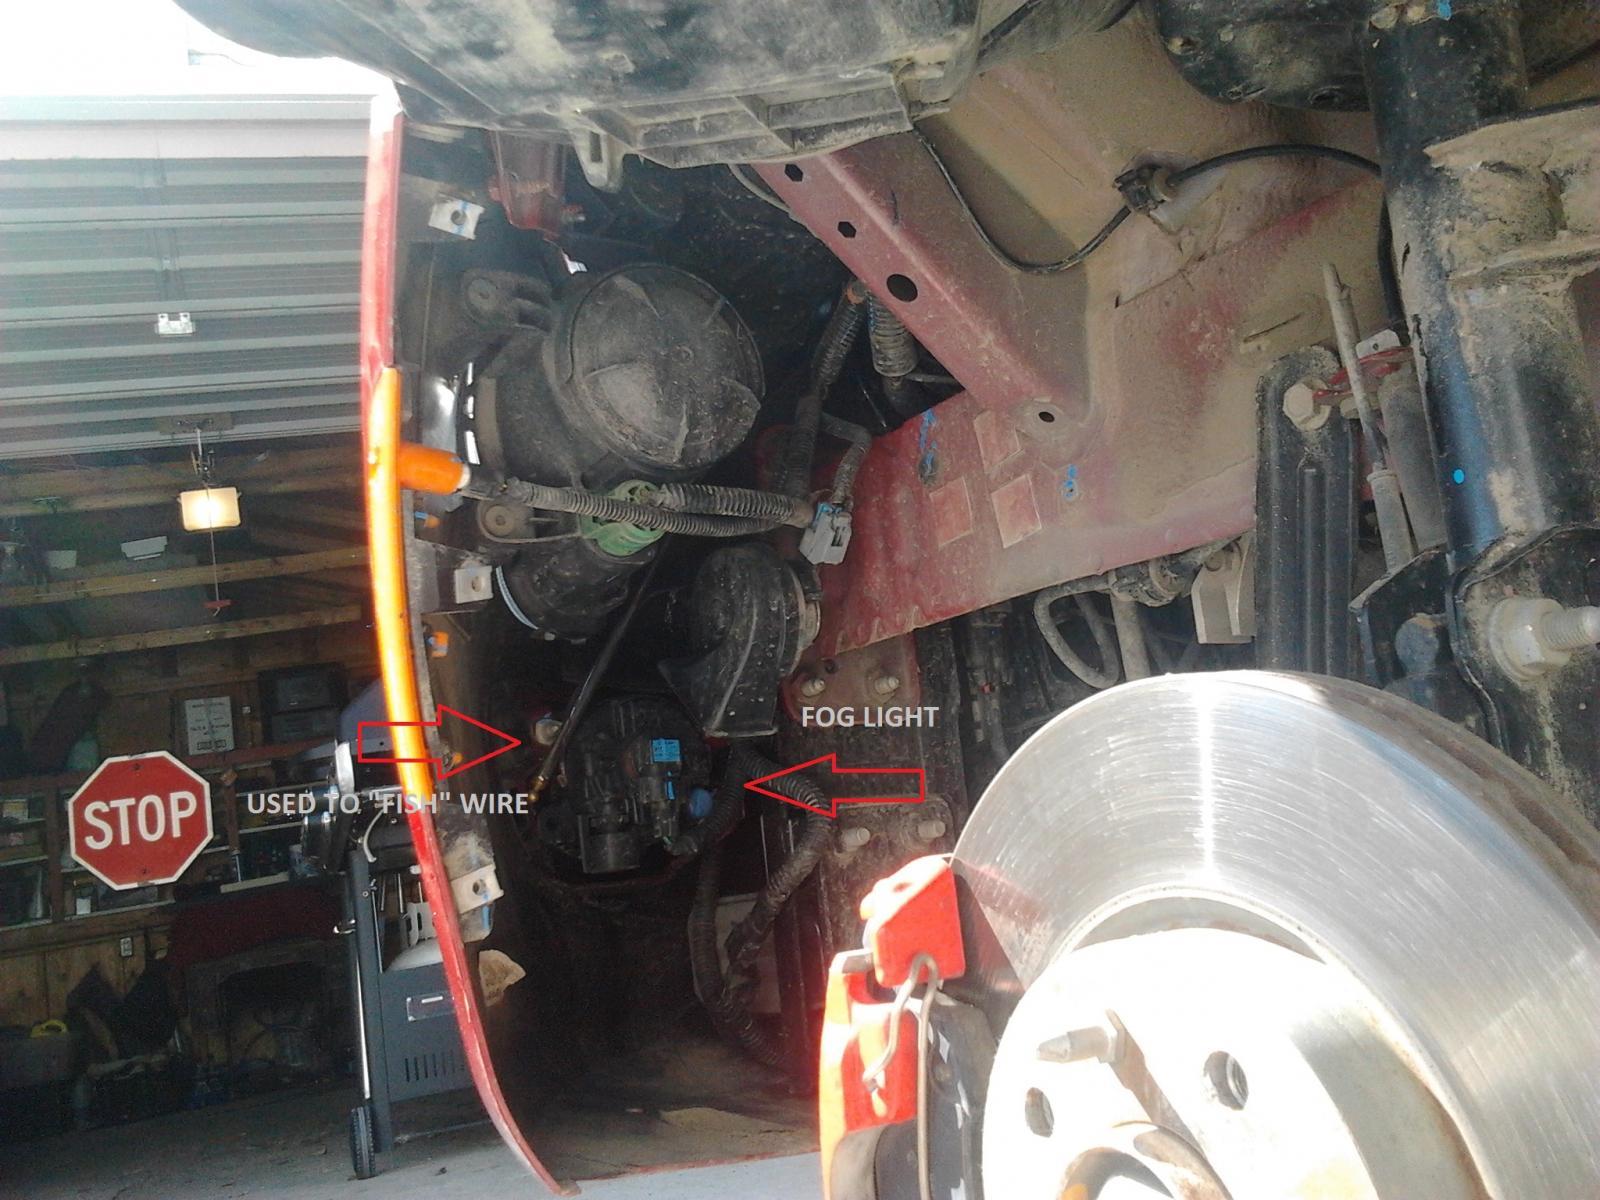
2. Remove 4 screws and 10mm nut in fender well and fold plastic back to access fog light(secure the panel to strut).
3. Remove 4 torx screws from the top of the front fascia(must raise hood first).
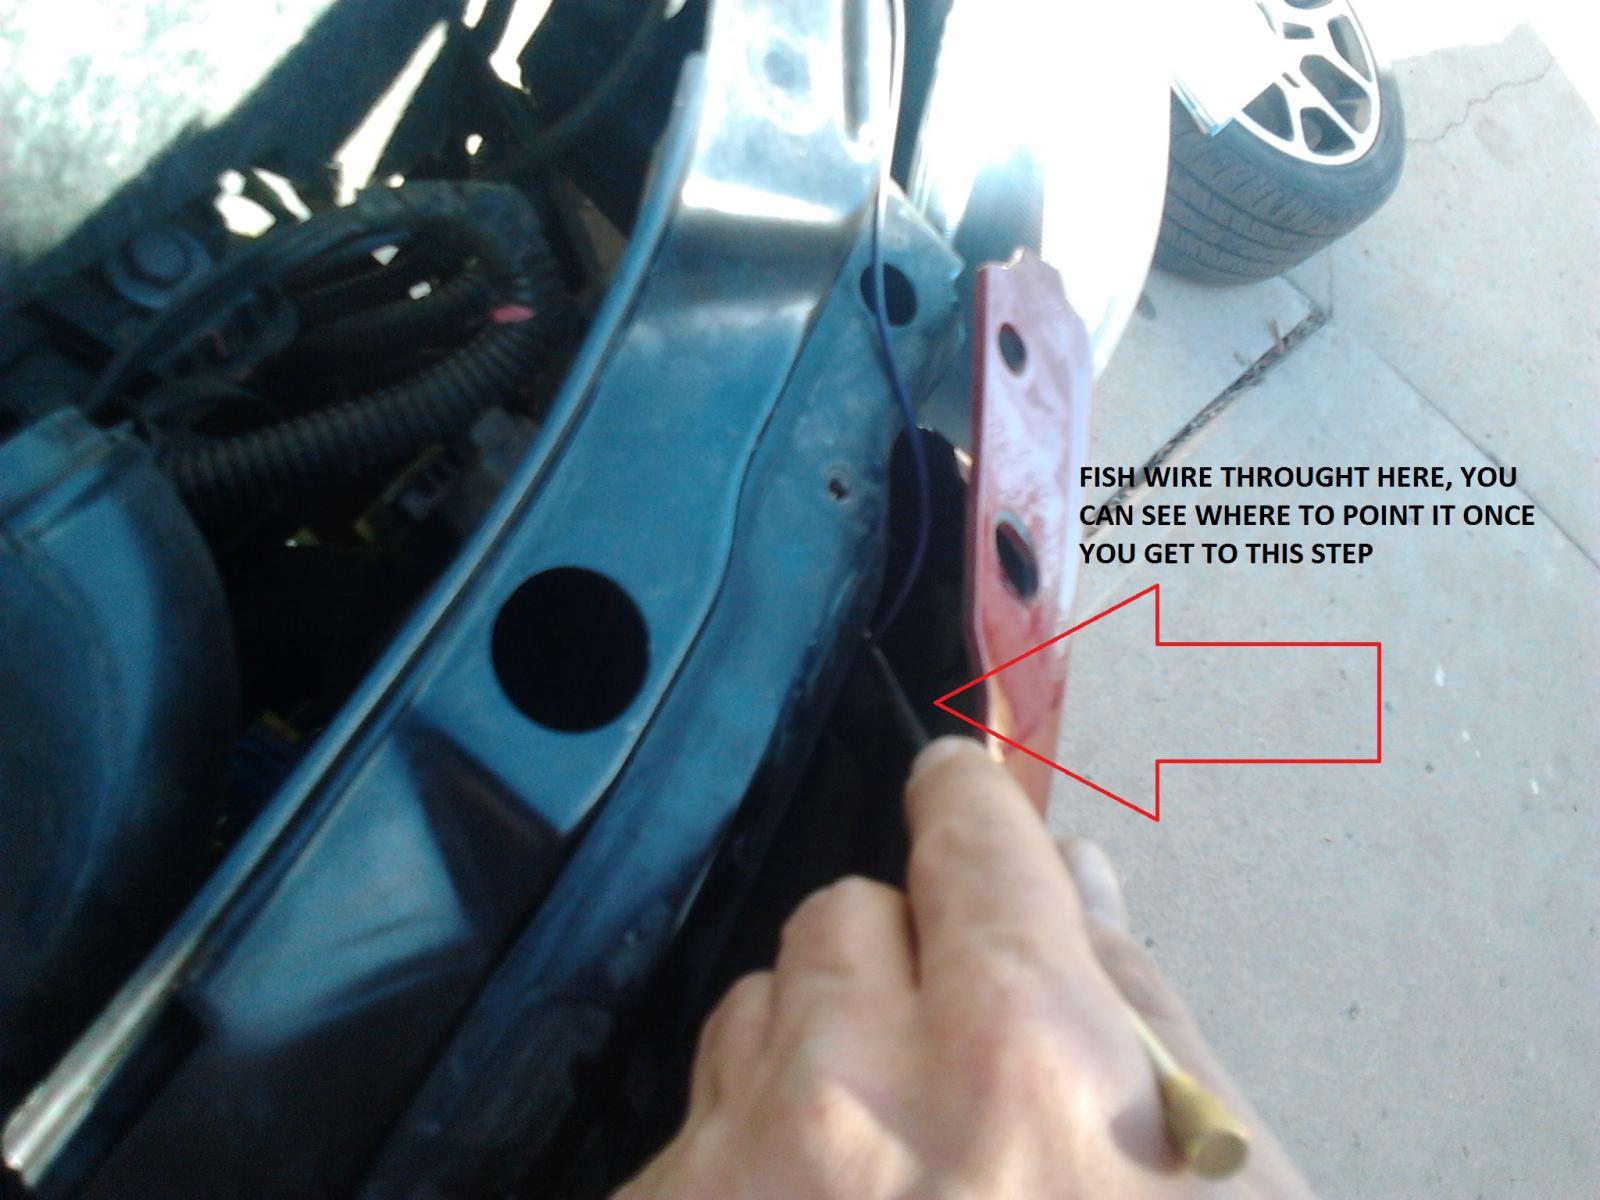
4. Use fishing tool to feed provided wire from in front of the main cross-member down to the left fog light. Check through the fender that the wire is in the right location. Remove fishing tool and secure the wire from falling into bumper.
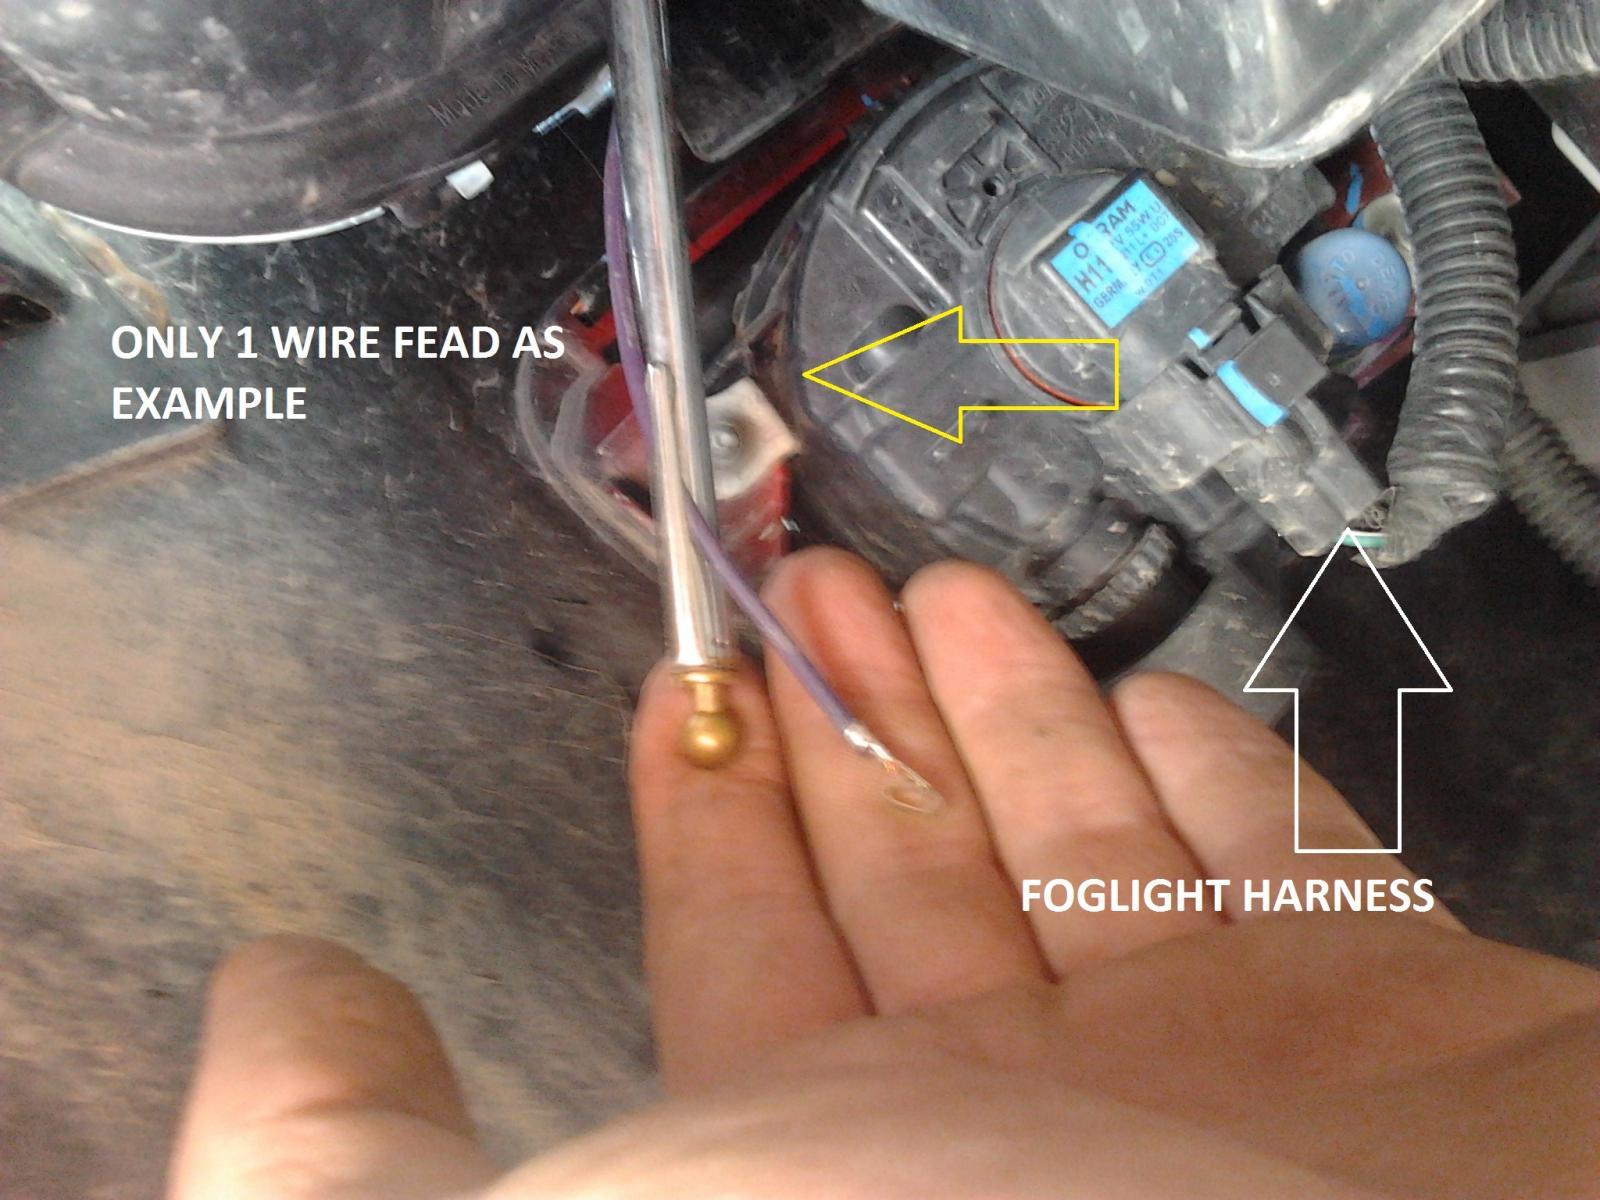
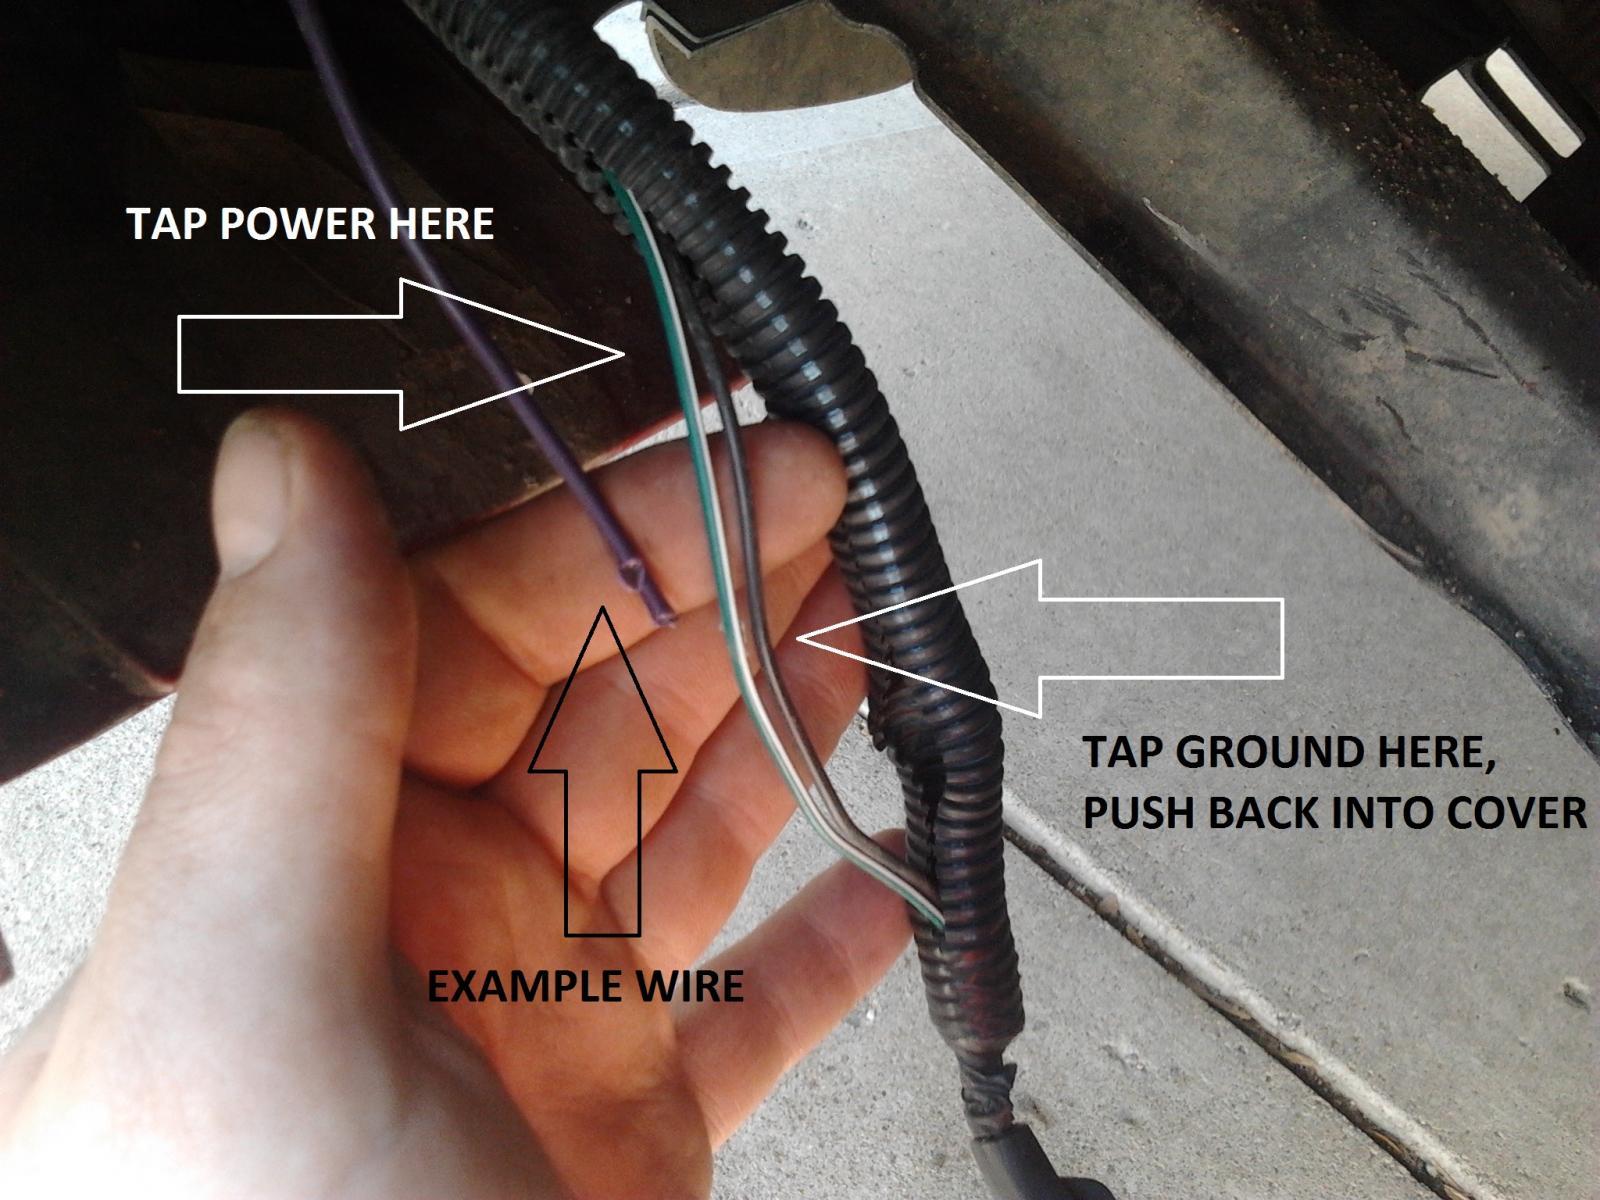
5. Disconnect the fog light harness and pull wire out for easier access, then use the provided wire tap-ins to connect wires(red to green, black to black).
6. Reconnect fog light and check LED emblem for function(Ignition and headlights must be ON). If there is no power to the emblem, open the wire taps and check that wire insulation has been pierced.
7. Once function is established, re-assemble fender, install wheel and lower the car.
8. REMOVE FACTORY EMBLEM; pull fascia forward and remove the nut then gently pry emblem away(careful as the factory adhesive can be strong).
9. Once area has been cleaned, centre the LED emblem and mark with a dry-erase marker.
10. Remove backing, push wiring through the mounting hole and apply emblem to the front fascia.hint: if the surface is hot it will adhere better.
11. Plug emblem into power wire and secure with electrical tape(if desired). Re-attach front fascia.

INSTALLING REAR EMBLEM
***before installing this product, use supplied battery to check for LED function.
YOU WILL NEED: Allan wrench, small pry tool, philips driver, fishing line, and a 3/4" nut or similar object to tie to wire.
1. Remove interior hatch panels and run power. Follow this link: Removing hatch panels and tapping power(3 ways).
2. Use fishing line to "saw" through backing of factory emblem *FROM THE BOTTOM* until 2/3 through the saw from the top.
3. Gently pry from the bottom to remove emblem(this will require some force).
4. Remove the 2 plastic grommets and clean away any remaining adhesive.
5. Centre the LED emblem and mark with a dry erase marker.
6. Push power wire through and plug in LED emblem; have a friend press you brake pedal to ensure function(ignition must be "ON"). If there is no function open the wire taps and check that wire insulation has been punctured.
7. Remove backing and apply LED emblem to hatch.
8. Plug connectors together and secure with electrical tape(if desired).
9. Replace all panels.
****This product has been tested in extreme weather conditions and high pressure water application. Improper installation may result in malfunction****