You must be logged in to rate content!
4 minute read

ECLIPSE 06+ SHIFT BOOT/E-BRAKE/ARMREST INSTALLATION INSTRUCTIONS
1. Remove the head unit faceplate by grasping on the top pulling towards you.
2. Once you dislodge the top, pull it from the bottom to remove it completely.
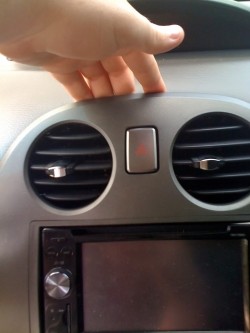
3. Remove the A/C controls unit, by grasping the top and bottom. No need to unplug it, because it can be replaced after step 5, it just needs to make room for the main console piece to come out.
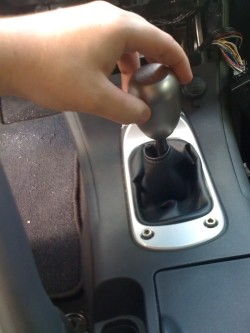
4. Twist the shift knob counterclockwise to remove and make sure the ebrake is fully lifted.
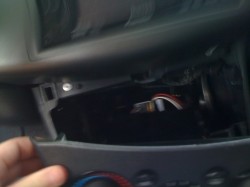
5. Loosen the top section of the center console by grasping the top section (located under the ac controls) and pull towards you. Open the center storage compartment/arm rest, and grasp the the plastic part by the cup holders and lift up up to loosen. You should now we able to remove the center console from the car completely.
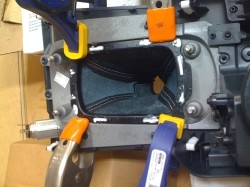
6. For the shift boot install, you will first need to remove the factory bracket that holds the boot in place. To do this you will remove the silver tabs. These will not be reused. You can remove them by bending them back and forth until they break off.

7. Remove the OEM boot from the bracket, and glue the new boot to it. Allow to dry. (The stronger the glue the better, you can use any epoxy-based glue to do the job, AutomotiveGOOP is one brand we've applied with good results, but there are many out there and you can get them at any RadioShack or similar store).
Now glue the bracket back to the console. You will need to put glue where the silver tabs where, use clamps to hold it down while it dries. Make sure you make it as secure as possible.
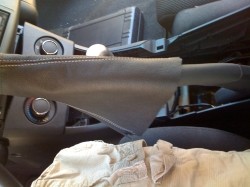
8. Ebrake boot just slides on the stock plastic ebrake. Nothing to it.
You can now reinstall the center console with the shift boot, reversing steps 1-5 to achieve this.
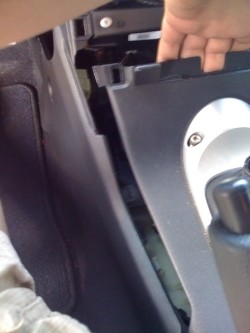
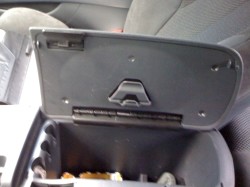
9. Remove the arm rest. Use an allen screw, to remove all four screws visible in the picture.
Remove the cover, and continue to remove the screws that are now visible on the metal hinge.
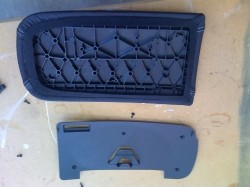
10. Install the arm rest cover, it comes with elastic so just slide it on and make sure it's aligned nicely (the decorative stitching should be even on the topside of the armrest). Then reverse step 9 to reinstall the armrest in the car.
Useful tip
You have installed a product made out of genuine leather. As you know, to maintain a leather product in good condition, you should take care of it. We suggest occasionally (every 4-6 week for example) applying some leather conditioner/UV protector to keep your leather from drying up in the sun and cracking.
Redline Automotive Accessories Corp. will not be held liable for any labor, incidental or consequential damages of any kind. Proceed at your own risk.