You must be logged in to rate content!
5 minute(s) of a 45 minute read
2-22-2011
this thing is on the back burner right now , too much going around in the shop to do anything to it .
it is running , but still need to wire the N2O and fix a few things . for me personally it's tearing my heart to see it just sitting there , but guess we'll get back on it in the off season here ( summer ) .
6-5-2011
guess its about time for an update
i took the evo under my wing and now i'm working on it in myself . the plan is to get this thing done once and for all ( untill the owner gets another engine combo idea ),,,,,, speaking of that ; the owner decided to ditch the N2o engine and go with a turbo setup .
so in light of that decision ( and sooo many others like it ) i decided to brake the project into seperate and individual segments so that no one segment is affected by the other :
- redo the original kmember, mounts, and steering .
- redo the rear suspension and frame ( suspension mounts and subframe connectors)
- build the turbo kit ( plumbing , mounting , tubes , etc)
- redo the wiring in the car and engine compartment
this way if azooooz (the owner ) decides to change the engine combo once again all he has to do is drop the new combo in
so first order of bussiness is get rid of the Kmember and mounts , and build a new one with better steering angles and more beef to the whole structure.
so after that was done ( removing the old stuff) , started mocking up the new stuff on the car , i got it where the steering rack would sit further back than it did before and decided on where the mounts would go , then began bending and cutting the tubes .
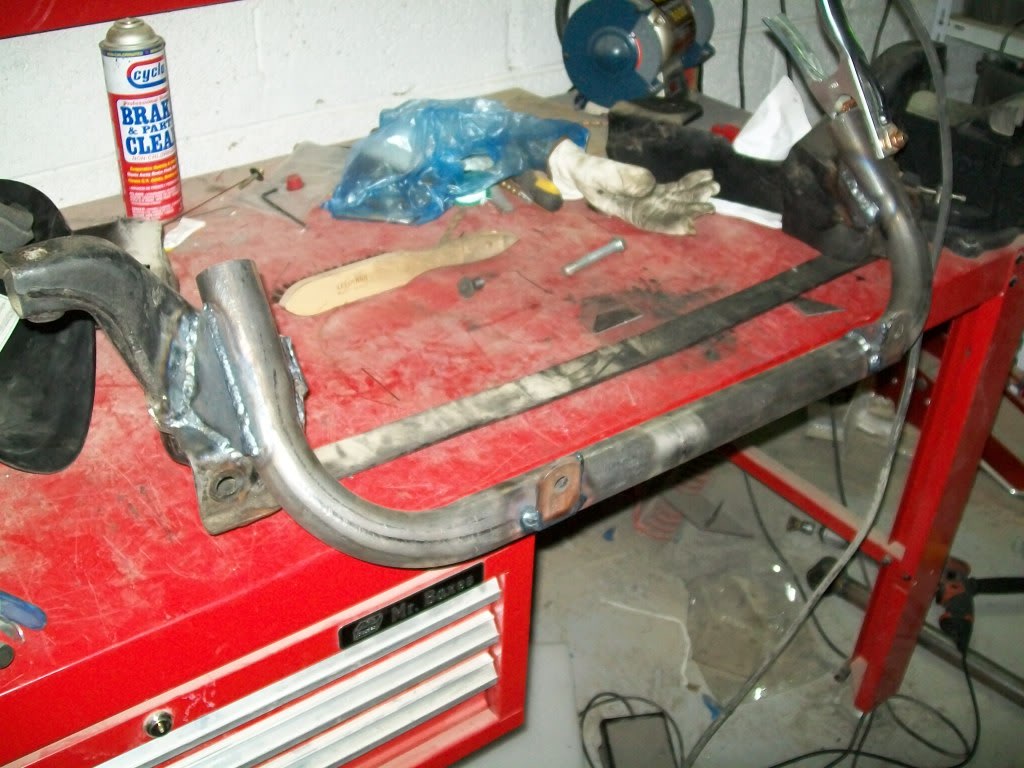
i starte with the original subframe ends of the car ( they are used to attatch the lower control arms) and welded a "U" to connect them and hold the steering rack :
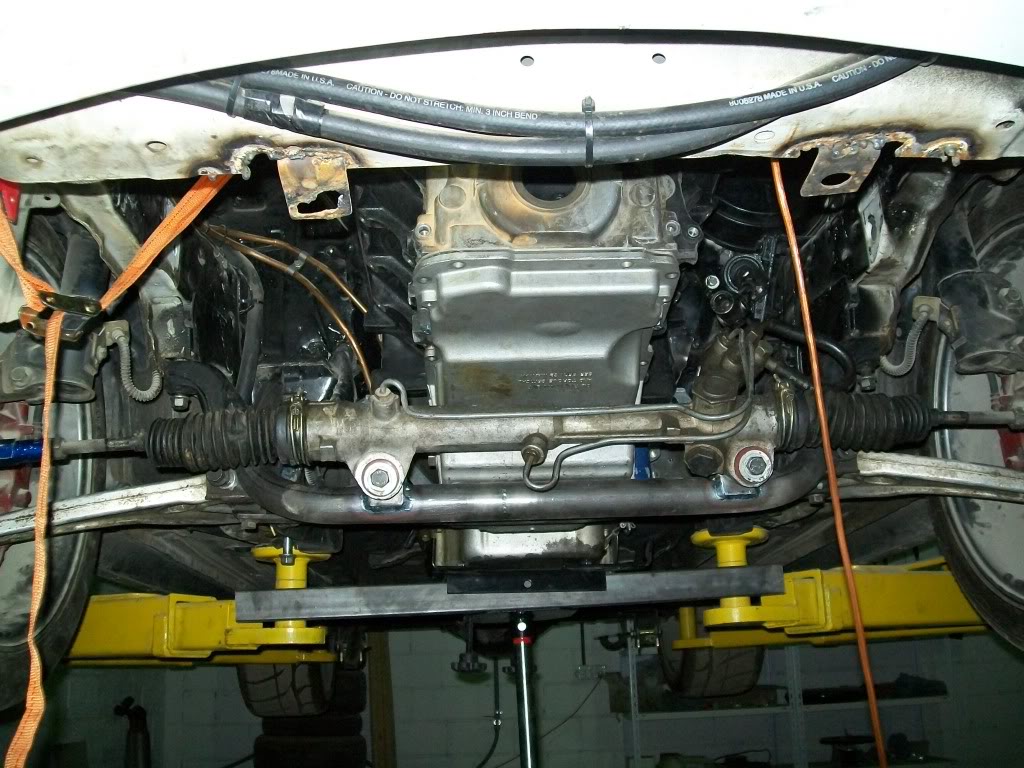
here you can see how it fits on the car ( still need to put a bump steer kit on the ends of the rack to get the rod angles right ):
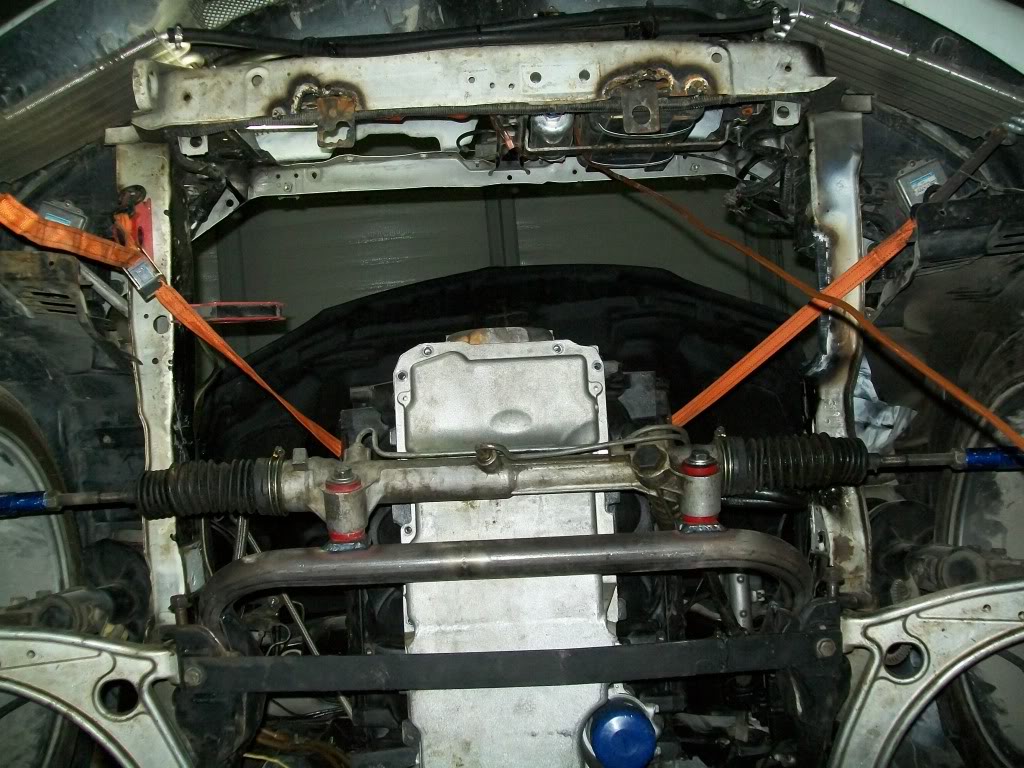
and here is how it looks from the bottom , notice how the tie rods are completly straight now ( the rack used to sit about 2 to 3 inches forward of this location ) :
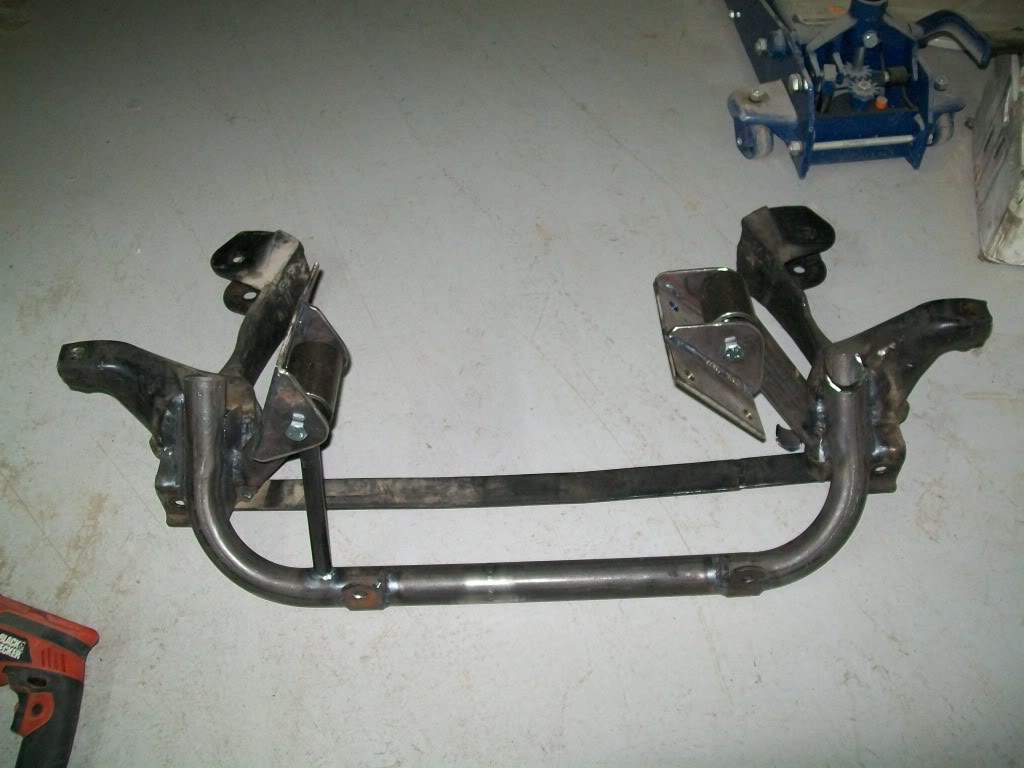
after finishing with the steering part it was time to move on to the engine mounting part of the process, so i welded up a pair of engine mounts that bolt tot he block and use round rubber bushings as mounts to connect the engine to the "pedistals" on the Kmember, here is how the finished product looks minus the bushings and powdercoating ( the flat bar underneath is only there to help figure out where the pan ends and keep the sides in place during the fabrication part) :
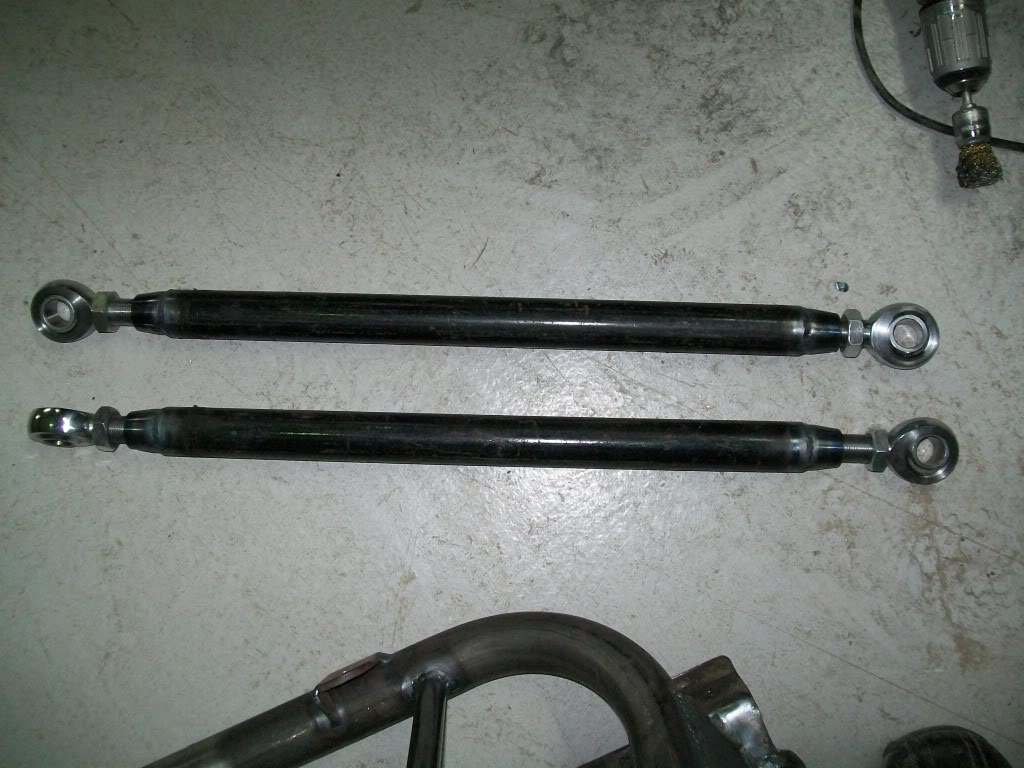
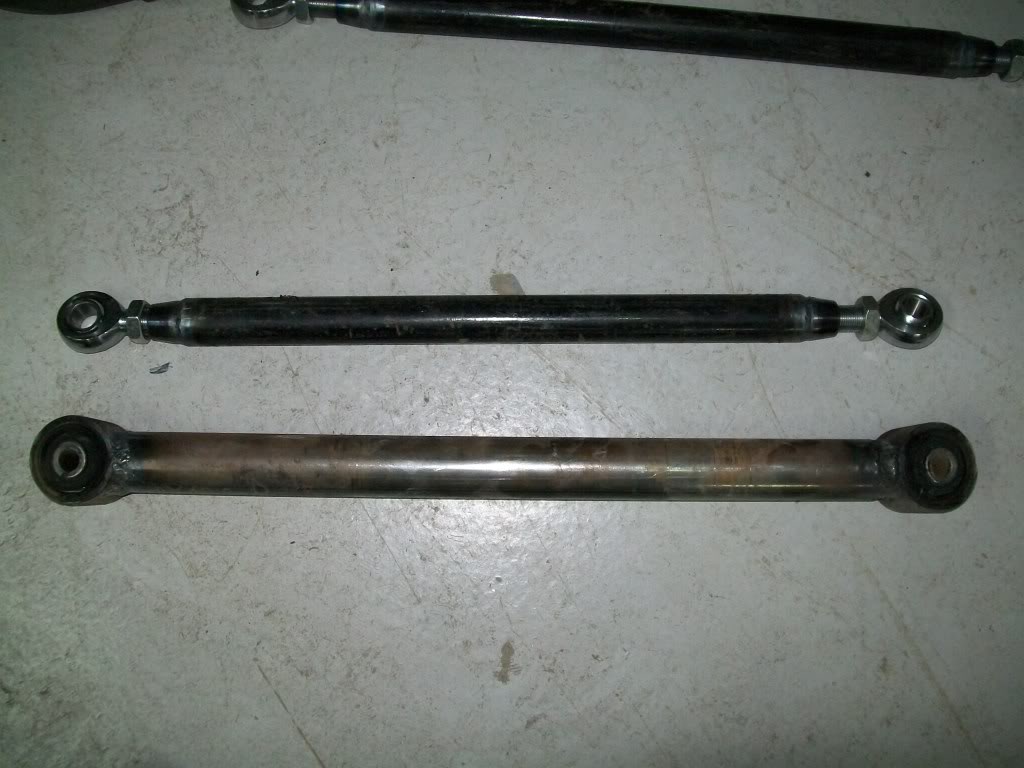
next order of bussiness was to redo the rear lower arms, the old ones were bulky and looked ugly , plus they were non adjustable . so i got a set of heavy duty chromolly rod ends and slapped together a pair of arms :
and here is the comparison of both old and new :
these were sent off to get powdercoated as well and i'm waiting for them to finish soon.
so now the plan is to get the kmember back in place , cut the steering shaft to length and attatch it to the rack , drop the N20 motor in and be done with the first part of the project
after that i'll be building the rear part of the suspension by cutting the old frame attatchement points off , cleaning the cross bar already there and welding new lower arm attatchement brackets ( something with a bunch of holes to give us more adjustability). after that i have to notch and box the cross bar for more driveshaft clearance, then move my attention to the upper arms attatchment points. these will be completly redone and "beefenised"
so more updates to come soon
