You must be logged in to rate content!
4 minute read

97-02 PROWLER SHIFT BOOT/E-BRAKE INSTALLATION INSTRUCTIONS
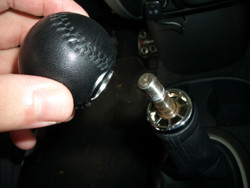
1. Remove your shift knob… righty tighty, lefty loosey.
AUTOMATICS: Remove the shift knob using the screw on the base. Once the screw is removed the top part of the shifter will pull off. Once removed pull the base part off as well. Turn the key on and suppress the brakes to move the shift selector to D.
2. Remove the carpet liner, it just lifts up, then loosen the screw (Phillips)

3. Now lift up on the front, there are two plastic clips that hold this down. Don’t worry about snapping anything, they are very strong.
WARNING! if you have interior lighting, and the switch is on your center console, be careful with removing it. Make sure your wires are disconnected before pulling too hard.
AUTOMATICS: Remove the silver bezel around the gear select; starting with the front side separate the bezel from the center console, mild to moderate force is required.
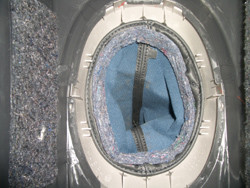
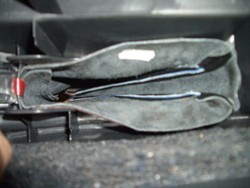
After the bezel is separated, install the shift boot into the bezel by manipulating the preformed base of the shift boot to fit into the specified area on the bezel (little hooks hold it into place). Once installed inspect the top side (visible area) to make sure the boot is seated smoothly around shift bezel.

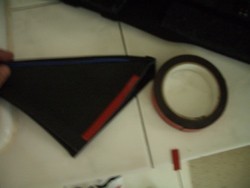
4. Pull off your stock boot, through the bottom (it is held on by a friction retainer wire, and little clips.) Remove your chrome boot top, it is held on by a slip ring.
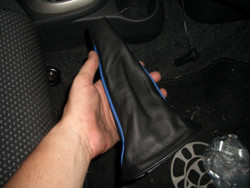
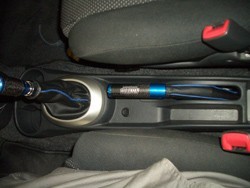
5. Here is the new boot. Turn inside out and reinstall the chrome topper.
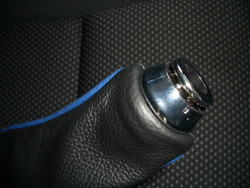
6. I installed mine upside-down, a hint I got from Scionlife.com looks good. Install back onto lever same way as you took it off, just reverse.
AUTOMATICS: Reinstall the shift bezel with the new boot installed slipping the boot over the gear select knob. With the shift boot and bezel re-installed proceed to reinstall the gear select knob.
7. Start by applying double sided sticky tape along the bottom edge of the boot, where you are going to install it onto your plastic.
8. From underneath the console tape the edge of the boot to the plastic, and then reinstall console again.
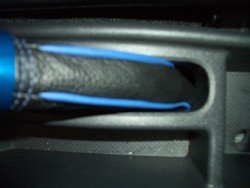
9. Carefully push the ebrake handle and the shift lever through the leather, it snags on the leather pretty easily, and you don’t want to stretch or rip the boot!
10. Screw down center console, clip the front, and screw on the shift knob.
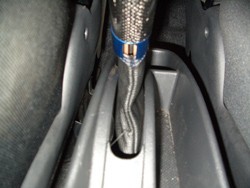
11. Enjoy! :)
CONGRATULATIONS - YOU HAVE SUCCESSFULLY INSTALLED YOUR NEW LEATHER BOOTS!
Useful tip
You have installed a product made out of genuine leather. As you know, to maintain a leather product in good condition, you should take care of it. We suggest occasionally (every 4-6 week for example) applying some leather conditioner/UV protector to keep your leather from drying up in the sun and cracking.
Redline Automotive Accessories Corp. will not be held liable for any labor, incidental or consequential damages of any kind. Proceed at your own risk.