You must be logged in to rate content!
4 minute(s) of a 76 minute read
5-6-2012
5-6-2012
I went out into the garage and began looking for some good headlight doors in a pile of about 15 doors and wouldn't you know it, there were only a couple of 68 doors. Unfortunately, they are not going to get the job done. Just my luck. So I got on the computer last night and ordered 2 grade A doors from WCCC. I also ordered up a set of NOS inner plates to replace the one that got a dent during powder coat. Why do I have the feeling I should have rattle canned the grille and been done with it!
I picked up a vibratory tumbler at Harbor Freight to tumble the bolts before I do the phosphate and oil finish. I have done a couple of batches already. It takes a while but is easier than blasting. This thing is awesome so far. I will keep you posted.
5-7-2012
I put a sticky tool drawer liner down on the bench because I was afraid it would walk. My bench is level, but maybe I should tilt it towards the wall. It has 20 or so hours on it now. I have noticed it gets pretty hot. I thought it was the same as the one made by eastwood which allows water in the drum, this one is dry only. I don't know if that would improve performance or make mud because the parts come out with a thin film of dust covering them. This made me think they were not done. After a quick rinse, I was impressed how clean the parts got. I am going to order up the manganese today. I have several more batches to go before I coat em. I want to do as many as possible in one shot.
5-11-2012
I received my headlight doors from WCCC today. They are excellent. When they say grade A they really mean it. It is almost a shame to powder coat them but it will make the coating that much nicer.
I spent the day doing the brakes on my daily driver, a 2006 Honda Civic Sedan. Lol that little demon in the background. I even installed a new set of headlights since mine were getting cloudy. If you can believe it, you have to remove the whole front bumper to change the headlamps. It didn't take long, thanks to a couple of youtube videos on the subject. Probably need to pull the engine to change the oil.
5-29-2012
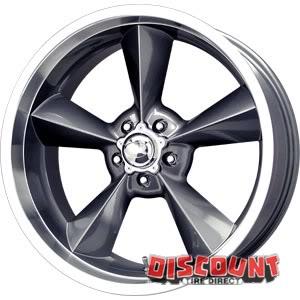
So I finally got a little garage time and went to button up the brake lines on the mustangsteve gt conversion. I got it all set up to my satisfaction and went to put my new wheels on and....wait for it...they didn't fit. Mfer. I picked out some sweet wheels too! They are too flat for the 2010 mustang disc brakes. Anyways, anyone local looking for a sweet set of wheels and tires? Pristine and still stickered...zero miles. Adam,...adam,...need a way to say good job for finishing your degree?
5-30-2012
They say 17". But Adam is right it is about the back profile. These have plenty of backspacing at 4.75 and 5.5, they are just too flat inside to clear the bulge of the mustang caliper. They would be great with drums for sure. They are 17 x 8 and 17 x 9.5 with 245 in front and 285 in back.

I am bummed about this one. Oh well,..moving on.
According to MustangSteve the Torq Thrust 2s don't fit either. But that is the idea I am going for more arch on the back of the spokes. I could put a spacer in but I should have longer studs to be safe. I didn't get as far as checking the rear rim for fit. I plan to roll the fenders though. I could check if anyone is interested in the rims. Right now I don't have anything to set the front end down on, so I have a problem to solve.

Wow great!
Posted by Diggymart on 12/1/19 @ 8:54:39 PM