You must be logged in to rate content!
5 minute read

99-02 FORD/MERCURY COUGAR SHIFT BOOT/E-Brake INSTALLATION INSTRUCTIONS
1. To get the shift boot off, you first need to unscrew the shift knob. 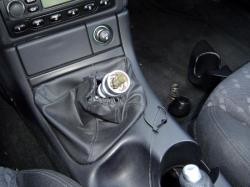
2. Then take an x-acto knife and cut the zip tie at the top of the shift boot.
3. Using a flat head screwdriver wrapped with a towel and carefully pry along the edges to disengage the clips holding the boot in.
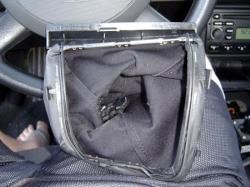
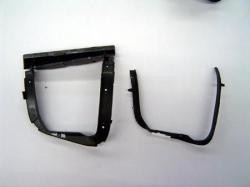
4. There are staples that hold the shift boot onto the plastic ring to secure the boot to the center consol. Using a small screwdriver you should be able to pull each 'tooth' of the staples out so that you can then pull the staples out with pliers without damaging the plastic ring.
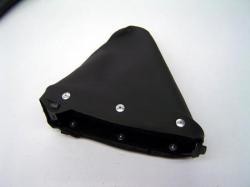
5. To attach new shift boots use pop-rivets placing them in the approximate location of each staple. I used a #30 bit and drilled the holes in the plastic ring.
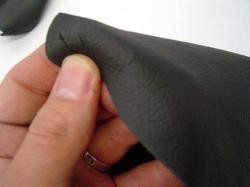
6. Test fit the new leather boot to the ring, and mark were each hole was located on the inside of the boot.
7. Cut a small slice in the leather where you have made my marks.
8. Then refit the boot to the plastic ring.
9. At that point you can push the pop-rivets through the leather and plastic and secure them into place. Make sure you keep the flat side of the rivet to outside of the boot so that the unit will fit back into the hole in the consol.
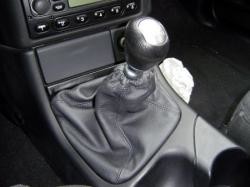
10. After the boot is secure just slip the unit back into the hole. Press around the edges to re-secure the clips. Reinstall the shift knob. Voila!
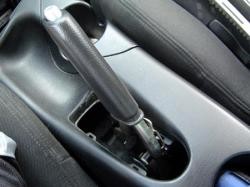
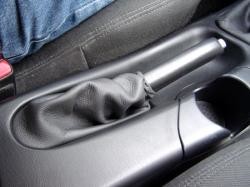
11. To remove the stock e-brake boot, take a flathead screwdriver wrapped in a towel and free the first clip that is closest to the rear of the car. The two clips in the front should come off easily with mild pressure.
If you can't get it off, you might have to remove the center console. Here's how: remove the three screws in the bottom of the armrest bin. Remove the ashtray & cigarette lighter cover. Remove the two screws behind them. Remove the two screws (one each side) at the kick panels - covered with plastic caps. Unclip shifter boot frame - you should be able to see where the clips are thru the gap - there's one on each the right, left and rear and the black trim piece under the ashtray. Pull e-brake as far up as possible. slide console back and unplug the sig lighter power and light bulb power cords.
12. Once you get the e-brake boot out you will need to remove the staples holding the boot on. Use a small screwdriver to pry up the 'teeth' of the staples, and then take a pair of pliers and pull each staple out.

13. Then drill holes approximately where the staples were with a #30 bit to use for the pop-rivets.
14. Test fit the leather boot and mark your holes on the inside of the leather.
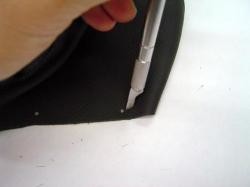
15. Take an x-acto knife and cut a small slit were you marked the leather.
16. Re-fit the leather boot and then pop-rivet the boot back into place.
17. Once the boot is secured fit it over the e-brake lever and push firmly back into place putting in the clip nearest to the rear of the car first.
Useful tip
You have installed a product made out of genuine leather. As you know, to maintain a leather product in good condition, you should take care of it. We suggest occasionally (every 4-6 week for example) applying some leather conditioner/UV protector to keep your leather from drying up in the sun and cracking.
Redline Automotive Accessories Corp. will not be held liable for any labor, incidental or consequential damages of any kind. Proceed at your own risk.