You must be logged in to rate content!
6 minute(s) of a 55 minute read
3-14-2009
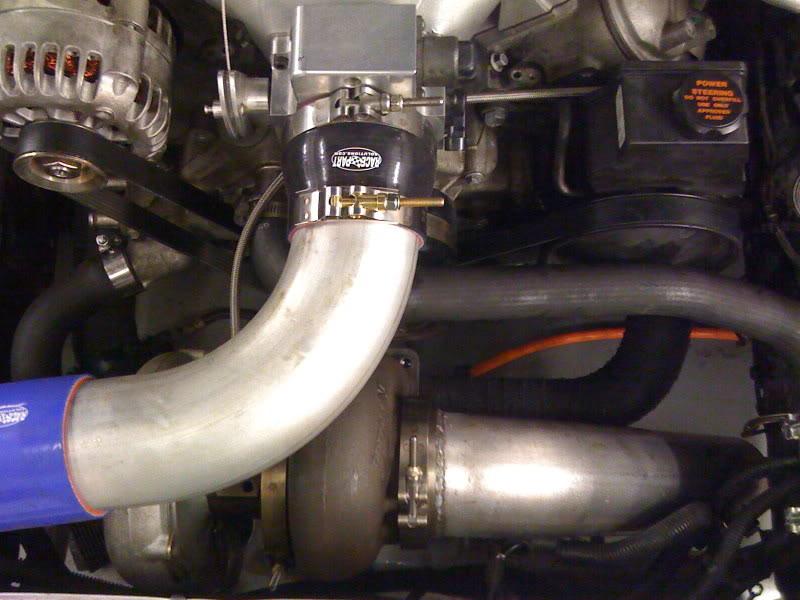
Yeah, I can see the light at the end of the tunnel. The only problem is the web of wiring that is in my way. After some of the posts on here, on the other forum, and PM's, I decided to run over there this morning and try the flange that I bought from dman for the exhaust housing and actually crank it down to see if it would bite.
This is why I didn't think that it would work. Notice how much larger the OD is on the shinny flange sitting under the turbo.
I went ahead and cranked it down and sure as ****, it's on there good.
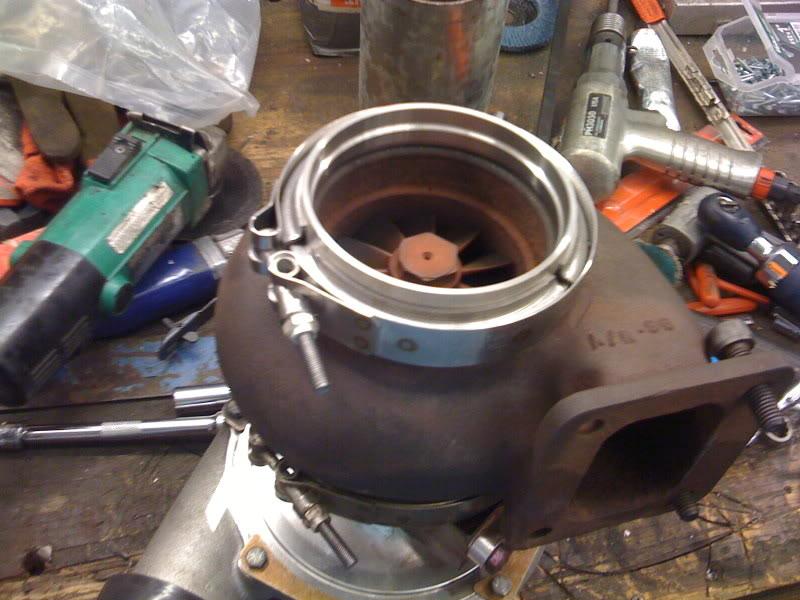
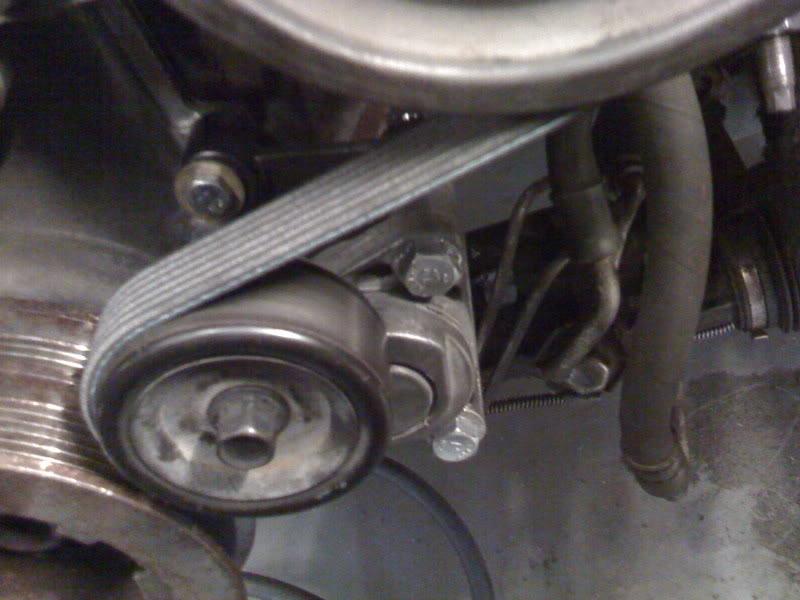
The bad news is that the exhaust housing will not clock. I wacked it with a big hammer and it wouldn't break loose. The good news is that the oil feed is only 20* or so off center and that is where it is staying. Since I dont have to weld the exhaust flange now, I'm not gonna worry about it.
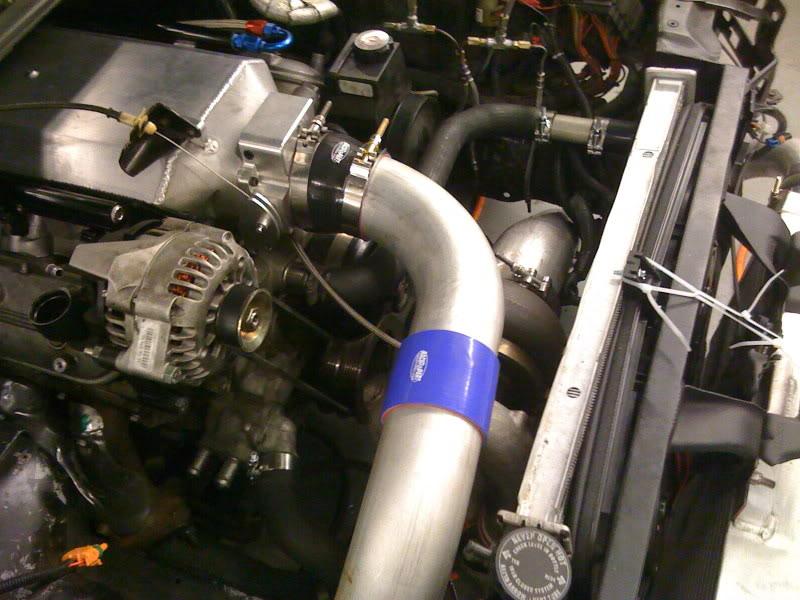
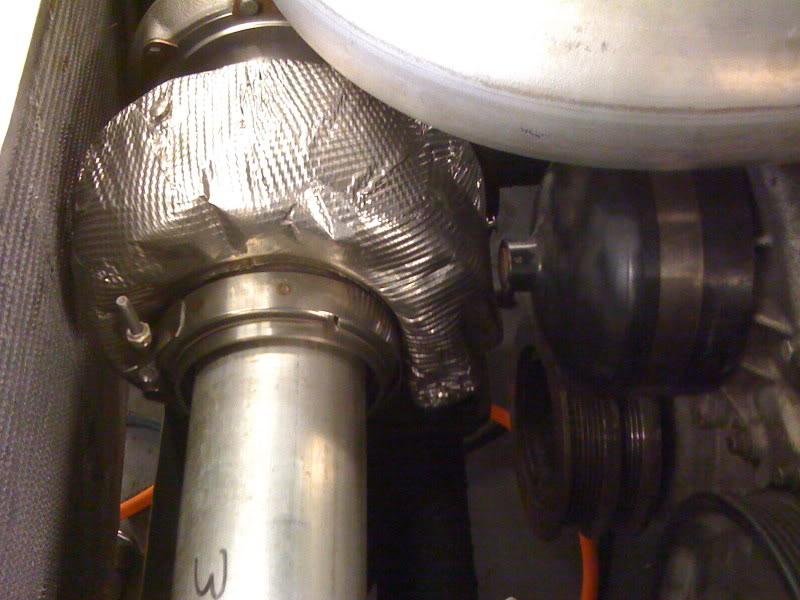
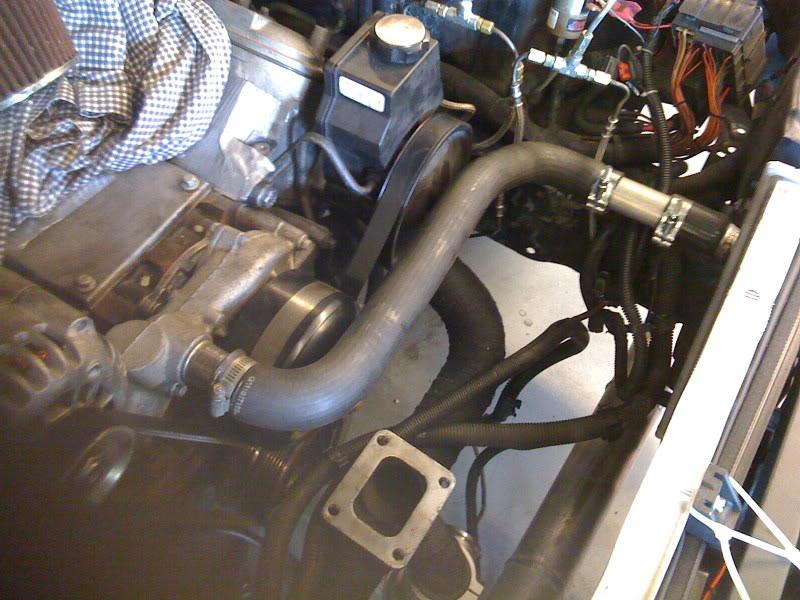
So I decided to put it all together and double check everything. Check out the gap between the turbo cover and the waterpump pulley and the gap at the radiator. Looks almost like we did some serious measuring. I pretty much got lucky that it landed right in the center.
I ended up with an extra 3 1/2" 90* tube so I stuffed it in the exhaust just to see how it would look finished. I will be using a 4" down pipe though.
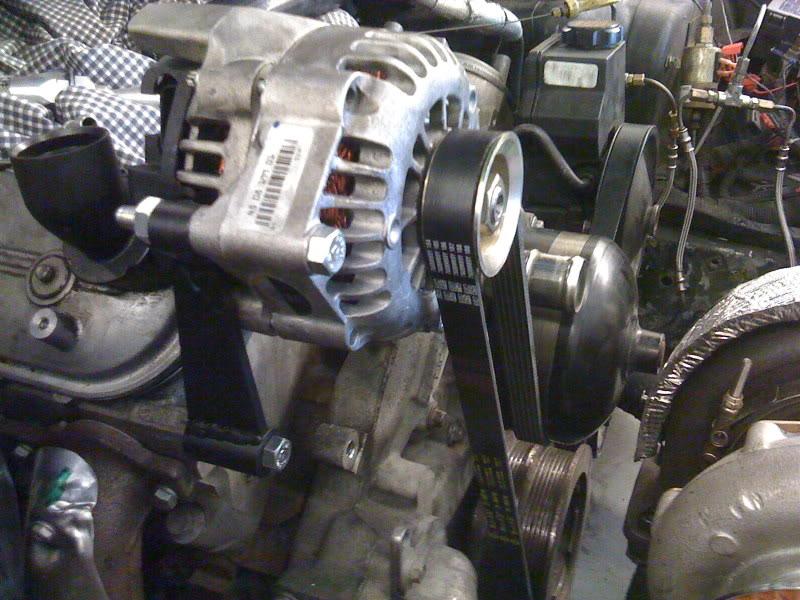
I am just waiting for the alternator relocation bracket, the FiberTuned intake which will be here this Wednesday and some wiring.
3/16/2009
I got the alternator relocated today. It was a little bit of a pain as I guess that I ordered the wrong kit. xfenix999x makes an LSx (aluminum) and an LQ9 (Iron) block kit. The LQ9 Iron block does not have a bolt hole on the front of the block that the LS1 has. I ended up having to modify the bracket slightly in order to get it to work as I didn't want to wait for the other bracket. I had to elongate one of the holes on the bracket in order to catch one of the bolt holes from the front cover.

My next obstacles are the radiator hoses. I think that I will be OK with just using some extension tubes. Should I use PVC, aluminum. stainless or aluminized mild steel?
Oh, and clocking this exhaust housing thing. Gotta get that blaster ****. WD40 isn't making it happen.
3/18/2009
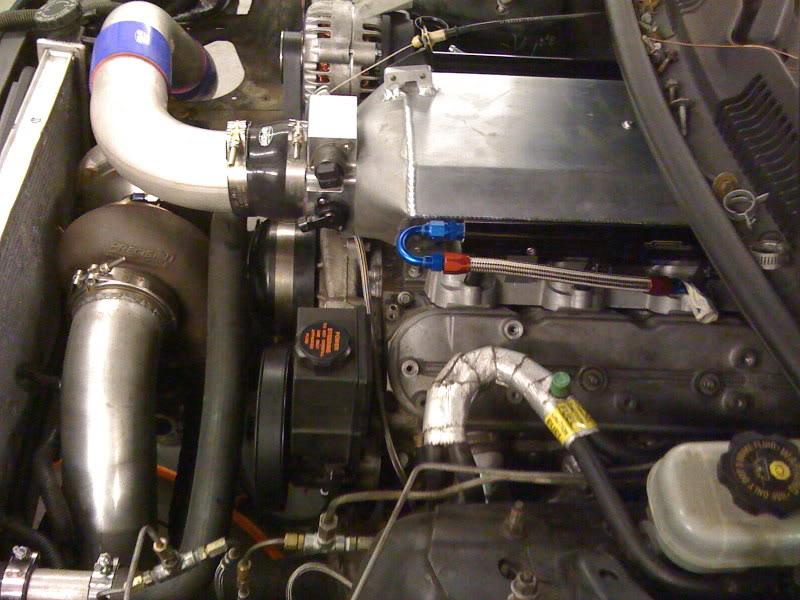
Well I went down to see dman yesterday, returned some of the extra couplers and tubing that I didn't need. He gave me a couple of sections of scrap aluminum tubing and showed me a really cool way to make a lip on the end with a pair of ground-down crimpers. I also picked up the couplers and clamps to tie it all together. UPS will be delivering my intake today. I will try to get that on and finalize the cold side tubing as well today.
I picked up a can of PB Blaster today so I will tackle the clocking issue and see if I can break it loose.
I blew off working on it last night but I put in a little time this morning. I picked up a can of PB Blaster and went to work on the exhaust housing. I had to knock it back in order to get it to free up some. Then I was able to clock it to the 12o'clock position on the oil feed and 6 o'clock on the drain. I was about to give up on it about 30 minutes into the process.
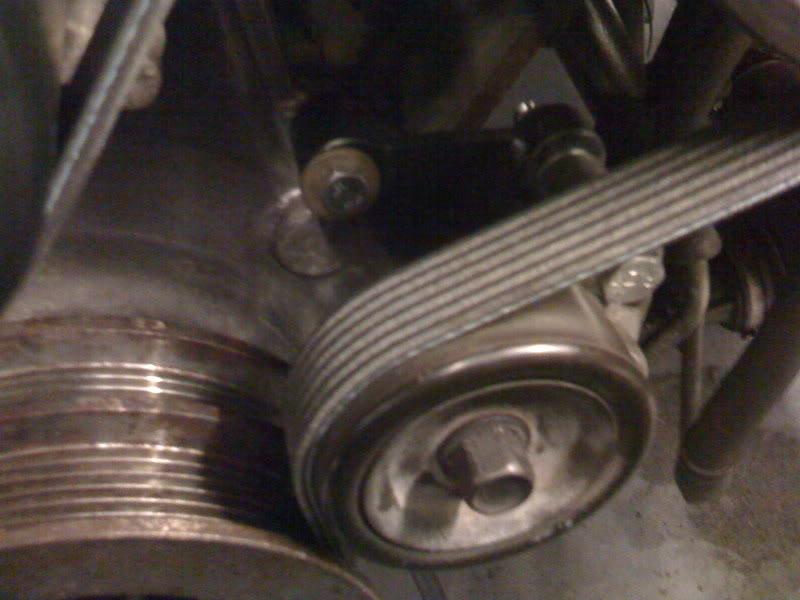
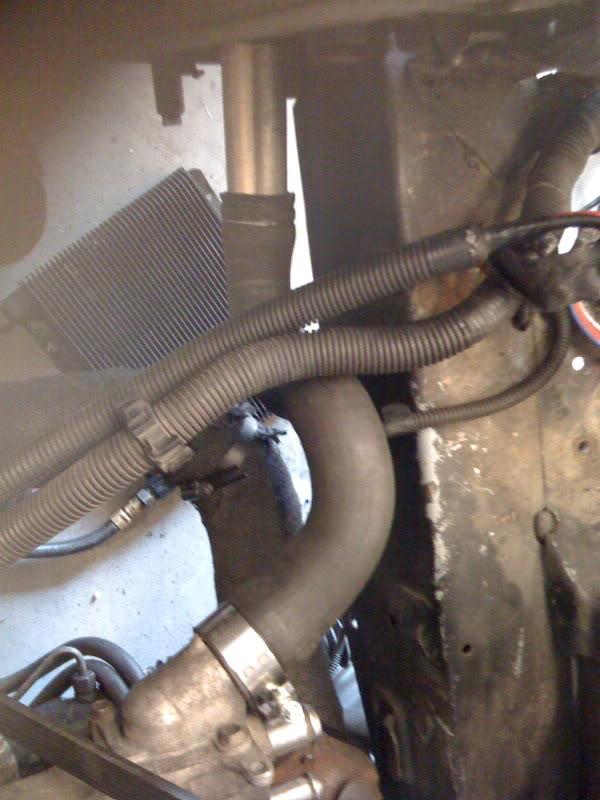
I got the coolant extensions in and the oil feed line run. Apparently I didn't use a big enough tap in the pan as the oil drain fitting is 1/2 NPT X -10. I may have used a 3/8 which really really sucks as I will not be dropping the motor again so I will be doing it with the pan on the car.
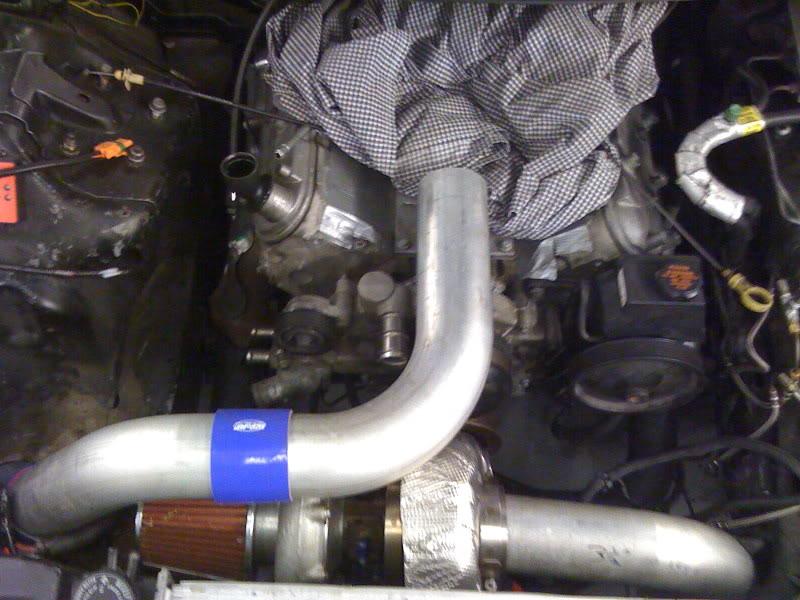
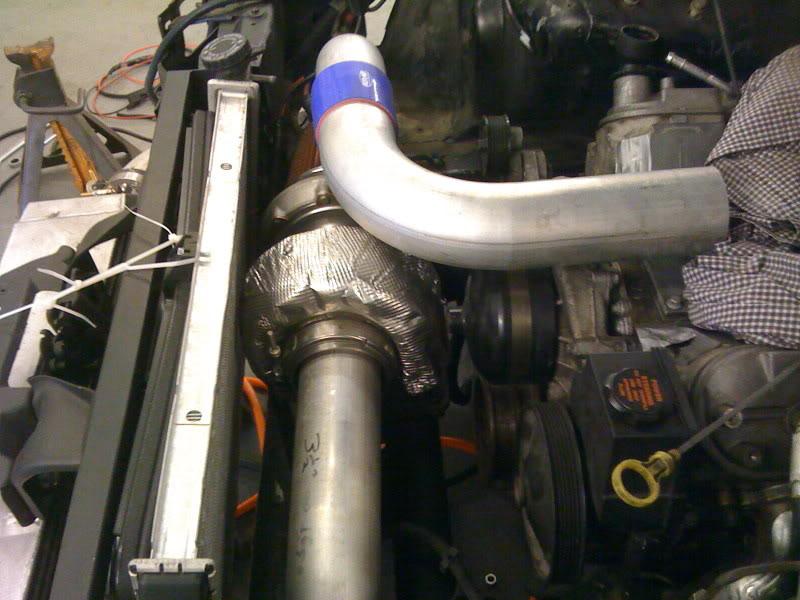
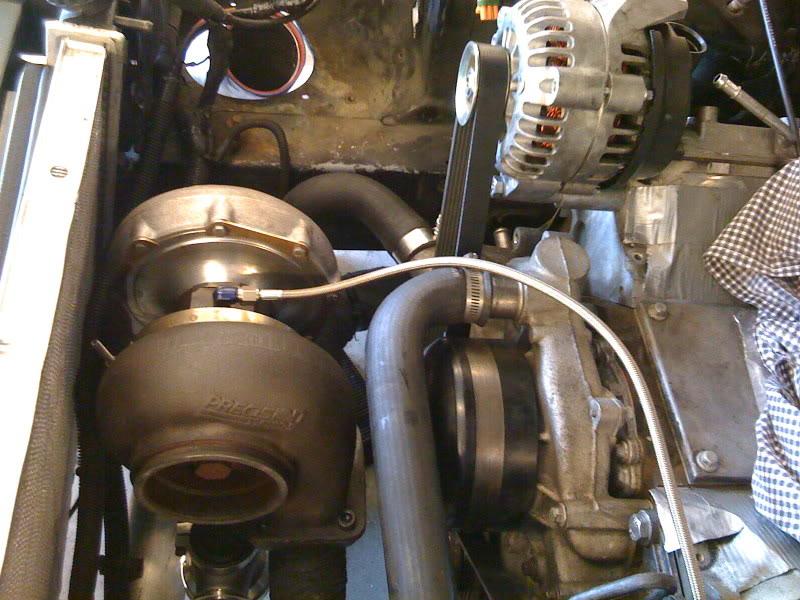
And last but not least, my intake is back so I will be bolting it on tonite and getting the final measurements so I can get the rest of it welded up.
Feed line was the perfect length.
Upper radiator hose extension
Lower radiator hose extension
3/18/2009
I got the intake all put together and dropped it in place to finish up the cutting on the cold side pipe. I cut the down pipe and Joe welded it to the v-band flange. It's starting to look like something. Here are some pictures.