You must be logged in to rate content!
5 minute(s) of a 51 minute read
1-19-2022
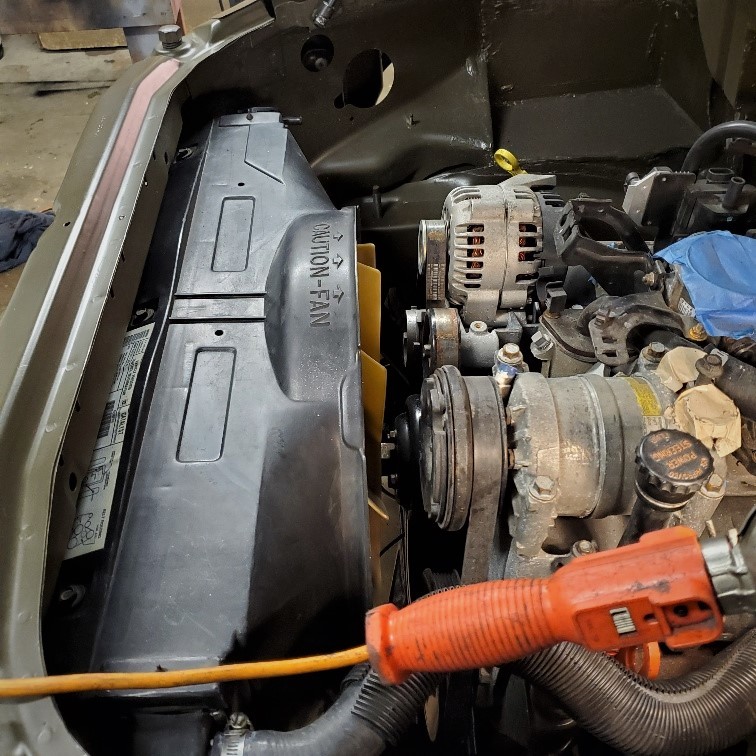
I did other stuff for a couple of months - following the tank paint people's advice to leave the paint alone for 60 days. The paint did harden nicely during the break! I had saved the Blazer radiator support in hope that it could be used on the HHR rather than fabricating a whole assembly. It took some trimming, hammering, and welding - but it eventually accepted the new role.
It actually fits behind and below the HHR radiator support whereas the HHR radiator fits in front!
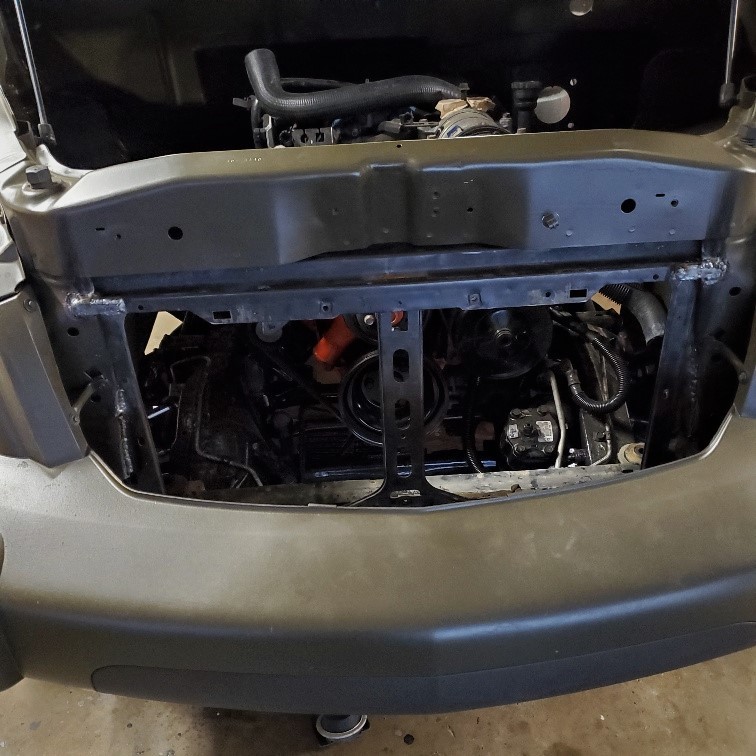
Once installed and painted the Blazer radiator and A/C accumulator fit right it - same spacing as stock Blazer so the hoses and cooling lines fit as well (all new of course). It probably looks stranger familiar to Chevy Blazer people......
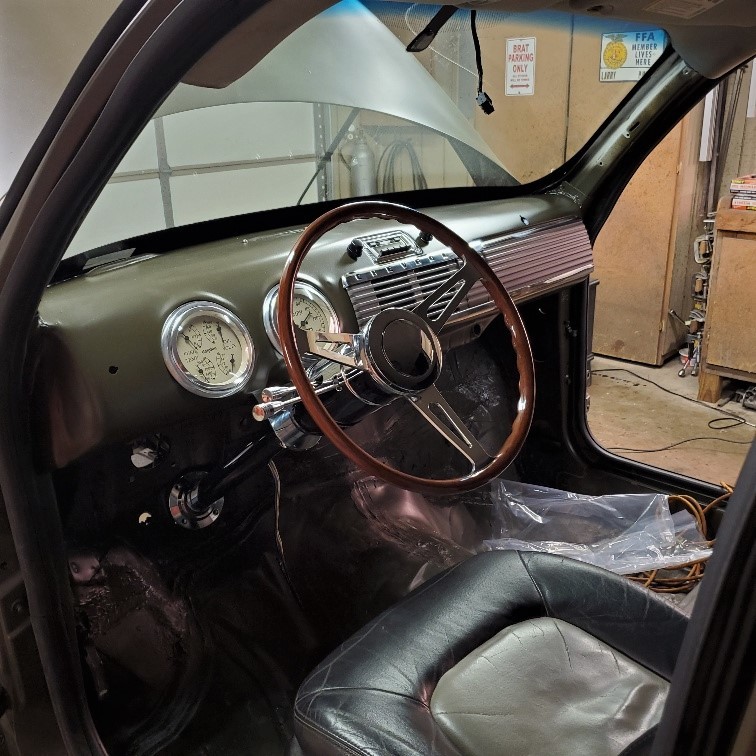
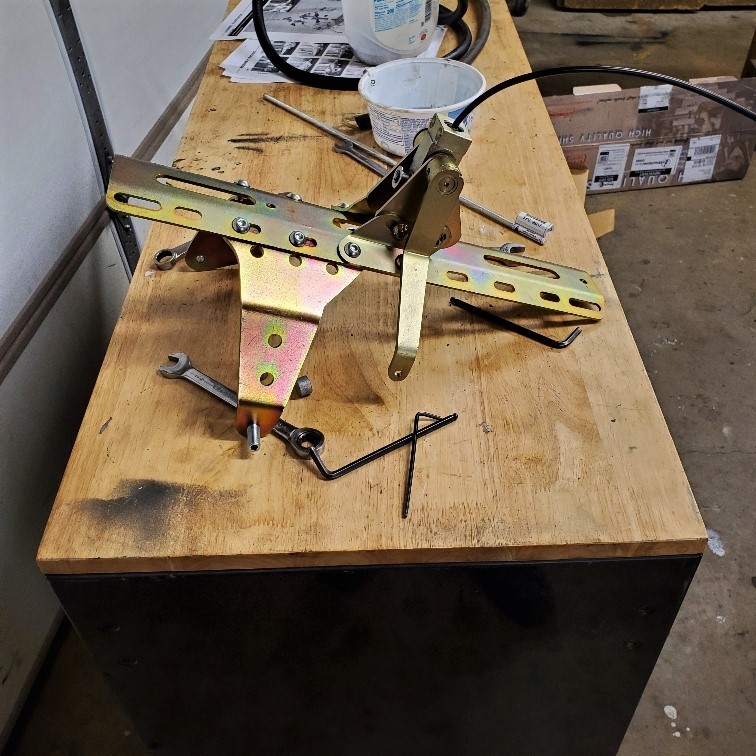
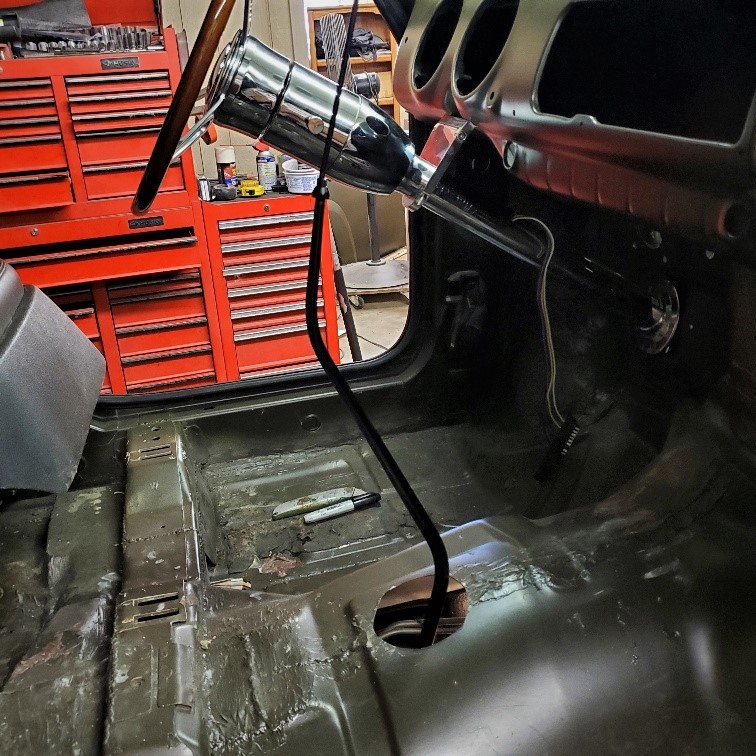
At this point I try to figure out what is next - there is a lot to do! So, I decided on fitting the steering column - I also chose that because it is a huge pain to manually move the front wheels when I roll the truck in and out of the shop. The steering column I selected was the chrome tilt version just like I used on BratXL. It is simple and works good. I was happy to see that my guesses on dash and firewall layout were pretty accurate - the steering column fit right in! I did order a 1 1/2 inch longer chrome column support to lower it some so there is no tilt in "normal" position.
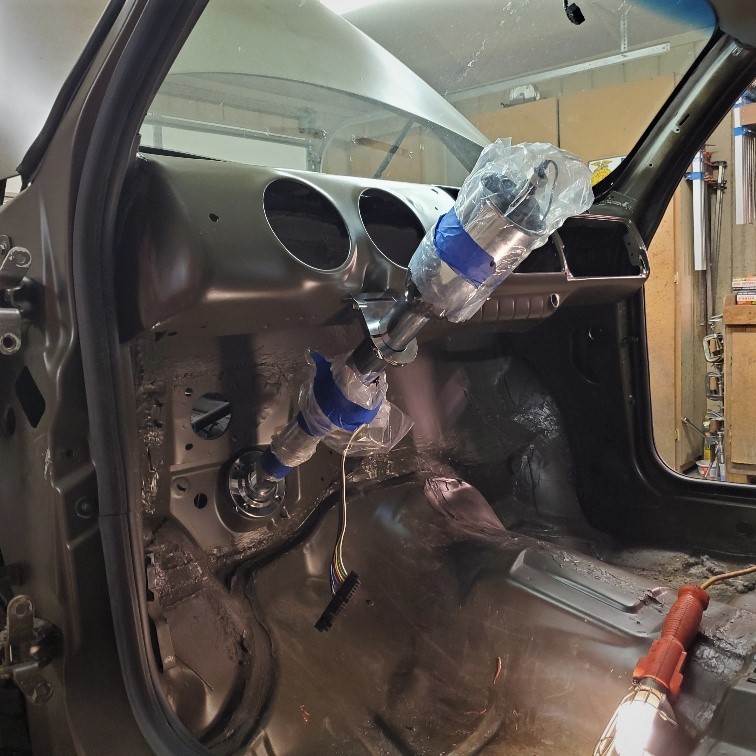
Of course since I was right there, and the stuff was right on the the shelf just a few feet away, I could not resist setting the gauges and stuff in place just to see what it would look like. I also set the seat in - the steering feels fine and I like the retro look!
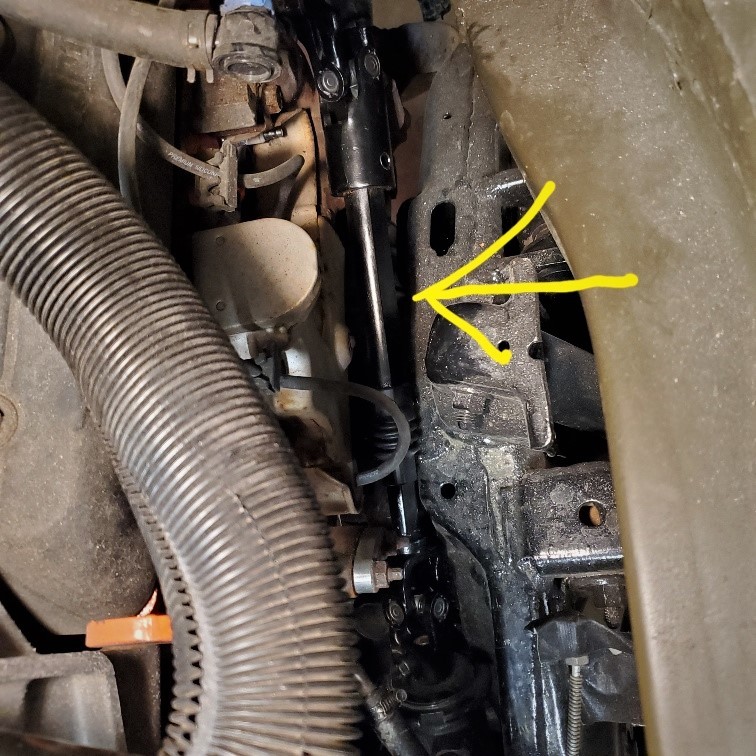
Since the column to steering box distance is different than stock Blazer I decided to use a Jeep intermediate steering shaft. It has two universals instead of a rag joint. I had to shorten it 7 inches and notch the column end clamp so it would tighten down all the way to the GM style column. Not a good picture - sorry.
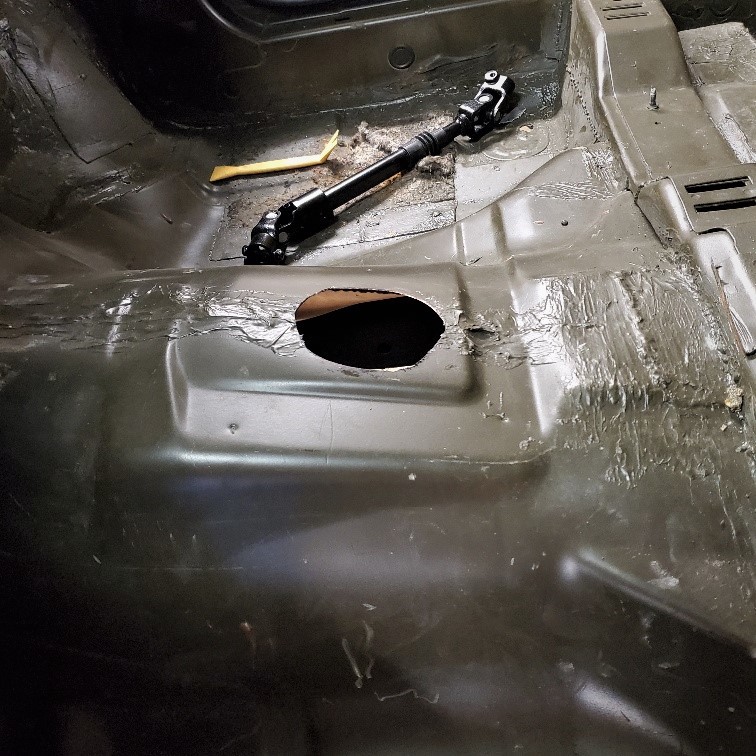
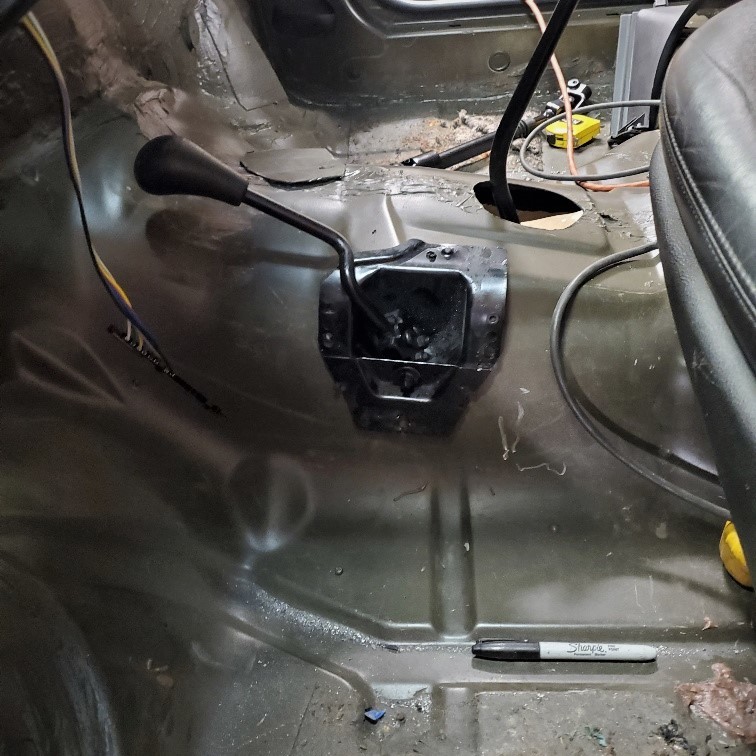
Up next was installing the American Shifter Company 1948 style shifter onto the rebuilt 4l60e transmission. The first thing I did was to unbolt and raise the body 8 inches to make it easier to get to the top of the transmission - I needed that for wiring, brakes, and fuel lines anyways. My biggest complaint - no instructions came with the shifter. And when I did find instructions online they were very poor, too generic, and incomplete. It took a lot of trial/error time I finally got it assembled, installed, and adjusted. Luckily I cut the shift hole accurately! Then I had to go back and spend more $$$ on a shift boot and park/neutral start switch so it would not start in gear! Sorry American Shifter - not a fan.
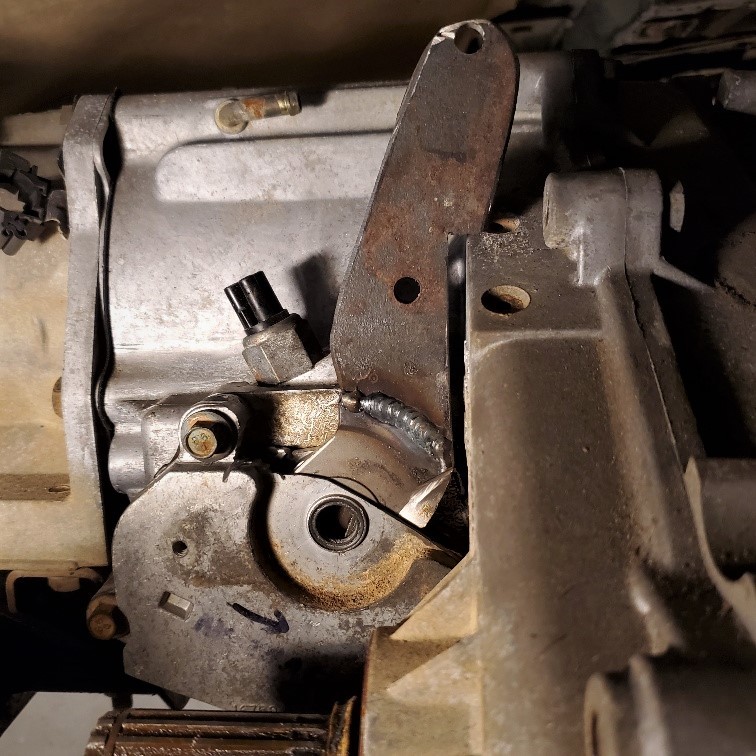
The next step was to convert the electric shift transfer case to manual. I cut up the electric encoder, took out a couple of gears, and welded on an shift arm. I had to go to two salvage yards to find the manual Chevy 4x4 shifter - and then get in a big fight with it to get it out. Not hard to install. It shifts a little harder (pressurewise) than a stock manual transfer case - so if you frequently go in and out of 4x4 you may want to stay stock. Here is a view not often seen inside a HHR!
I joined the HHR fuel lines (aft end) with the Blazer fuel lines (forward end) and added an inline fuel filter. Also rebuilt the Blazer remote oil filter system with new seals and hoses. And I ran the brake line up to the firewall. Next will be to install the stand alone wire harness - Lord help me! And then I can lower the body back down and install the Vintage Air heat A/C.
Comments
Yes, last week. I will post the update today.
Posted by BRATXL on 10/11/21 @ 12:26:47 PM

Did you figure out the spare tire?
Posted by Diggymart on 10/10/21 @ 10:29:21 PM
Love these transformations! Looks like you got some free groceries with the car haha, never seen that before. Always loved the HHRs looks, this will give it some muscle it never had.
Posted by MPower on 4/13/21 @ 2:38:11 PM
Nice updates!
Posted by Diggymart on 4/8/21 @ 7:23:13 PM
Holy hell! Thats a ton of work, will be an awesome project though! Looking forward to seeing how you make it all work.
Posted by diyauto on 4/8/21 @ 3:31:41 PM
Did you figure out the spare tire?
Posted by Diggymart on 10/10/21 @ 10:29:23 PM