You must be logged in to rate content!
3 minute read

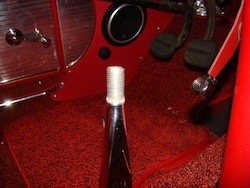
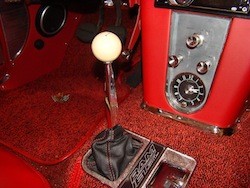
53-62 CORVETTE SHIFT BOOT INSTALLATION INSTRUCTIONS
1. Remove shift knob: Back off shaft nut. Unscrew ball.

2. Remove the nut.
3. Remove center cover plate. Illustrated is a plate that is attached with adhesive tape, original equipment plate is attached with two small screws.
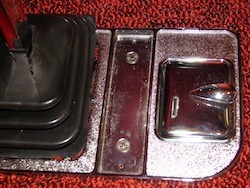
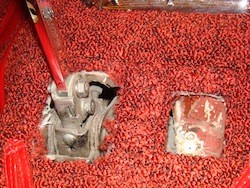
4. Remove two screws attaching shift plate to floor.
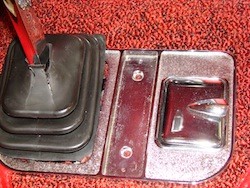 5. Remove shift plate and boot.
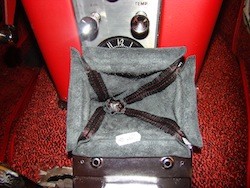
6. Orientate the new boot so that the longer front to back leg is positioned toward 2nd and 4th gear position
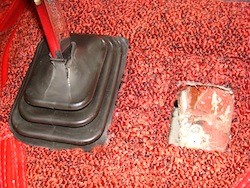
7. Position boot in plate, aligning corners with stitching. Use two-way tape on the back of the shift plate to hold the boot in position.
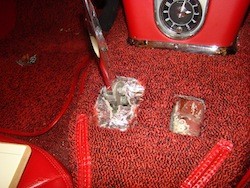
8. Insulate over the hole in the floor (optional). Cut the insulation to allow the shifter to travel. Insulation is used to prevent hot air generated by the transmission from entering the boot area.
9. Slide boot and shift plate over shifter. Push collar down 5 inches below ball. Ensure some slack in the boot in all shift locations. Secure shift plate to floor with screws
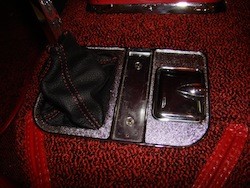
10. Replace cover plate, nut and shaft ball on shift console.
CONGRATULATIONS - YOU HAVE SUCCESSFULLY INSTALLED YOUR NEW LEATHER BOOTS!
Useful tip
You have installed a product made out of genuine leather. As you know, to maintain a leather product in good condition, you should take care of it. We suggest occasionally (every 4-6 week for example) applying some leather conditioner/UV protector to keep your leather from drying up in the sun and cracking.
Redline Automotive Accessories Corp. will not be held liable for any labor, incidental or consequential damages of any kind. Proceed at your own risk.