You must be logged in to rate content!
7 minute read

The 84-89 SHIFT BOOT installation instructions.
1. Remove the instrument cluster.
Do this by removing the 3 left side screws and 4 screws on the front.
Remove the headlight knob. Use a small flathead screwdriver to depress the spring clip holding the knob onto the shaft, then (while still pressing the spring clip) pull the knob off.
Next, adjust the steering wheel all the way down, then unscrew the adjustment level. Now simply slide the bezel forward and out. Screw the steering column adjustment lever back in and move the steering wheel all the way back up so you have room to work.
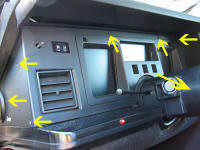
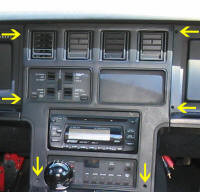
2. Remove the radio bezel.
Remove the 2 side screws on the left hand side. Remove the 2 front screws on the right hand side. Remove the 2 front screws on the bottom.
There will be 2 nut heads sticking out of the bottom of the dashboard at the top of the bezel, so you may need to push up on the dash slightly to pull the bezel straight forward and out.
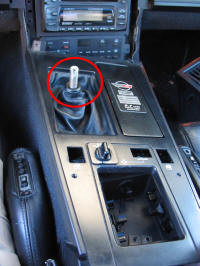
3. Remove shift knob.
Using a flathead screwdriver, pop the shift diagram cap off of the top of the shift knob.
Next use the screwdrivers to pry the retaining pin out from the top of the shift knob.
Now unscrew the shift knob to remove it.
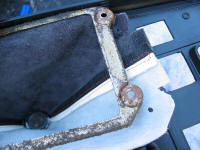
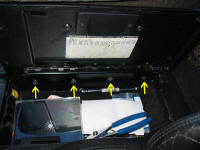
4. Remove the center console bezel.
Remove the 2 top screws, located just below the window switches.
Remove the 3 screws inside the front of the arm rest. One of the screws is holding on the latch for the arm rest door, note which way it sits before taking it out.
Lift up on the whole center console bezel, taking care to slide it to the left slightly as it will catch on the open arm rest (circled in red).
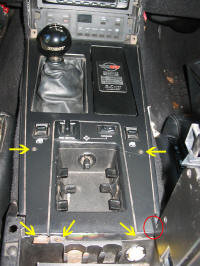
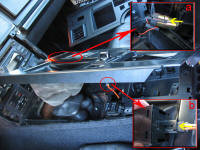
5. Remove the clips on either side of the cigarette lighter and pull the connector off. (Inset A)
If you have the FX3 Ride Control option, pull the connector out of the switch. (Inset B) (Note: I found it easier to just remove the FX3 switch from the bezel and then remove the connector)
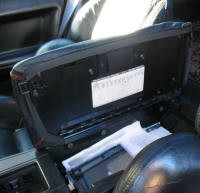
Now the entire center console bezel should be free to pull out.
6. Now would be a good time to clean your center console and bezel up a bit.

7. I found lost change, sticky soda stains, etc that I was easily able to clean up once everything was off.
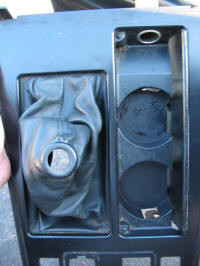
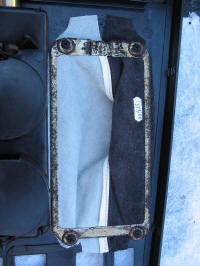
8. Unscrew the 4 screws holding the metal trim plate that holds the shift boot on.
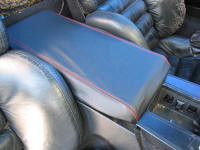
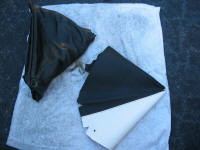
9. Comparison shot between the old boot and the new one (right).
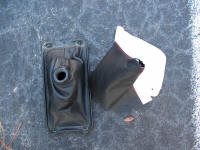
10. Next remove the old boot from the trim plate.
Simply peel the old leather off the metal trim and separate it from the trim plate.
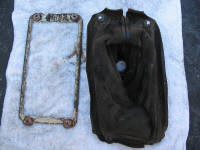
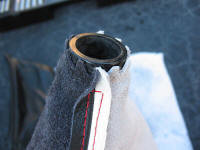
11. The final step to removing the old boot is to remove the trim ring from the top of the shift boot.
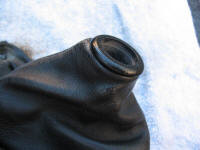
12. Turn the boot inside out. The leather is just glued to the plastic ring.

13. Peel the leather tabs off and pop the ring out.
14. Here is another comparison of the two shift boots side by side. The old one is on the left, the new one is on the right.
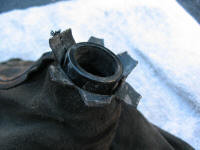
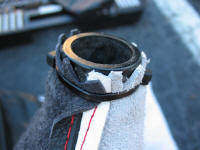
15. Reverse the exact same steps as you did to remove the boot.
Turn the boot inside out and press the trim ring inside and through the opening just until the top of the leather tabs reach top of the trim ring.
16. If you don't have any glue, use a small zip tie to secure the leather to the trim ring. Pull it as tight as you can so it will not slip off later on.
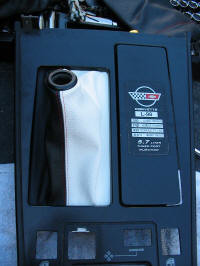
17. Now turn the boot right side out
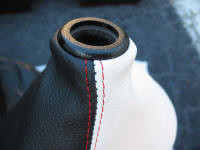
18. Now reattach it to the center console bezel. You will not need to use any glue.
Note the holes in the leather line up perfectly with both the holes for the metal trim plate and the screw holes in the bezel.
19. Stretch one side out and set a screw in and loosely finger tighten it. Do the same for all 4 screws.
Make sure you pull the slack out of each side so that the metal trim plate has plenty to grab on to.
Now screw the screws in tight and test it to make sure nothing is loose and the leather doesn't come out anywhere.
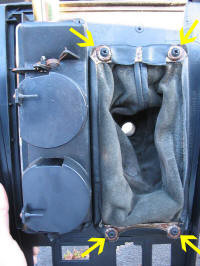
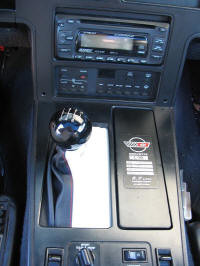
20. Turn the center console bezel over and admire your handiwork and the fine quality of the new RedlineGoods shift boot.
21. Reverse all the steps you took to remove everything.
Make sure once the center console bezel is back on that you test your shifter out to make sure it has enough slack on all sides so that nothing binds. Remember that leather can stretch, wear out and eventually tear over time, so you don't want it to be too tight, especially if you daily drive of race your Corvette.
22. I found the easiest way to install the armrest was to just remove the 4 screws holding the armrest lid on and then stretching the cover around the edges. You can put it without taking the lid off, but I found it much easier to install it with the lid off.
23. Here it is after it was installed and the lid was screwed back in place.
24. Completed install