You must be logged in to rate content!
4 minute read

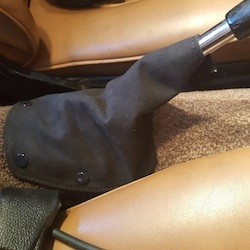
ALFA ROMEO SPIDER 86-93 INSTALLATION INSTRUCTIONS
1. Remove shift knob. Depending on the shift knob it should unscrew with Allen wrenches and slide off.
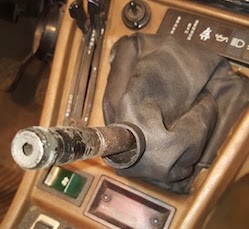
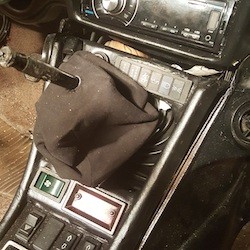
2. Loosen the center console. You should be able to remove the shift boot with completely removing the center console.
Pull off the two black rubber knobs for the heater/AC and defroster slide switches. Also pull of the plastic AC knob. Use needle nose pliers to carefully unscrew the flat nut holding the AC switch to the consoler faceplate.
Remove screws holding kick panels.
Remove the 2 screws at the lower front of the console (may be hidden under part of the console that goes back to the p-brake if you have that interior).
It is may not be necessary to unplug the wiring for the fan switch and clock.
In some cases, the switches and heating controls have enough slack so you do not have to completely remove the console.
Pull console switches from the front, label their wires, disconnect.
Remove console if required.
3. Free the shift boot frame (at base) from the console and the shift boot.
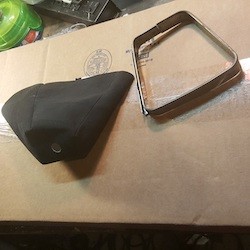
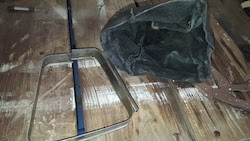
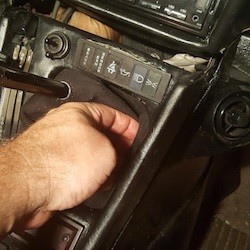
4. Now pull the boot and ring out through the opening of the console faceplate cover and remove from the vehicle. The leather boot is wrapped around a metal bezel. The boot is held on with these sharp little clamp spikey things around its periphery. You can gently remove them with a screwdriver. (if you're lucky they won't be rusted and break in your hands.)
Inspect the shift boot rubber boots (under the leather boot), replace if necessary.
5. Make sure the orientation of the new boot is correct, then clip it back in.
Use existing hardware to attach the new boot to the retaining ring making sure that the 4 retaining tabs are oriented as in correctly (tabs should be on the bottom of the retaining ring when installing the boot).
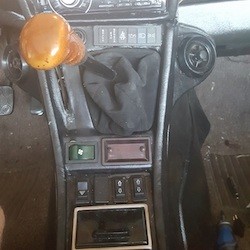
6. Push the entire boot and ring through the opening of the console faceplate cover and through the console opening.
With your fingers grasping the edge of the retaining ring, pull the ring toward you.
Repeat for all 4 sides until the ring has securely snapped into place.
Reinstall the center console if you did remove it in #1 above.
7. Pull the ebrake as far as it will go. Unsnap the old boot and pull it off...
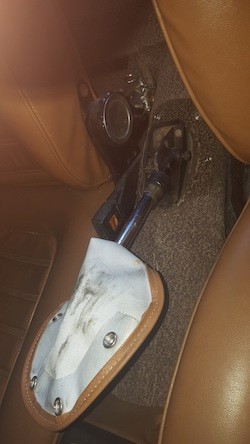
8. Install the new one instead and snap it into the buttons.
Useful tip
You have installed a product made out of genuine leather. As you know, to maintain a leather product in good condition, you should take care of it. We suggest occasionally (every 4-6 week for example) applying some leather conditioner/UV protector to keep your leather from drying up in the sun and cracking.
Redline Automotive Accessories Corp. will not be held liable for any labor, incidental or consequential damages of any kind. Proceed at your own risk.