You must be logged in to rate content!
3 minute read

1) First lift up the armrest and take out little carpet cover to get to to screws. Than pop off the silver trim off of the center console.
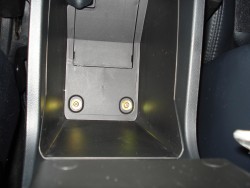
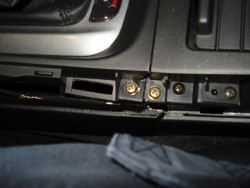
2) Remove the 4 gold screws that attach the armrest portion to the shift area portion. Now remove the armrest section, and while your doing it there is a connection on the right side up towards the front of the passenger seat, disconnect that. Remove the armrest section. Now find a small flat head screw driver to gently press on the hooks that are beneath the type S emblem (underneath the shift panel!) to release the shift plate from the panel. Be careful, if you break this plate than you will have to get a new one from acura and its over $120.
3) Now to get the armrest off the console. Lift up the armrest and remove the 4 lower screws and pull it off the console.
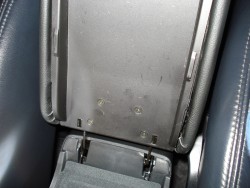
4) Remove the 2 other screws and take the first trim plate off.
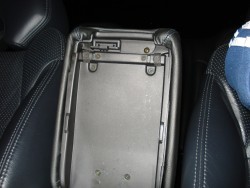
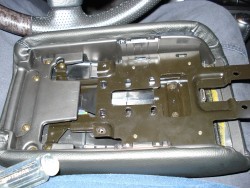
5) There are 4 screws that hold the metal adjuster plate on, remove those and remove the adjustment plate. Now theres one more trim plate with 8 screws. Remove them, and take the last trim piece out. Now your ready to put your new cover on.
Installation is reverse of removal.
Congratulations, you're DONE!
Useful tip
You have installed a product made out of genuine leather. As you know, to maintain a leather product in good condition, you should take care of it. We suggest occasionally (every 4-6 week for example) applying some leather conditioner/UV protector to keep your leather from drying up in the sun and cracking.
Redline Automotive Accessories Corp. will not be held liable for any labor, incidental or consequential damages of any kind. Proceed at your own risk.