You must be logged in to rate content!
8 minute read

91-95 ACURA LEGEND INSTALLATION INSTRUCTIONS
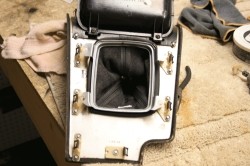
1. The center console is held in place by only two screws located below the lighter and ashtray. The two screws have been removed in the picture.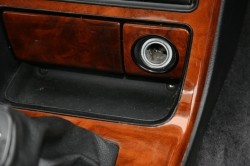
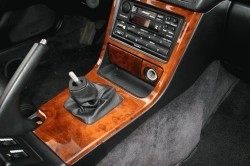
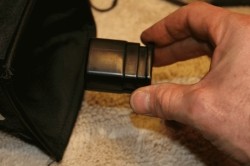
2. The shift knob slides into and sits on top of a plastic retainer. The top of the shift boot attaches to this retainer as seen in the picture. The shift knob disengages from the retainer by grasping the retainer and twisting it clockwise about 45 degrees - as seen in the picture (either direction will likely work) - and simultaneously, pulling down on the retainer. Once the retainer is no longer attached to the shift knob, the shift knob simply screws off.
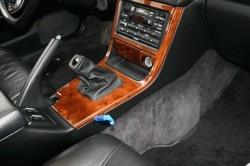
3. With the shift knob and two console screws removed, the console will snap out of place. To pry the console out without damaging it, use a blunt tool like the plastic bike tire removal tool seen in the picture. It might also work done by hand. Pry up on the console from approximately the location shown and the console will pop it out of one of the retaining clips. From there, gently pull up on the console to disengage it from the other lower retaining clips. There are additional clips behind the console above the stereo. Gently pull up and out to fully remove the console. Once the console is free, there is a single wiring harness behind the lighter and ash ashtray to disconnect as well.
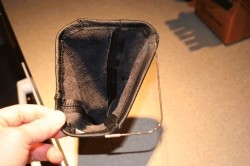
4. The shift boot is held in place by a metal bracket bolted to the bottom of the console. Remove this bracket, which is held in place by 4 screws, and the old boot can then be pulled out of the console. (Note the location of the retaining clips in the picture. You disengaged these clips in the prior step by prying up on the console).
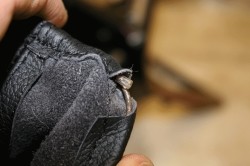
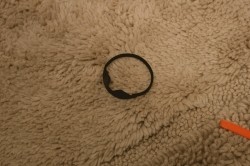
5. Remove the steel wire from the old shift boot. The new shift boot will have an opening in it. Work the wire through this opening and into the new boot. This step will take some time. At the same time, remove the plastic retainer from the old boot as well. It is held in place by a wire tie and a funny shaped rubber band. Save this wire tie if you can because it is small, but longer that the typical ones its size. If you must cut it off, Radio Shack has a similar sized wire tie.
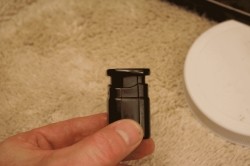
6. Join the wire ends together with the plastic tube. This is difficult because the two ends will join at the front seam (if installed counter clockwise from the opening as shown in the picture), but can be done by inserting the tube onto the wire as shown. (Note, it likely isn’t necessary to join the ends of the wire since the metal bracket should hold the boot securely to the console).
7. Note that one corner of the plastic retainer is notched out more. This is where the end of the wire tie will go.
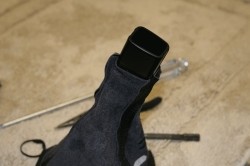
8. With the plastic retaining ring removed from the old boot, pull the new boot inside out and insert it into the new boot as shown. There are three seams in the new boot. The single seam will point forwards and the two corner seams will point backwards. Insert the plastic retainer such that the wider part points backwards.
9. Secure the plastic retainer to the new boot while it is inside out using a wire tie. Note that the end of the wire tie should be over the larger notched area on the plastic retainer.
10. The rubber band that came off the old boot has a thicker section with a notch in it. This notch goes over the end of the wire tie and will smooth out what would otherwise be a bulge in the boot from the wire tie end once the boot is right side out.
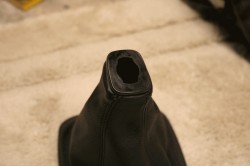
11. With the plastic retainer attached to your new shift boot, pull it through the boot making the boot right side out. Be careful to keep the rubber band in its proper place. The finished product will look like this.
12. Reinstall the center console by reversing the removal steps. Screw the shift knob back on. Push the plastic retainer back onto the shift knob and you are ready to go.
ARMREST COVER
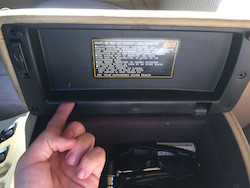
1. Remove the 7 screws visible in the picture.
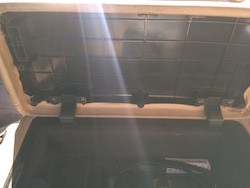
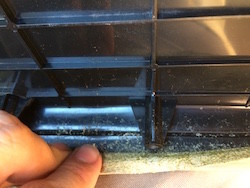
Use your finger to start prying the bottom out from the cover, it will be very snug if it has not been removed before. Once you have the bottom edges out enough start to slide your fingers up the sides to remove the piece evenly. There are three tabs along the top that pop out easily if you apply an equal pressure and pull the plastic out straight.
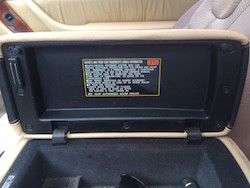
Also, take note of how the magnet sits in the lid, as it will fall out.
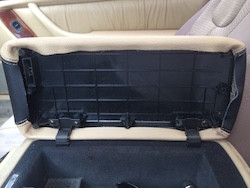
2. Remove the 4 screws to remove the lid from vehicle.
3. Once you have your lid off it is time to peel that old one off.
4. Now its time to put the new cover on, it will help if you let it sit in the sun for 10-15 minutes to warm up, it'll allow the leather to stretch a little easier as these fit very snug.
You have a couple options at this point, you can either use some sandpaper to scuff the inside edge where the old one was glued down and glue the new one down or just slip the cover on and put it back together. The inside piece fits so snug that it will keep the cover in place. I just simply installed the inside piece.
5. If you mixed up your screws from Step 2 and Step 4, you'll need the 4 shortest screws. Get the lid back on the hinge and tightened.
6. Make sure the fabric is fed down in so its not covering any of your screw holes. Line your magnet up properly and press the cover into place. Reinstall the 7 screws finishing the armrest lid from below.
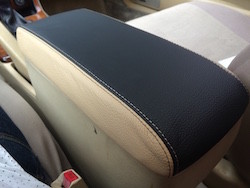
ENJOY YOUR NEW LEATHER BOOTS!
Useful tip
You have installed a product made out of genuine leather. As you know, to maintain a leather product in good condition, you should take care of it. We suggest occasionally (every 4-6 week for example) applying some leather conditioner/UV protector to keep your leather from drying up in the sun and cracking.
Redline Automotive Accessories Corp. will not be held liable for any labor, incidental or consequential damages of any kind. Proceed at your own risk.