- Philips #2 screwdriver
- Pry tool
- Plastic zip lock bag
You must be logged in to rate content!
3 minute read

The installation for both front and rear Arm Rests are identical. There is not difference with the removal, Leather application, and installation of the Arm Rest covers.
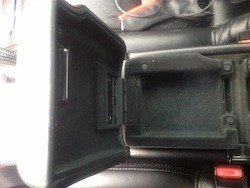
1. Open the armrest closer to the gear shifter. Remove the two screws that secure the Arm Rest cover to the center arm rest console. Do not remove the L bracket. Leave it in place on the center arm rest base.
2. Remove the two screws that secure the Felt Under Housing of the Arm Rest Cover.
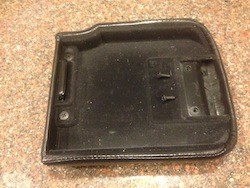
3. Using the Pry tool, separate (pull a part) the Felt Under Housing from the center Arm Rest cover.

4. Wrap the leather cover around the Arm Rest cover. Next using the two screws, install the Felt Under Housing into the Arm Rest cover. Using the Pry tool, push the leather under the sides of the cover in between the Felt Under Housing and the Arm Rest cover. Make sure the leather is inserted flush in between the Felt Under Housing and the Arm Rest cover.
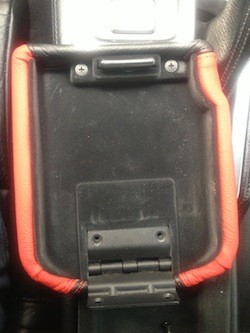
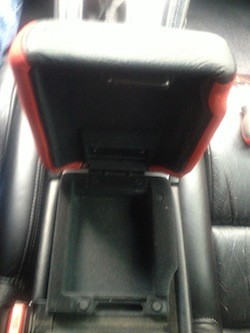
5. Re-install the Arm Rest cover into the L Bracket with the two screws.
6. Open the Arm Rest closest to the rear of the car. Follow the procedure for the front armrest to complete the rear one.
Useful tip
You have installed a product made out of genuine leather. As you know, to maintain a leather product in good condition, you should take care of it. We suggest occasionally (every 4-6 week for example) applying some leather conditioner/UV protector to keep your leather from drying up in the sun and cracking.
Redline Automotive Accessories Corp. will not be held liable for any labor, incidental or consequential damages of any kind. Proceed at your own risk.