- Philips #2 screwdriver
- Pliers
- Long nose plies
- Wire side cutters
- Utility knife (strong razor or butter knife)
- Hot glue gun
- Masking tape
- Small pick.
You must be logged in to rate content!
7 minute read

1990-2005 HONDA/Acura NSX. All models with manual transmission, including Type R, R-GT, S and Zanardi.
Removing the center console without damage requires the correct tools and patience.
Only tighten screws until you feel resistance against the fastened item and STOP---any further tightening will break the item.
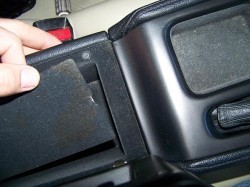
1. Open armrest and using a pick or similar tool: lift up and remove the bottom cover.
2. Remove the four (4x) screws, from inside the armest and lift out the armrest.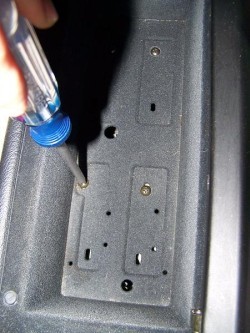
The entire armrest removes as one piece.
3. Remove the screw from the bottom of the main console cover.
Make sure you track and group the screws, so you can replace them to their original position during reassembly.
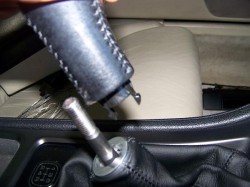
4. Prepare to remove the shift knob by pulling down on the chrome boot retainer.
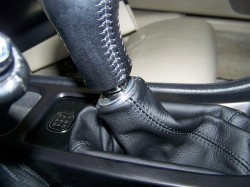
5. Unscrew the knob and remove.
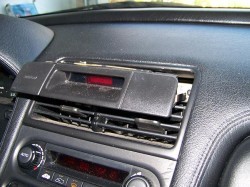
6. Pull forward on the clock assembly, without touching or putting any pressure on the clock control door flap. Use deft fingers or you may damage the bezel finsh. Unplug and remove clock.
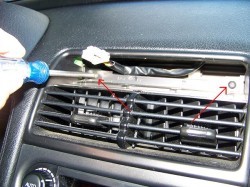
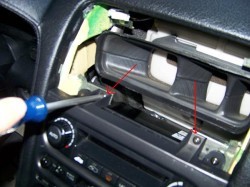
7. The vent is secured on top by two screws (arrows) and on the bottom by two hidden clips.
Remove the two screws.
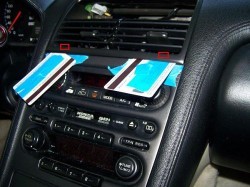
8. To prevent scratches, apply masking tape to cover the top 25 mm (1 inch) of the main console cover. The tape should be applied as close to top of the console and overlaped by the vent by 1-2mm if possible.
Insert the two plastic cards (or feeler gauge) in between the vent and the top of the console cover. Work the cards at an obtuse angle until you dislodge the bottom clips, the clips are located immediately above the center of the climate control knobs. Pull forward lightly on the vent assembly and remove it.
This step takes patience and may require multiple attempts.
9. Push up on the ashtray door, remove ash receptacle and the cigarette lighter. Remove the two screws under the ash receptacle. Gently lift up console cover 30mm (about 1 inch) to to ensure you have removed all the screws.

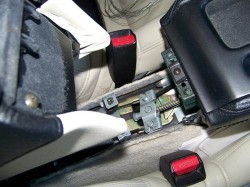
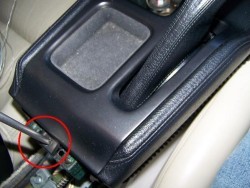
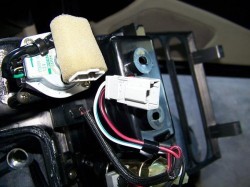
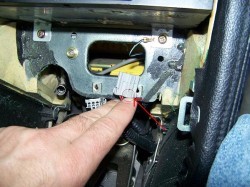
10. Fully engage the parking (emergency) brake in the "up" position. There are two wiring connectors that are to be disconnected, press the indicated tab and pull the connector shells apart. The console cover can now be removed from the vehicle.
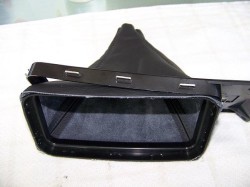
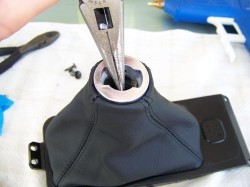
11. The shift boot assembly is detached from the console cover by removing three (3x) screws. Take the boot assembly to a clean table or bench area to complete the detail work.
Use a utility/butter knife straghten each staple (10x) and pry them out one at a time, these staples are going to be reused. Lift off the outer plastic (the part with the transmission shift pattern molding).
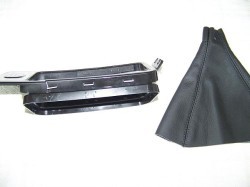
It is common for this part to be cracked and/or broken along the edges of the boot, this is not a serious problem as installation of the new boot will mask or repair the issue.
12. Peel off the old vinyl boot and any sticky residue from the inner retainer, it should be clean and dry. The new leather boot is much thicker than the original vinyl one, it is recommended to trim down any leather on the inside of the boot that extends past the sewn seams. A hot glue gun is invaluable in adhering the new boot to the inner retainer. Start on one corner on the shortest side, you can peel off the glue repeatedly and reapply to ensure a proper alignment.
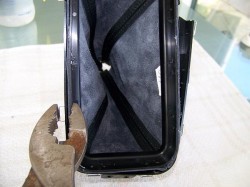
13. Fit the outter boot bezel over the boot after the new boot is glued and properly aligned to the inner retainer. Using pliers reapply the staples by piercing; matching the old staple positions is not necessary. Fill in any cracks or gaps on the outer boot bezel with hot glue and, if desired, color the glue black with an indelible marker. Any imperfections, cracks or breaks in the outer bezel along the boot is difficult to see once installed inside the console
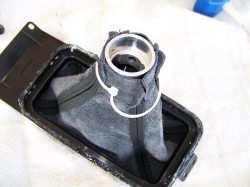
14. Reverse the old boot inside out to expose the chromed plastic shift knob retainer and the plastic zip tie. Cut the old zip tie and remove the shift knob retainer.
15. Reverse the new boot inside out, place the shift knob retainer inside the boot upside down and install a new zip tie as shown. Make sure the zip tie is threaded "backwards", through the holes in the leather and retainer. Snug tighten the zip tie, but do not cut the zip tie.
16. Return the boot from its reverse position, work the leather around the retainer and tighten the zip tie.' Repeat this process several times until you achieve good alignment and fitment. Cut the zip tie remainder.
Reverse the above steps to complete the installation. Take care to only tighten screws until you feel resistance and STOP, otherwise you will break the plastic parts.
Reinstall front console, reinstall armrest, reinstall shift-knob and... ENJOY!!
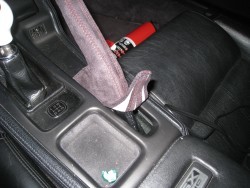
17. To install the ebrake handle just slide it over the factory ebrake assembly and use a dull tool like a putty knife to make it form well inside the
You have installed a product made out of genuine leather. As you know, to maintain a leather product in good condition, you should take care of it. We suggest occasionally (every 4-6 week for example) applying some leather conditioner/UV protector to keep your leather from drying up in the sun and cracking.
Redline Automotive Accessories Corp. will not be held liable for any labor, incidental or consequential damages of any kind. Proceed at your own risk.
