You must be logged in to rate content!
17 minute read

DIY Lowering / Dropping Your TL
Compliments of myTaLizaS3.2 @ http://acurazine.com
8-6-2007
I just got done lowering my car this weekend and it wasn't so bad. If I was given some more tips and directions, I think it would have gone a bit smoother. Otherwise, it's a pretty straight forward installation with a little bit of elbow grease. The instructions that I will be giving is exact procedures that I used to lower the car. I guess there are other ways, but these are the steps I did in order.
I lowered my 03 TL and I'm not sure of it's the same as the 99-01 models, but I imagine it's very similar if it's not identical.
Tools Used:
Air compressor ( Will make this DIY REAL easier if you had this)
Any kind of jacks - Floor jack would be best though, IMO.
Jack stands
Rachets- big and small ( not sure about the size, maybe 3/4" and 1/2")
14 mm Open end / box wrench
17 mm socket
14 mm socket
14 mm deep socket
19 mm socket ( for spring compressor)
12 mm socket
10 mm deep socket
WD-40
Hex Key Wrench - I forgot what size to use, but you can find out for yourself.
Spring Strut Compressor- Can be rented from Autozone( w/ a deposit)
I'm assuming that you all know how to remove the wheel and place it on jack stands so I'll just skip that part.
Removing suspension: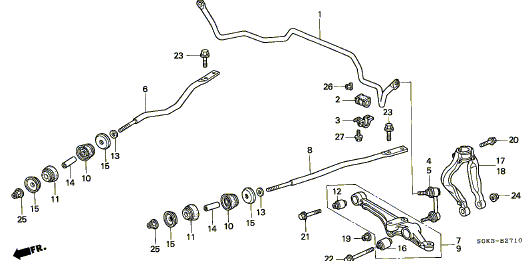
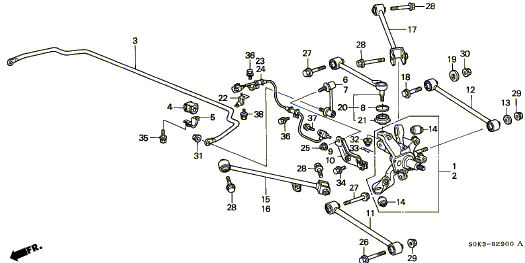
1) First off, I started on the front suspension. I wanted to tackle the 17 MM bolt on the Lower Control Arm where the suspension sat on. ( #22 and #24 on the above diagram). On one side, thats where the #22 bolt goes through to connect the LCA to the strut, and on the other side, there's a nut(#24) . I used two rachets with 17 mm sockets, one on each side. I found it easier trying to loosen the end with the nut, so I used the other side to hold it in place while I loosen. It's not going to be easy to loosen this bolt, so use a hammer to tap it to get it loose. Once you get the nut off, use a small screw driver and place it at the tip of the bolt and tap it out. Now, the bolt is off, so put the nut back on the bolt and put it aside so you don't misplace it or kick it somewhere.
2) Next, I unbolted the 14mm bolt ( #20 on the above diagram). With that taken off, you can slide the fork (#17/18) down while the strut stays in place. Now, the #17/18 fork can be taken out and put aside.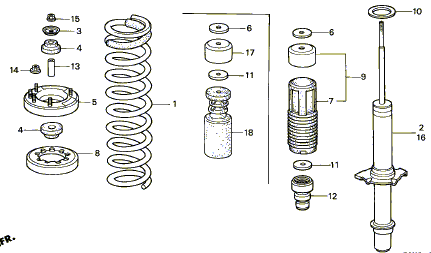
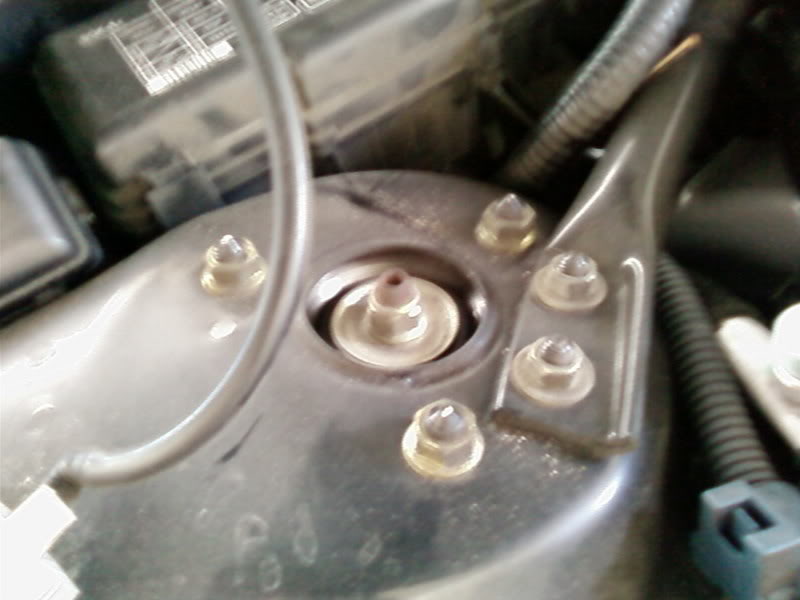
3) Next thing to do is to go under the hood and remove the top part of the suspension. This can be done by removing five nuts. Three of them requires using a 14 mm socket, and the other two, connects the Sway bar to the suspension. To take the two screws from the sway bar off, use a 12 mm socket.
4) With all the nuts and bolts taken off, the suspension should be able to come out. Have someone help press down on the brakes so that it gets you enough clearance to put out the entire suspension.
Voila, it should look like this..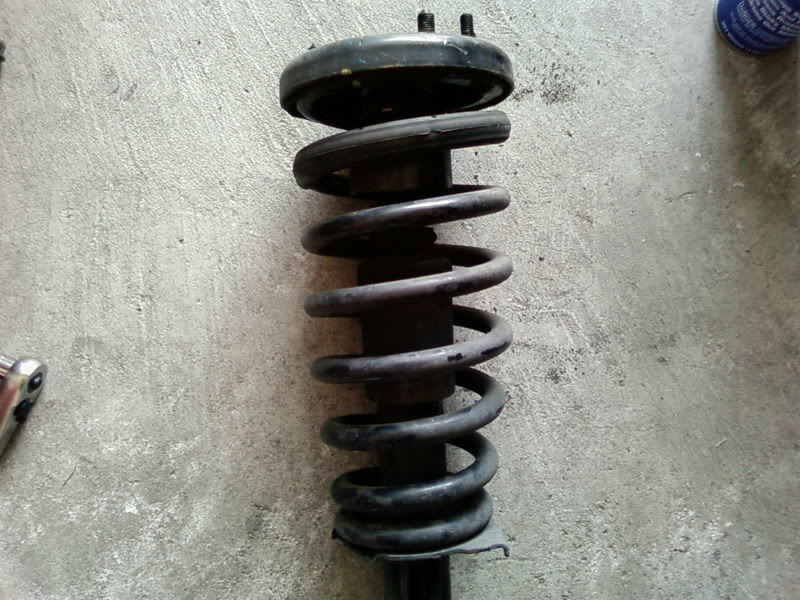
Removing Spring from Strut
Ok, here comes the fun part...removing the springs from the strut. I went to autozone to rent the spring strut compressor, so you guys can do the same. They made me put a $43 dollar refundable deposit.
This is what I got.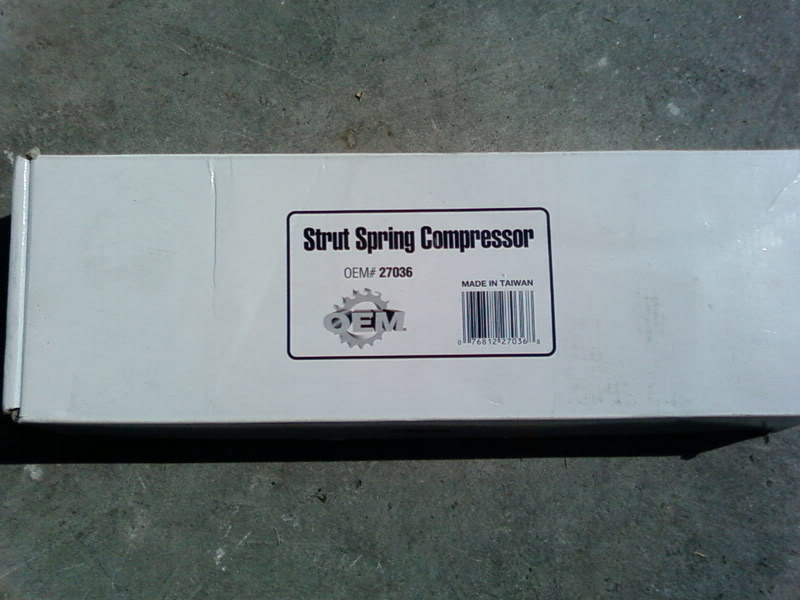
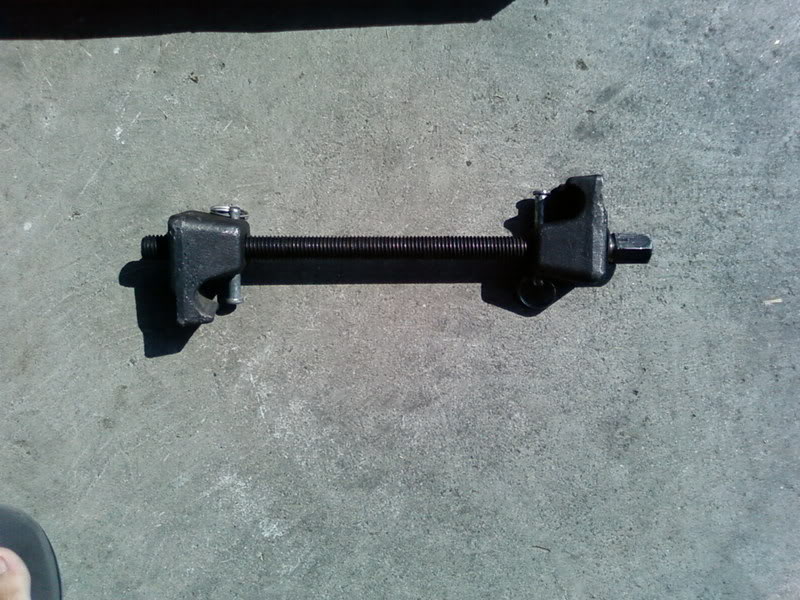
It comes with two, one for each side of the spring.
1) First of all, take a look at the bottom of the strut. There is one side that has a notch. That must be aligned to the top mounting bracket. If they are not aligned correctly, you'll have a problem.
One of two things will happen if they aren't straight.
a) The bottom strut will sit back on the Fork Bracket, but the top 5 bolts will not fit back into the holes.
or
b) The top five bolts will fit through to the top, and the bottom of the strut will not sit back into the Fork Bracket.
So mark before you remove the spring, mark the notch on the bottom of the strut and make a mark on the Mounting bracket.
2) Put the Top part of compressor on the spring, and the bottom part more towards the bottom. Push in the clip so that it stays in place. Do that to both sides.
3) Now, evenly, tighten both sides.
It should look something like this...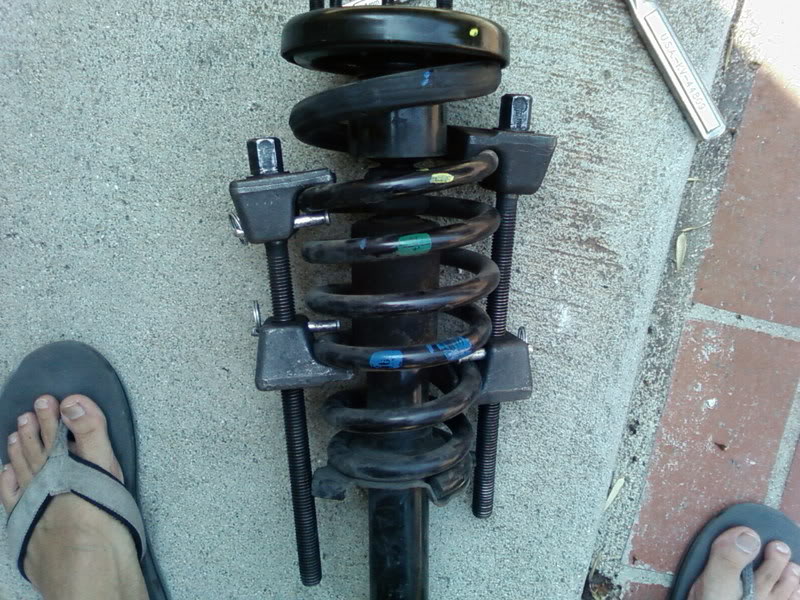
The way I can tell that it's tight enough is when the spring isn't putting too much pressure on the top mounting cover.
4) Now it's time to remove the top mounting cover. To do this, you'll need the Hex Key wrench along with an open end/ box wrench.
5) What I did was lay down the spring and aimed it away from me. This is just in case when you take the top off, and the spring is still not compressed all the way, it can shoot away from you, not killing you.  Then, with the Hex Key wrench, put it through the top of the strut, while at the same time putting the open end / box wrench in. I sprayed a little WD-40 on the threads so it can come out easier. Then, twist down while holding the hex key in place. If it's too hard, use something to beat down the open end / box wrench to knock it loose. So once the nut is almost coming out, slowly take it off with caution, just incase it'll fly out.
6) If you are at this step, then you probably didn't kill yourself. haha.  So now, slip the top mounting cover off and slide out he spring from the strut. Put it aside.
Cutting Rubber Bump Stop
The installation guide that I got from Tein said that the front rubber bump stop has to be trimed 1.6" amd the rear .6".
The bump stop looks like this,
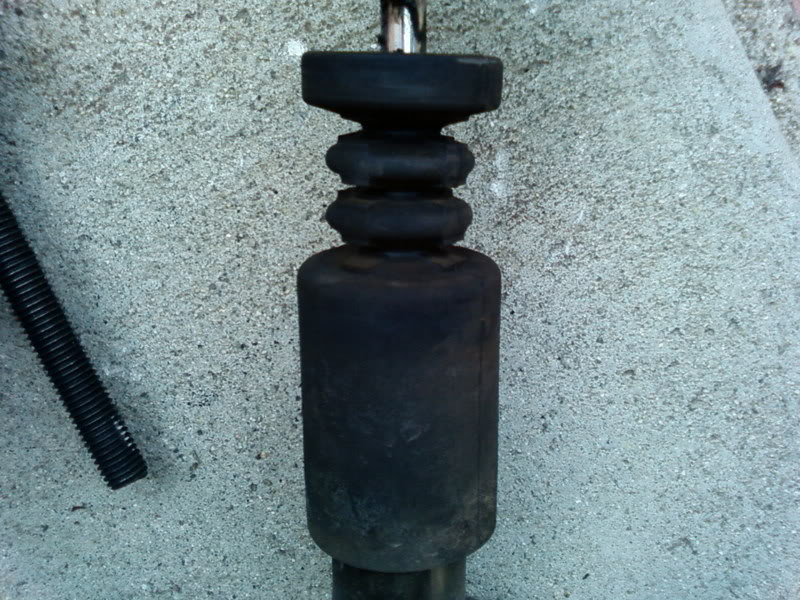
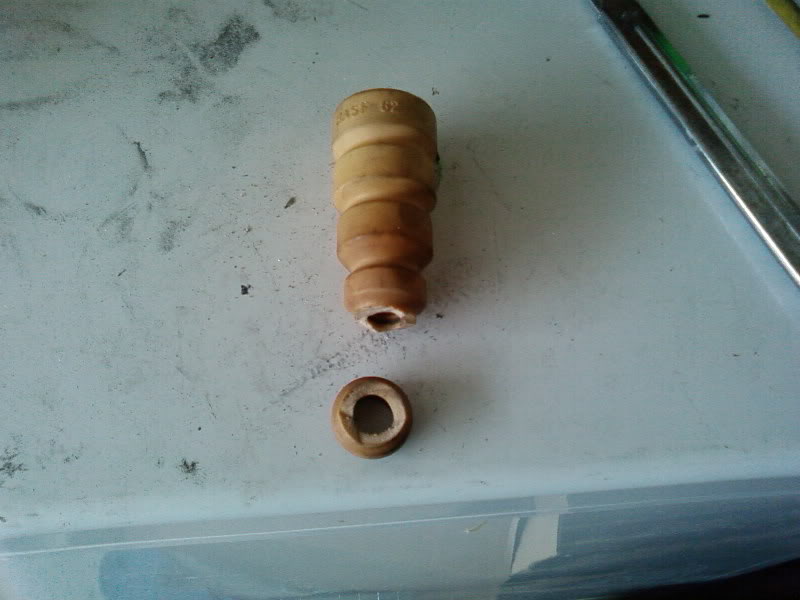
I guess you are able to pull the bump stop off before you cut to avoid any damages to the piston. I couldn't find out how to take it out so I just cut it with caution. There's a boot that covers the piston from dust so I didn't cut that. I cut off one notch above that boot. It looks like this,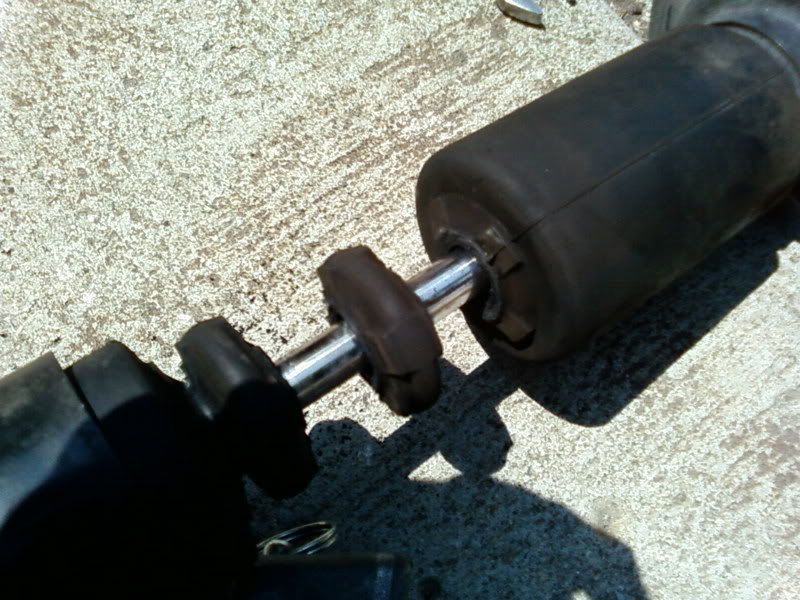
Remove it from the strut and trash it!
Springs back on the strut
1) Remove the Spring Strut Compressor from your stock springs by evenly loosening it until it comes off.
2) Grab your new springs and put the compressors on it like on step #2 and #3.
3) Put the spring back on the strut and make sure that the end of the bottom of the spring is sitting against the end. Kind of hard to explain, but you'll know what I'm talking about when you look at the base where the spring sits on the strut.
4) Now, make sure you put EVERYTHING back in the strut before you got and tighten everything. This is EXACTLY what I didn't do. I forgot to put a spacer back in the strut before I tightened everything up and put the entire suspension back in. It wasn't until I lowered my car back down to finish up when I noticed that damn spacer sitting behind me.  That's exactly what i did when I saw the spacer sitting there. After I thought I was done with that side, I had to take EVERYTHING back out and redo it. So learn from my mistakes and make sure EVERYTHING is placed back on the strut before continuing.
5) Place the top mounting cover back on and line it up with the markings you made. Now tighten the top nut. Then, uncompress the springs and it should look like this.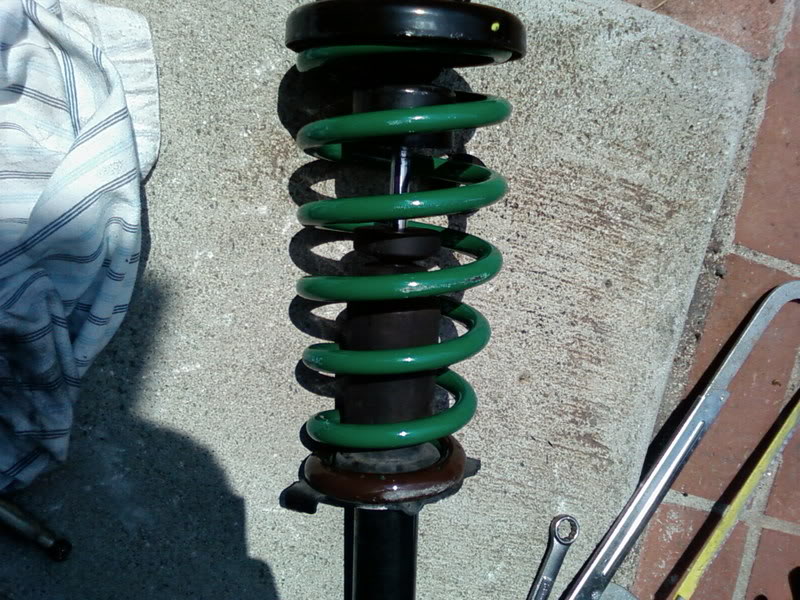
Installing Suspension back on
1) Slide the suspension back in place. It also helps to have someone press down on the brakes to give you some clearance.
2) Now, stick the suspension back to the top and screw on the five nuts.
3) Slide back the Fork Bracket back on the bottom of the strut and put the 14 mm bolt back on.
4) Grab the 17 mm bolt and have someone help you while you press down on the brakes. Slide the bolt all way through to the other side. This might be a bit tricky, but you just have to nudge the brakes a little so that it aligns with the struts. Put the 17mm nut back on and tighten.
5) Tighten the top five nuts and you are officially done with one suspension. Do the same to the other side and you should be done with the front. It should look like this,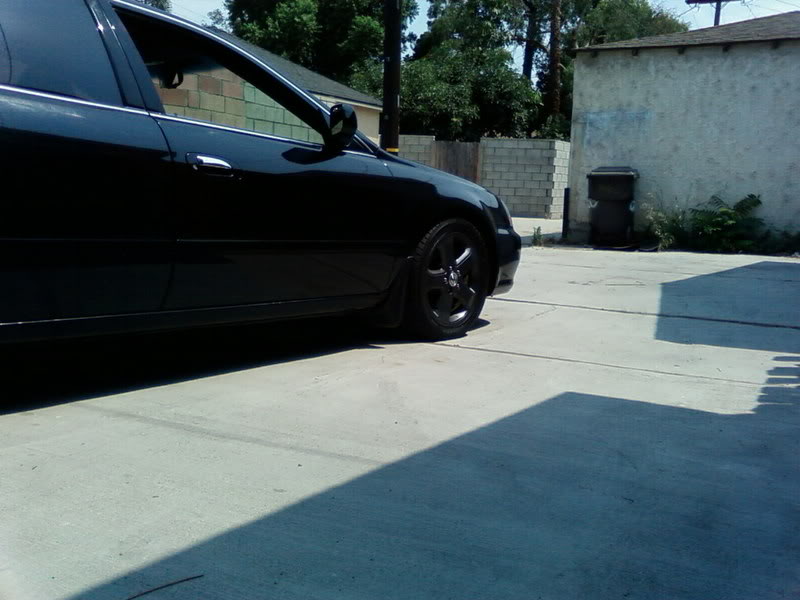

Rear Suspension
While doing the rear, I found that it was a bit trickier to do because it had things that obstructed my clearance. If you follow my directions step by step, you won't have a problem. One problem that you will run into is the end links. Once you've taken off the 17 mm bolts, you'll find that the end links are preventing the shocks from coming out. The end links connects the rear sway bar to the rear brakes system by way of a bracket called the Link Stabalizer. So, theses are the steps I did in order to remove the rear suspension with ease.
Removing Rear Seats
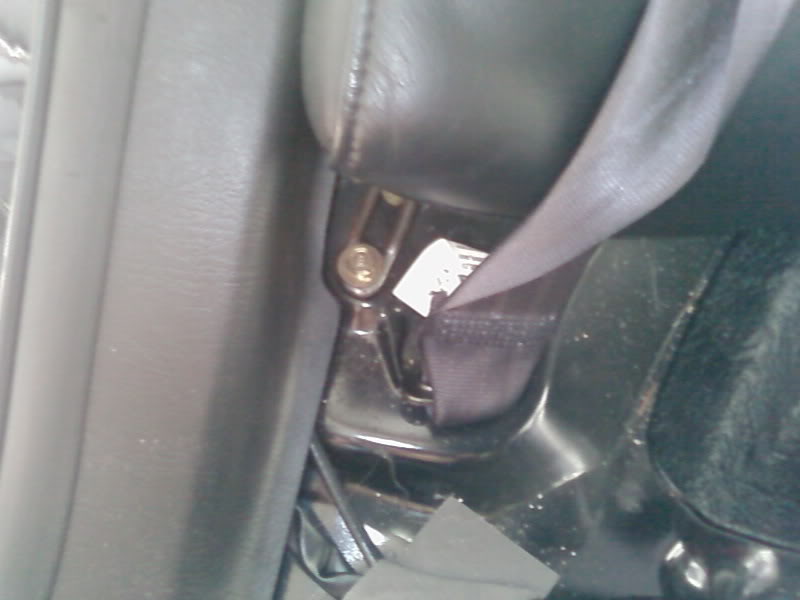
1) The rear seat is in your way and has to be taken out before you can access two bolts that holds the susension from the top. The bottom seats come out first. If you take a look at the cup holder/ arm rest on the back seat, there are two clips or markings on each side to the left and right of the arm rest. Directly below it between the bottom seat and top seat, there's a 10 mm bolt. Using a 10 mm socket with an extension and you'll be able to remove those two bolts. If you grab the bottom of the seat on the driver side and pull up, it'll just pop out of place because of a clip. Do the same to the other side and you'll be able to remove the bottom seat.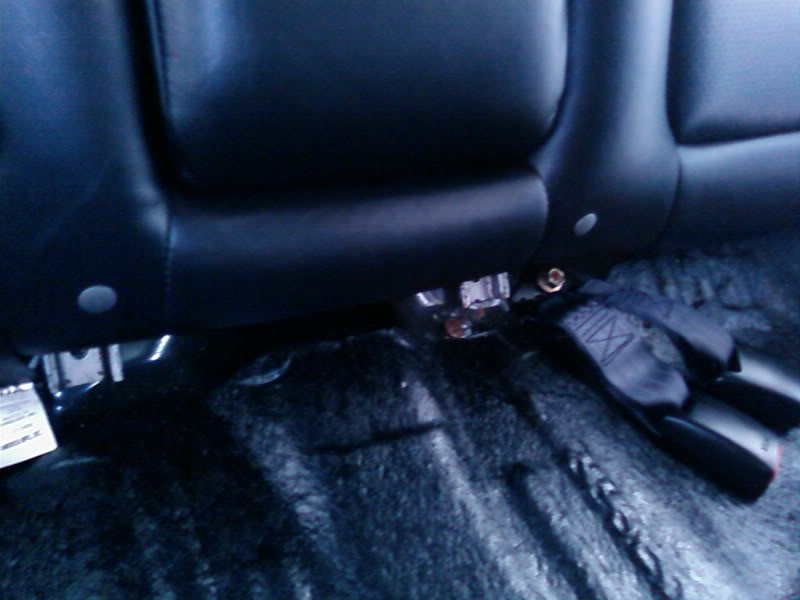
2) To remove the back portion of the seat, on both sides of the seats, close to the doors, there's a 10mm bolt that needs to be taken off. Take both sides off.
3) With the two bolts off, now you need to grab the seat from the bottom and lift up so that the two metal brackets come out and pull out the seat.
4) Now, if you look on either side, you can barely access the top suspension by lifting up the rear deck lid. There are only two 14 mm bolts. Remove that and the top should be about to come out.
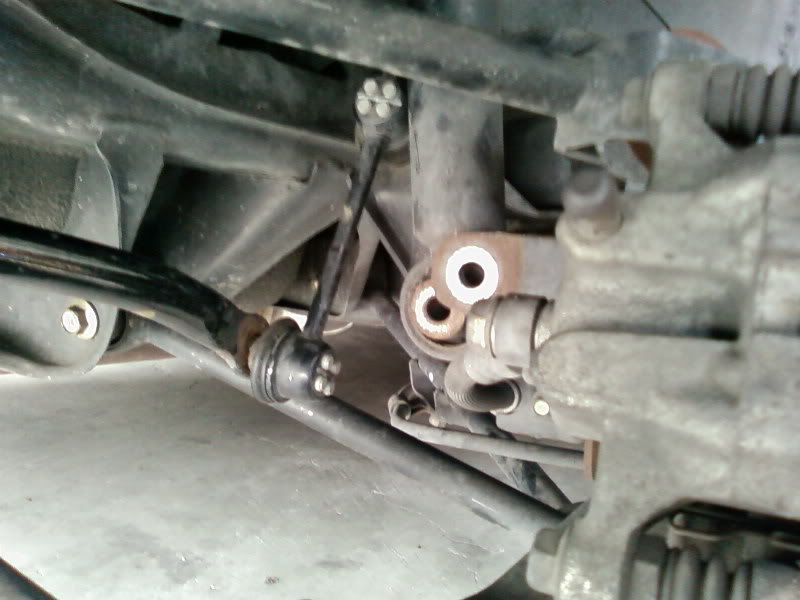
#6 and #7 is the rear end links. It's pretty much a little bar that has two bolts, one on each end. # 9 and #10 is the Link Stabalizer that has to be taken off. If you follow the top line on the diagram, it'll lead you to #6 and #7.
End links are pictured to the left of the shocks,
1) Remove the 17mm Bolt from the LCA.
2) There are two ends on the end link, one that is closer to the engine, and one closer to the trunk. The end that connects to the Rear Sway bar must be taken off first. This is taken off with a 14mm open end/ box wrench with the Hex Key Wrench.
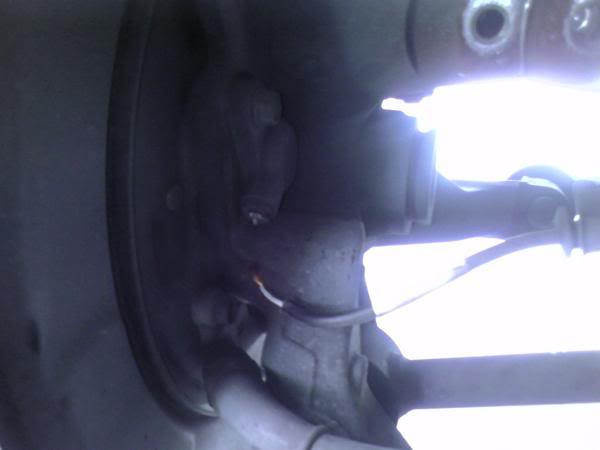
3) Once that end link is taken off, the Link stabalizer must be removed with a 14mm deep socket. Be careful here because there's a wire there that looks like a sensor, so don't rip this. You might mess up and this could happen to you.
4) Once the Link Stabalizer bracket is off, you'll have room to push the end of the strut away from you through to the bottom. Have someone push down on the brakes and you'll have enough clearance to take that sucker out.
The rear strut has a big boot that covers the rubber bump stop, so remove it and you'll reveal the bump stop. It looks a little different from the front, but I was able to take this out from the pistons to cut it. I just cut the bottom part and placed it back in .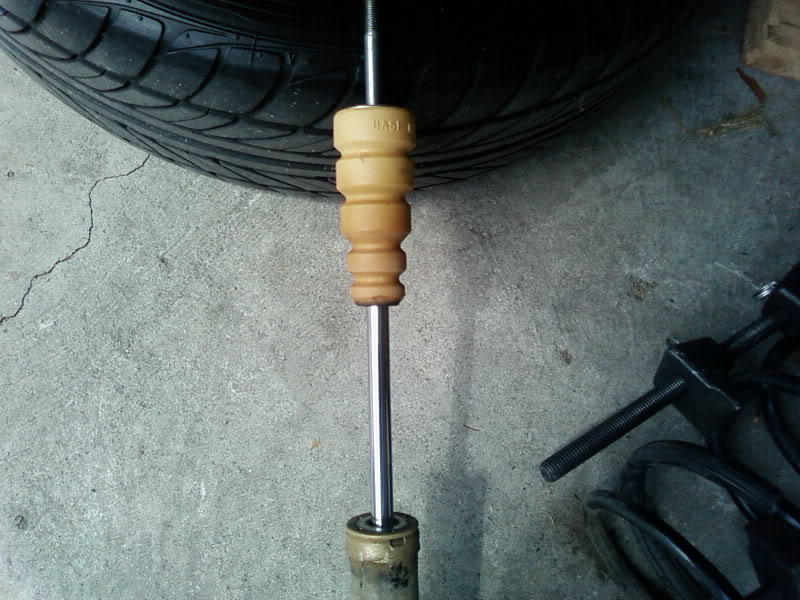
Do the same as you did to the front suspension and it's time to put it back in.
1) Shove the suspension back on and screw the top portion in first.
2) Slide the bottom of the strut so that it's aligned with the LCA. The Link stabalizer doesn't have to go in yet.
3) Slide in the 17 mm bolt through to the other side where it meets the Link Stabalizer.
4) Screw in the 17 mm bolt so that it screws into the link stabalizer bracket a bit.
NOTE : If you look at the Link Stabablizer bracket, where it meets the LCA, it has a little groove that has to go back into the LCA. Make sure it does this when the 17 mm bolt is tightening up.
5) Now, take the 14 mm bolt and bolt up the Link Stabalizer, but don't tighten it all the way. You have to put the end link back on the sway bar. I found out that it was hard for me to the end link back on the sway bar, so what I did was remove the other end link from the Link Stabalizer. Then put the end link back on the sway bar.
6) Tighten the 14mm bolt on the Link stabalizer all the way.
7 Tighten the 17 mm bolt on the LCA all the way.
8) Now, you must put the end link back on the Link Stabalizer. It's going to be difficult, but what I did was press down on the rear sway bar so that the bolt slides into the hole. It's still not all the way in right now, but using a jack, lift up the brakes. This will lift up a little bit and will allow for the bolt on the end link to go through, allowing you to put the bolt on.
9) Tighten everything thing and you are done!!!
I spoke to Kris( Fsttyms1) about this process and he was able to remove the rear without having to remove the end links. He just removed the Link Stabalizer and was able to move it out of his way and put it back with not problem. Unfortunately, it didn't work out too well for me, so I did a little extra work. You guys can use anyway to remove the rear, but the way that I explained was the best way for me. Repeat for the other side and put back your seats and you are done.
Last step is to wash your car and take lots of pictures!! Haha. You've done it. You've saved yourself from 150 to 200 bucks of labor.  Hope that helps.
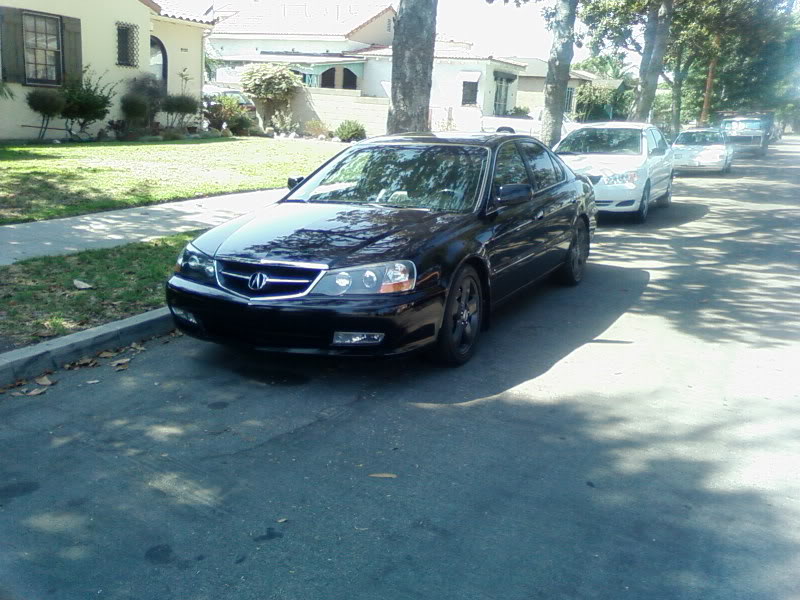
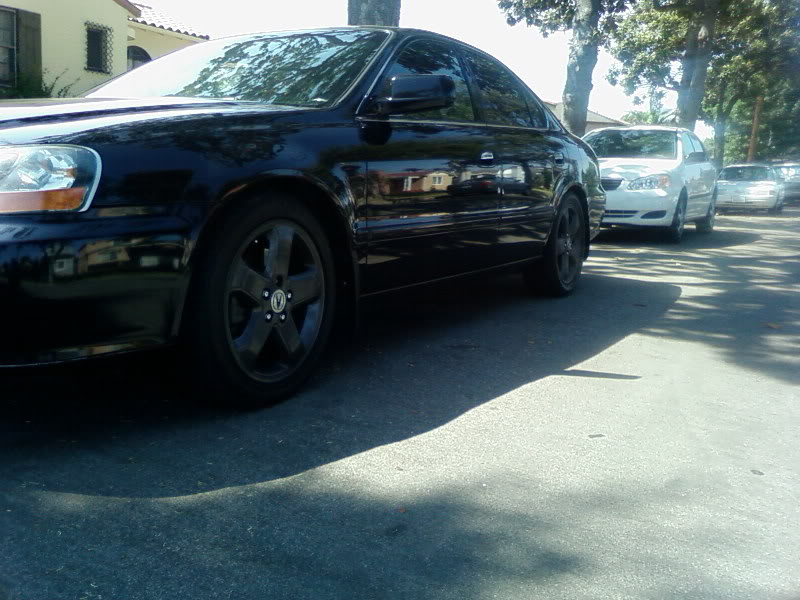
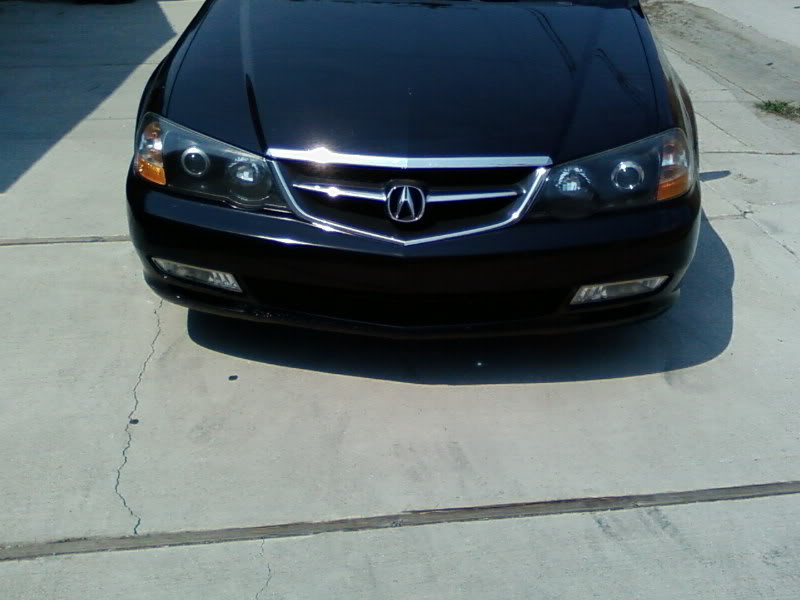
Before: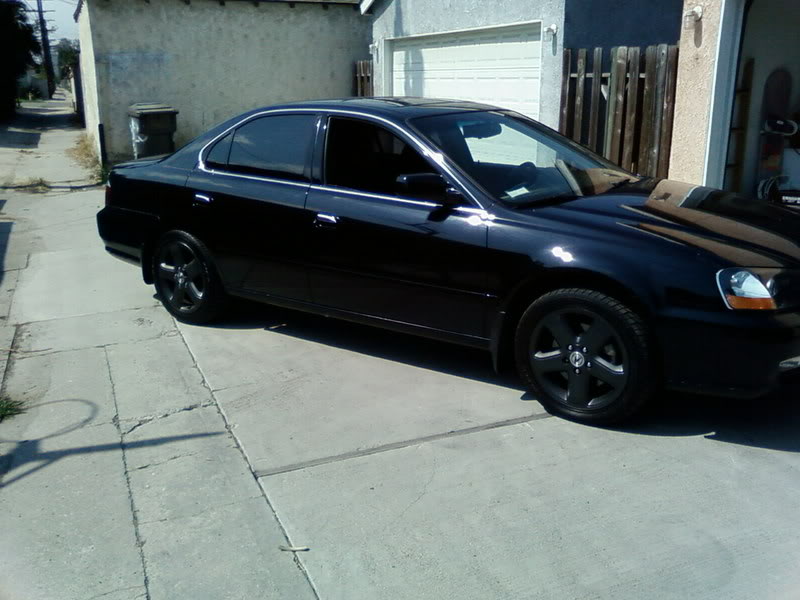
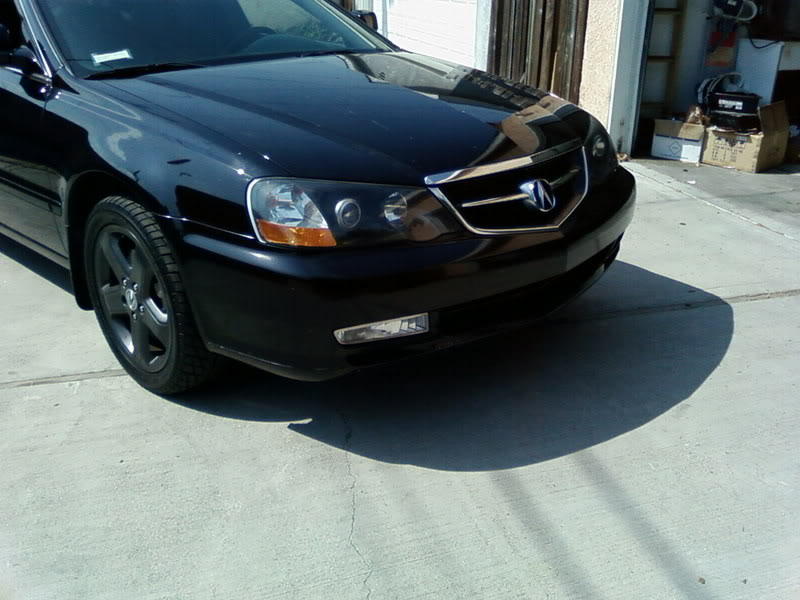
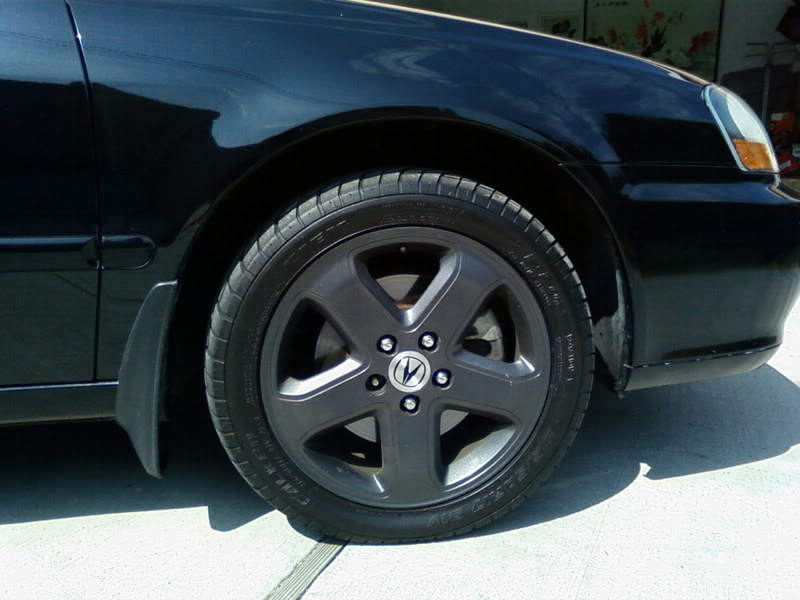
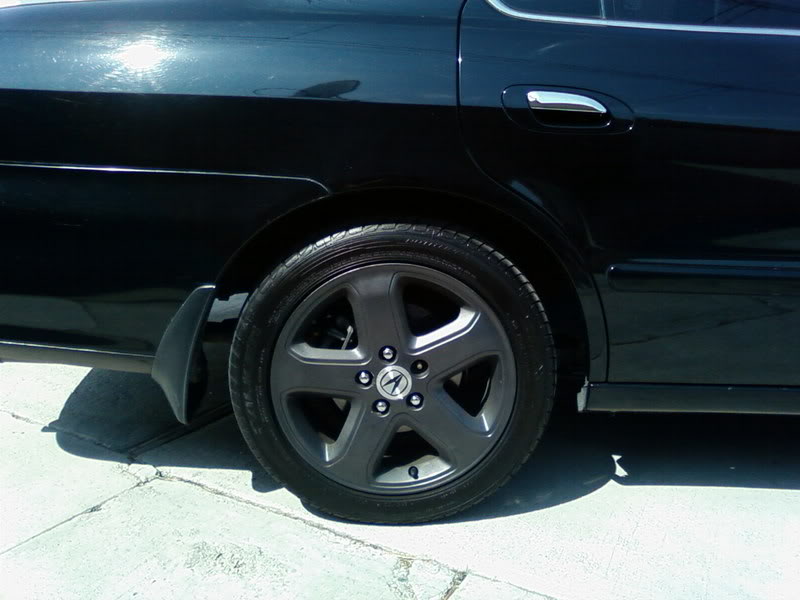
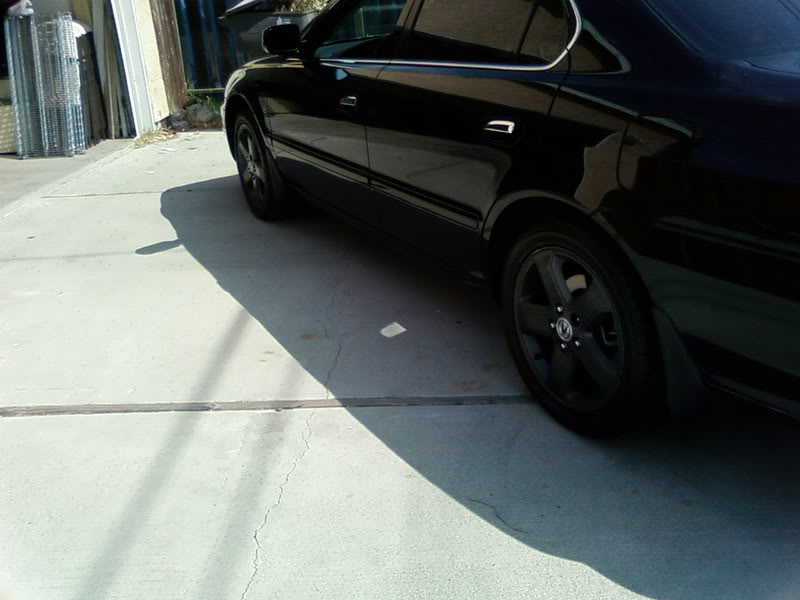
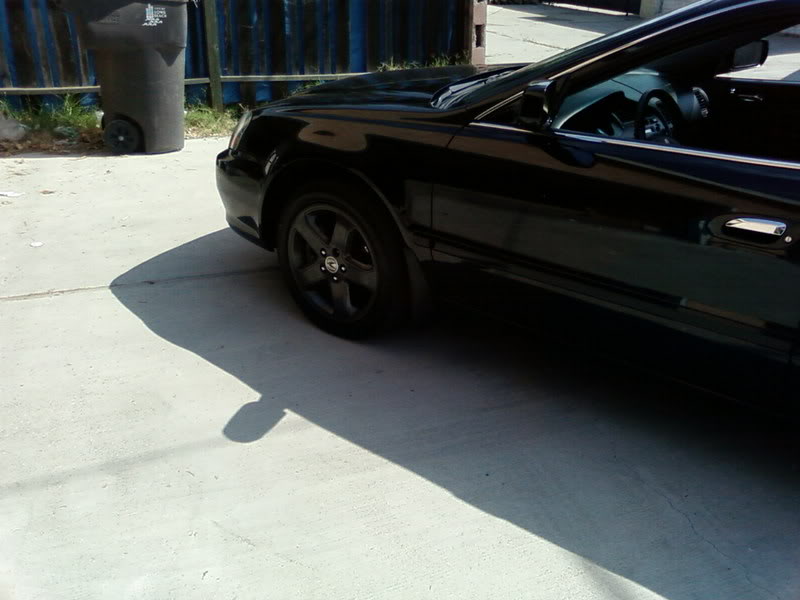
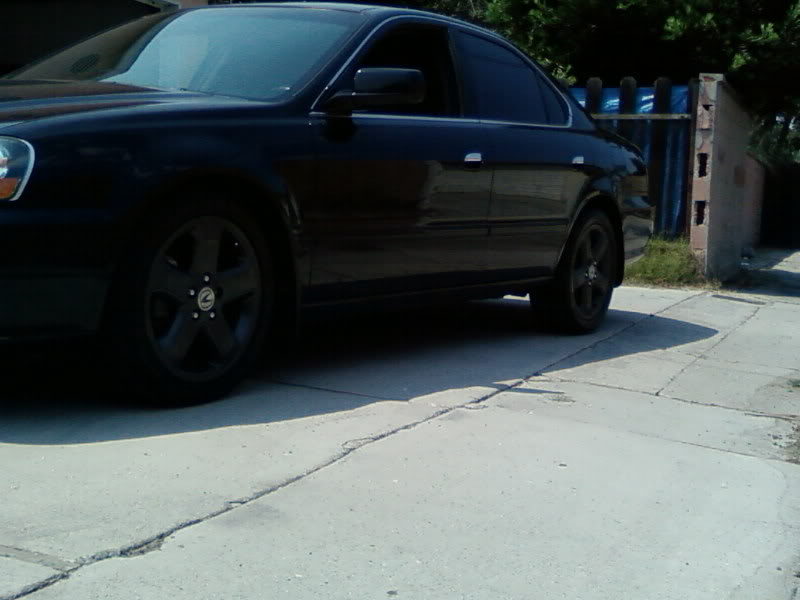
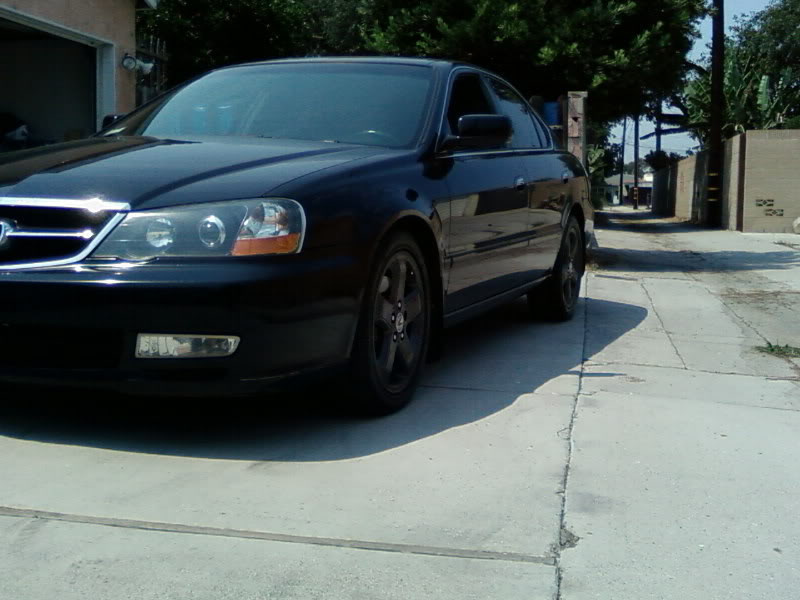
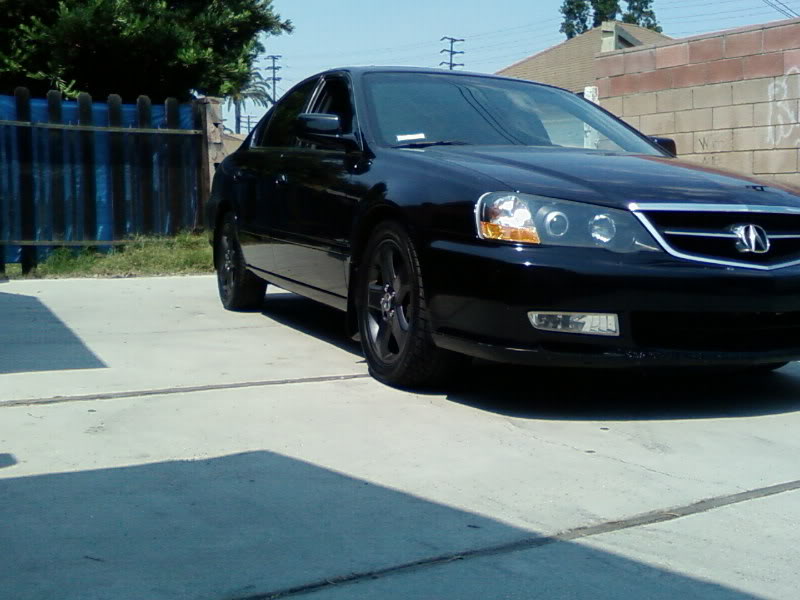
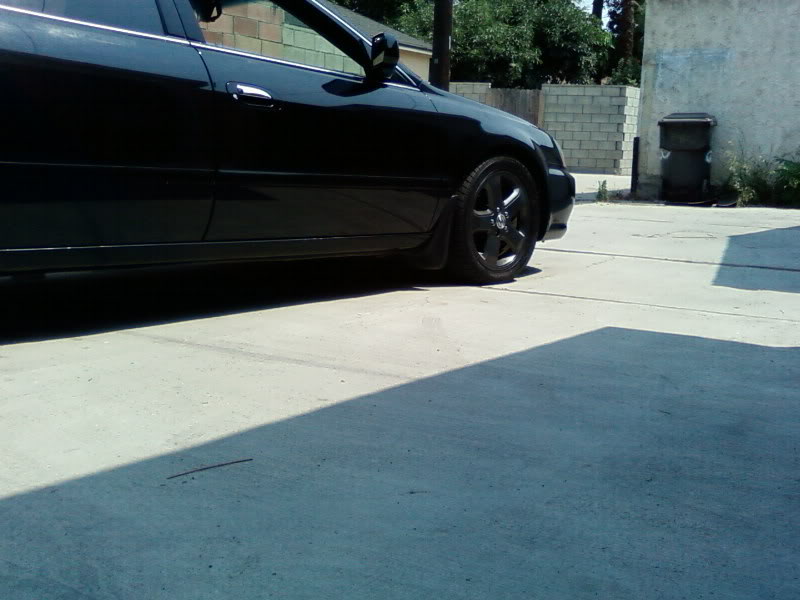
After:
8-7-2007
yeah, I didn't change out the struts. But the ride is way better than stock. It feels great actually. Handles very nice too. Overall, I'm very happy with the S-Techs. I was afraid that once I drop my car, it would be all bouncy and not ride like a stock car, but it drives like it was stock, but a bit better because of the handling now.
