You must be logged in to rate content!
4 minute read
Pics! Aftermarket Headlight Housing Assembly Installed - Headlight Condensation Fix
Compliments @ boorah623 @ https://acurazine.com
10-9-2016
Hey Guys,
So, as most people have experienced, the driver's headlight in my 03 TL-S went out a few months back. The headlight got pretty yellow and ugly from all the water build up. The passenger side headlight was still fine but the assembly showed that it was starting to yellow too as that top. Some pictures of the way it was:
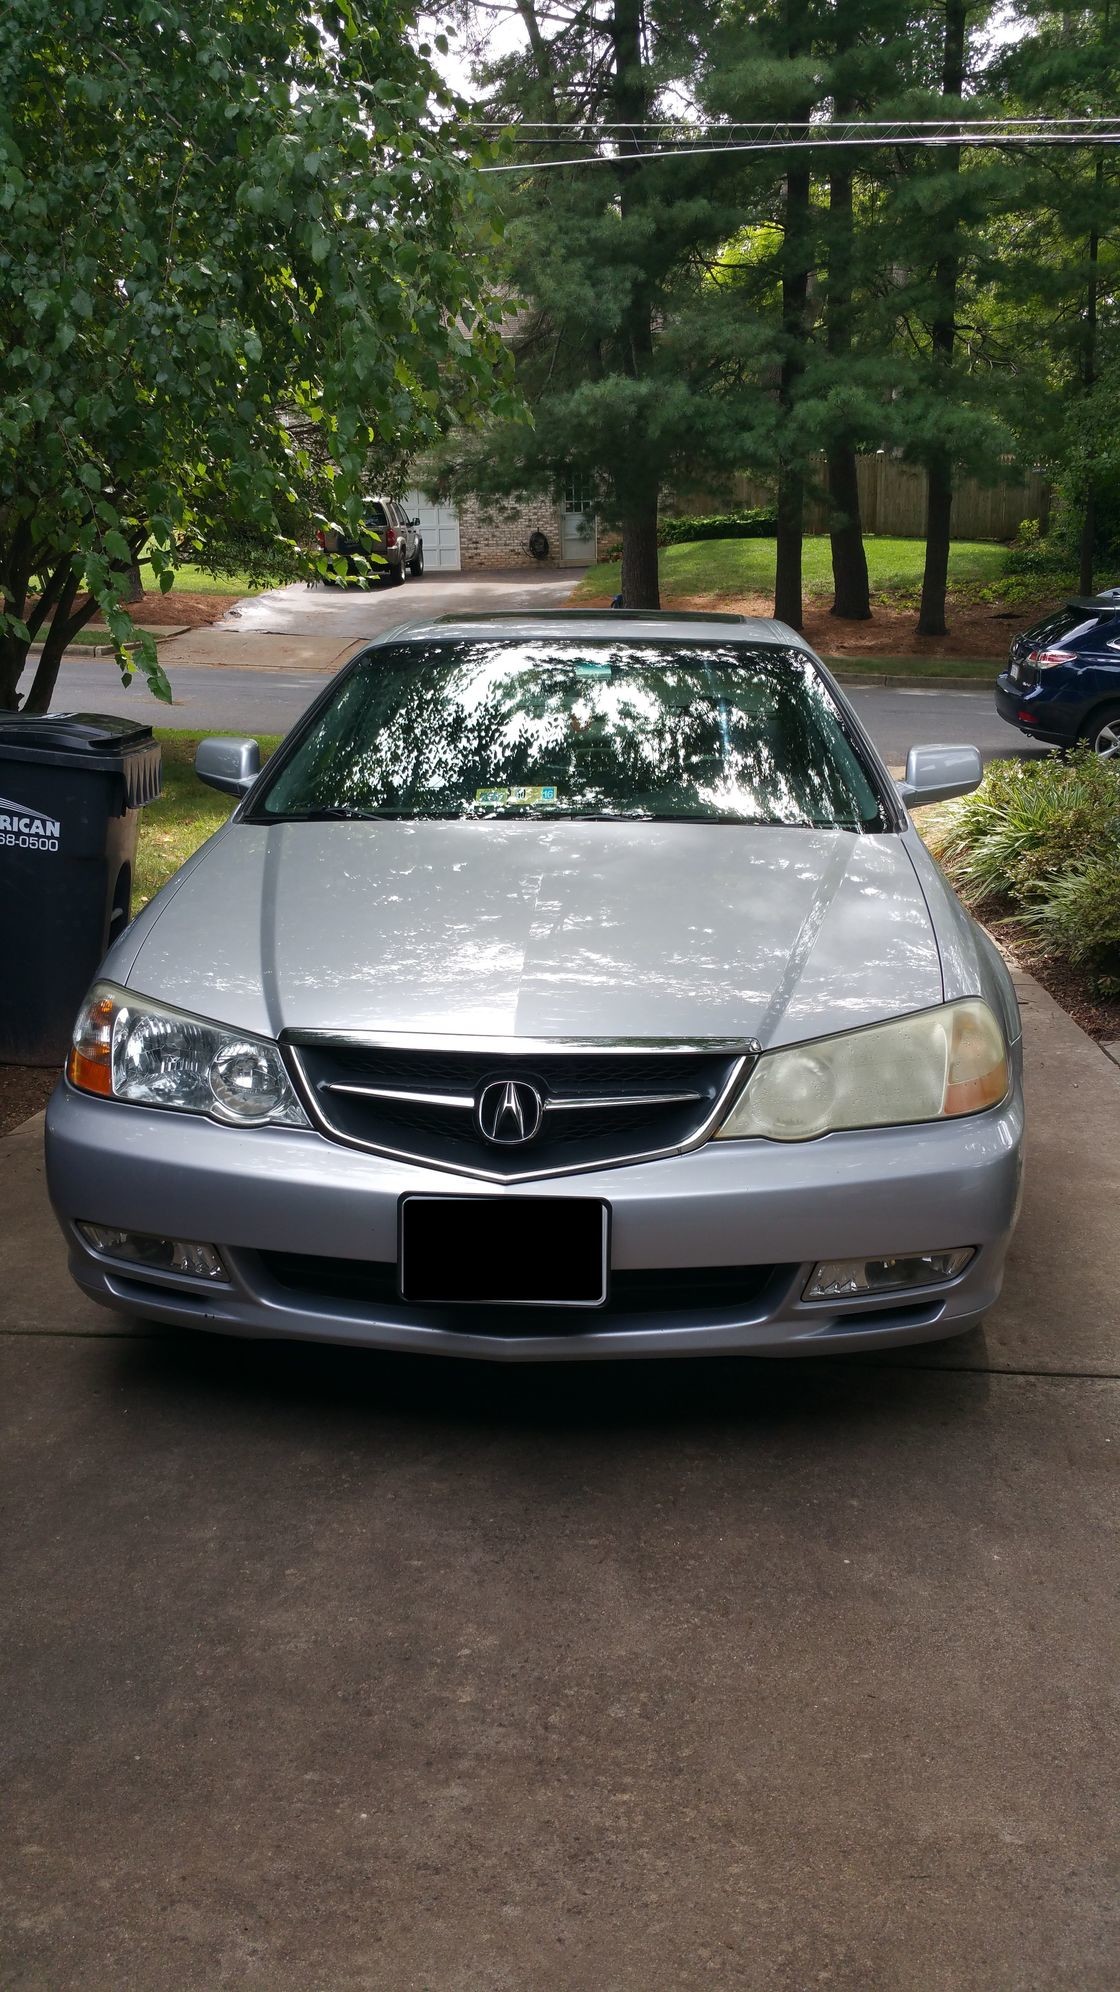
Driver's left is so yellow, but you can also see some yellowing on passenger's side top.
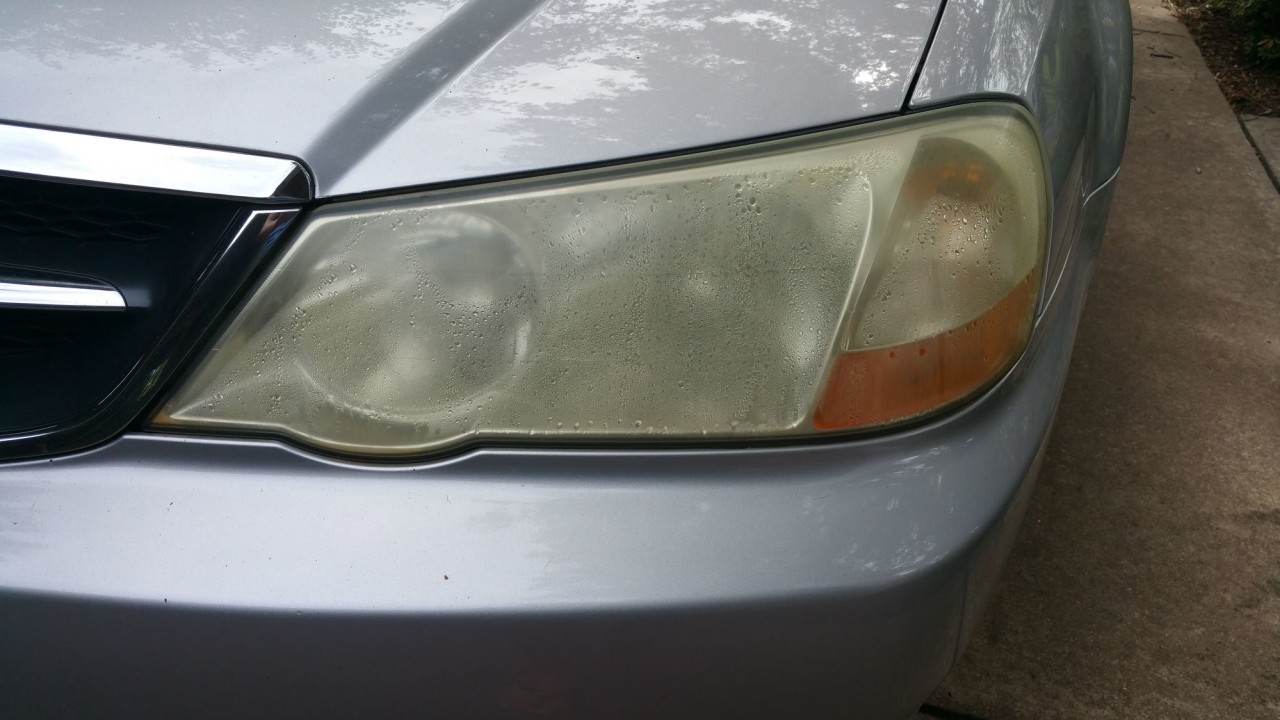
Like a rainstorm inside...
Thanks to the folks on this forum, I mustered up the courage to try to tackle this myself (and also after getting a quote for $300+ to fix just the one). This thread and video was super helpful: https://acurazine.com/forums/second-...type-s-941509/
I decided to splurge for nicer aftermarket housing / assemblies just because I was tired of looking at the originals and didn't really like the amber side marker. For the electronics, I know folks have suggested getting aftermarket (ex: HIDExtra), but I decided, rightly or wrongly, to go with OEM. I didn't really want to deal trying to find a place to stick the aftermarket ballast and then cover up the bottom hole.
Anyways, in doing all of this, I discovered a few things:
- The front bumper has mostly push type snap connectors and just 4 screws: 2 on the bottom and 2 by the wheel wells. The ones by the wheel well are held by some plastic / nylon grommets... I had trouble with one of these (luckily just one) as the grommet would turn as I was unscrewing, so I could never get the screw out. So, I got around this by just swinging the bumper off to the side while working it. I think the other option is to open up the wheel well panel and try to vise grip the grommet. Anyways, poor choice of the engineers to use that grommet thingie IMO.
- Swapping the electrical components from the working side to the non-working side seemed like a good idea to confirm what really needs to be replaced. When I did this, I realized I needed a new ballast. But then weeks later, I realized the igniter was bad--60% of the time, it worked every time. Luckily, a local Ziner had leftover parts from his aftermarket swap.
- Even after swapping to blackout housing and clear side marker, I was still left with amber color from the turn marker. I guess there are some chrome options to consider, but most of the ones I could find had poor reviews.
- I ended buying new bulbs from Retrofit Source and got the Morimoto in 6500k. Unfortunately, I made this purchase before taking everything part and testing the parts. It turns out I didn't need them and the original bulbs still worked. Oh well...
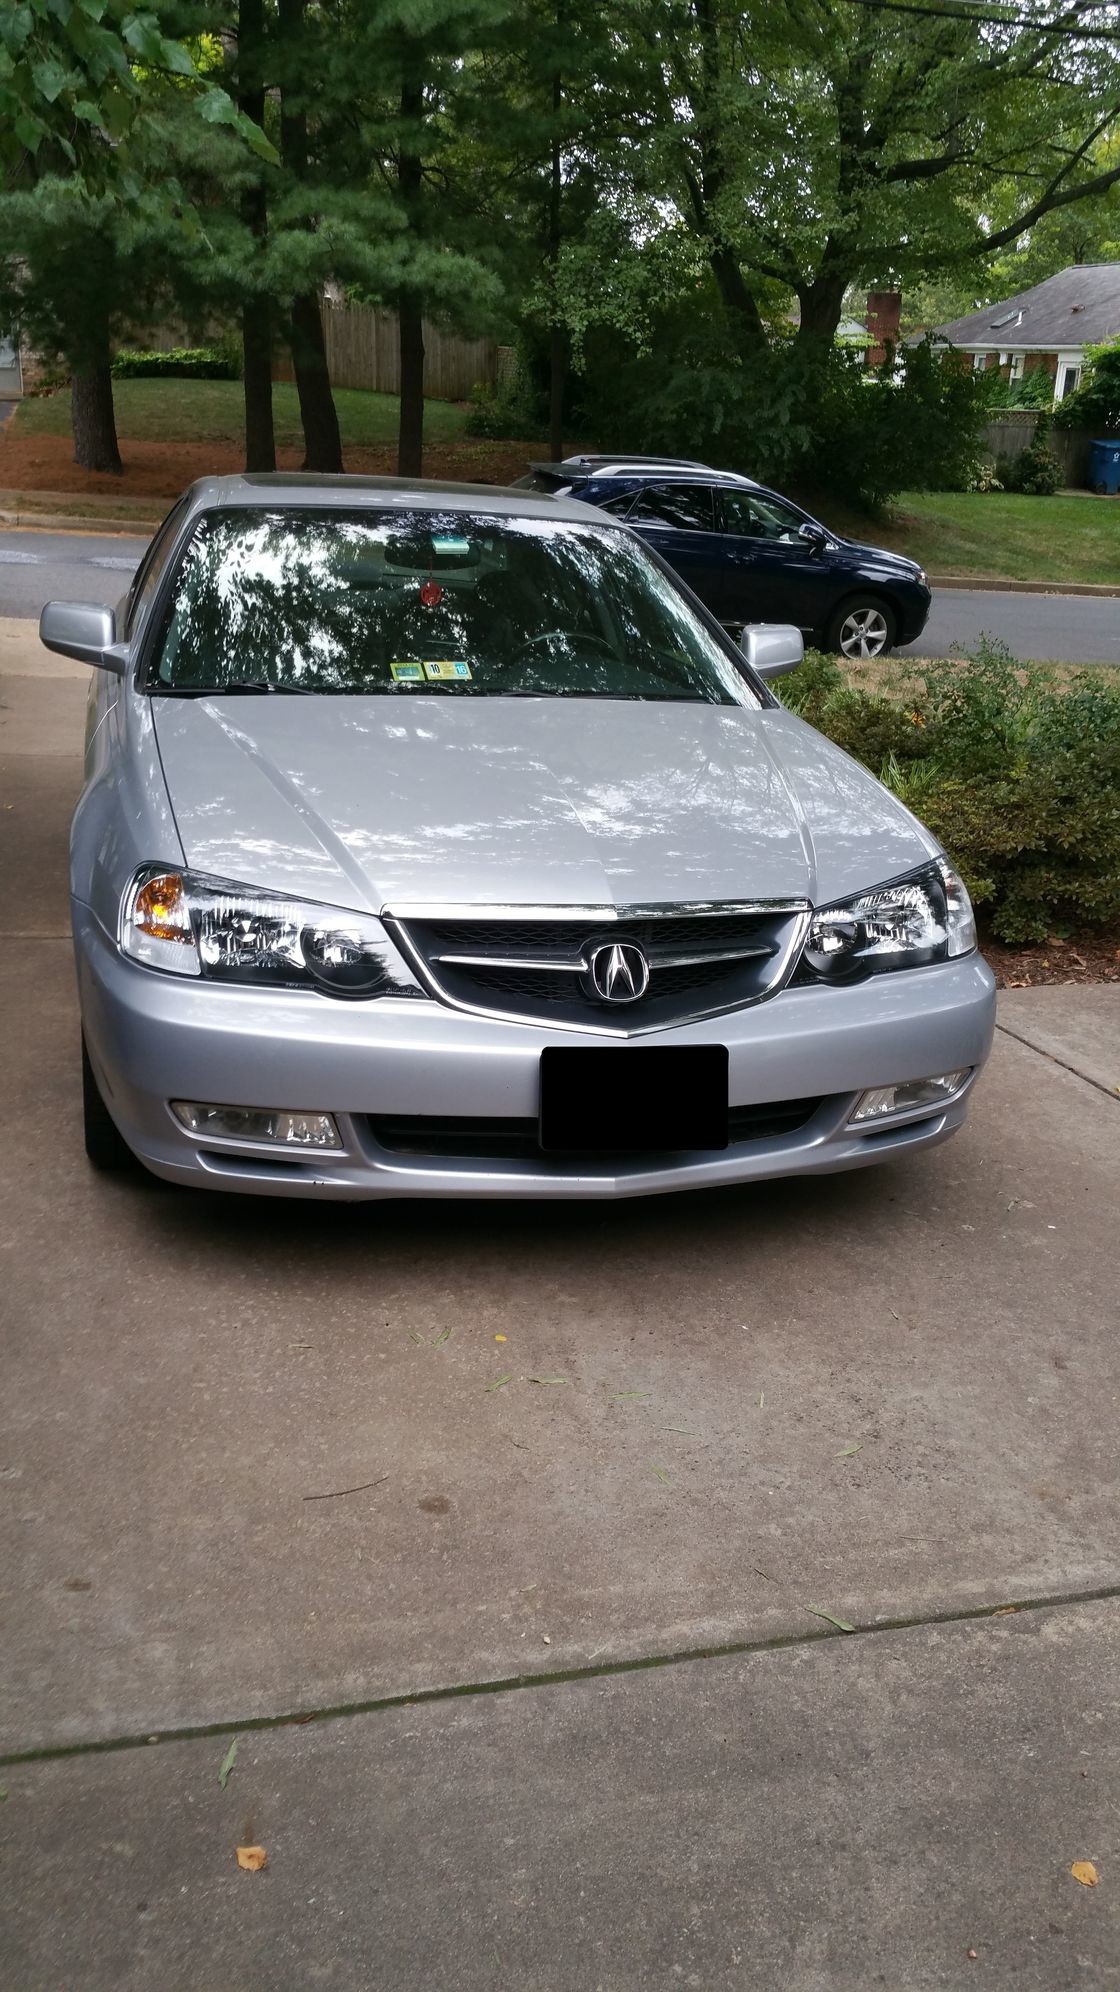
Anyways, that's a lot of words, here are some pictures of the completed look. What do you guys think?
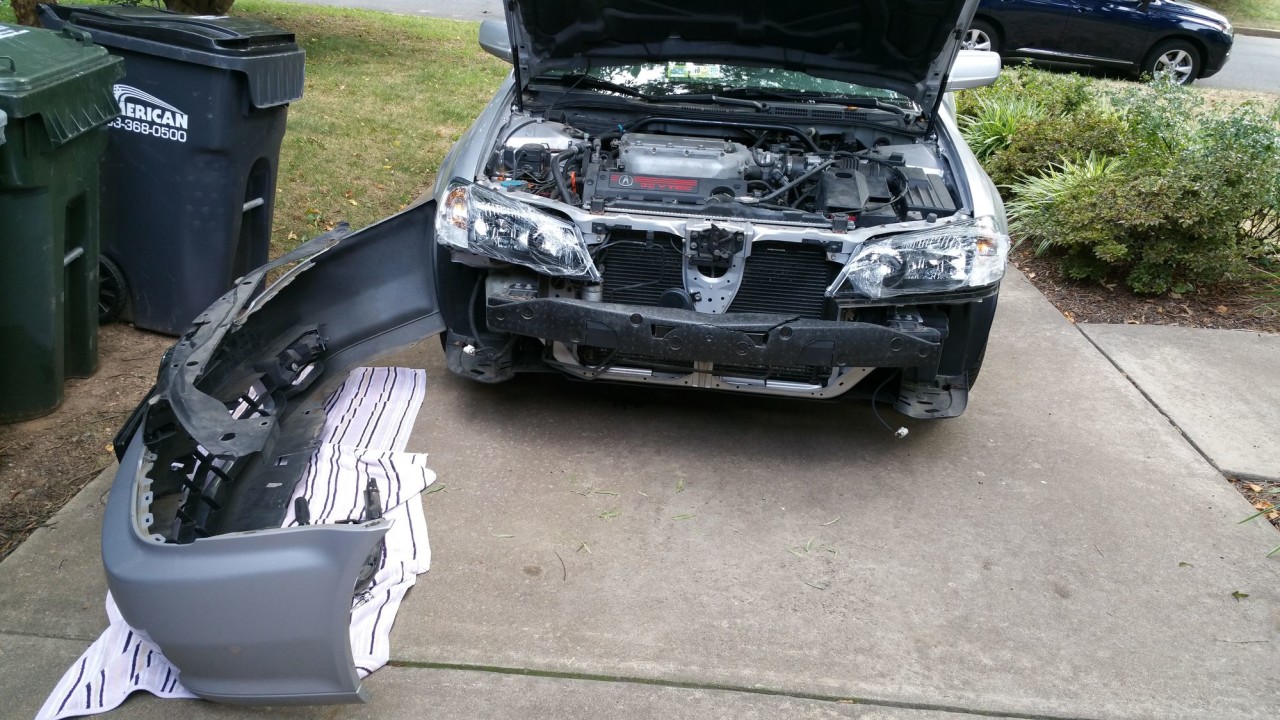
Couldn't get that one screw off so just swung bumper around.
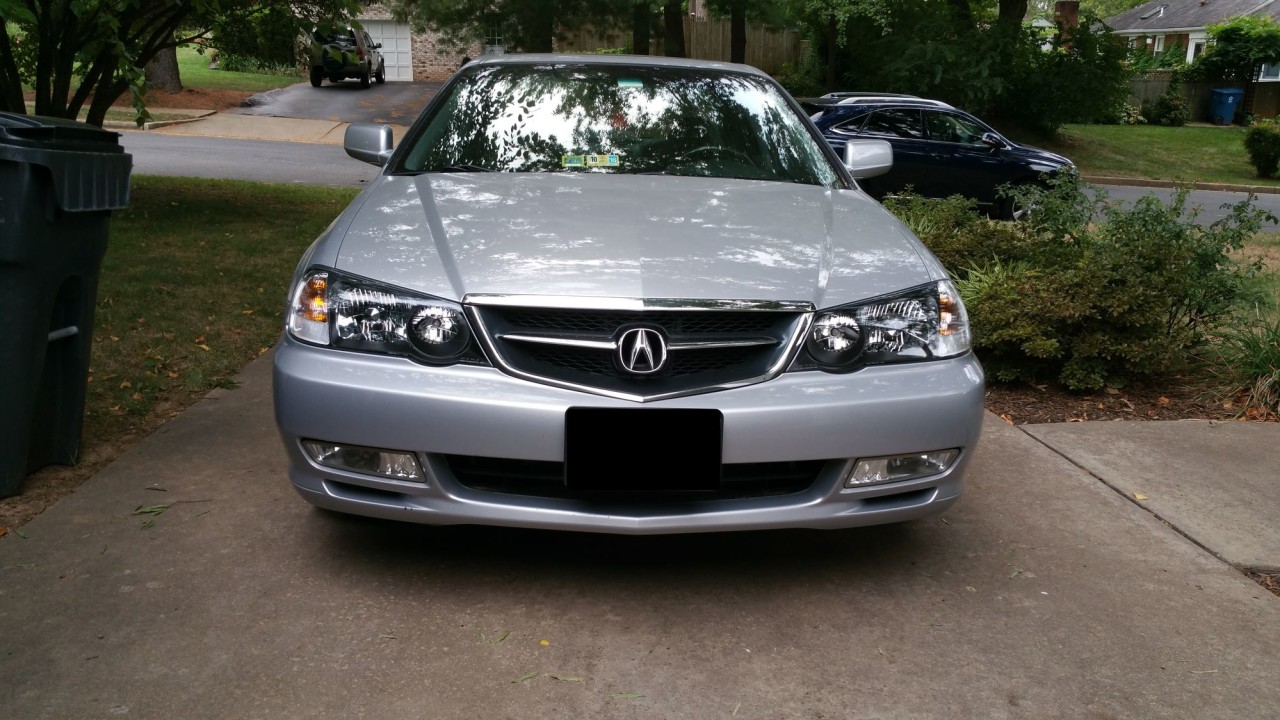
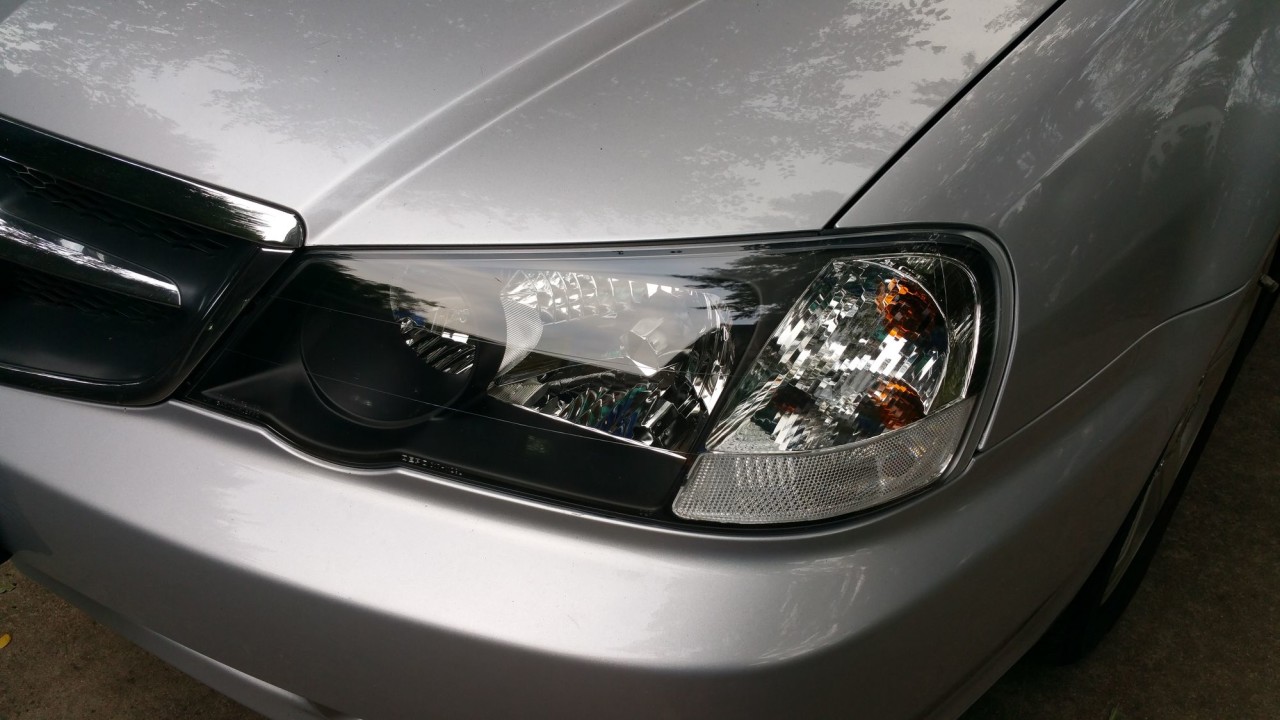
The amber turn bulb is clearly visible :/