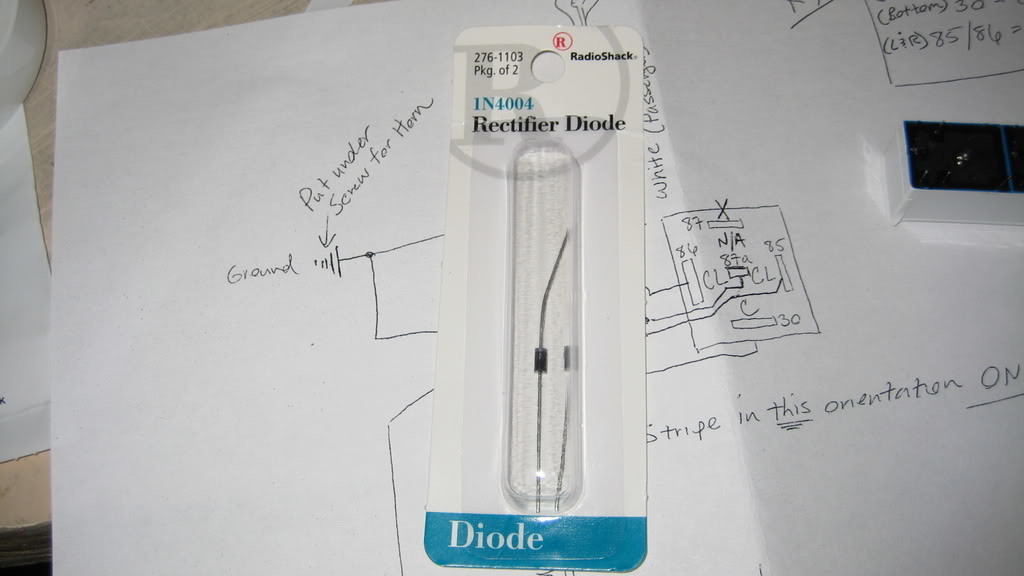
- -(4) diodes from radioshack (as shown below)
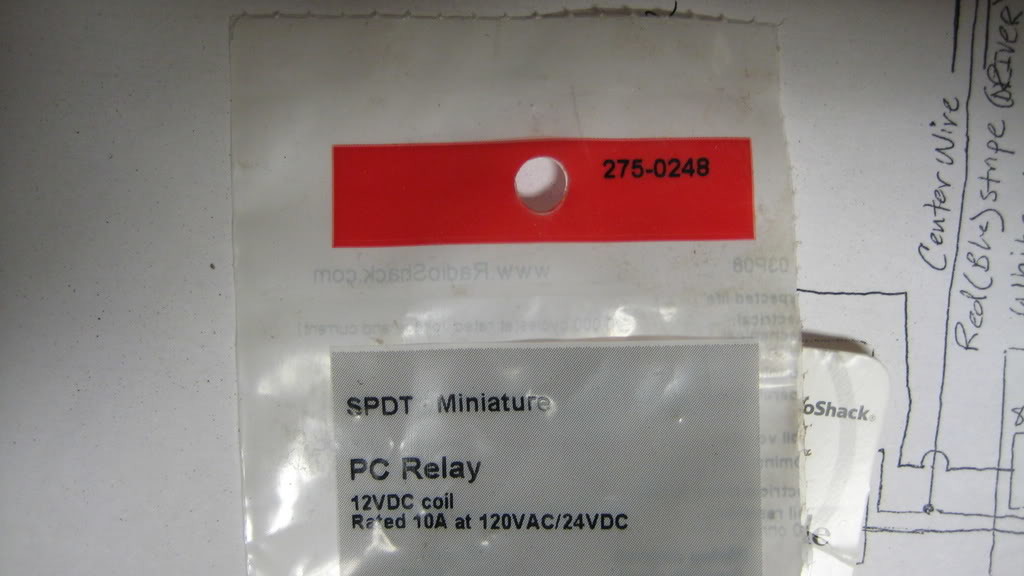
- -(4) relays from radioshack (as shown below)
- -medium flat head screwdriver
- - medium Philips head screwdriver
- -Soldering Iron
- -Solder
- -Wire snip/wire stripper
- -flux
You must be logged in to rate content!
5 minute read

Blinking sidemarker DIY guide!
Compliments of gerzand @ https://acurazine.com
1-4-2009
This past week I tackled a mod that I had been wanting to do for a while now: Blinking front Sidemarkers.
While there are some threads in the 3G garage that cover this topic, they are a bit old and dont elaborate on much of the wiring sprefic to any ONE brand of relay. So i decided to to this on a radioshack relay that "Kennedy" showed some basic pictures of in one of those threads. I do appreciate all the into provided in those threads. They have definitely helped me to do this to my own car and create this DIY guide.
This mod requires the following tools:
-medium flat head screwdriver
- medium Philips head screwdriver
-Soldering Iron
-Solder
-Wire snip/wire stripper
-flux
-(4) relays from radioshack (as shown below)
-(4) diodes from radioshack (as shown below)
-About 4 hours of labor
The diodes:
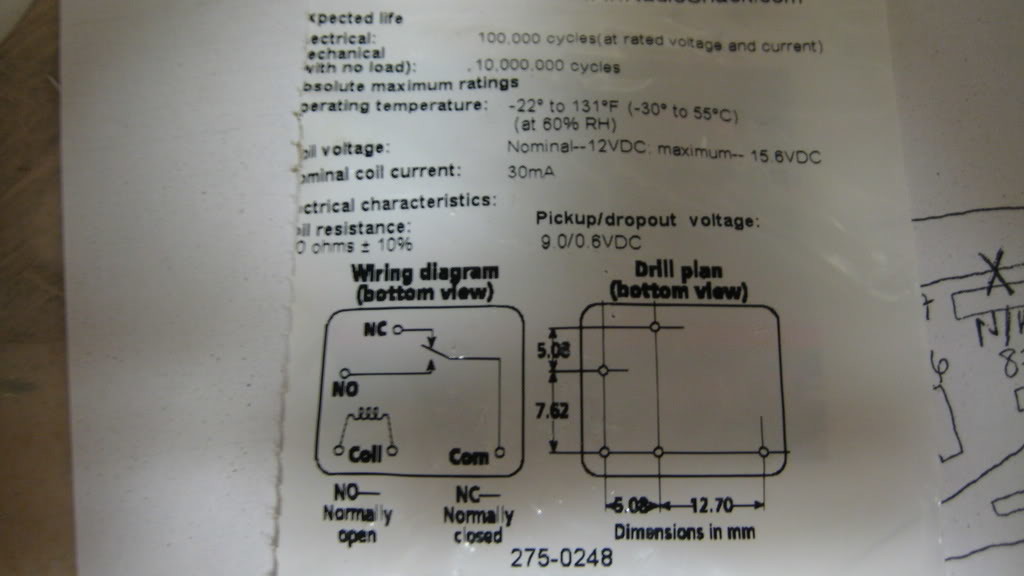
The relays:
Starting off:
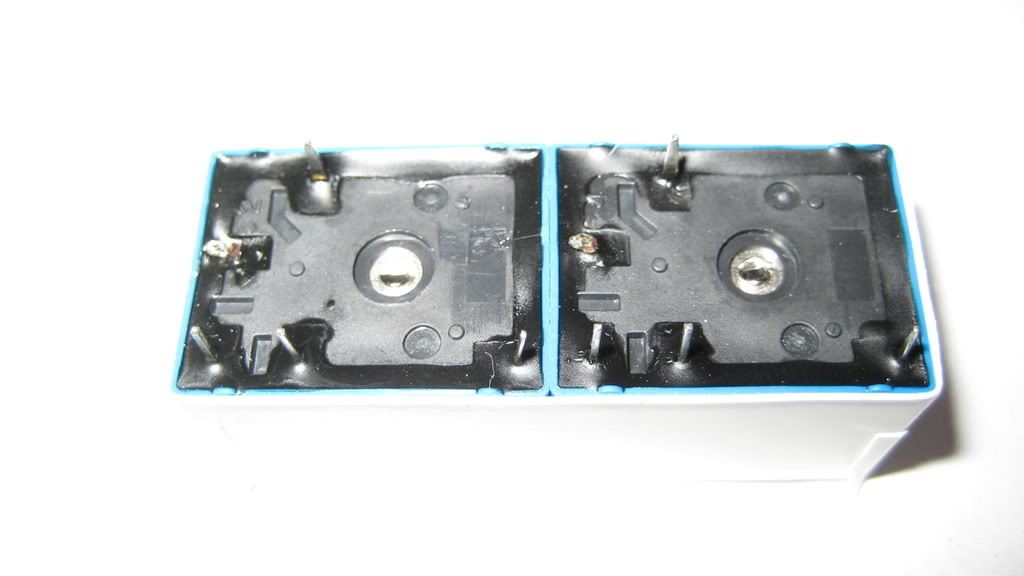
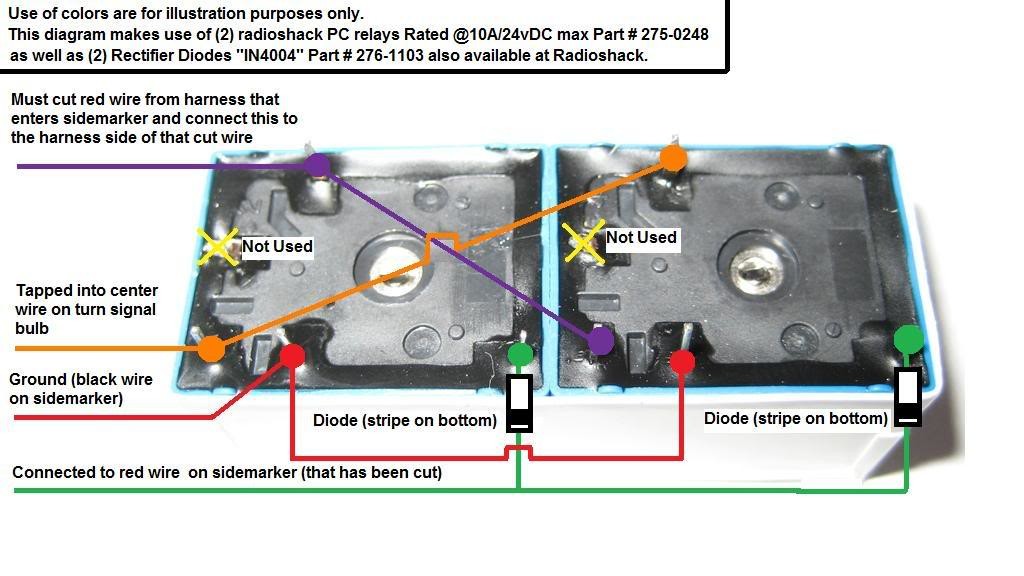
Use the diagram/pictures below to purchase what you need from Radioshack and wire up 2 identical pairs of relays. Tape the relays together using eectrical tape than then wrap them in electrical tape after you are done wiring them to make them relatively water proof. I also used some "liquid" electrical tape.
One pair of relays will be used for the drivers side sidemarker and the other for the passengers side sidemarker. Make sure to give ample length to the wire which runs to the turn signal bulb harness (about 4 feet is a safe bet). The other 3 remaining wirescoming from your relays can be left at about 12-14 inches long.
Diagram:
After wiring:
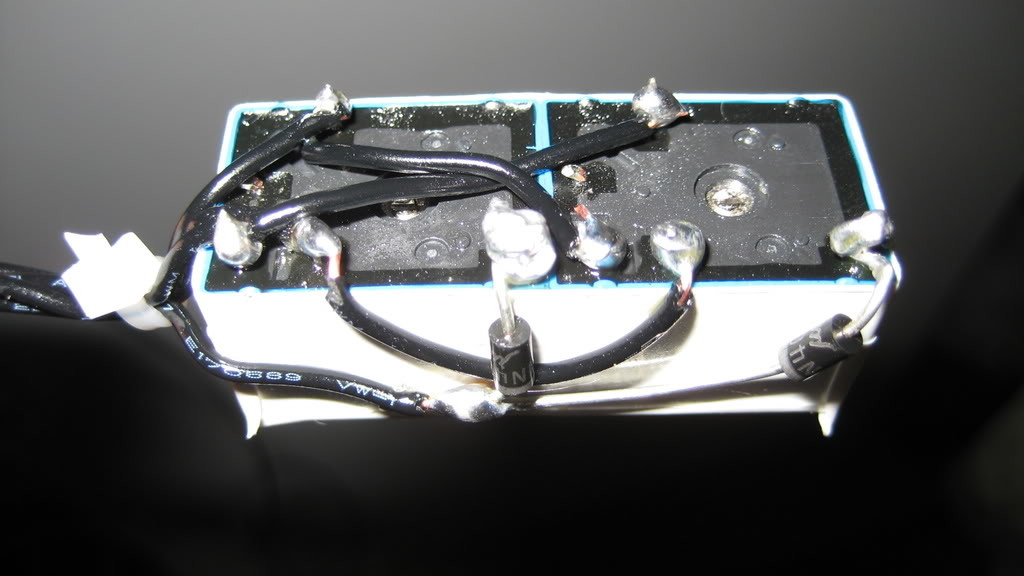
Waterproofed:

The installation:
We will start by removing the drivers side sidemarker. To do this, turn the steering wheel all the way to the left so that you have room to get behind the wheel.
Once you are at this point, remove the (4) philips at the bottom of the wheel well as well as a clip just above those so that the wheellining can be pulled back. Pulling back the wheel lining can be tricky. But just be rough, you wont hurt anything. It's made of a very tough plastic.
Once the wheel lining is pulled back, put your hand up to where the sidemarker is and depress the clips on either side that have been designed to hold the sidemarker in place. The sidemarker should now fall out and have its harness attached. The diagram below explains which wires from the relays need to be wired to this.
Now, turn the wheel all the way to the right so you can access the rear portion of the headlight (and most importantly the turn signal bulb/harness). Remove the necessary screws/clips as we did for the rear of the wheel well. Once exposed, you should see the turn signal bulb housing, turn the bulb until you can remove it and use the extra slack length in the harness to tap into the bulb's center wire as described above in the diagram.
From this point onward, things should be pretty self-explanatory. Button everything up the way you found it and the sidemarkerswill snap back into place.
I'll be posting a video soon as well.
Thanks!