You must be logged in to rate content!
9 minute read
Full Install w/Pics - BlitzSafe HON/Bluetooth V.2X
Compliments of Anthracite'04 @ https://acurazine.com
12-26-2014
With X-mas festivities ended unusually early this year, I was able to Get a few ours to myself in the driveway to install my new Bluetooth interface!
Before starting, i'd like to point out that trying to find resources was somewhat troublesome with all the dead picture links scattered throughout the forum, so I decided to be as thorough as possible and provide pics of my own. Below are the 2 online resources I used along the way...
1.
Stereo removal video posted by Factory Car Stereo Repair. Most of the steps I took were pulled right from this video, with the exception of the A/C vent removal (not necessary for this install) and the actual removal of the stereo itself.
2. https://acurazine.com/forums/perform...-086-a-590326/
Another thread w/ pics explaining the removal of the center console.
Required Tools:
1. Phillips screwdriver. Preferably magnetized.
2. Some sort of panel removal tool (I used a butter-knife wrapped in vinyl bc i'm cheap)
Optional:
1. Gloves of some kind (you'll see why this may be important later in the post)
2. A headlamp if you're doing this at night like I did.
So let's get started!!
Here's the application list which came with the unit
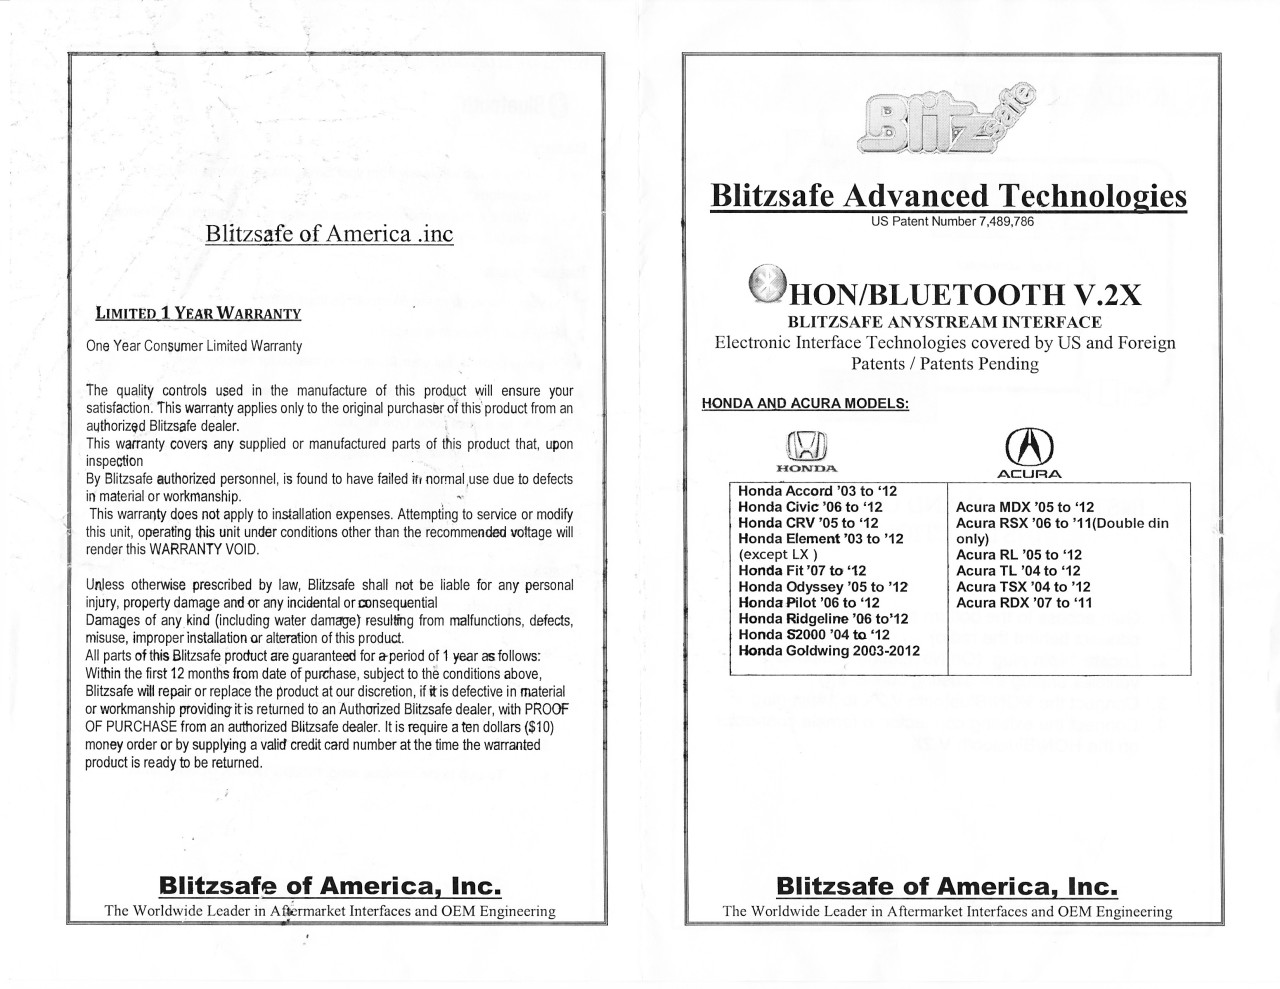
Instructions...
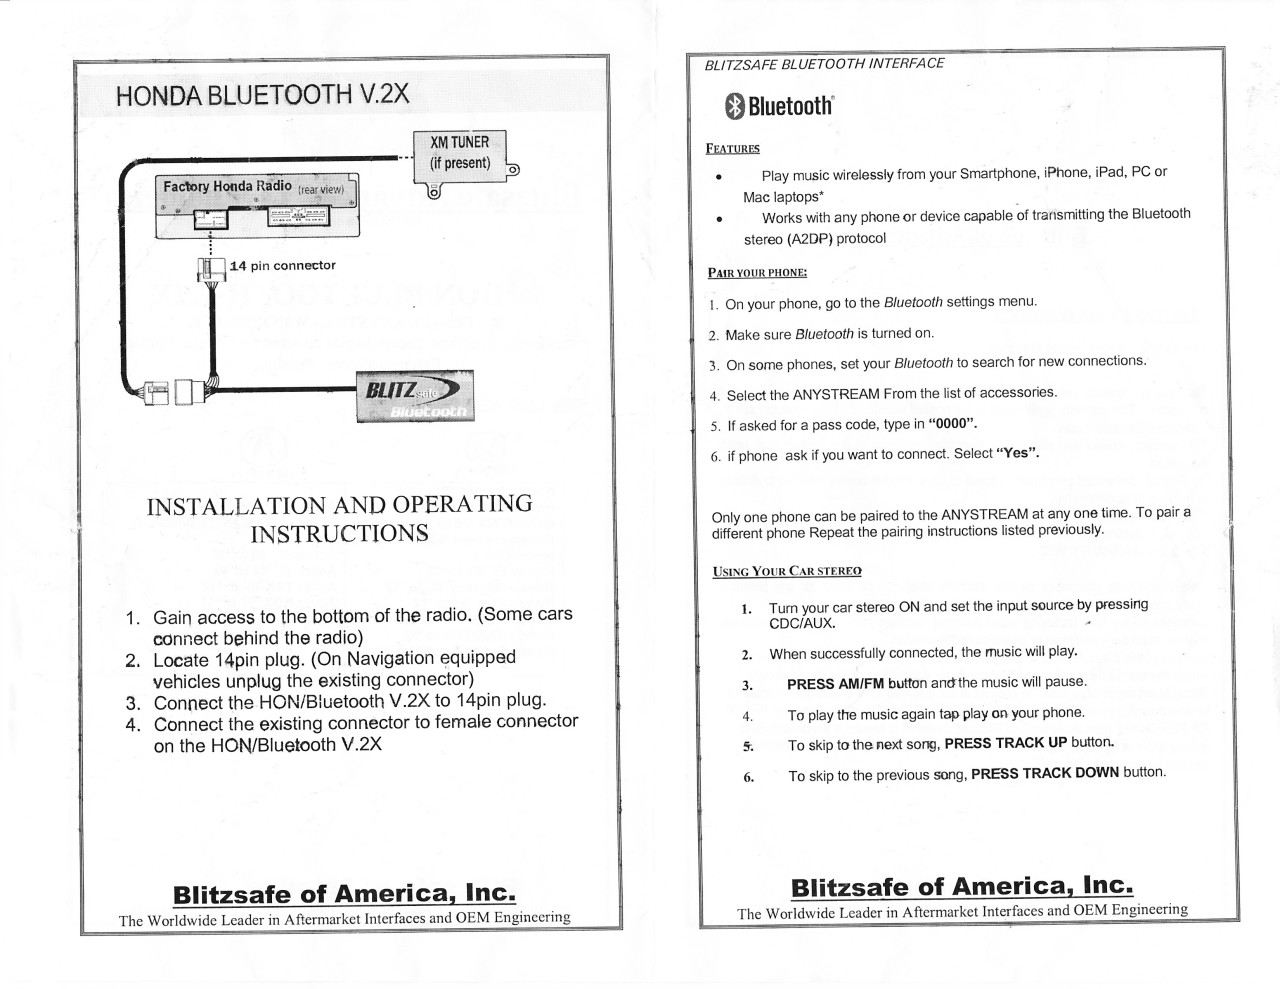
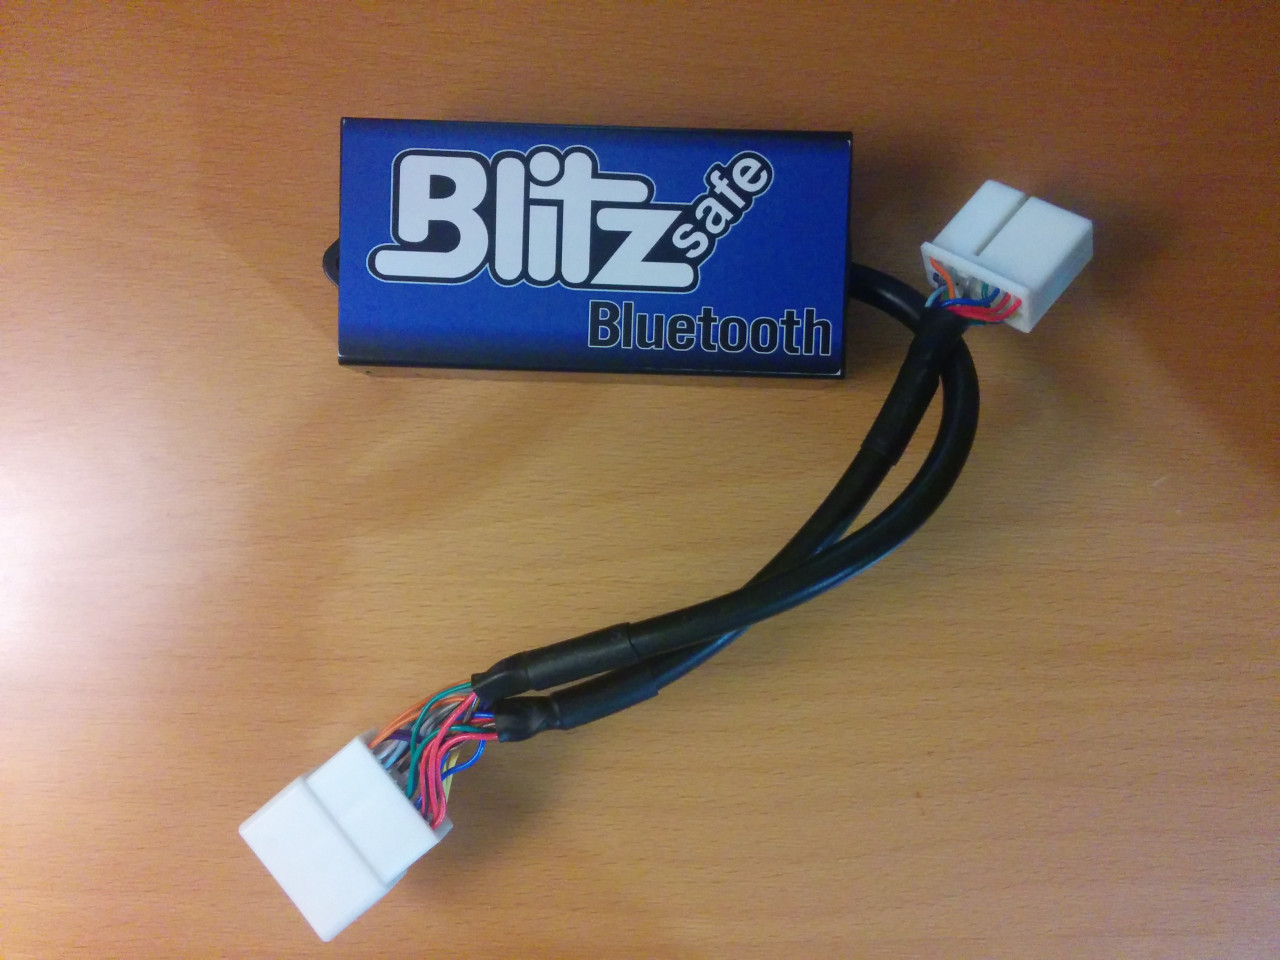
The unit we're installing - BlitzSafe HON/Bluetooth V.2X
As you probably guessed, the first step is to remove the silver trim pieces from the console. Shown in video linked above.
When those are out, you want to remove this screw. It's located on the bottom right corner of the panel under the steering wheel.
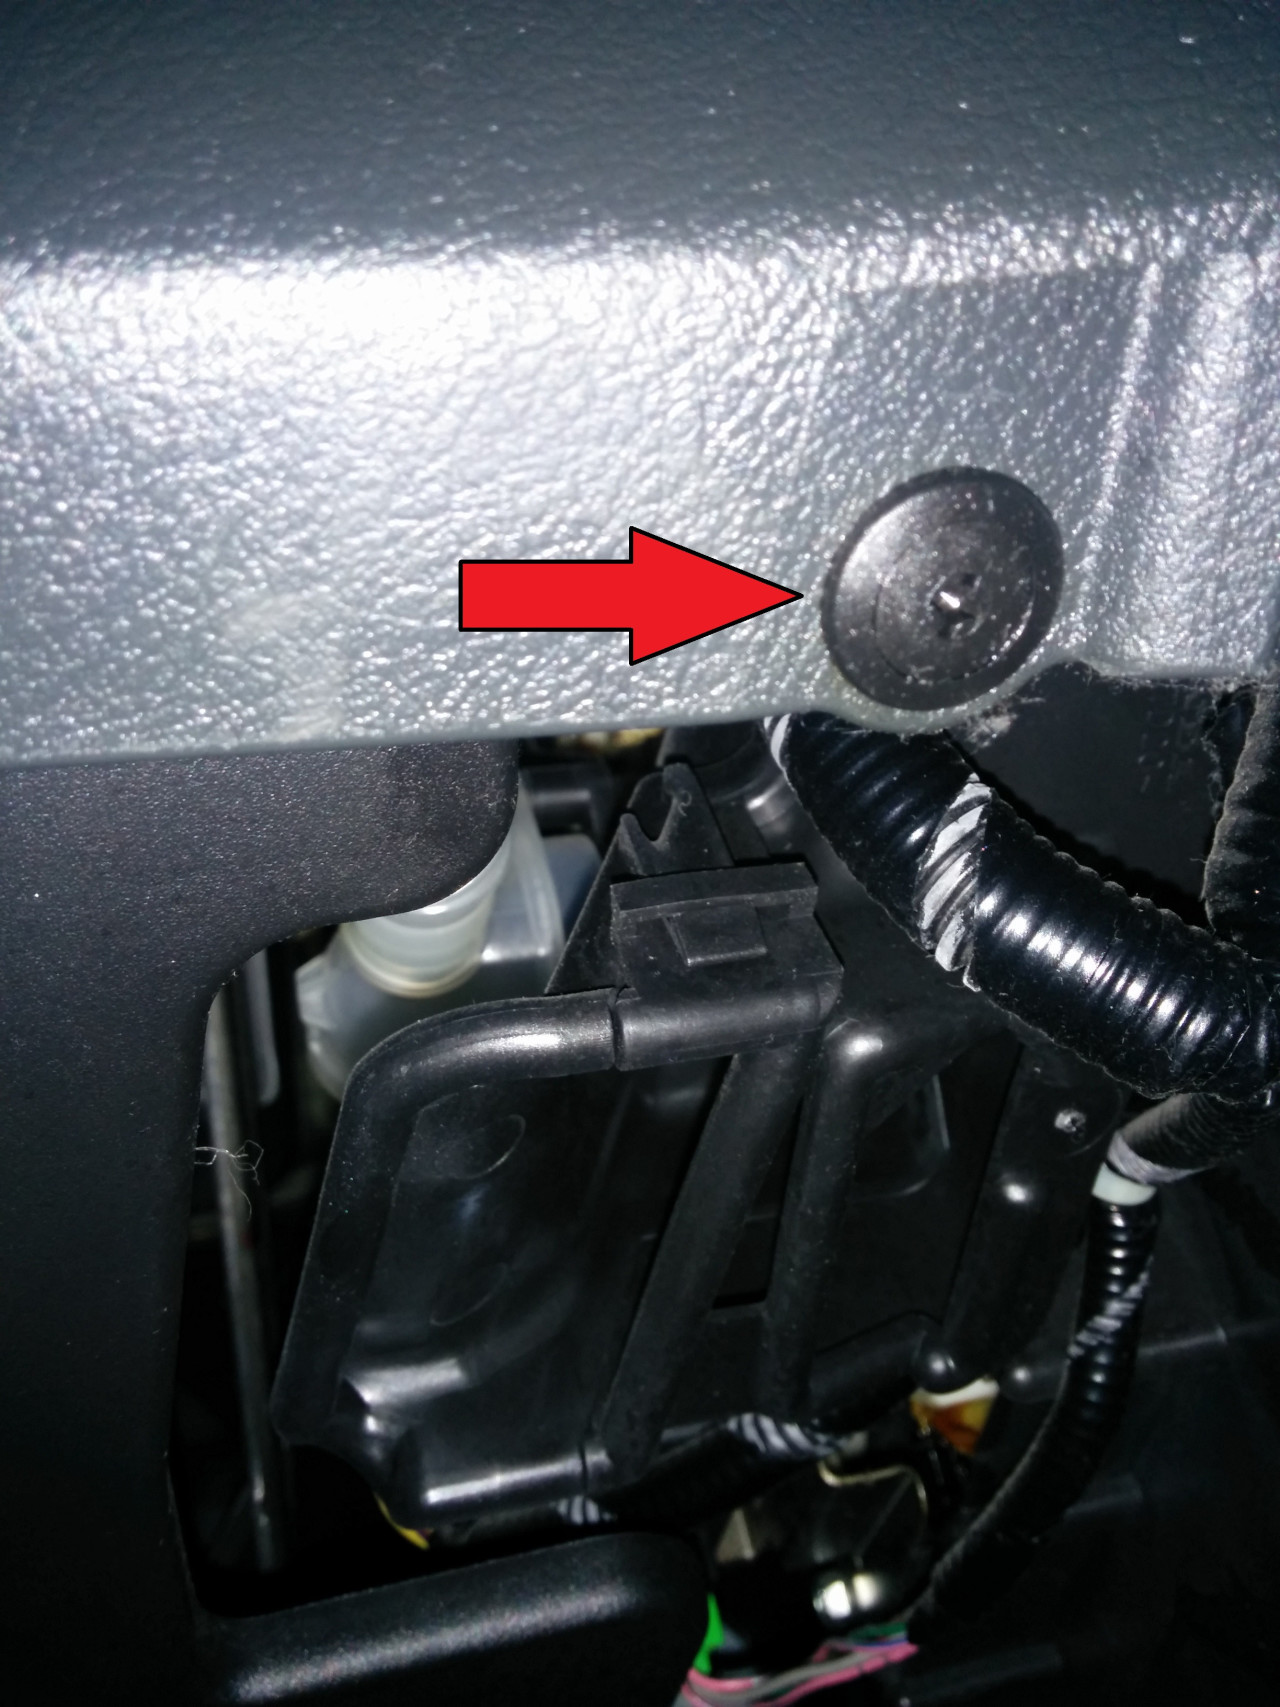
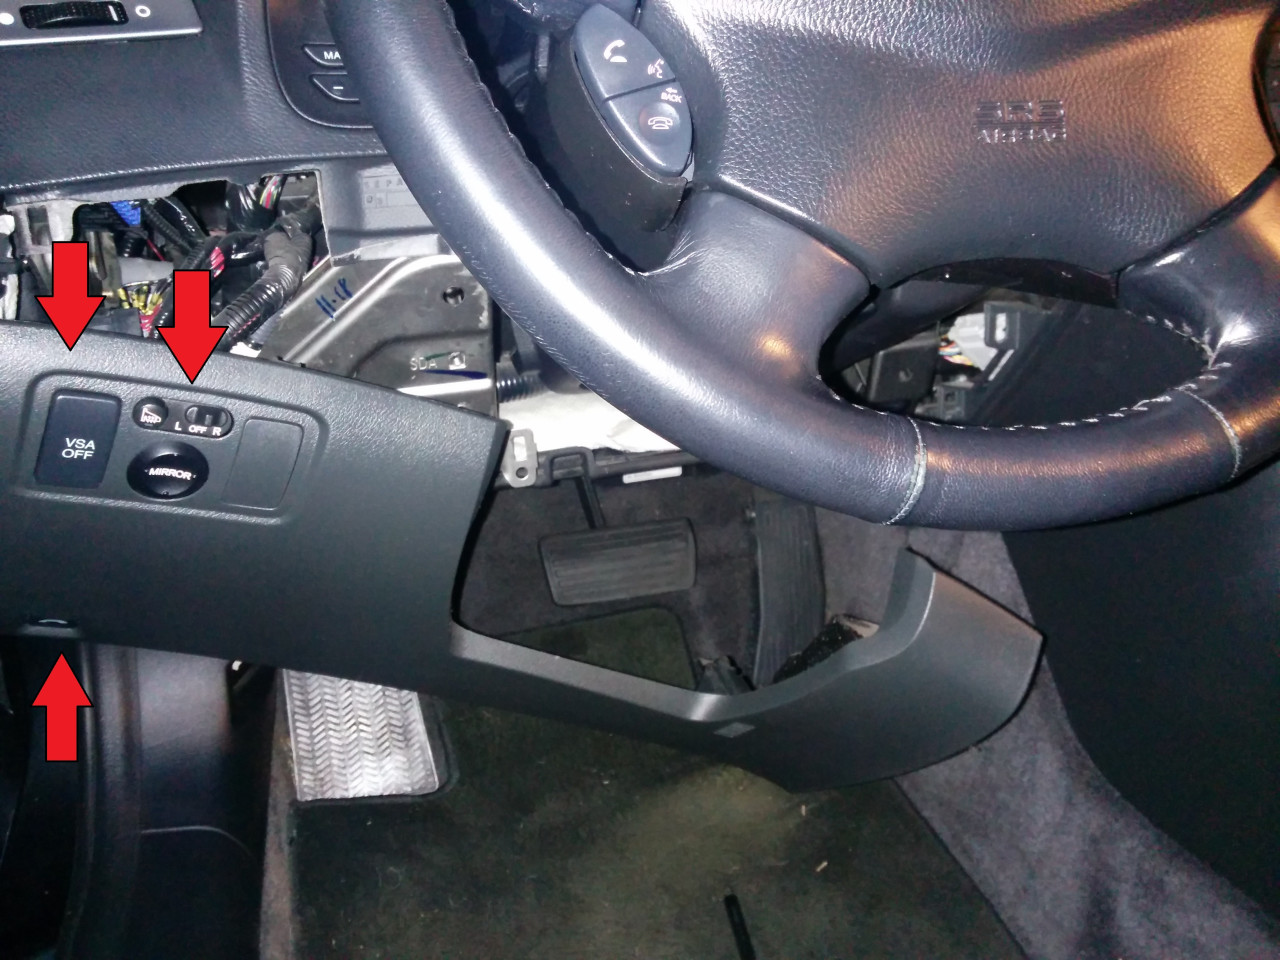
After removing that plastic screw, pull the panel towards the rear of the car to detach it. Disconnect the 3 plugs for the mirrors/VSA/etc indicated by the red arrows.
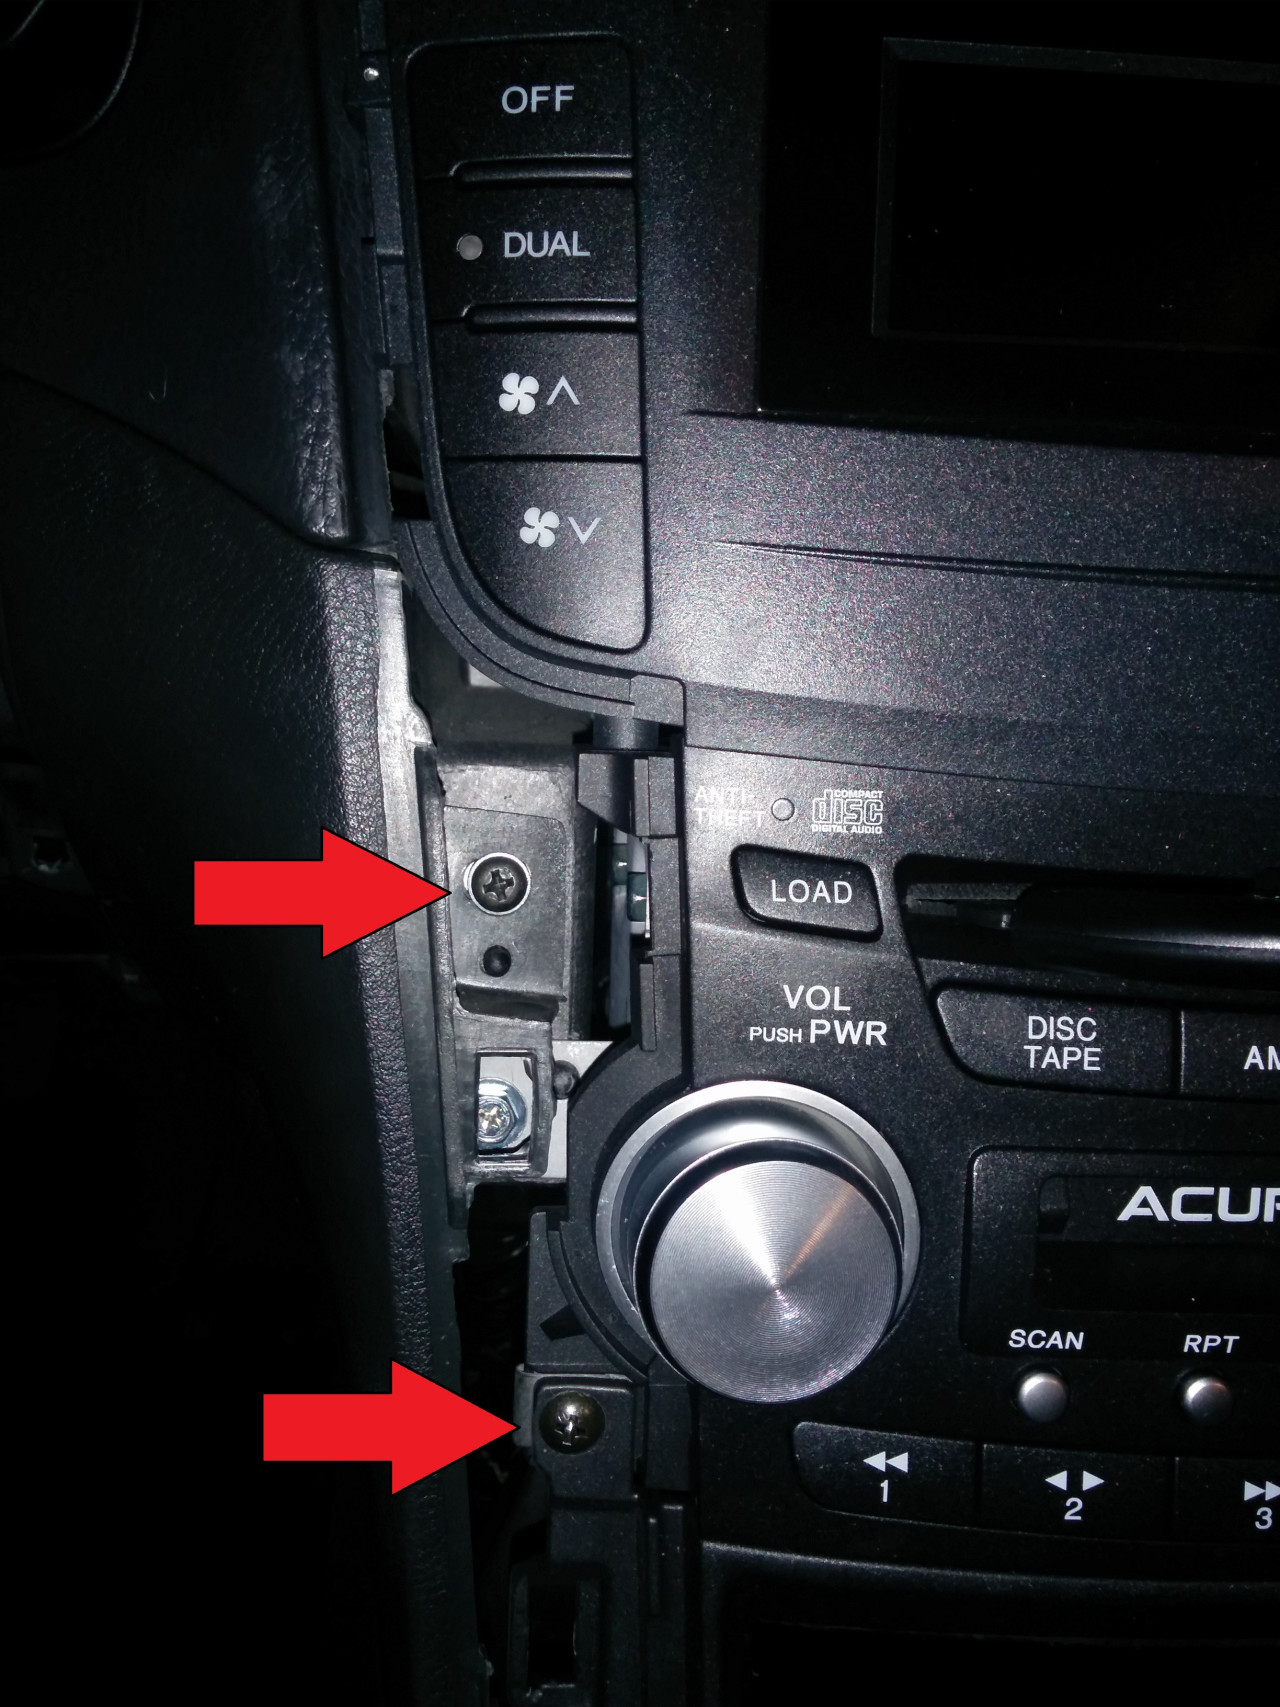
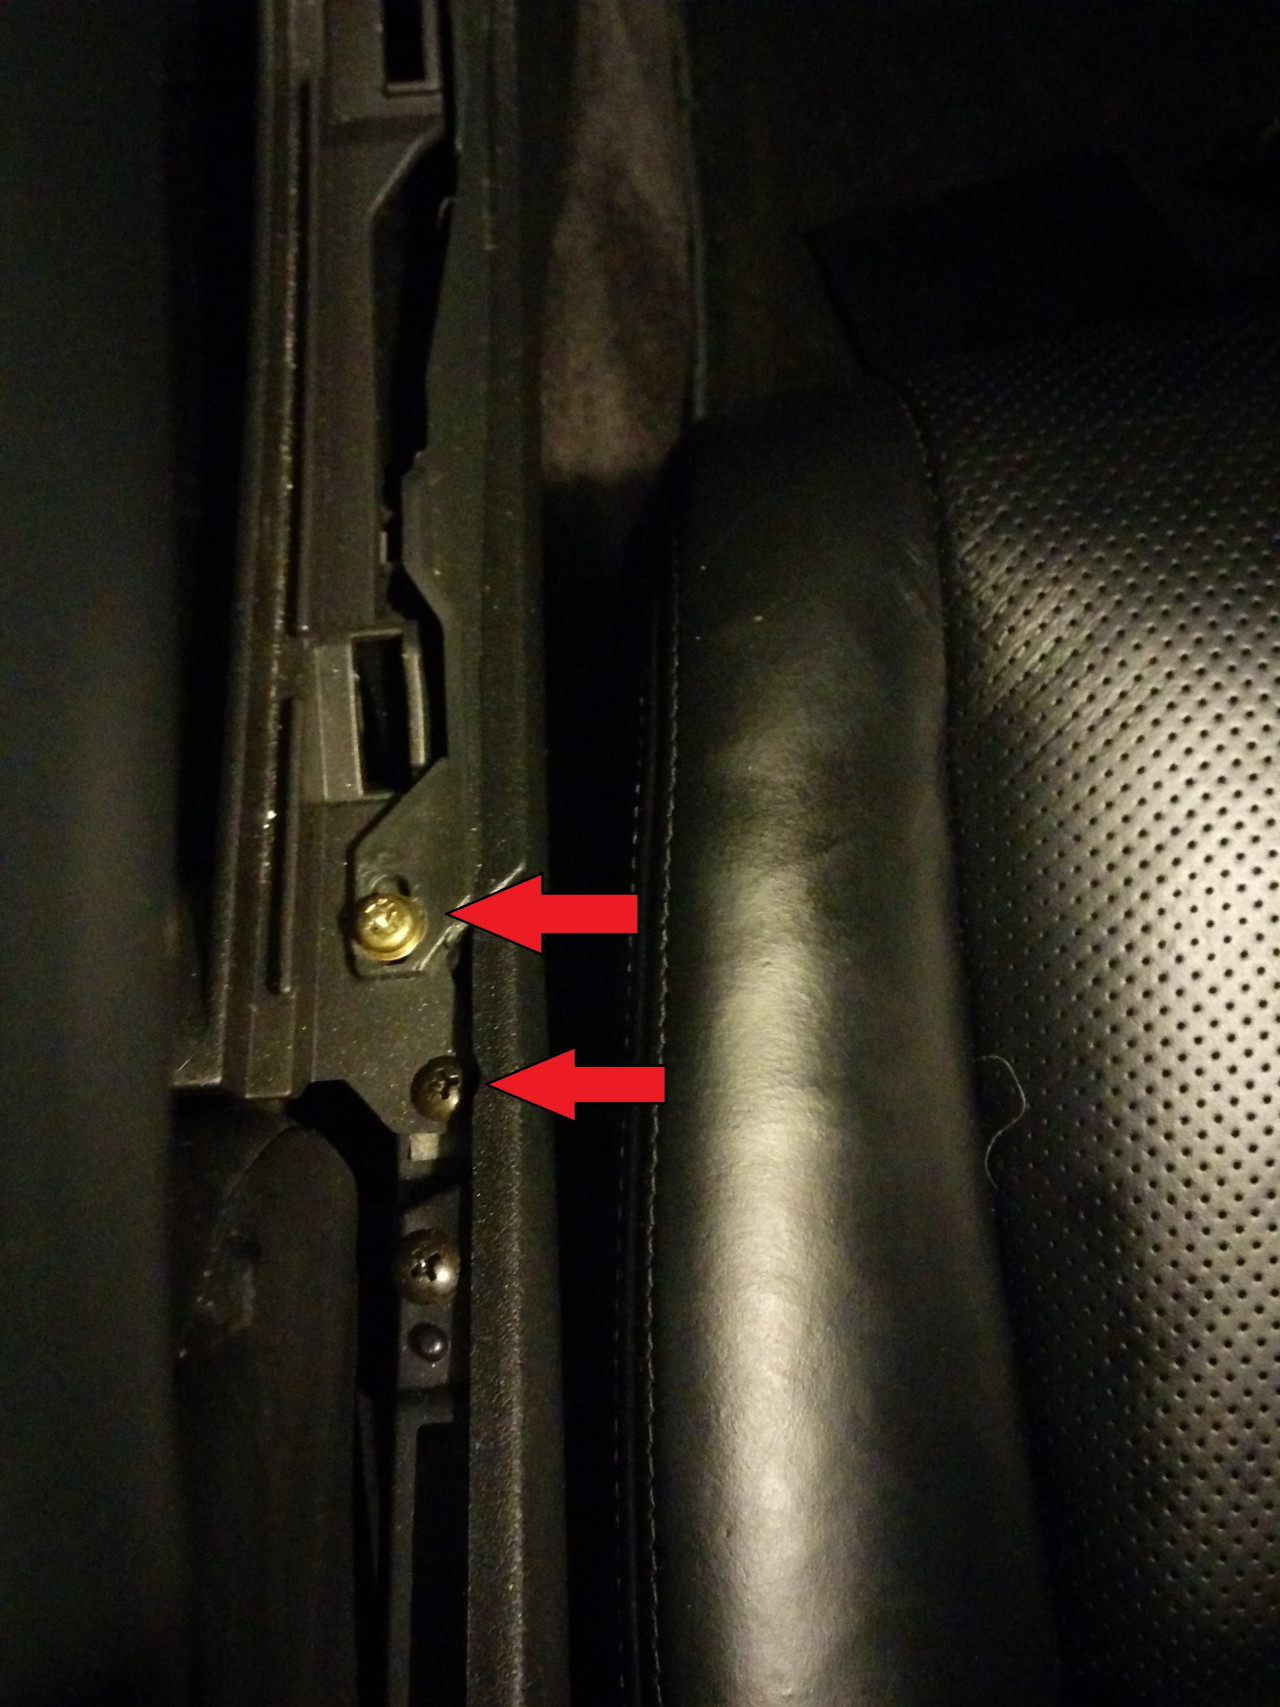
With the panel removed, the two screws shown below will be accessible. Remove them.

Then get these two...
And these two...
And these two, which are under the rubber mat at the bottom of the arm-rest bin whatever-it's-called.
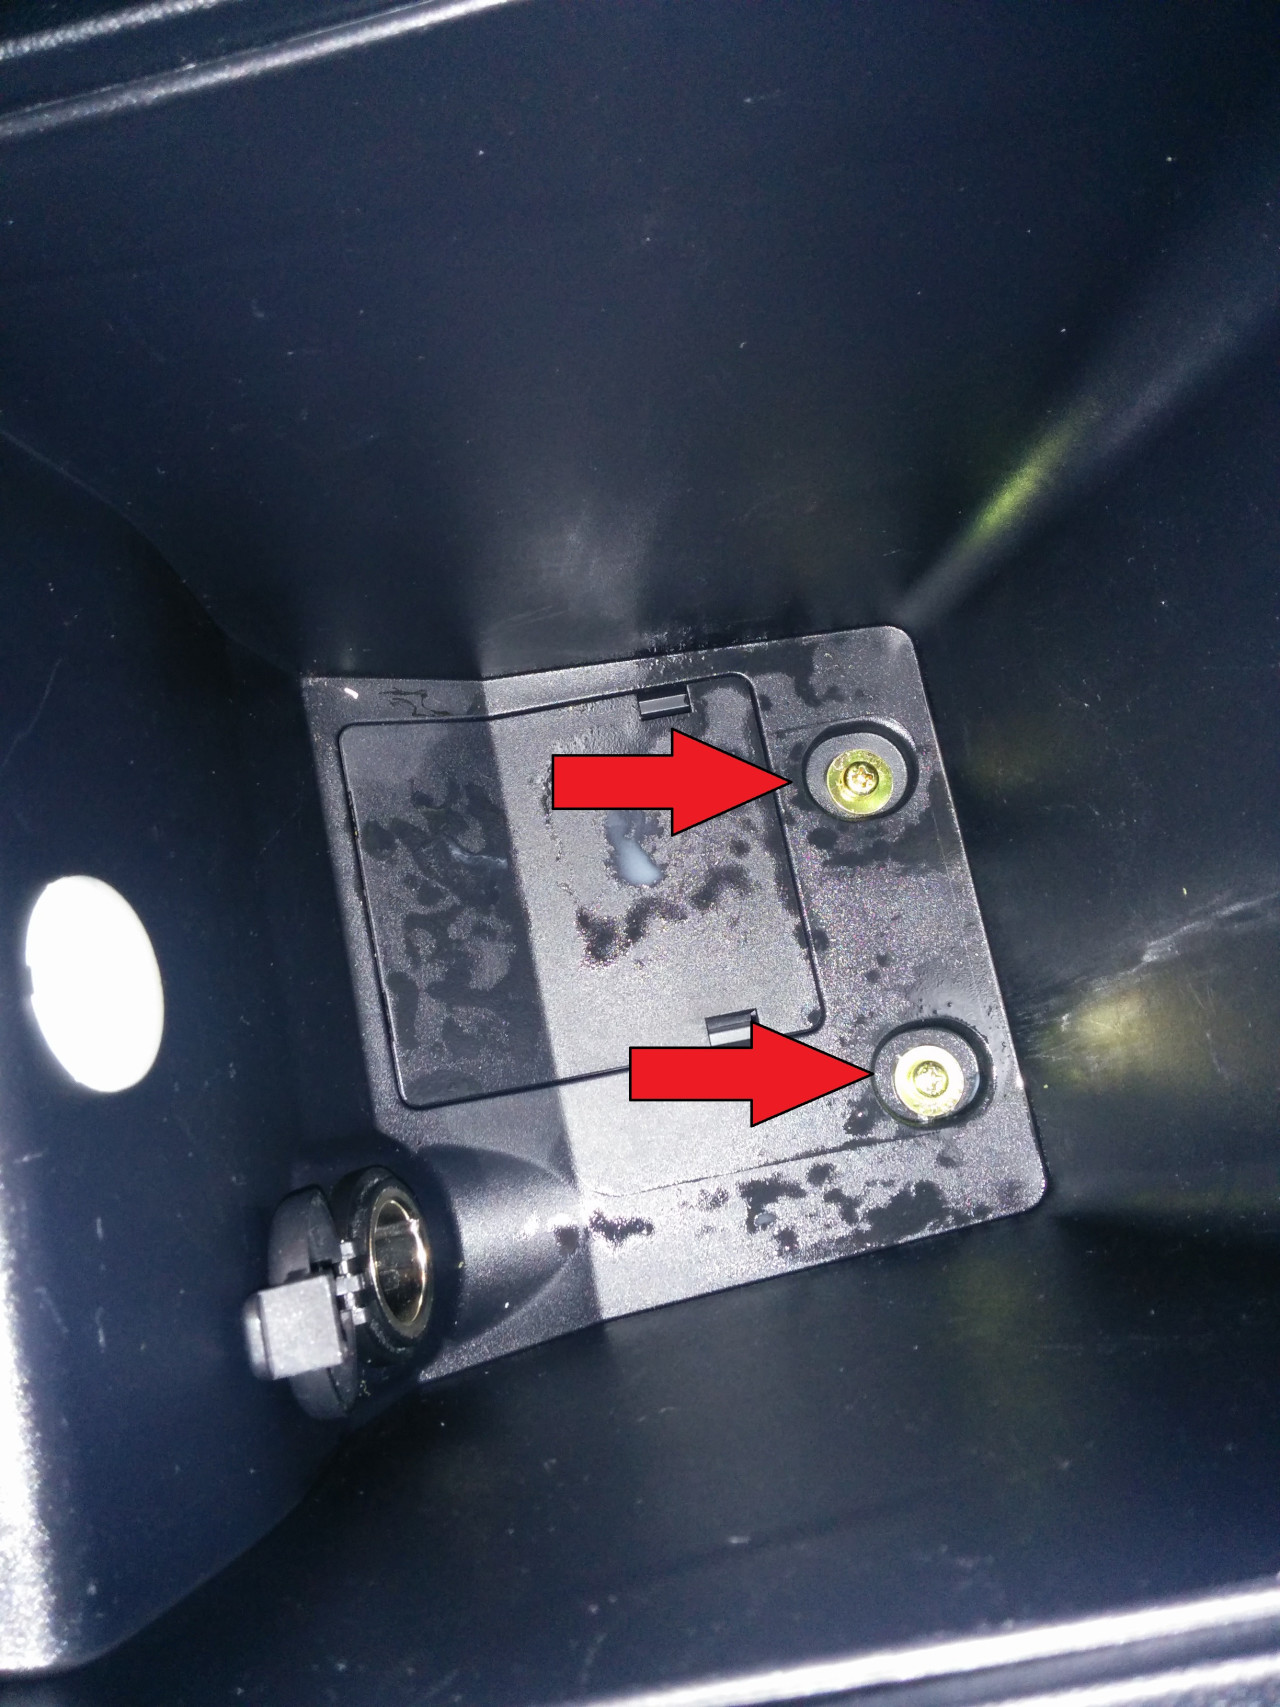
Get these two next. When they're out, you should be able to slide the armrest portion of the console back a few inches. BTW, that's NOT a pube you're spying. It's dog hair.
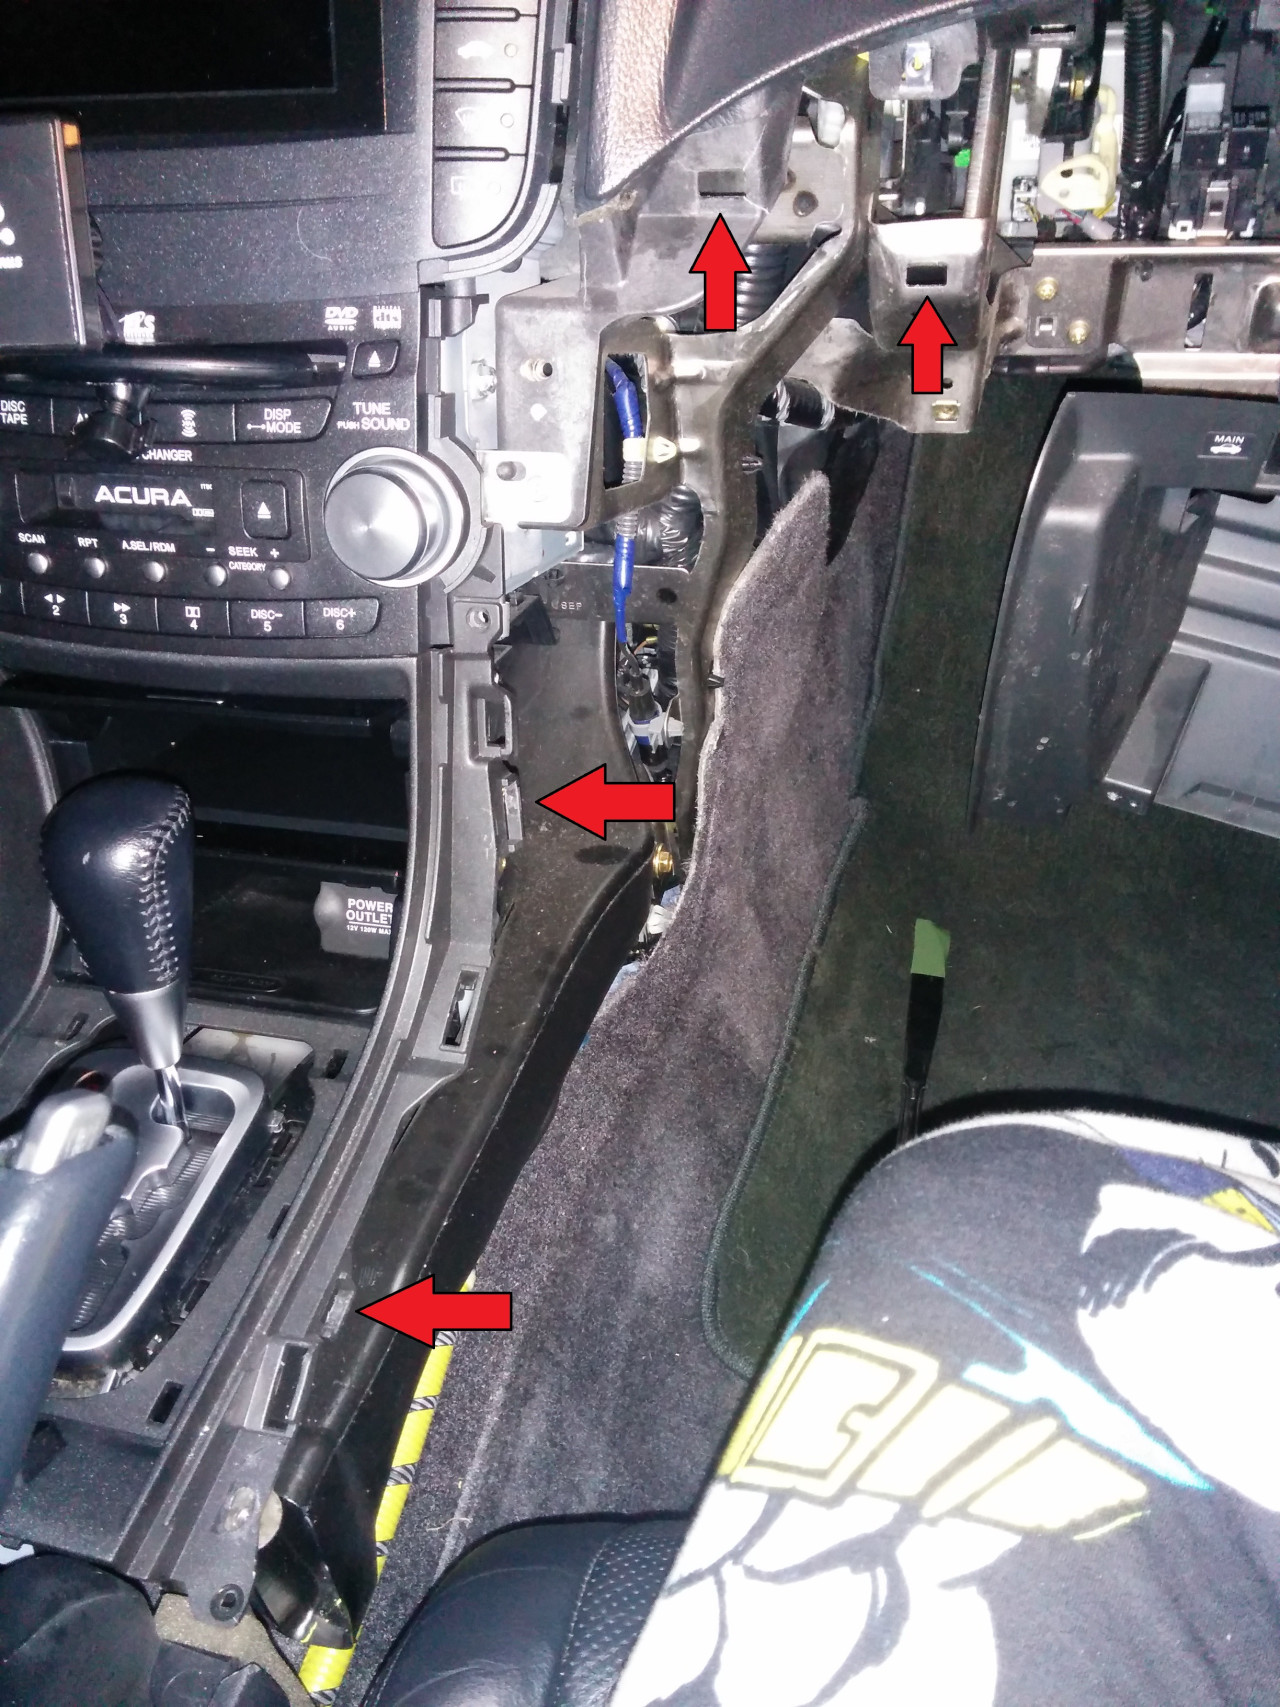
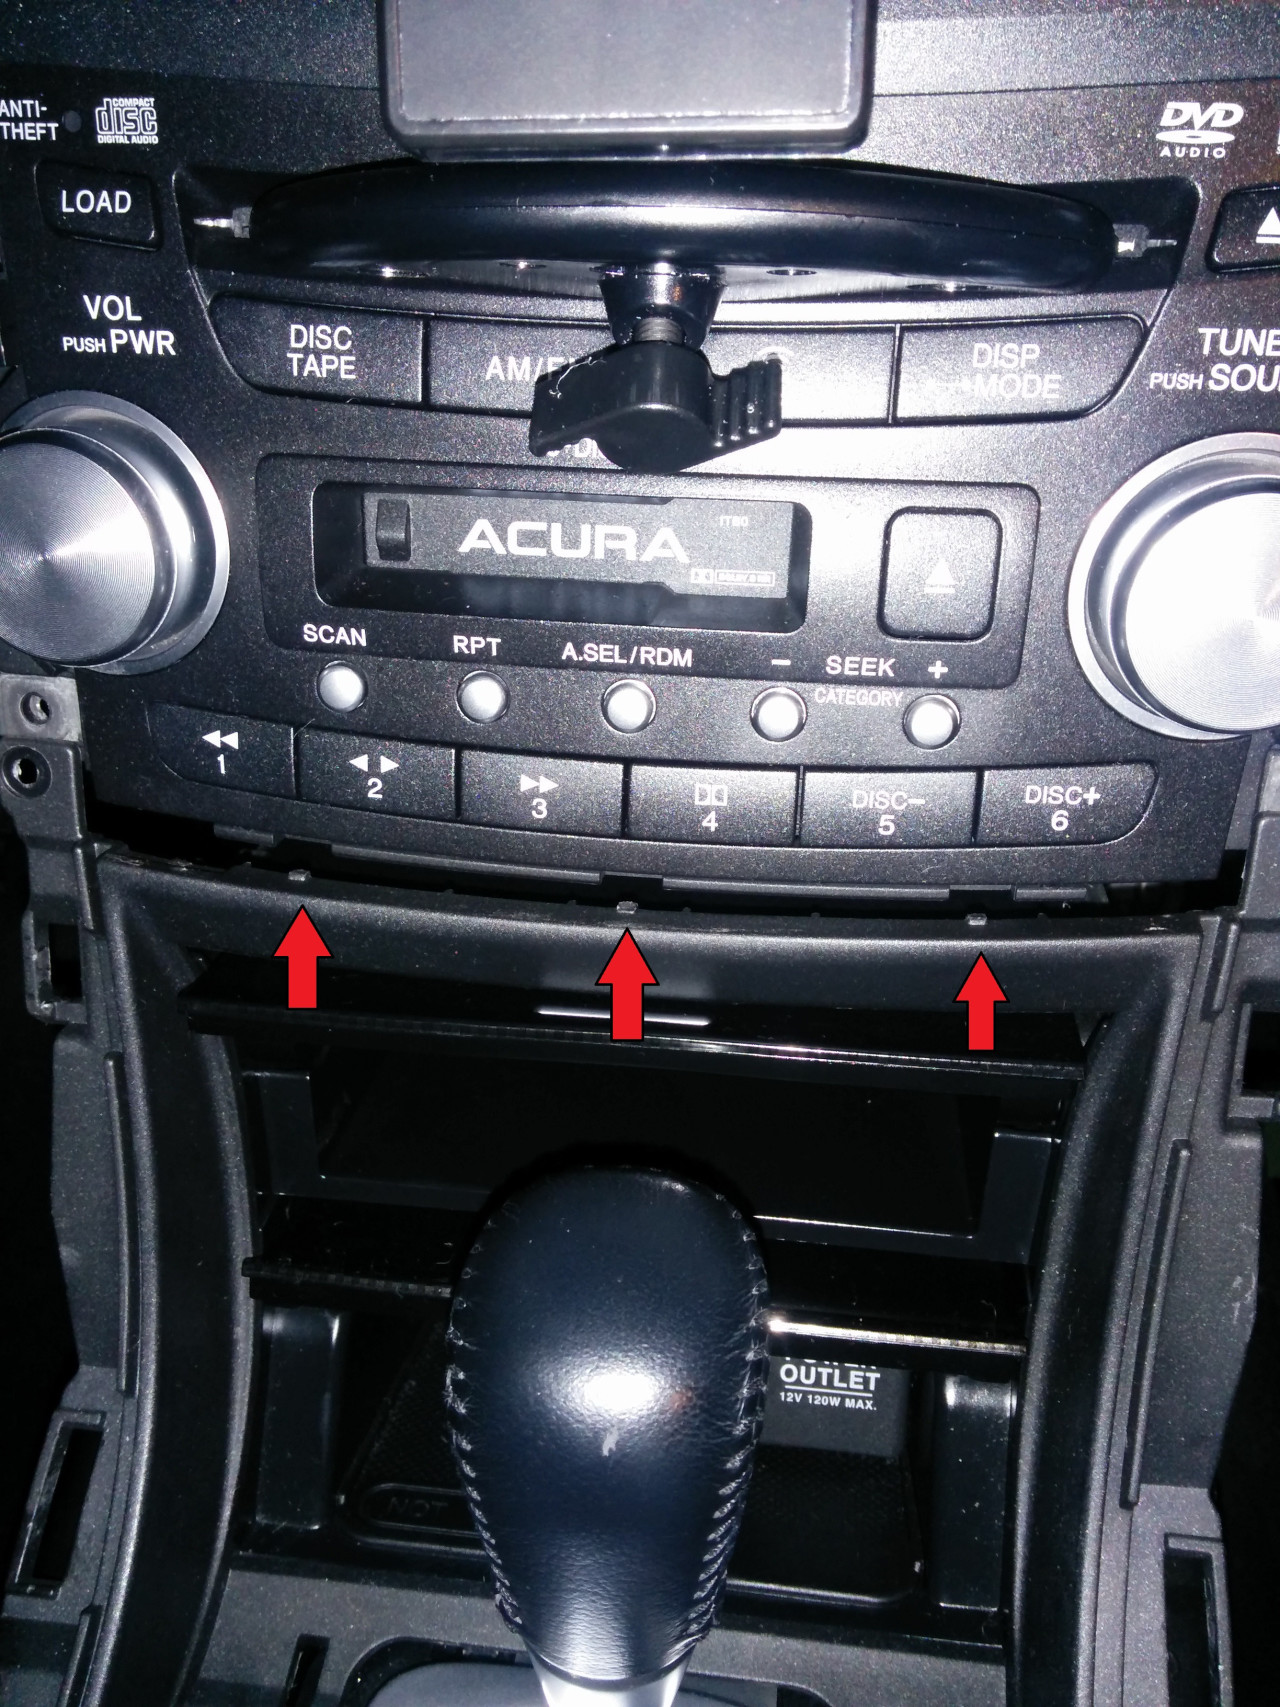
With the armrest now moved back a bit, you will need to unclip the panel shown below. Red arrows indicate clip locations.
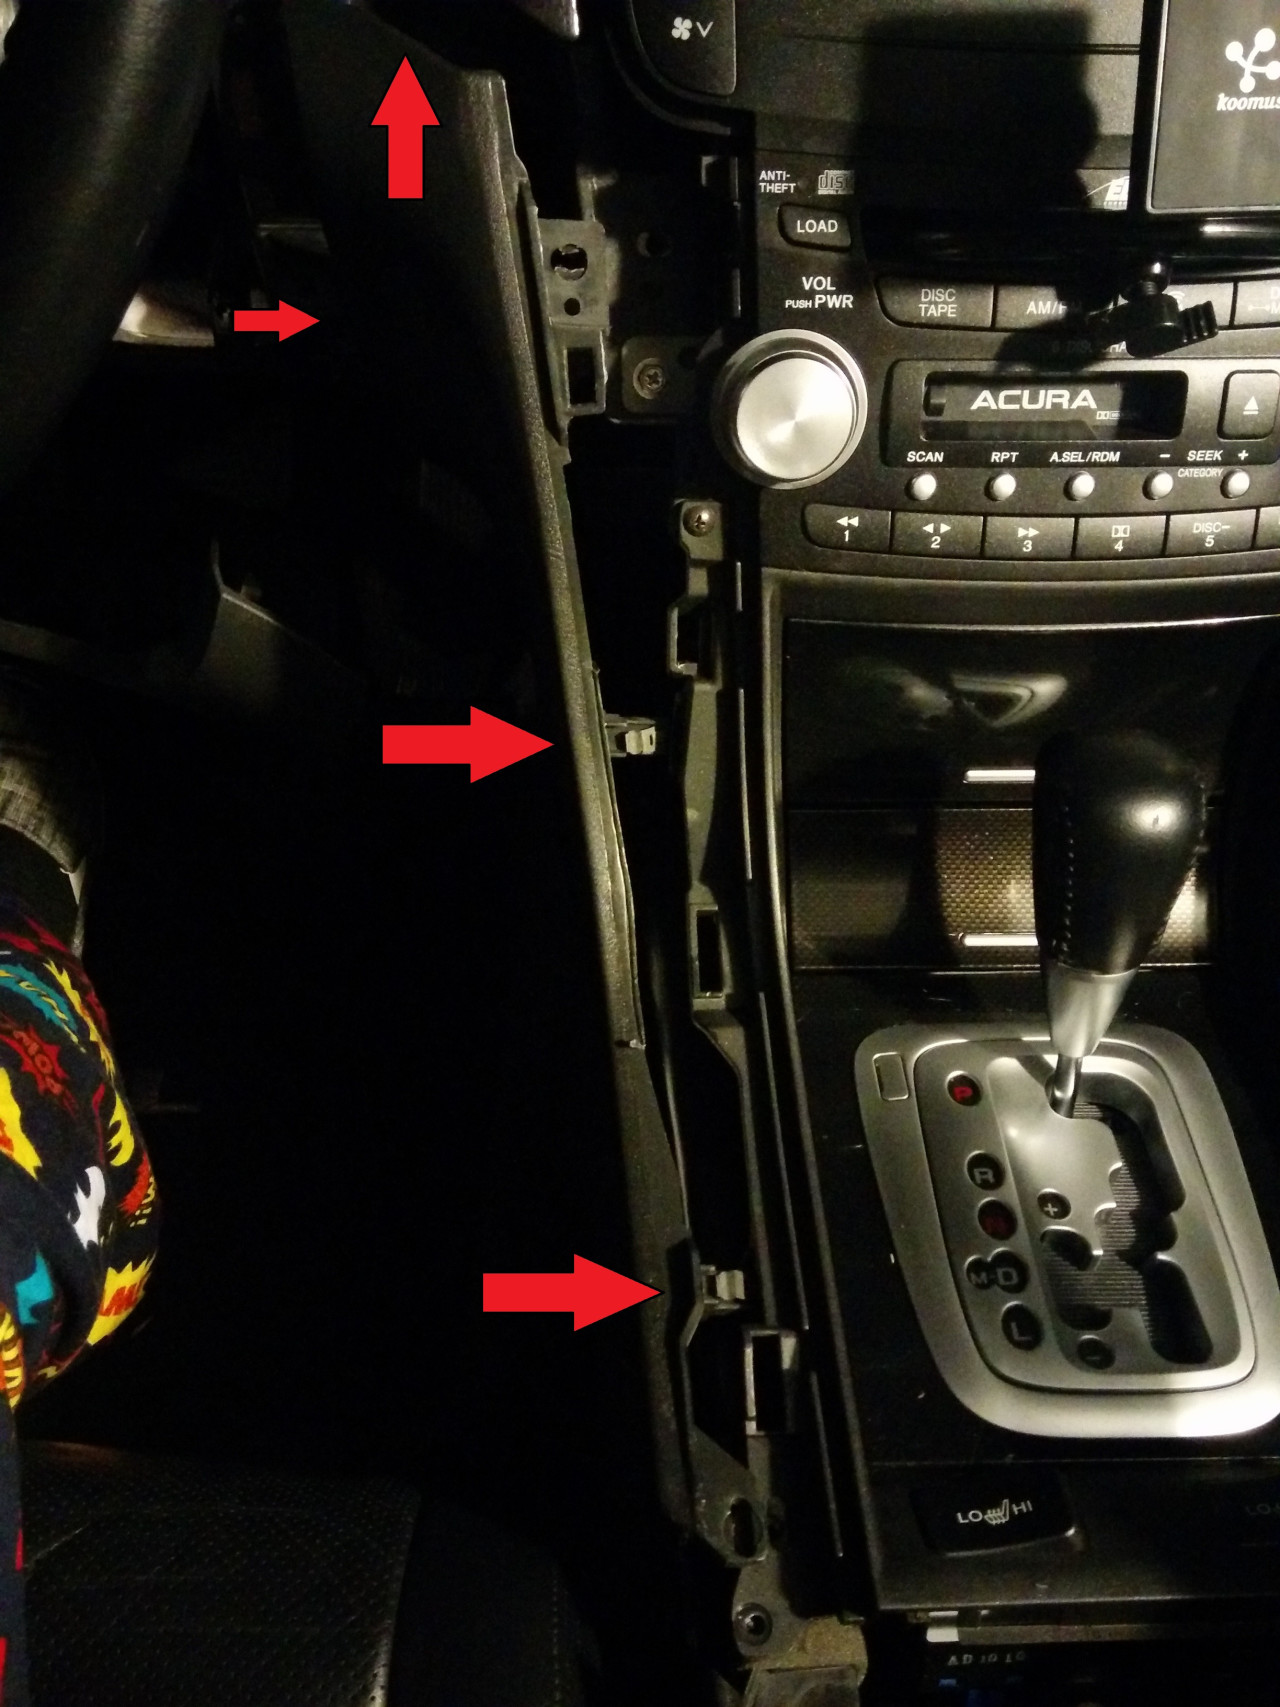
Close up of the top clip.
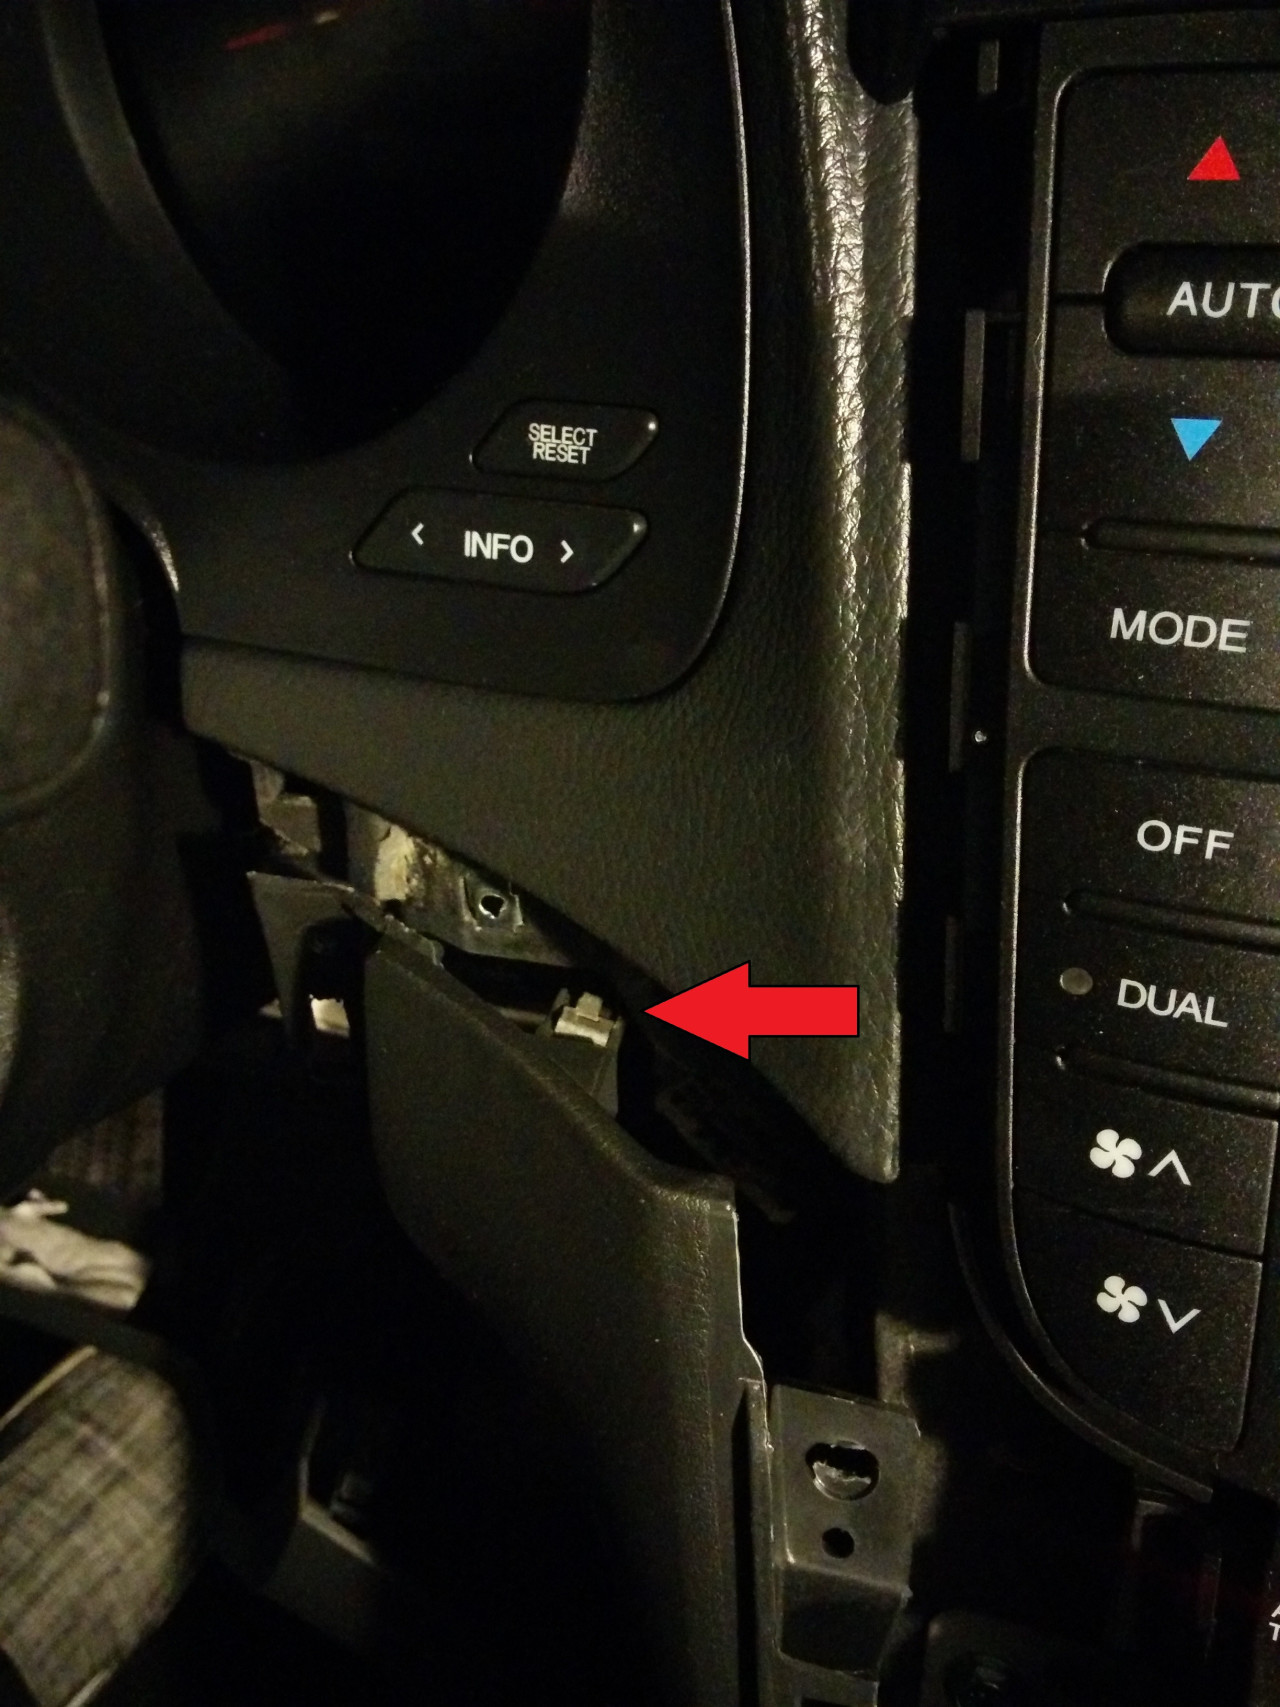
For those of you with slender/small hands, this is where the road ends after removing the panel shown above. You should be able to unplug the required connector (red arrow below) and connect the BlitzSafe unit using a combination of the available spaces (red circles below) to maneuver your way to a complete install. Verify the unit works, put everything back, and voila', you're DONE!
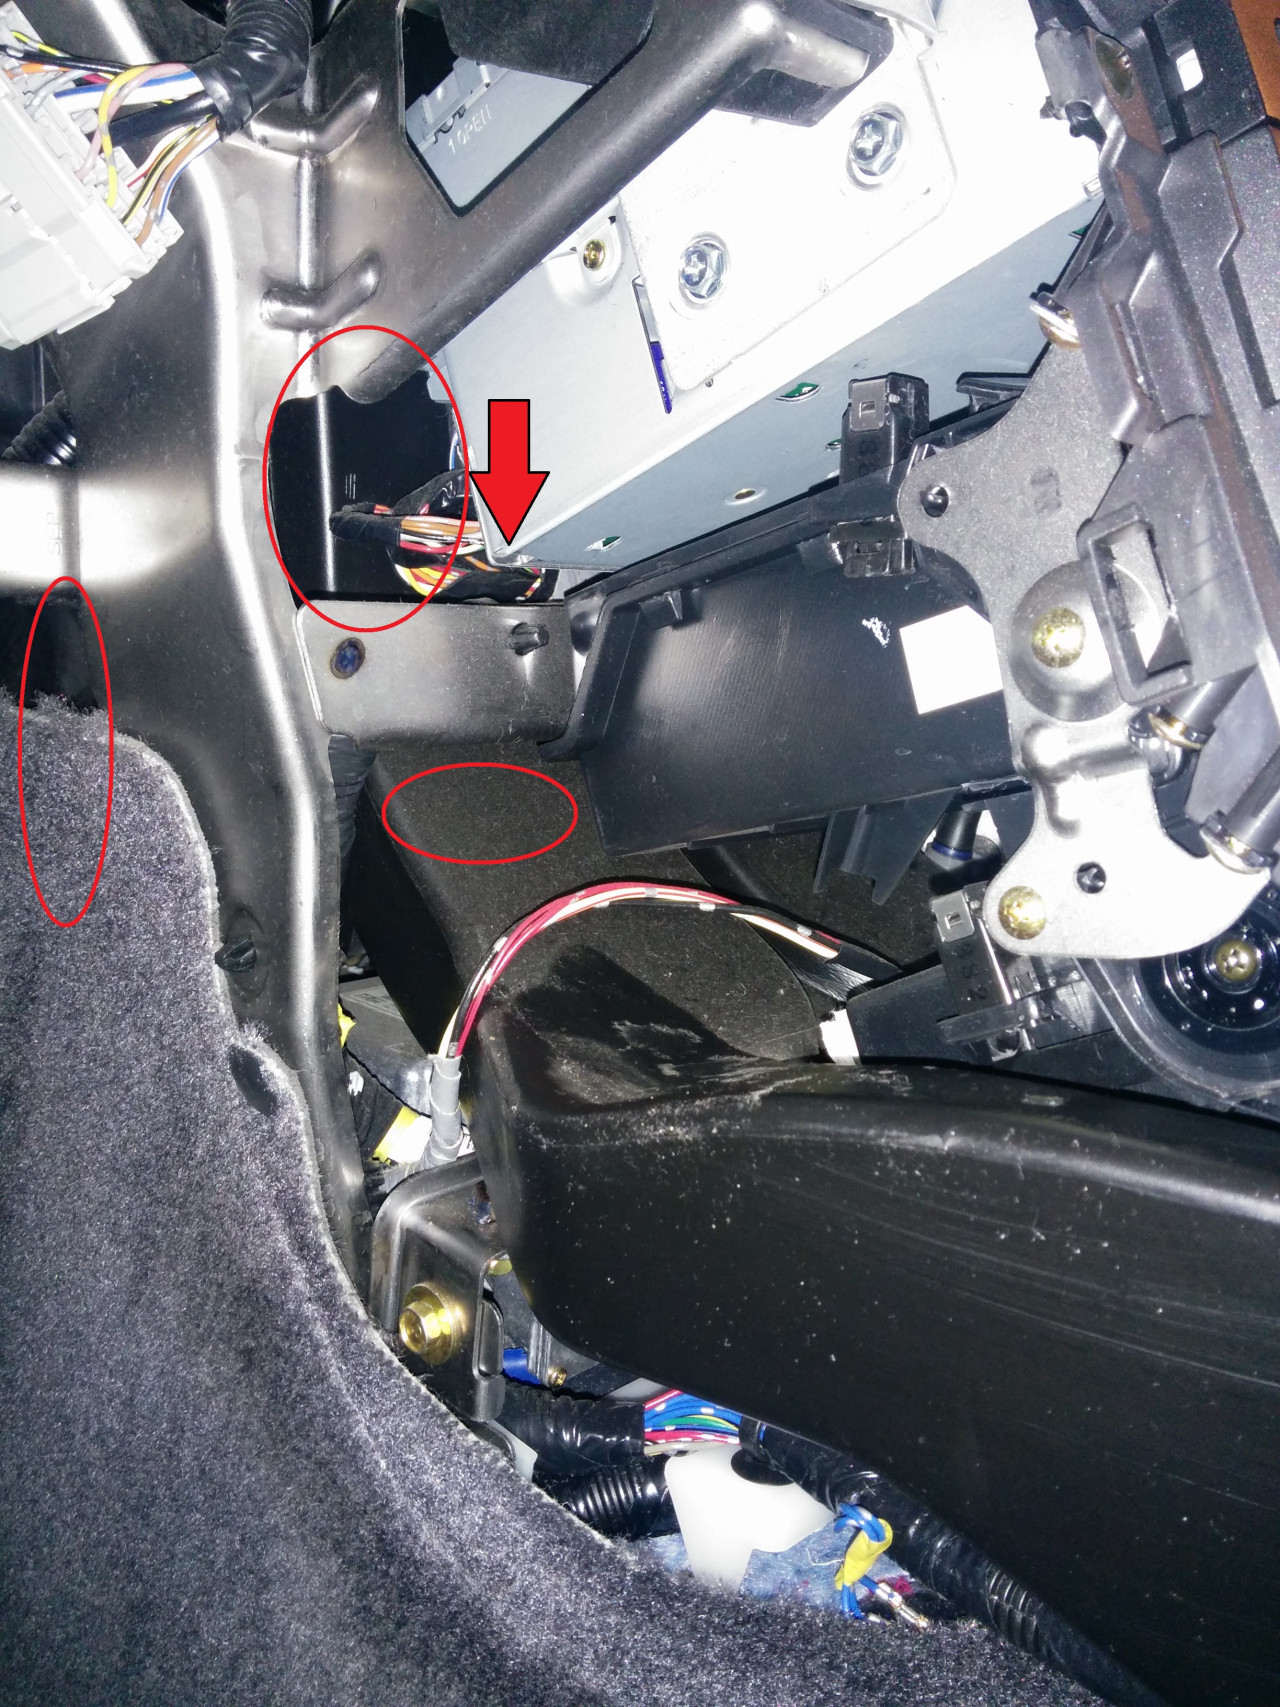
UNFORTUNATELY for me, I have thick stumpy hands which are no bueno for this particular install. If you're still reading, we'll assume yours are no slimmer. And so, the journey continues...
New goal: Get the trays below the stereo out, so we can gain some extra wiggle room for our fat fingers.
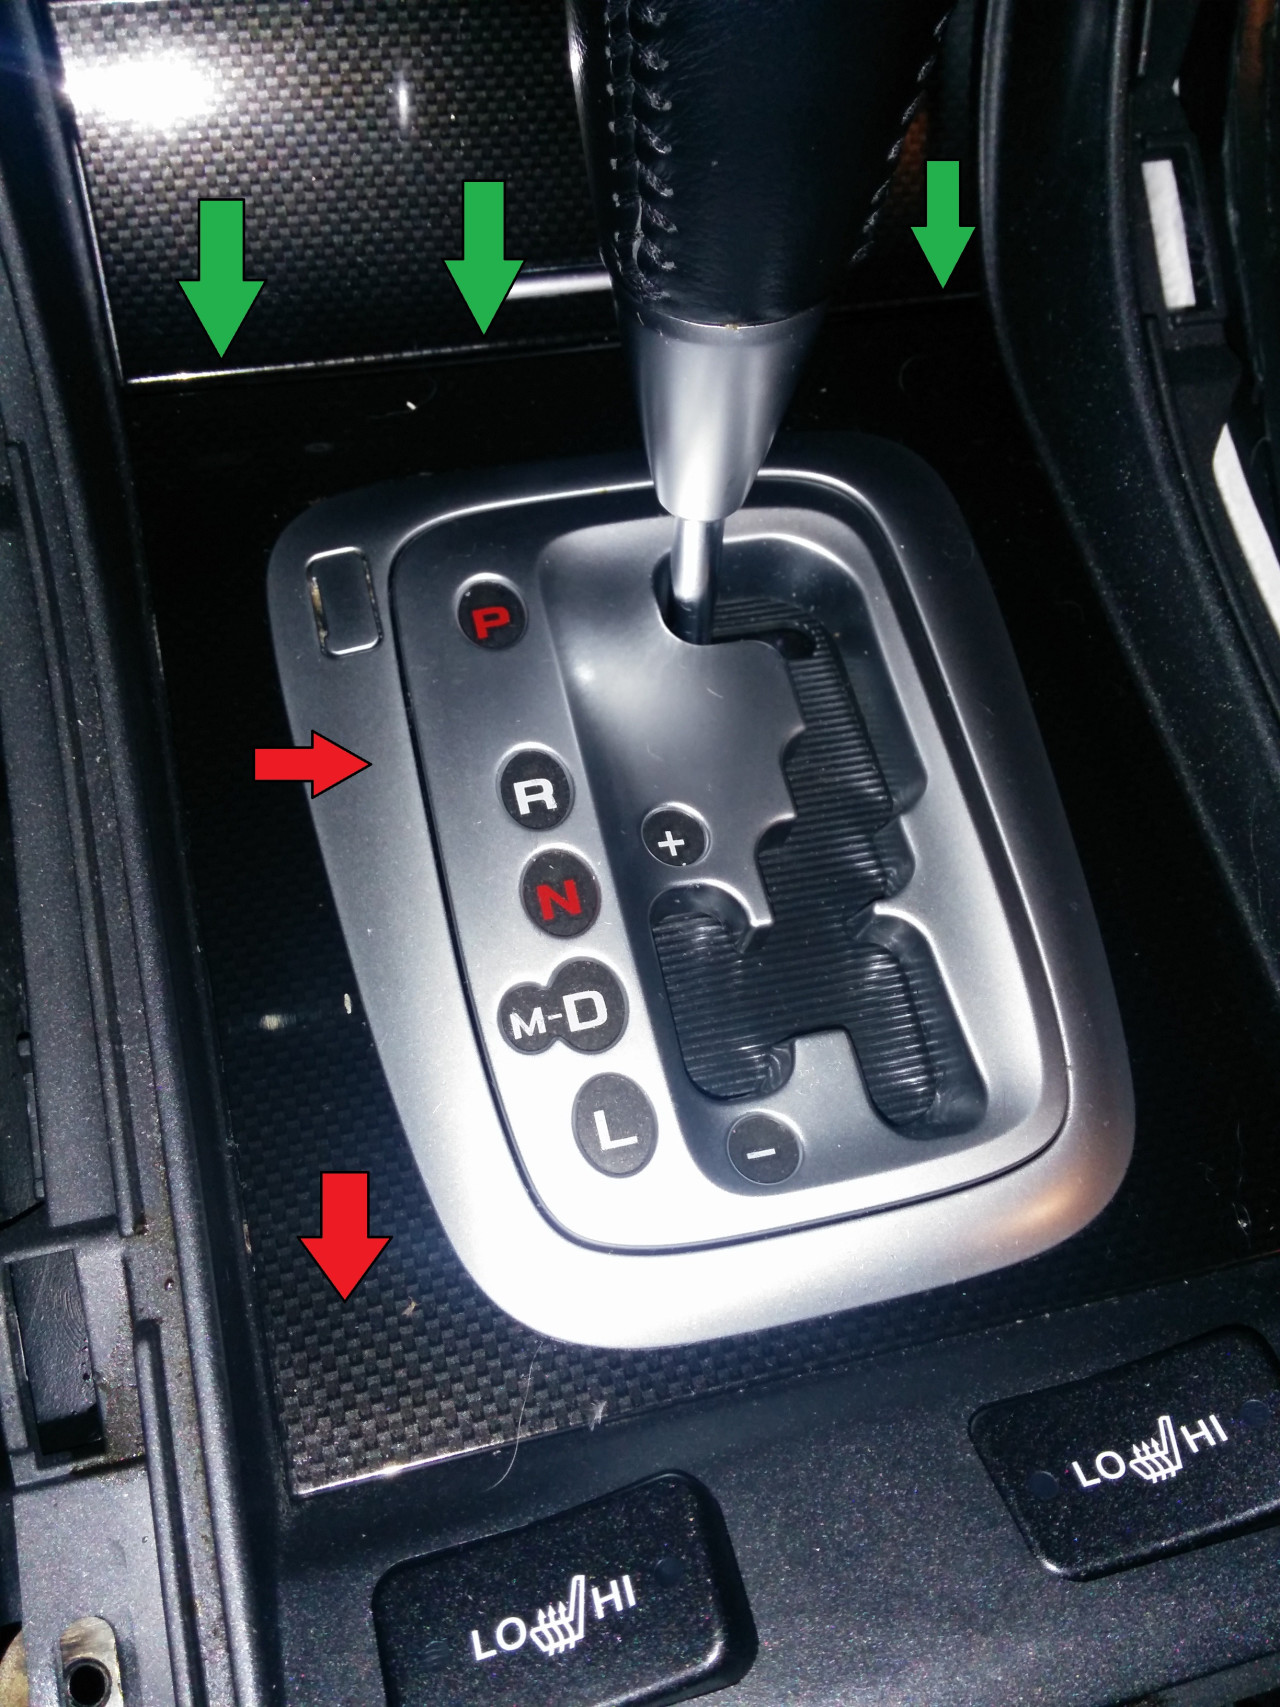
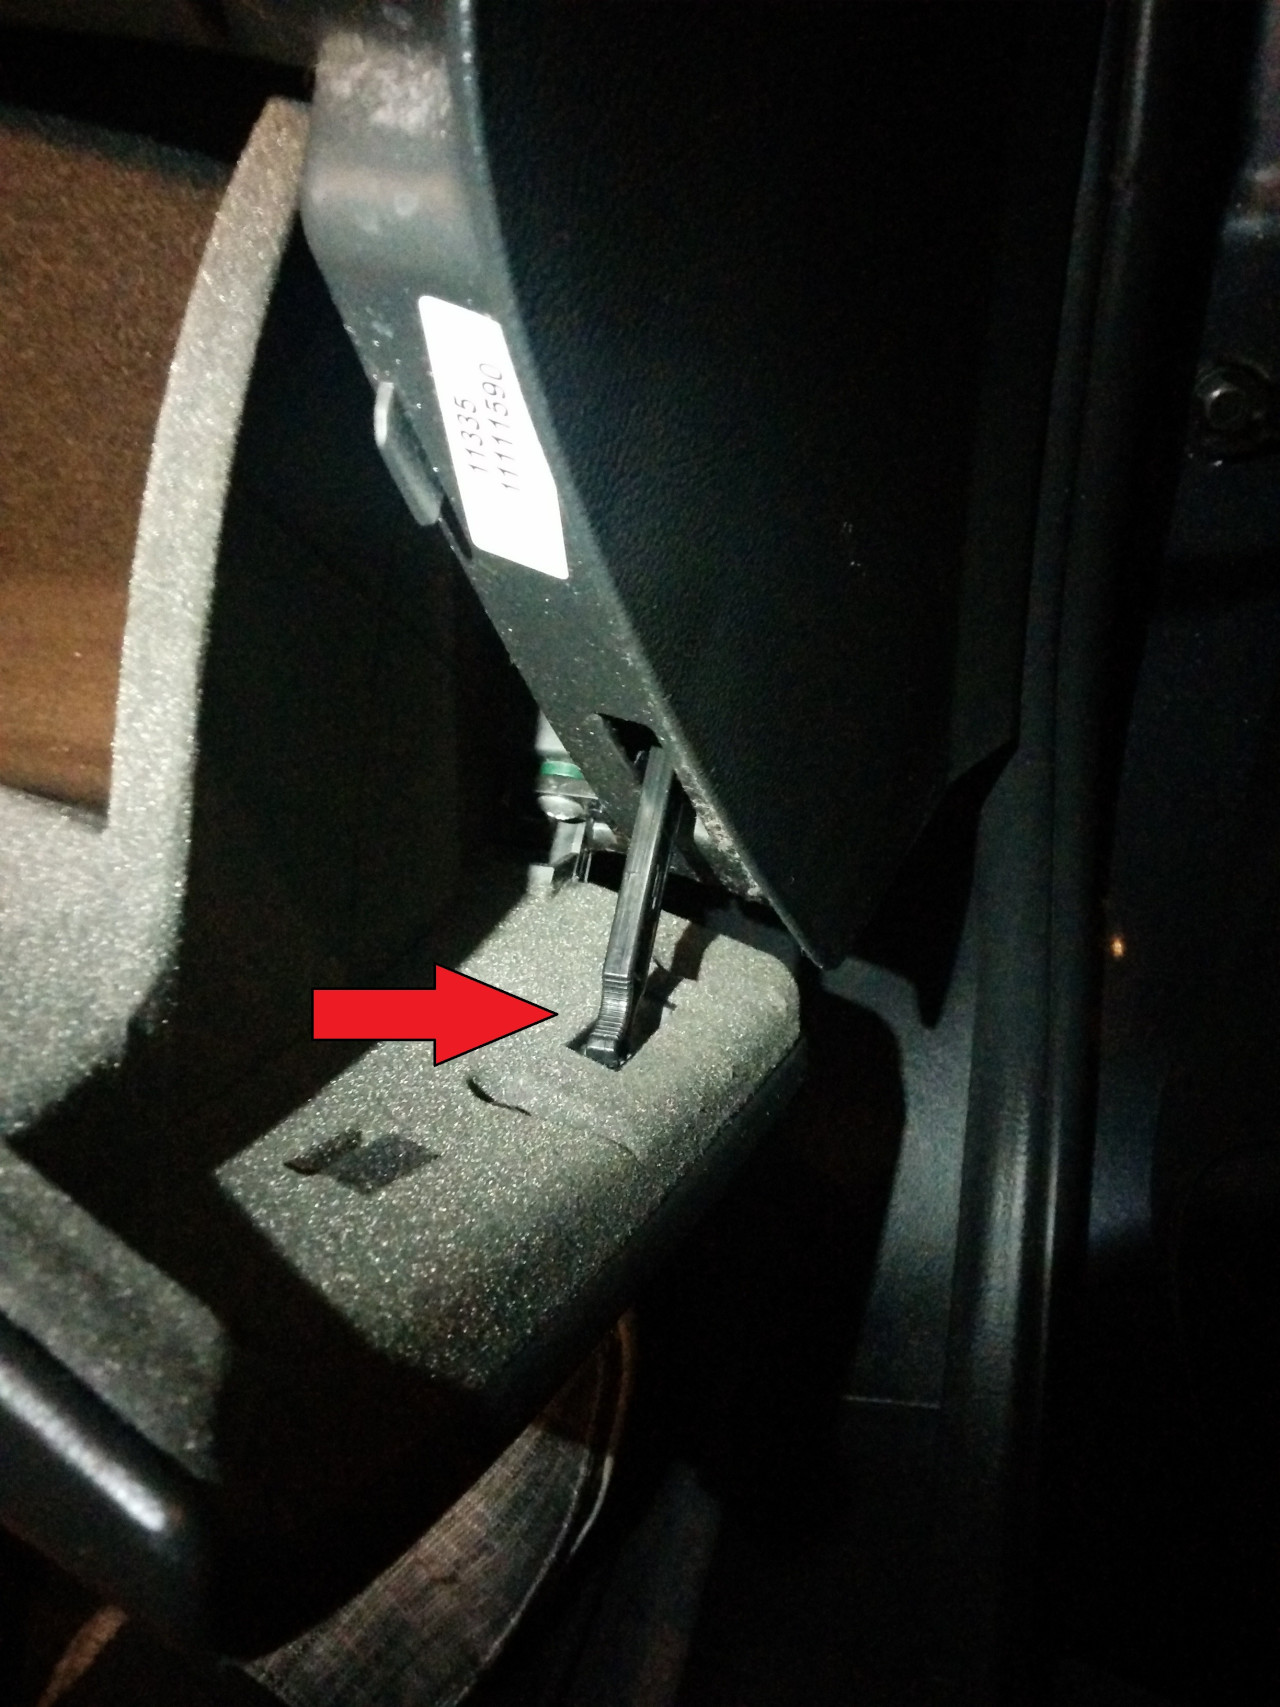
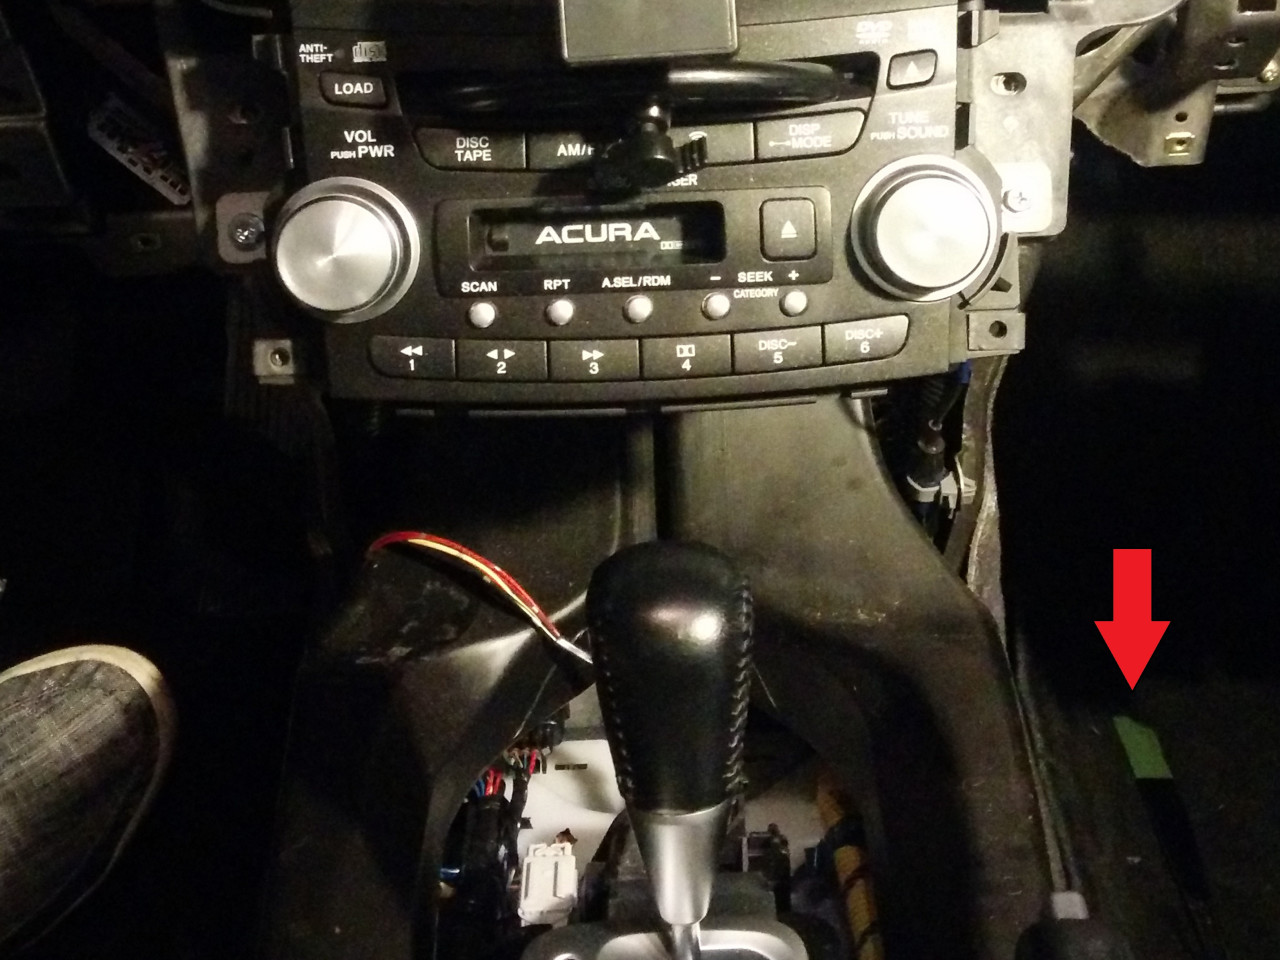
Remove the silver trim piece surrounding the shifter, and the black piece underneath it. The black piece comes off easily if you open the door to the cigarette lighter and pull up along the edge indicated by the green arrows.
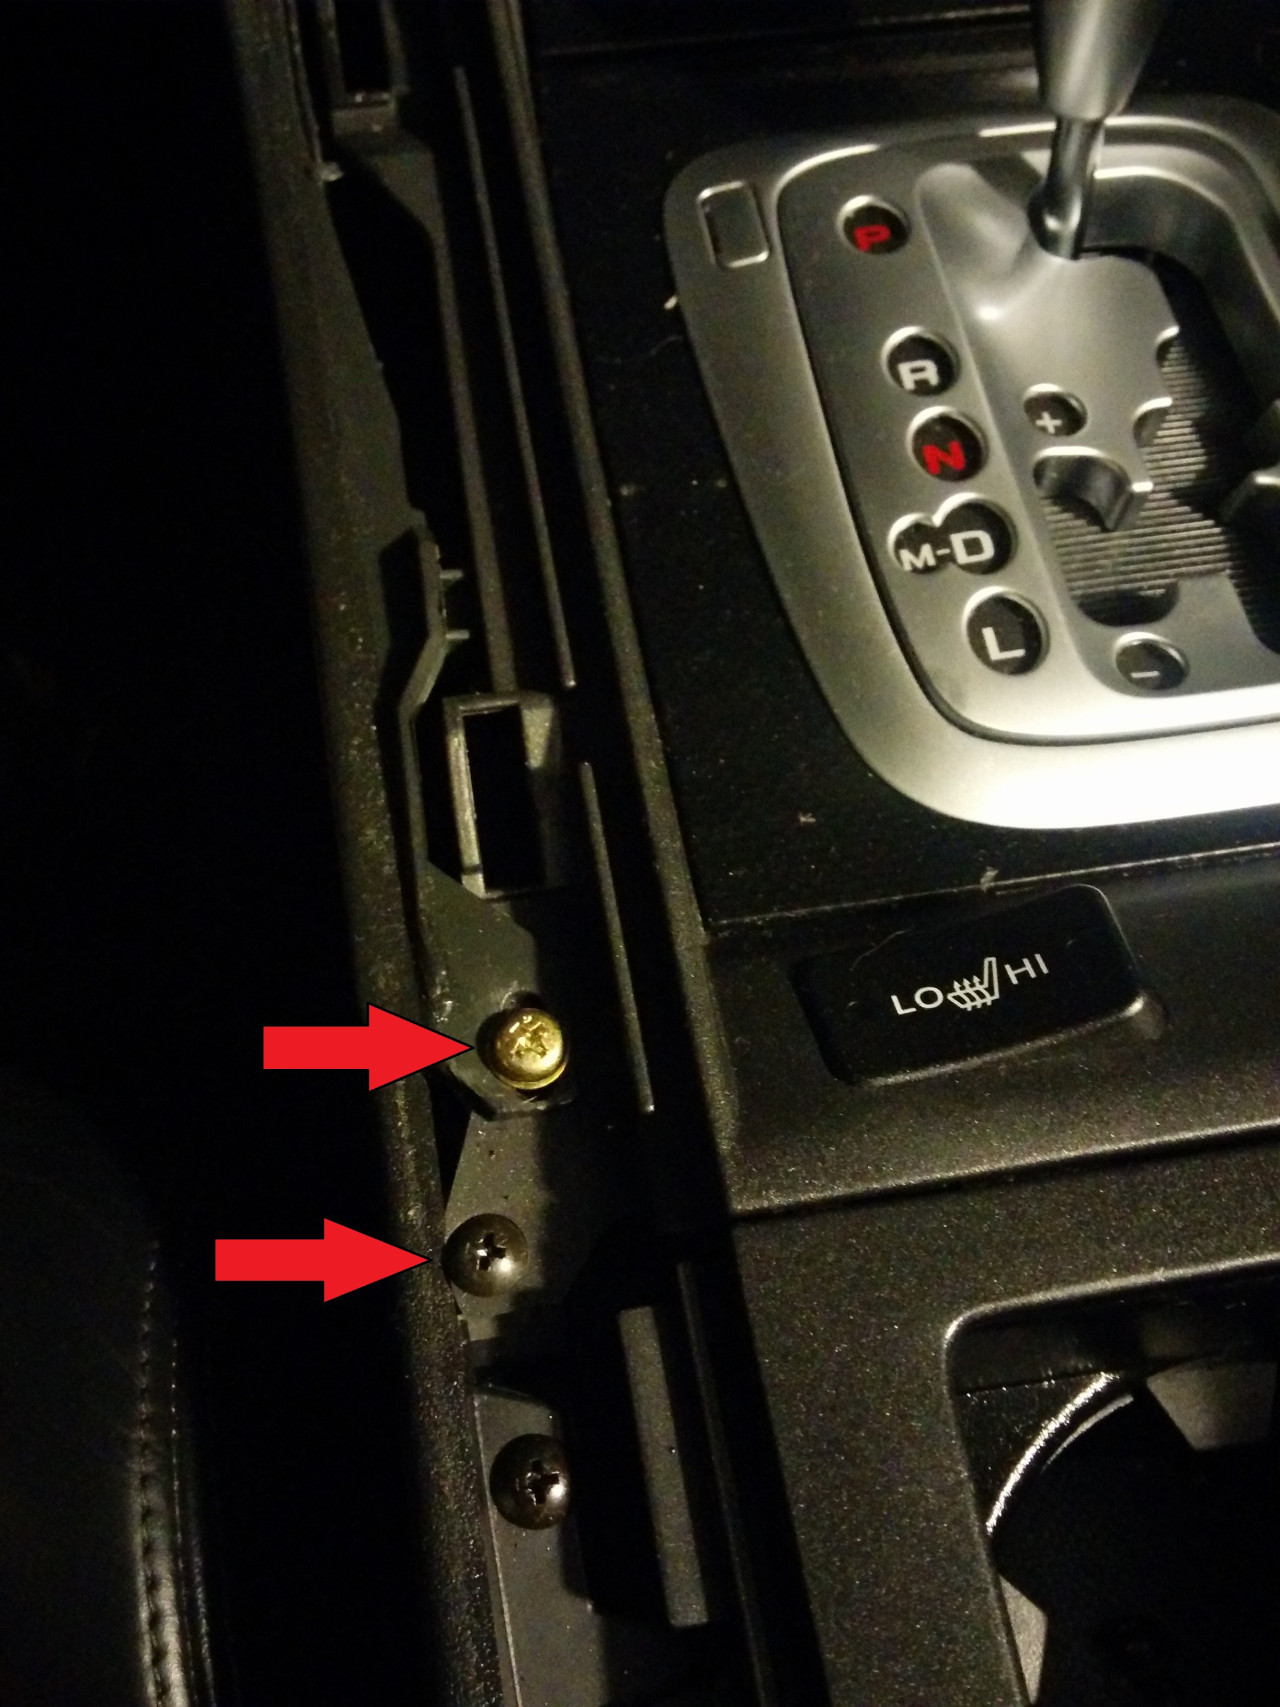
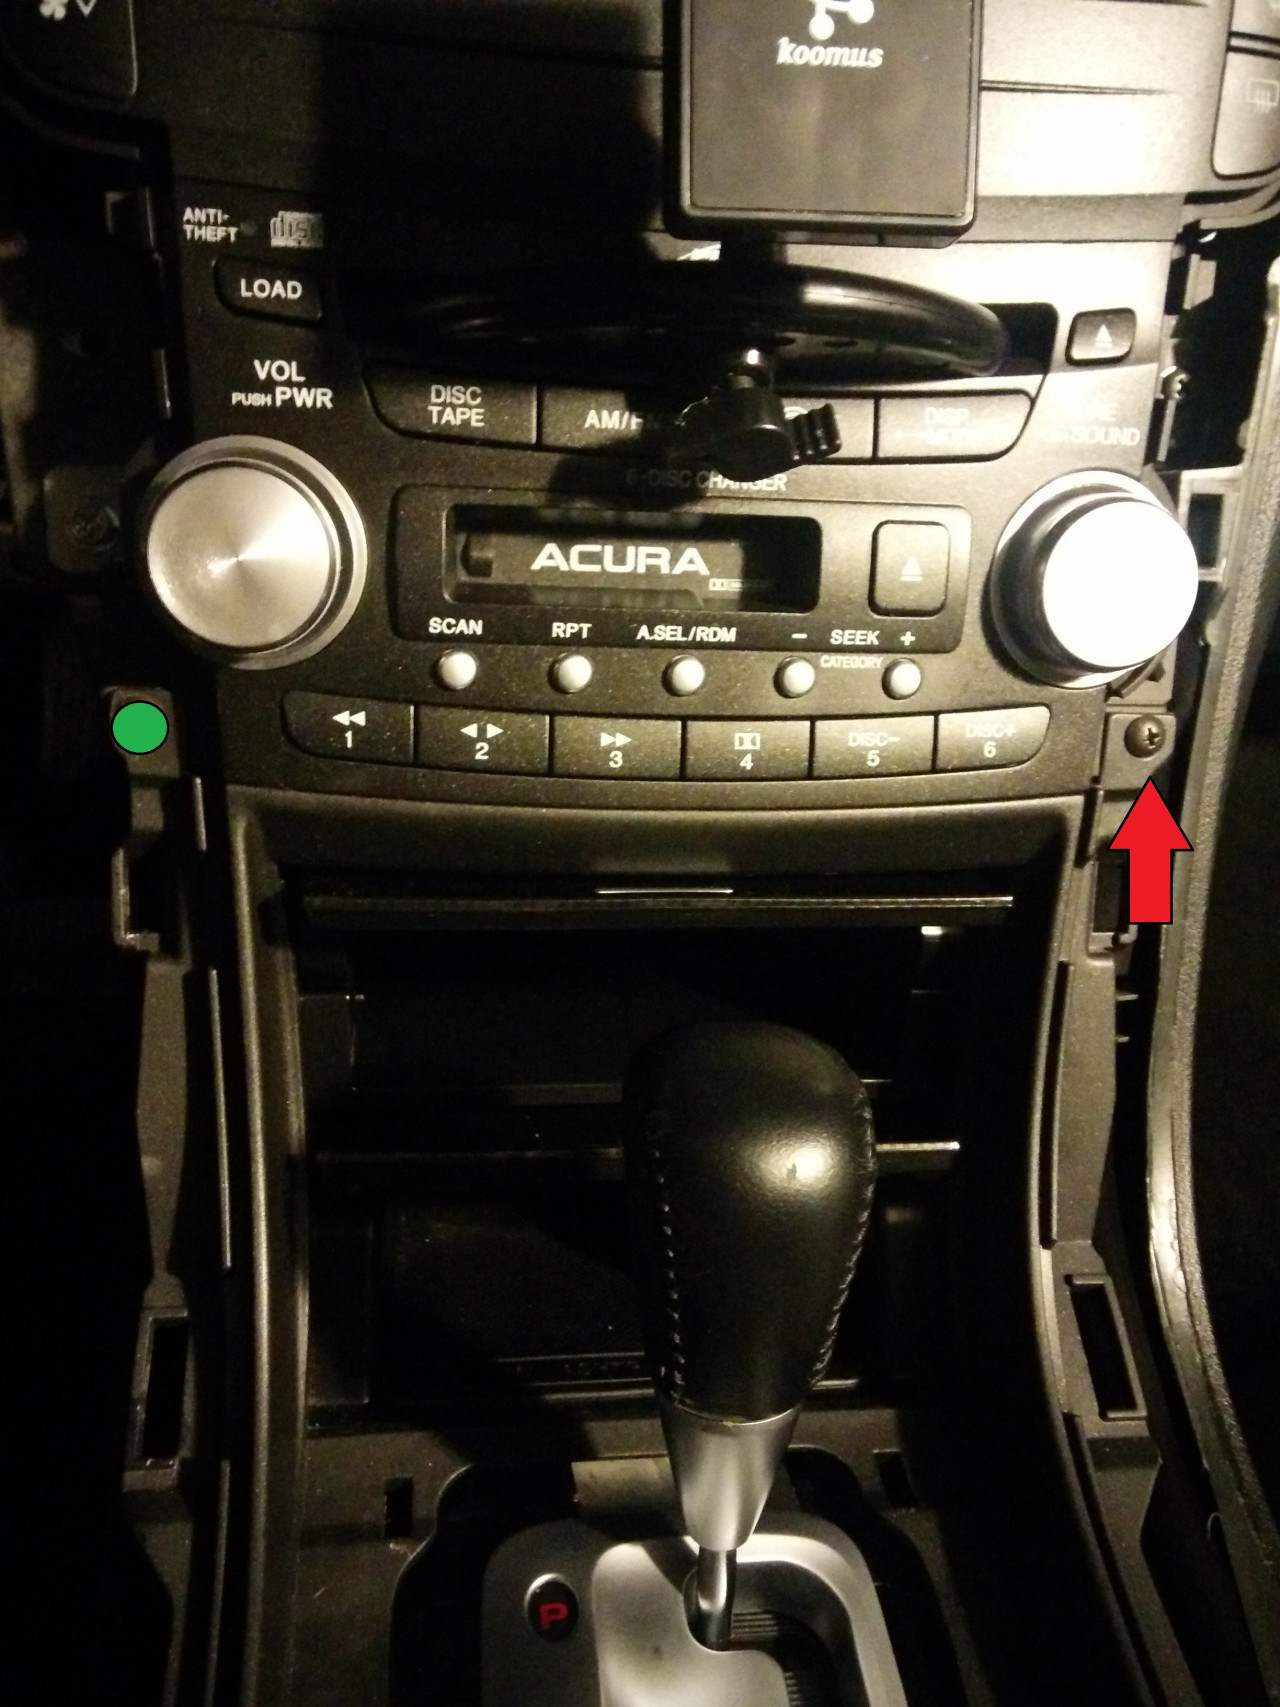
Then remove this screw (red arrow). Screw under green dot should have been removed earlier.
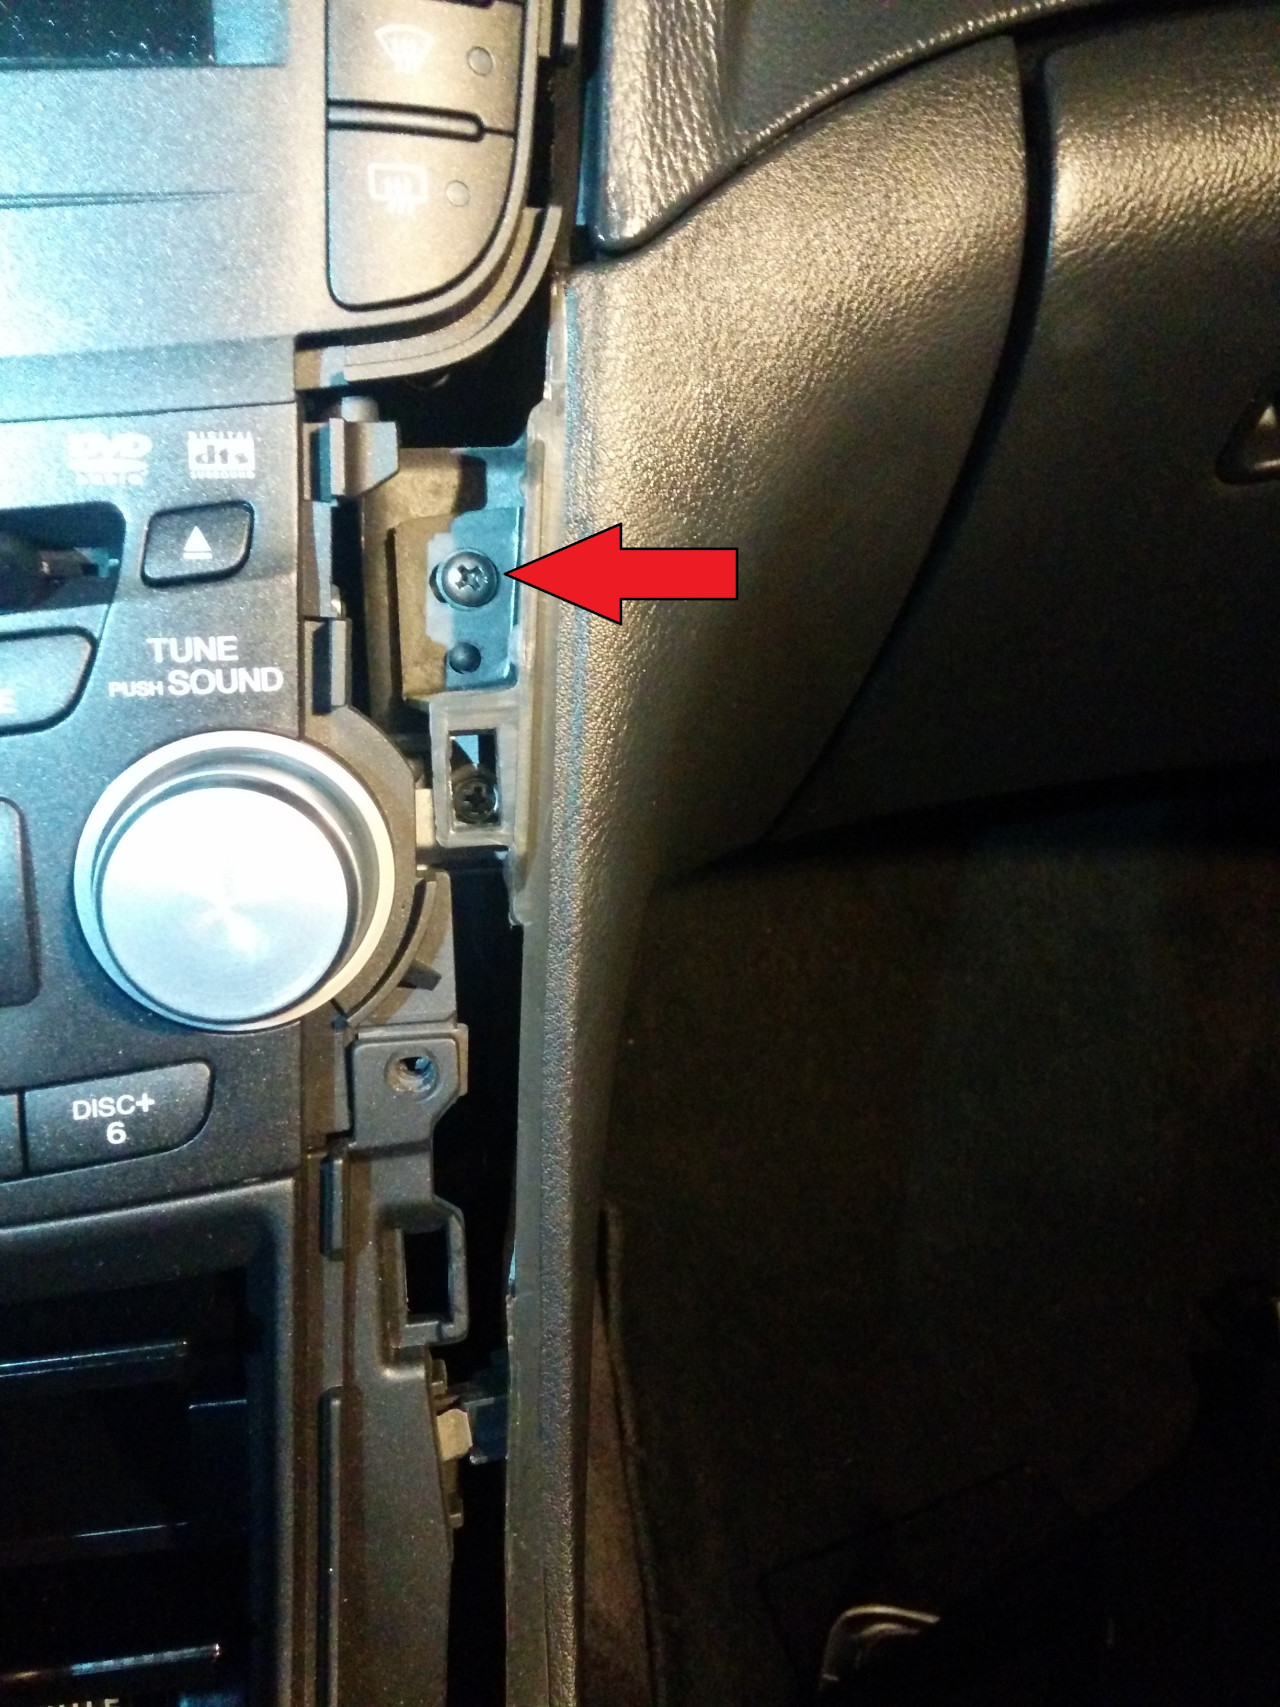
Take this one out too...
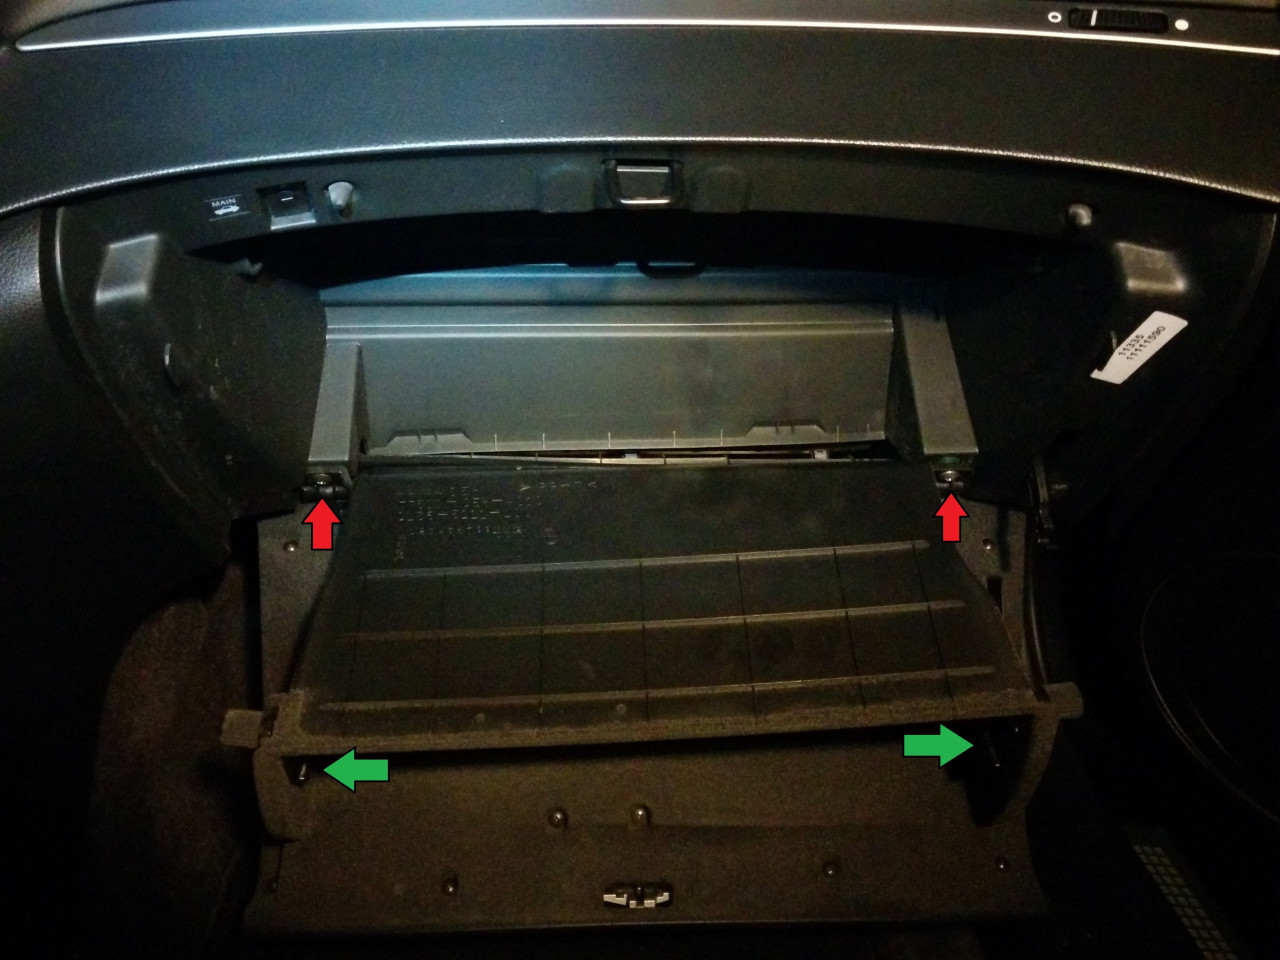
Now open your glove box and remove this latch by pushing it toward the front of the car...
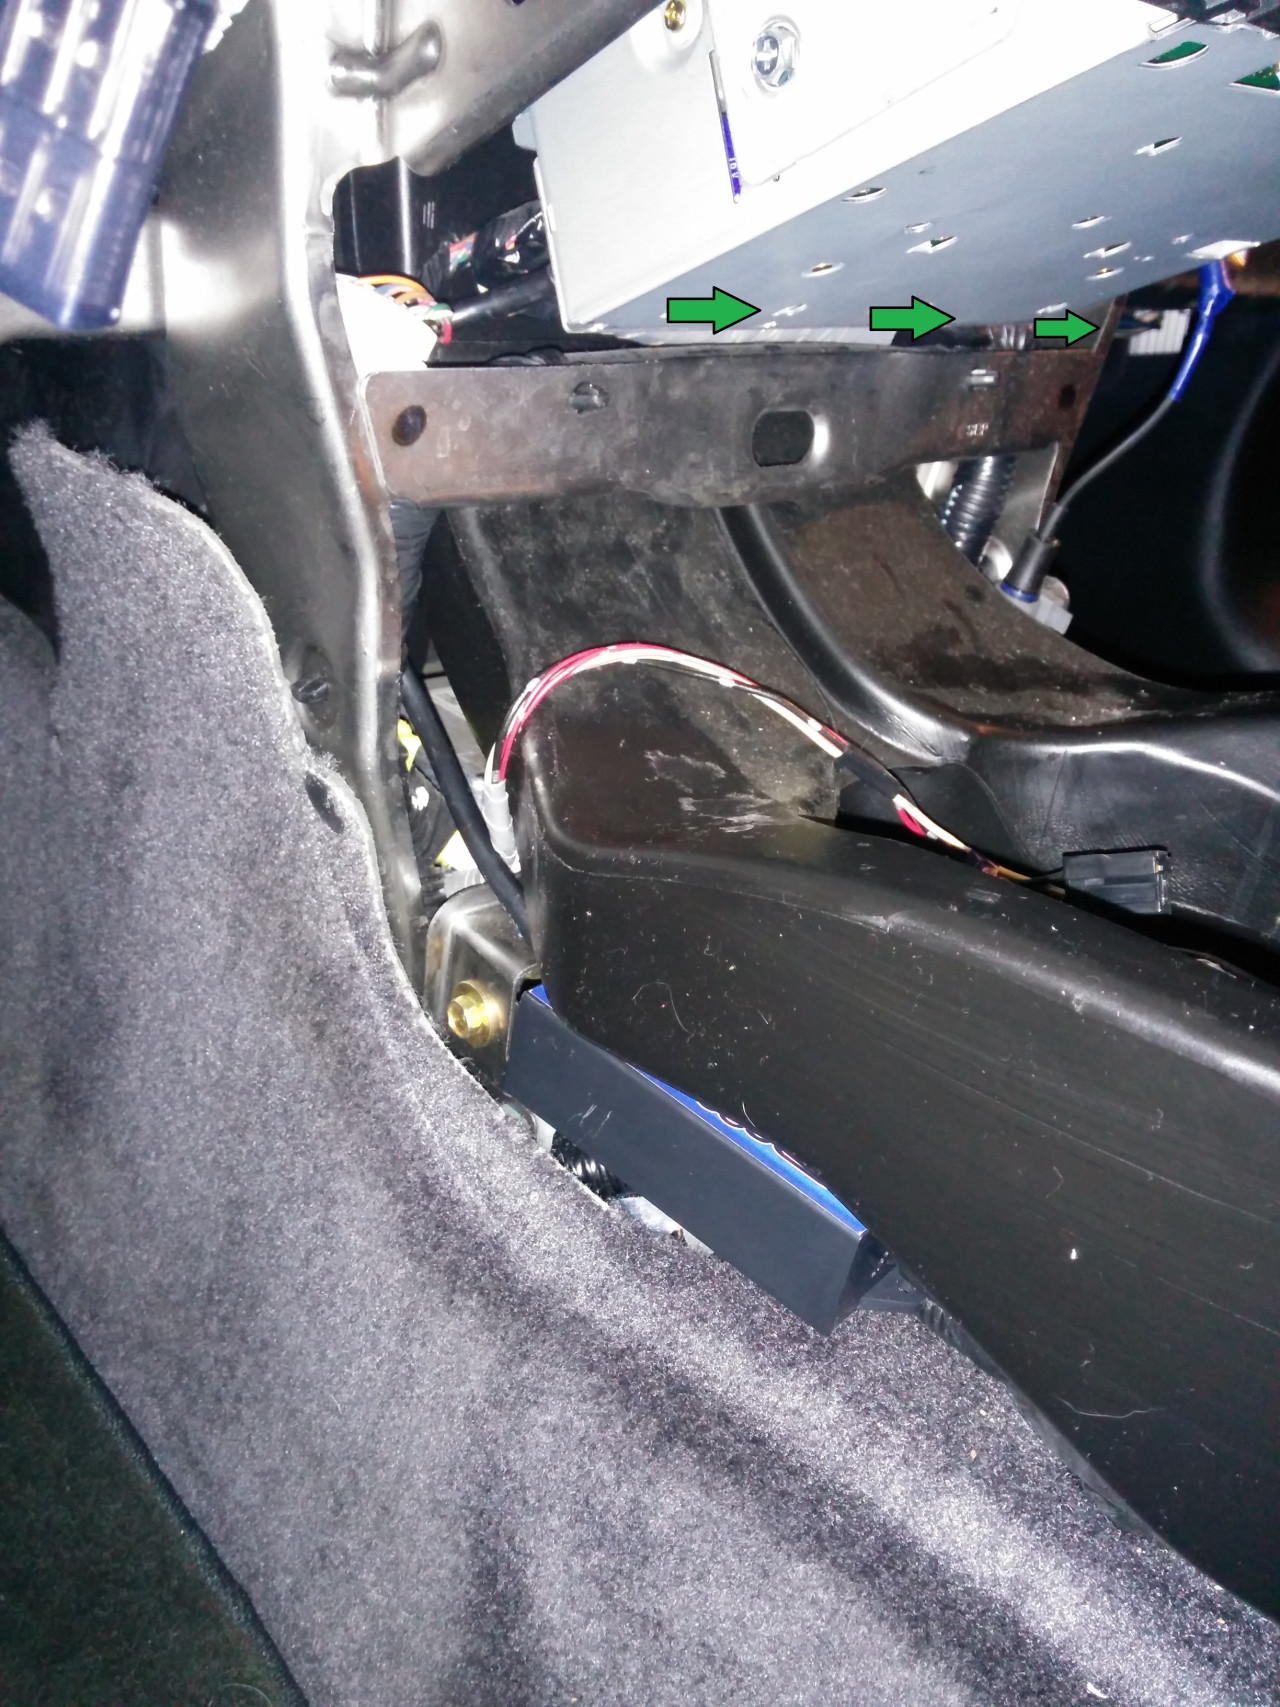
If you squeeze the clips in on the outside of the bin (green arrows) you can remove them and allow the bin to drop down like in the picture below. This will allow you to remove the two screws (red arrows)
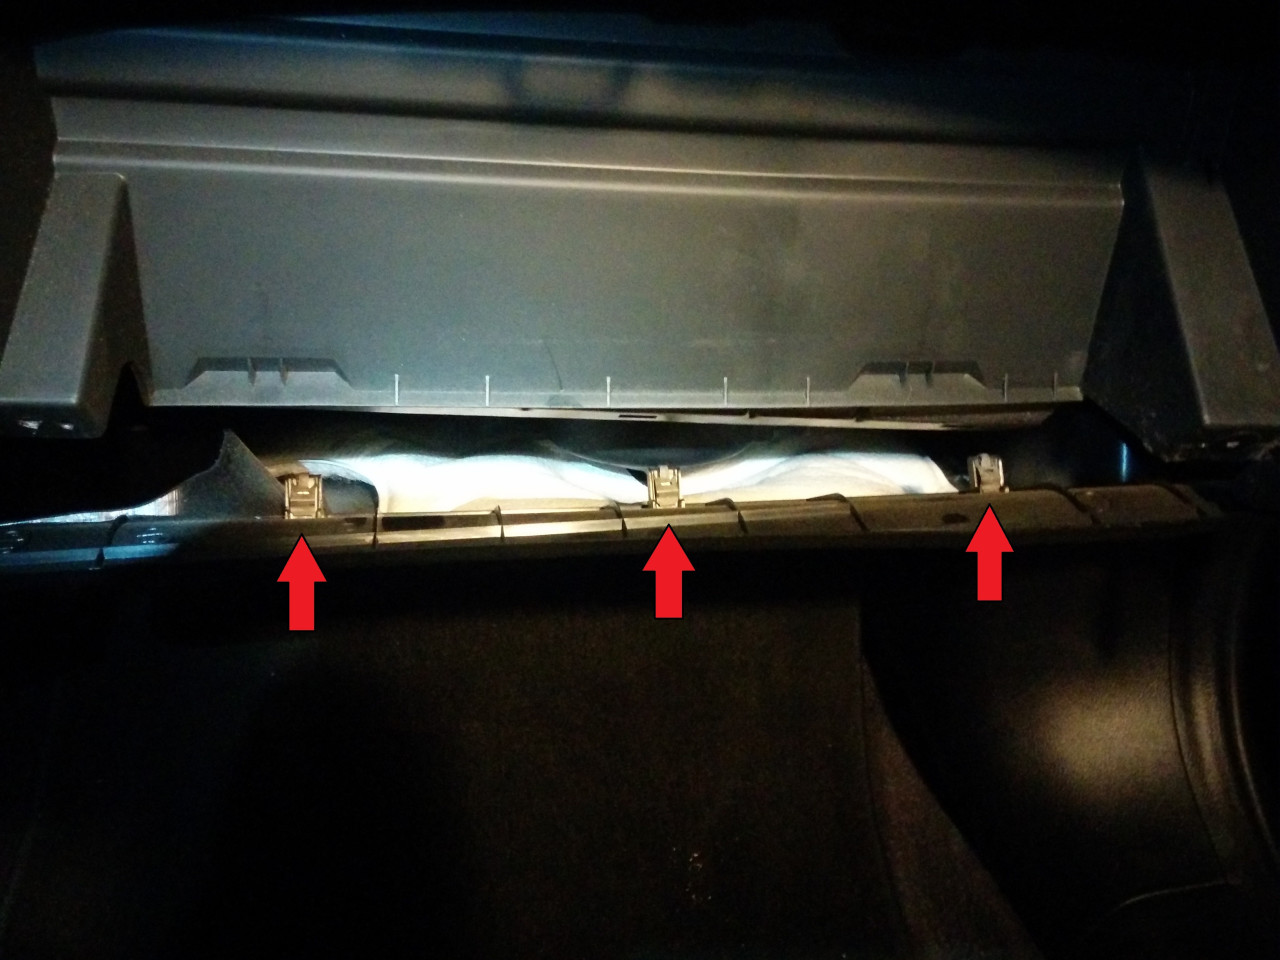
Next you want to pull back on the plastic panel that is below the door you just removed. It is held in by clips, 3 of which are shown here.
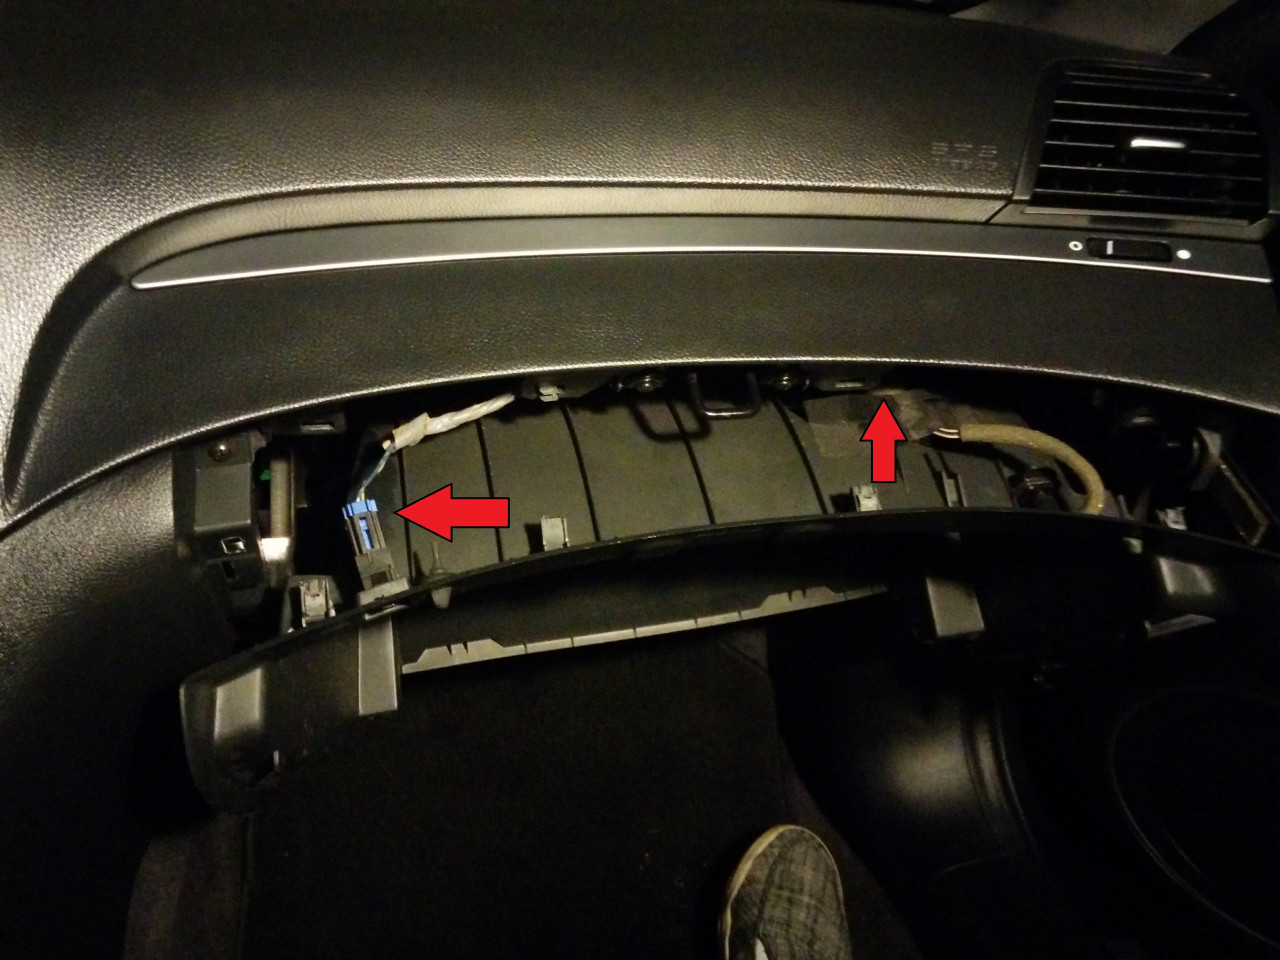
Now un-clip the plastic shroud that covers the doors latch by pulling it towards the rear of the car. Once it is free, unplug the connectors shown here.
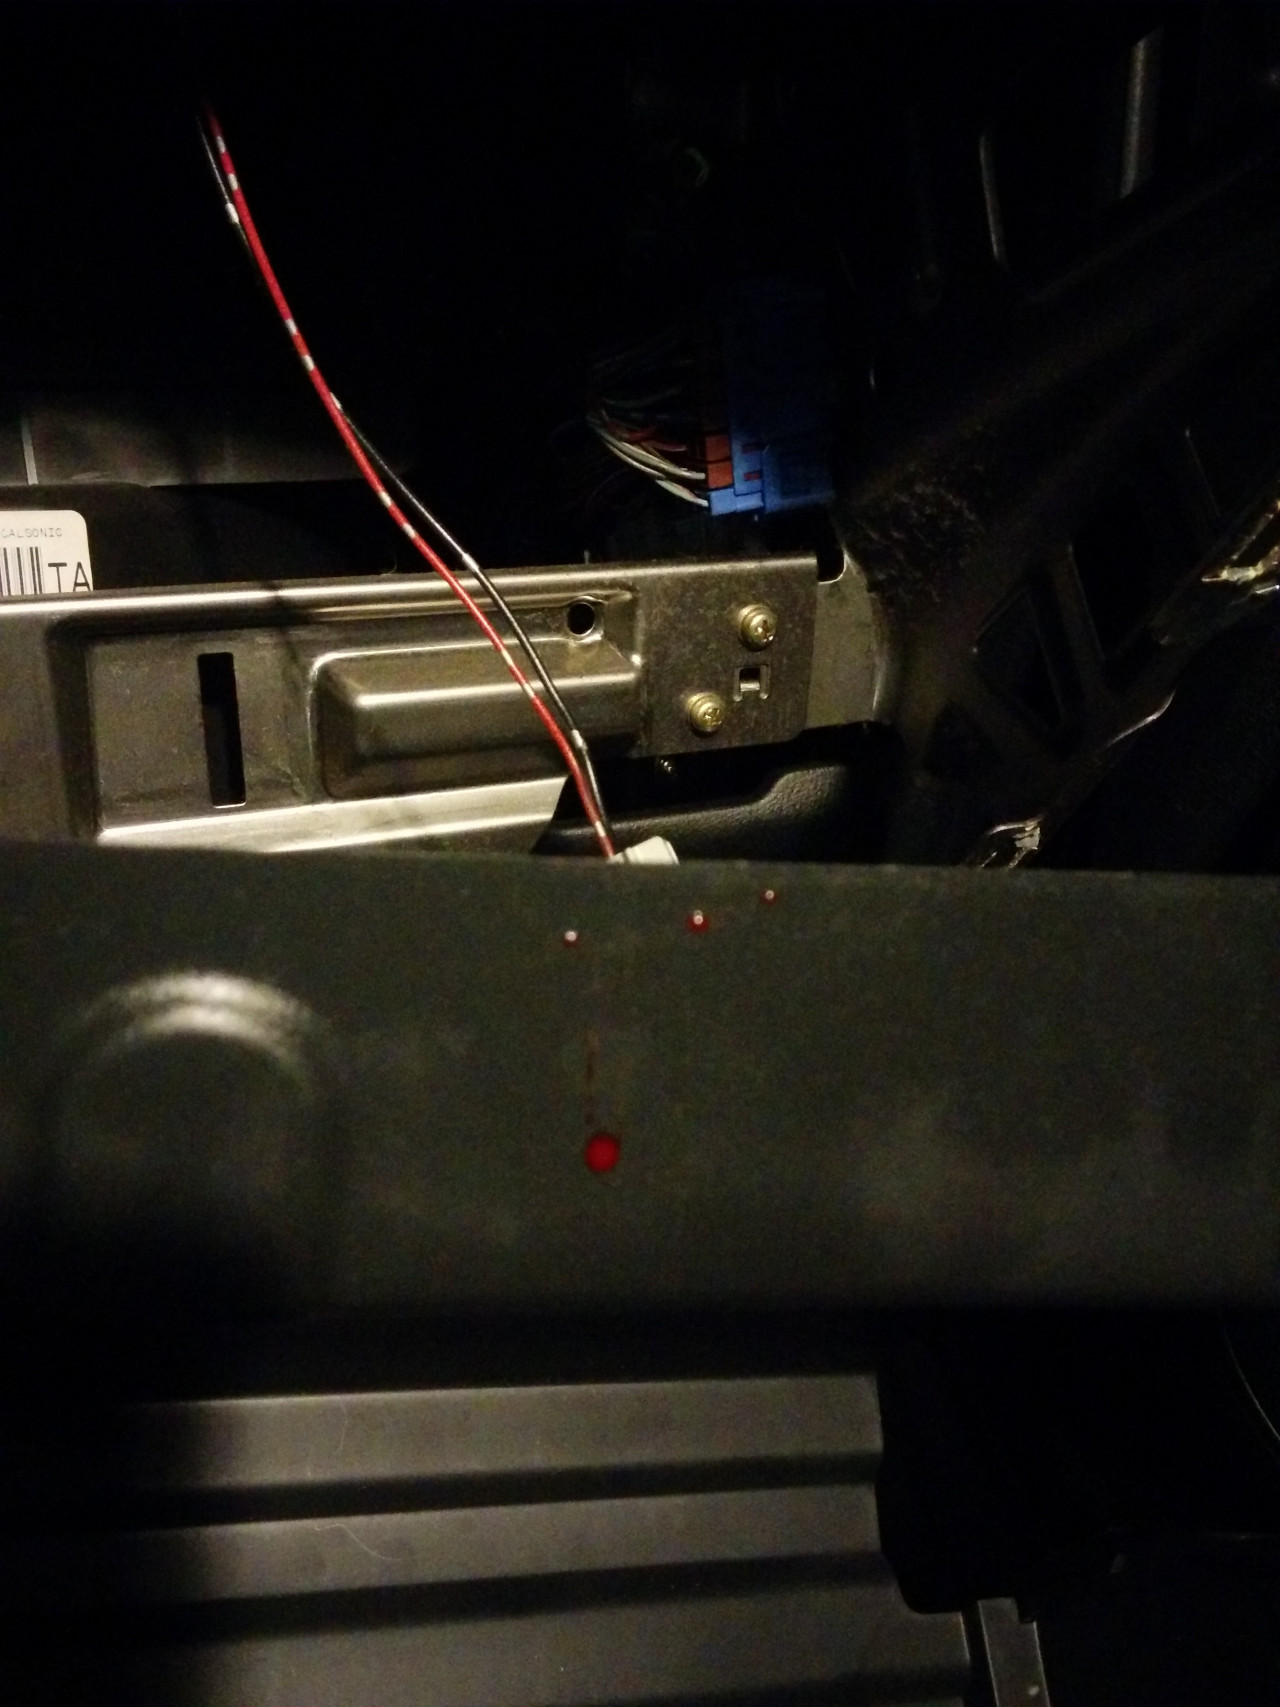
Did you remember to use gloves? I didn't. These clips were harder to remove than any of the others, and I ended up cutting myself and dripping blood all over my floormats and other stuff.
Now that the previous piece is out, you have exposed the only 2 screws still fastening the plastic panel to the right side of the center console. You remove this one the same way as on the drivers side, by un-doing the clips in these four locations.
Now its time to unplug your seat heater connectors.
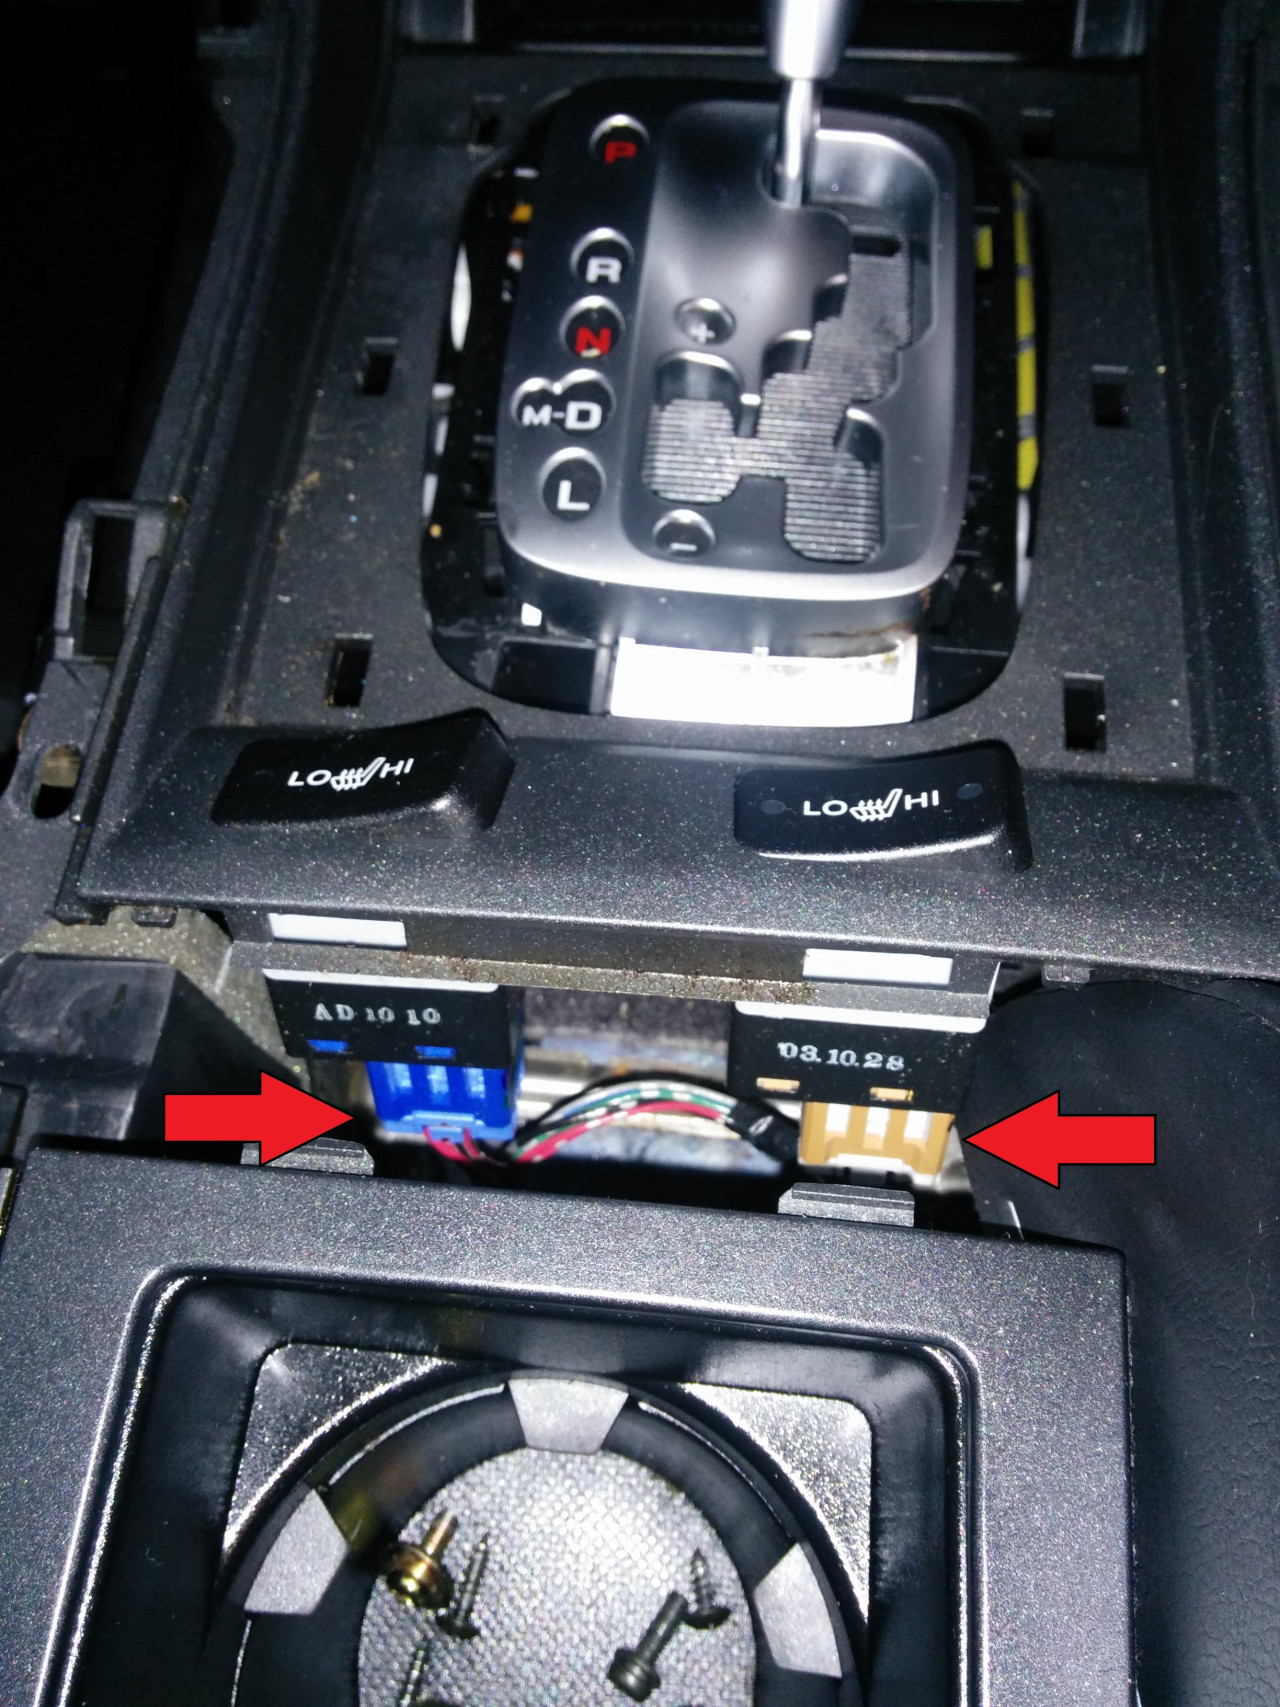
And disconnect the cigarette lighter adapter (black plug) sorry, didn't put an arrow on this one.
Now wiggle the lower section with the storage bins and cigarette adapter thing away from the stereo. It should end up looking like this.
Hold the brake, put the shifter in drive (I started the car because the key thing on the shifter didn't work for me) and wiggle the piece out of the way.
This is what it looks like after removal. Notice my "panel removal tool" (butter-knife with vinyl wrap on the end, lol) Remove the last two screws holding the bottom of the stereo onto the console (shown below, no arrows )
)
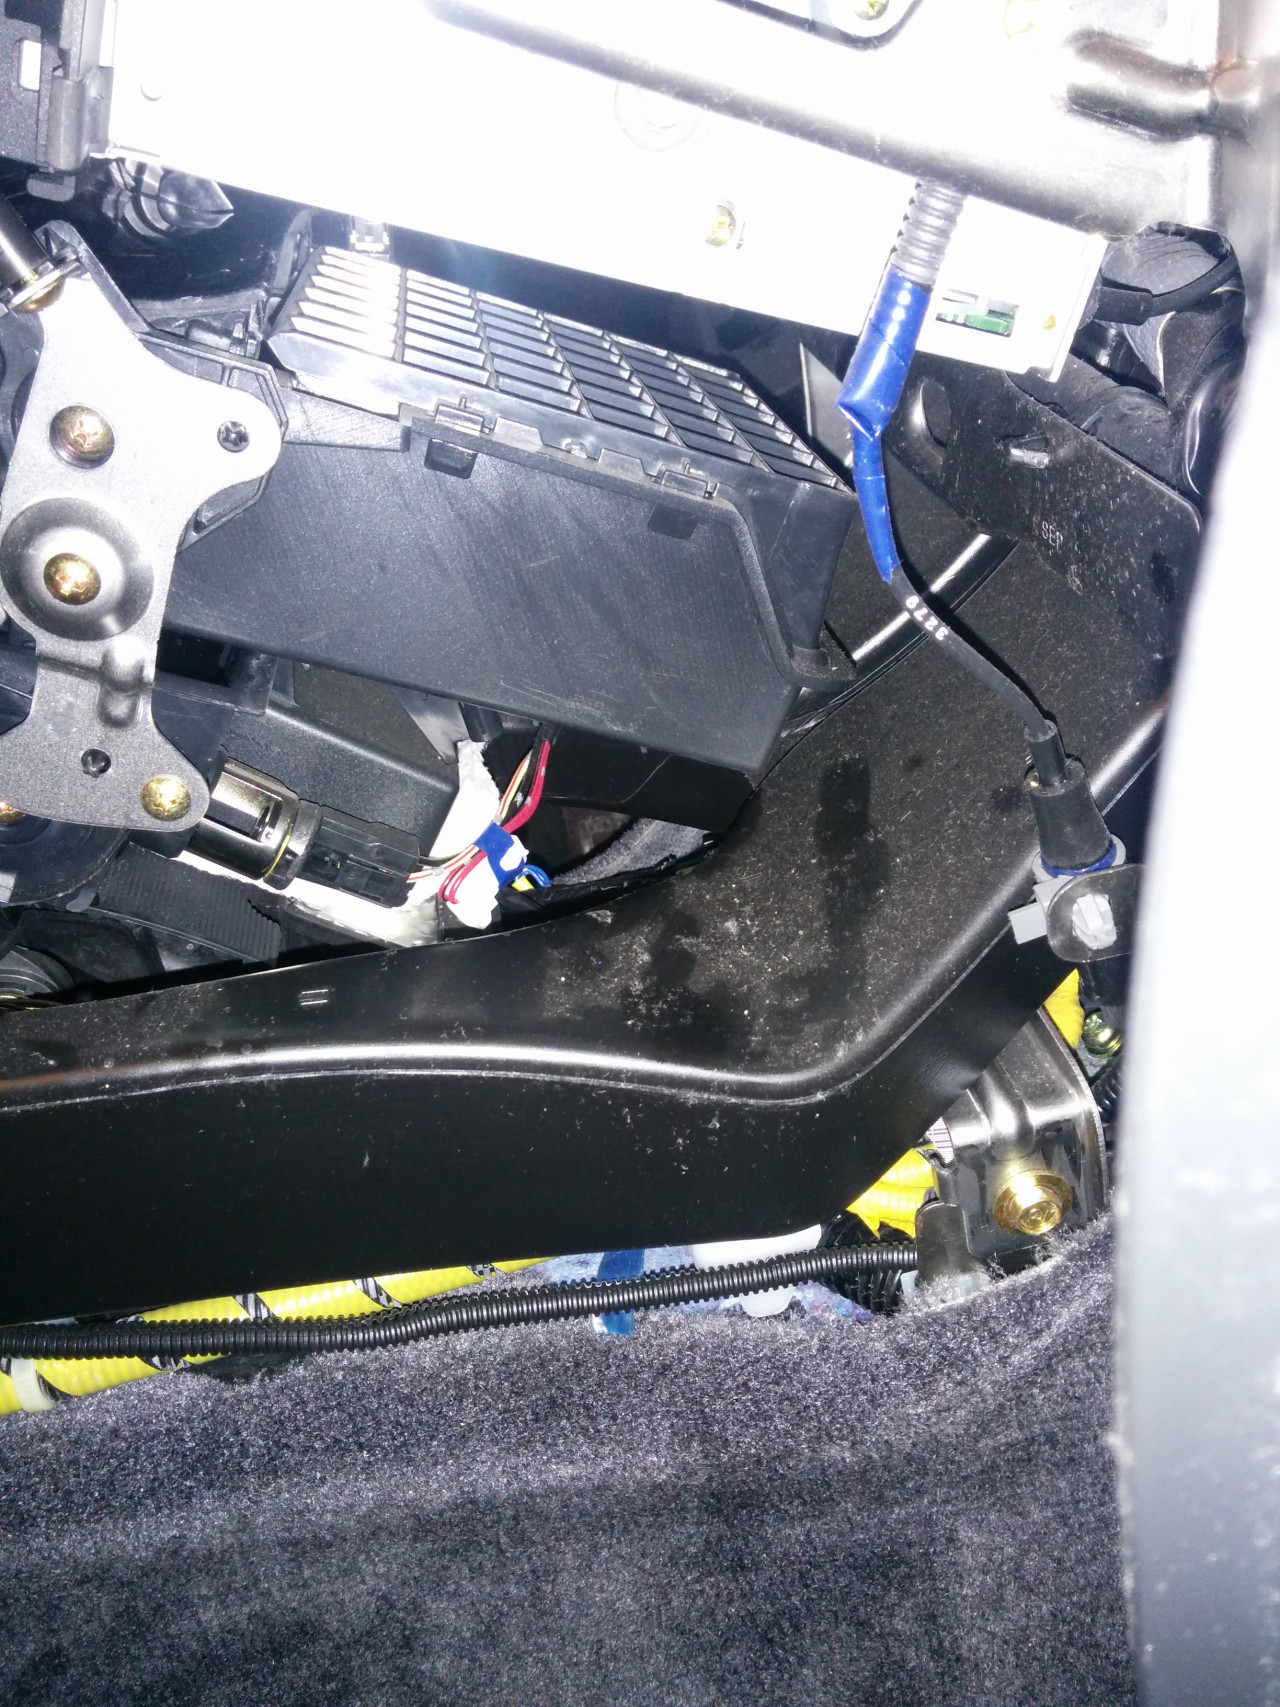
At this point you should be able to pull the stereo foward slightly, just enough to reach back and unplug the connector and install your BlitzSafe unit. Pull in the direction of the green arrows, genius. This is where I ended up hiding mine
CONGRATULATIONS! You have just installed your BlitzSafeHON/Bluetooth V.2X!!!
Now put everything back together!!
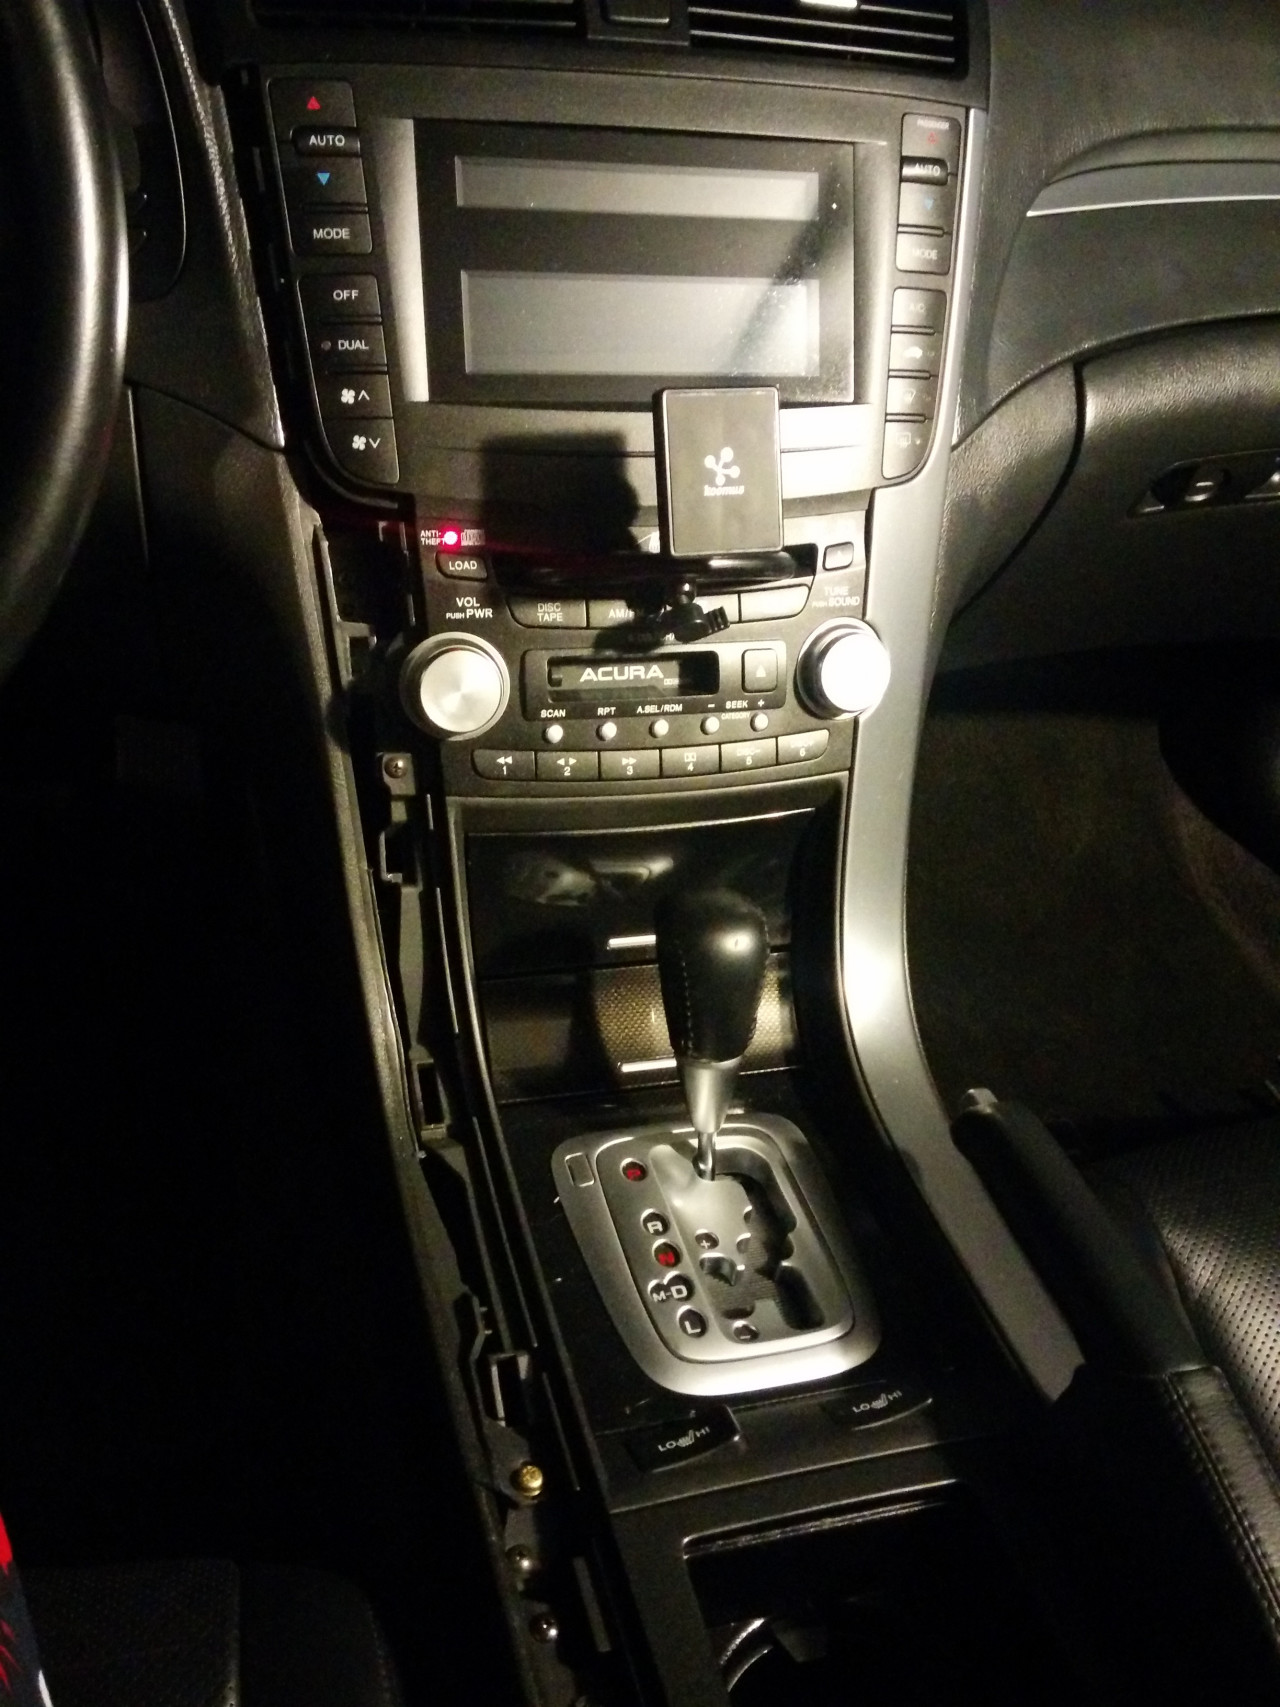
This is what I ended up with. I am using a Koomus Magnetos magnetic CD slot mount ~$16
Amazon.com: Koomus Magnetos Universal CD Slot Magnetic Cradle-less Smartphone Car Mount Holder">![]() Amazon.com: Koomus Magnetos Universal CD Slot Magnetic Cradle-less Smartphone Car Mount Holder" /> Amazon.com: Koomus Magnetos Universal CD Slot Magnetic Cradle-less Smartphone Car Mount Holder">Amazon.com: Koomus Magnetos Universal CD Slot Magnetic Cradle-less Smartphone Car Mount Holder
Amazon.com: Koomus Magnetos Universal CD Slot Magnetic Cradle-less Smartphone Car Mount Holder" /> Amazon.com: Koomus Magnetos Universal CD Slot Magnetic Cradle-less Smartphone Car Mount Holder">Amazon.com: Koomus Magnetos Universal CD Slot Magnetic Cradle-less Smartphone Car Mount Holder
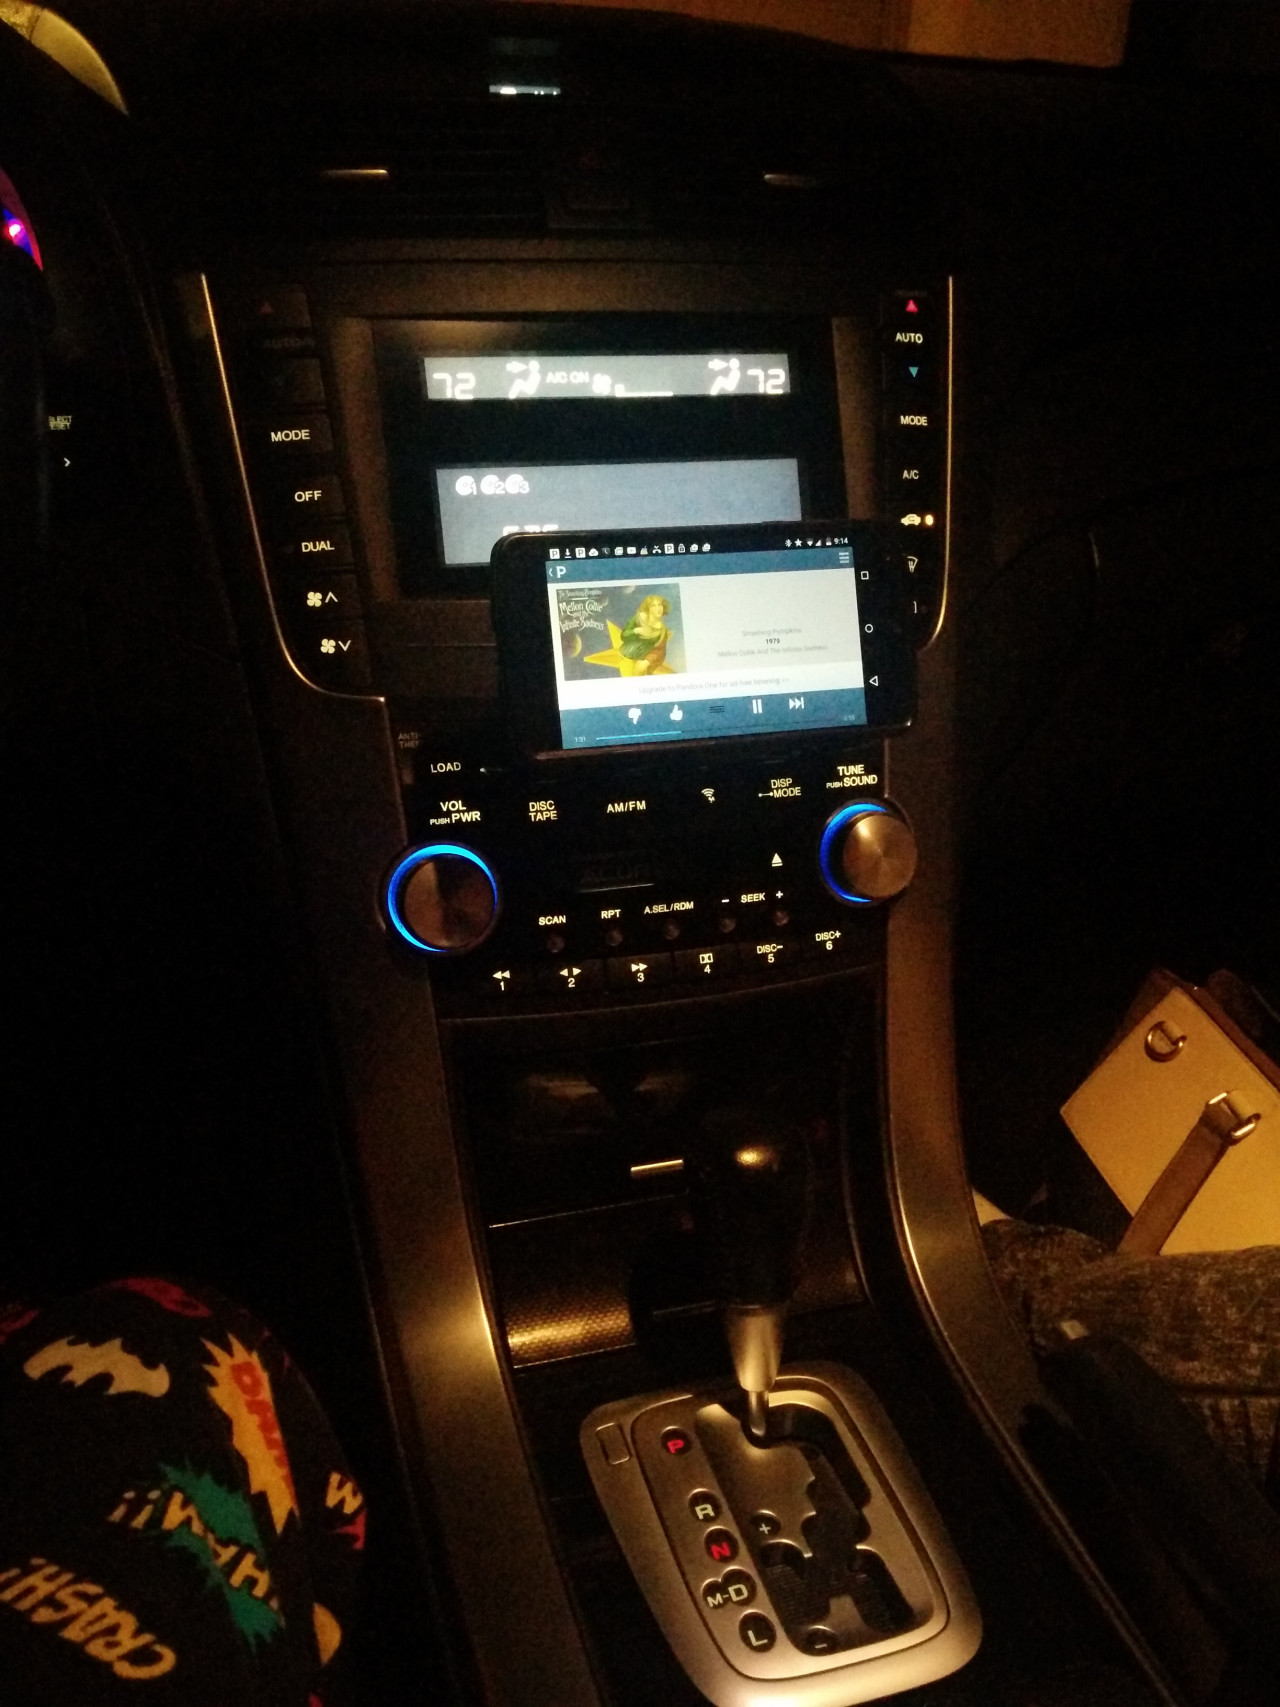
You just slap your phone on it and go. No cords, no adjusting. "Set it, and forget it!"
Post-Install comments:
1. Pairing with my Nexus 5 is lightning quick and automatic. Just turn on BT and your done. +/- 5 seconds.
2. Quality is fantastic! I'm no audiophile, but there is no drop in quality vs CD, or interference/buzzing/etc. Sound is crystal clear. Played the same track at 192 kbps on CD and compared to BT stream after downloading to my phone. Can't tell the difference.
3. STEERING WHEEL CONTROLS FOR VOLUME AND TRACK SELECTION STILL WORK!!!
4. My HFL is busted so can't comment on functionality here.
5. Incoming calls pause music. When the call ends, music automatically resumes.
6. I'm absolutely happy with my purchase. Paired with the Koomus mount, I just pick my music, set my phone on it, and go!!!