You must be logged in to rate content!
15 minute read
Windows up, roof close, from Fob (DIY + pics)
Compliments of chusteveb @ https://acurazine.com
11-13-2004
Alright TLers simply put, if you want your windows to shut and your sunroof to close from your key fob this is a DIY with a dificulty level of about 4 out of 10. If there are still questions remaining, of course feel to ask since I don't promise that I'm the easiest to understand.
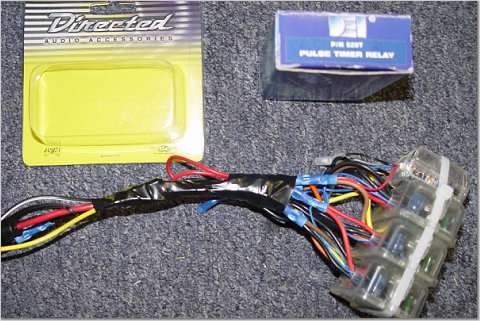
First you will need to aquire:
- 1 Remote Power Adapter, ($20) DEI
- 3 Pulse Relay Timer, ($20ea) P/N 528T DEI
- 1 Inline Fuse,
- 3 T-Taps,
- 1 Ground Ring Connector,
- 1 handfull of 'butt' connectors and 10 feet of 16g wire
- electrical tape is nice to have
- so are some zip ties
You will also need a good wire cutter and stripper as well as a good crimper, plus a philips screw driver (geezs how detailed am I gonna get  )
)
With that in your posession here is how to turn all that to make things work.
- Remove the drivers door panel and locate the wire harness that plugs into the master window control switches.
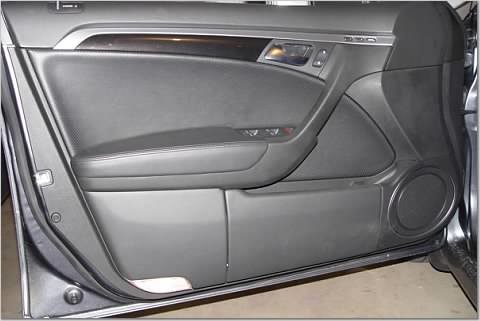
Door panel comes of with the removal of 4 screws total
Be careful when unpluging harness' on door panel
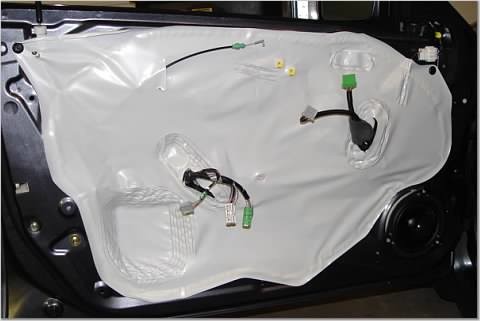
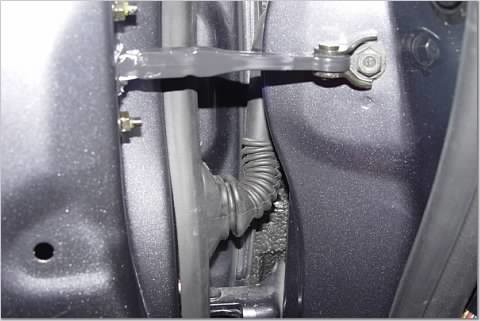
- Where that harness dissapears into the door behind the white plastic cover is a pug that has 3 wires, you'll have to stretch the plastic a bit to get to it.
Stretch up
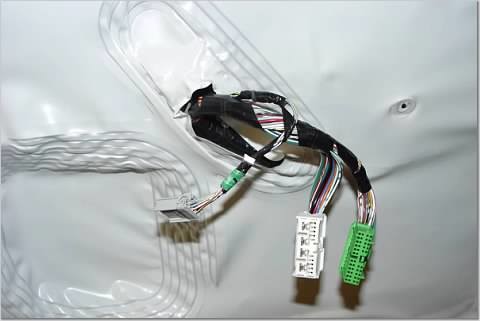
- Locate the White/Red wire (bottom of the 3 wires) and install a T-Tap.
This is the wire that receives the signal from when you turn the key in the lock position twice. If your windows are down, you can check to see if you have the right wire by touching it to ground momentarily, then again a second time and holding it for a period of time. This should lock your doors and send windows/roof to close. (The door may need to be closed for this to occur simulating the car all locked up.)
- Upon finding the correct wire, bring it through to the car via the stock boot.
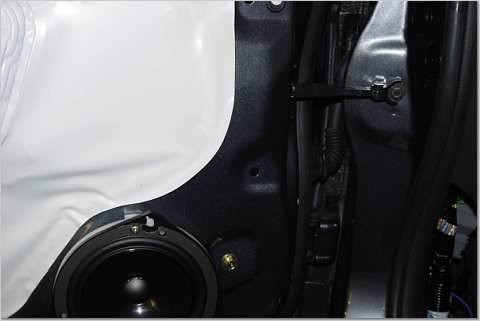
This will be the hardest part of the install. Take the speaker out and reach up into the door and unplug the harness (be careful, you'll get some vasoline on you)
After you get the harness that goes through the door jam unpluged locate a place where you can stick the wire through. Pull it through into the car and reinstall harness, speaker and eventually the door panel. You need this wire to come into the car right above the fuse panel.
- Locate the wire to the left of the steering column
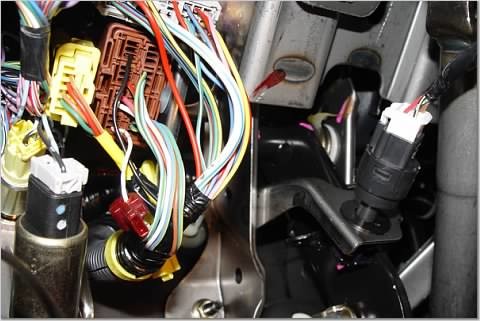
It is the White wire at the very bottom of the brown plug that is attached to the yellow plug.
- T-Tap this wire
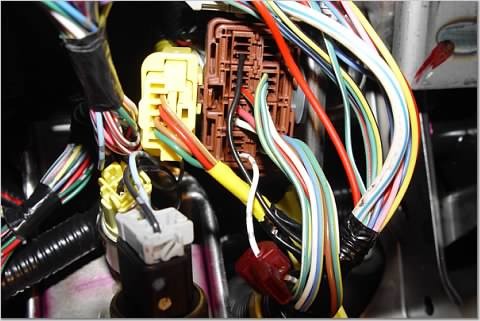
This is the wire that sends the signal to the piezo
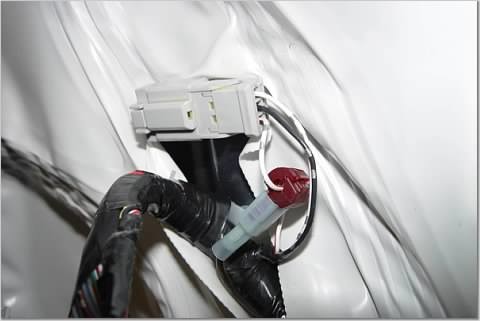
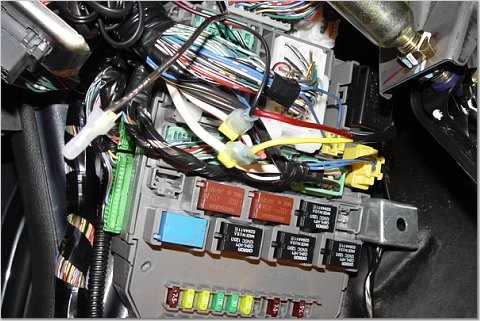
- Locate and T-Tap the B+ wire as shown ( not the wire you see that I attached a red and black wire to, but the one below it with the single yellow wire attached to it). Install your inline fuse to this T-Tap (picture isn't how I did it)

Use a 12V test light to find the correct wire if necessary
- Find a good grounding spot and attach your ground ring and appox 3 feet of wire to it. This should complete the first in-car preping leaving you with 4 wires total, 1st from drivers door panel, 2nd from brown plug, 3rd from B+, 4th from Ground.
Ok before I continue, I'm gonna read what I've got and see if I make any sense...
Hey not bad, my pics showed up and eveything...
OK so now that we've finished the in car prepping, we need to prep all of these relays and remote power adapter
I don't have any more detailed pics but if you follow my instructions you'll be fine.
-Zip tie them all together as I did to make it one unit, have all the wires facing out the same way. This makes it easier to attach them together.
-Label each relay (1,2, & 3)
-First, all the Red wires will be connected together but in addition to, Brown from timer 2 will be connected to all the Reds to make a total of 5 wires together
-Second, all the Black wires will be connected together but in addition to, Brown from timer 1 and Brown from timer 3 will be connected to all the Blacks to make a total of 7 wires together
-Third, Black/Stripe from timer 1 and 2 will be connected together, this will go to the wire in the brown plug under the dash in the car
-Fourth, the Black/Stripe from timer 3 will connect to the Blue wire from the Remote Power Adapter
-Fifth, the Gray wire from the Remote Power Adapter will connect to the Yellow wire from timer 2
-Sixth step is to connect the Yellow wires from timer 1 and 3 together. This will connect to the wire from the door that was brought into the car.
-Seventh, just cut the connection of the blue looped wires on all 3 timers and shorten the 3 orange wires which will not be used
All said and done, you should be left with 4 things: a Red (5) to go to B+ in the car; Ground (7) to be grounded in the car, the Black/Stripe (2) to connect to the wire in the brown plug under the dash in the car; and the Yellow (2) wires to be connected to the door wire in the car
Before installing this into the car, take all the timers and adjust them so that timers 1 & 2 are turned all the way to the left (counter clock wise) then back to the right (clockwise) just a niche (litterally just enough to where you could tell it moved by feel.
Install this wad of stuff into the car.
Adjust timer three when everything is installed into the car and adjust it to stay open just long enough to close up the roof.
Make sure the option for the factory beep from the drivers setting is turned on.
Cross your fingers (I am), this should work!
Whoa, ... So I know this sounds confusing. For those of your with 'smarts' as far as relays are concerned:
87a = Orange (the wire that will not be used)
87 = Brown (Normally Open)
30 = Yellow (Common)
Red (Fused, + 12 Volts, Constant)
Black (Ground)
Black/Stripe (trigger input)
Blue Loop (cut if trigger is positive +)
As for the Remote Power Adapter:
Red = Constant 12v +
Black = Ground
Blue = positive output but has a delay (this is how I got the second pulse to delay)
Gray = connected to anything that measures above +5v to turn on and below +3v to shut off
Botton line: I'm still researching if there is module that will perform what I've put together, but this works! It really sounds more confusing than it really is.
11-14-20014
Hey guys, glad to report that mine has been working without a flaw. To answer some of the questions asked:
- You only need to take apart the drivers door panel, the cover panel under the drivers side knee panel, and the drivers kick panel. All you need is a philips srewdriver to remove a total of 4 screws in the door. Everything else "pops" off.
- This will not void any warranty as this project doesn't require the cutting of any factory wires.
- You will still be able to use the key and physically perform this same function from the key hole on the drivers door as designed from the factory. Kind of like the Maxima, except that in the TL, you must turn the key and lock the doors, release the key, then turn it to the lock position again and hold.
- This set up is designed to roll up any windows that are down and close the roof if it is open (either position) upon exiting the vehicle and locking the car by pressing the lock button on the key fob twice consecutively. Note: the confirmation tone in the drivers setting must be set to 'on' for this feature to be enabled.
- I lucked out and ended up using parts from a local car audio/ alarm shop. I ordered a part online which turned out to not work for this aplication (I still kept it since I'm sure I'll use it sometime for something).
- A 15 amp fuse would be sufficiant to run all relays etc. All the misc. connectors, wires, in-line fuses and fuse holder, electrical tape, etc. can be found easily at your local auto parts store ie. Pep Boys, Auto Zone, O 'Reillys, Napa, etc. They even have wire cutters/strippers/crimpers and other tools at those stores.
- Part Number for the Pulse Timer for DEI is 528T; you may even find this part if you ask the install bay at Best Buy
- I don't have a DEI part number for the Remote Power Adapter but I'll post it asap once I find the info. Another name for this is a Low Voltage Turn-On, they are used in aplications where factory headunits are to be driving aftermarket amplifiers but do not have a remote turn on lead (I used one in my TL for the aftermarket amp used to drive my aftermarket subwoofer). Again, this part may very possibly be found at your local Best Buy install bay.
I will post links if I find websites that sells these products that I have.
Some links for the pulse timer relay: (just did a search for it on msn)
http://www.radiomancaraudio.com/deta...DUCT_ID=DE528T
http://www.drdetailshop.com/528T.htm
Some links for low voltage trigger: (not exactly the same as mine but does the same thing)
http://www.cardomain.com/sku/PERLVT2
http://www.logjamelectronics.com/pie1vt.html
http://www.virtualo.net/index.asp?Pa...WPROD&ProdID=6
http://www.go2pac.com/products/trigger.htm
I'll post where to find the one I have when I come across it.
Here it is, but no pic of it on the website:
http://www.audionmore.com/Merchant2/...uct_code=55000
11-15-2004
Not on the rear windows; they don't have one touch operation so this wasn't something I could do, but I can tell you that if you hit the unlock button on your key fob everything will stop moving, and as you know, hit the unlock button twice consecutively and hold and eveything will reverse in direction and open. If for some reason, the rear windows do not shut due to an object in it's pathway, the motor will stop trying to close the windows after the timer relay kicks off (which is the max time it takes to shut the sunroof).
^
lol
I think some may like my subwoofer project. I like a more powerful bass note and am utilizing the stock 8" sub mounting location. The stock set up is a free-air design. I sealed up the rear deck lid to simulate a subwoofer box since a sealed subwoofer set up is more accurate and more powerful than free-air IMO. I also wired up an alpine sub amp and was able to hide it behind the trunk liner by the XM trunk unit. Using the factory sub speaker wires as the line level inputto the amp, I am still able to retain my sub level control in the factory head unit. All said and done, I wanted my set-up to simply give me more bass response without changing the factory control set-up and look, as if it came stock from the factory this way. I also wanted to retain all of my trunk space so I didn't want a box back there. This also allows me to retain the all stock appearance so I don't have to start to worry about putting in additional security into the car. This project is almost complete; I'm trying to figure out the correct amount of air space within this box for the specific sub. If people are interested, I can post pics and let you guys know how it all worked out and a DIY for the amp set-up and the box.
Just remember that this safety issue of the windows/ roof closing that some may be concerned about, is still all controlled by you (the user). I'm not sure what kind of senerios that people have run into where something gets into the way of the window closing but just remember that all this is doing is just giving the option of on top of locking up your TL from the key fob, but also to remotely close all the windows/ roof.
11-18-2004
I can verbally tell how to remove the door panel which may help a bit too.
- Put the window all the way down.
- Behind the interior door release handle is a cover that upon removing you will find 2 screws, remove those.
- Next you will find a rubber stopper below the door hinge (on the door itself) that is screwed into the door, remove this also.
- The last screw is below the master power window switches right above the door map pocket, it holds the door armrest to the door itself (if you get down towards the ground and look up at the door you will find it easily) this needs to be removed also.
- Using your finders (or a flat head screw driver) pry at the corner of the door panel by the speaker; using force will pop the plugs that hold the door panel to the door itself.
- Work your way around the door till it is completely free from the door then lift the door panel up and over the lock 'thingy' at the top corner of the door.
- Gently tilting it back unhook the cable at the interior door release handle
- Finally unplug all necessary harness' on the door panel to free the door panel completely from the door itself.
- Double check to see if all the plugs came off the door and are on the door panel itself, if not remove these plugs from the door and reinstall them onto the door panel in preperation to reinstalling back onto the door.
11-27-2004
This mod to me wasn't hard at all nor was the install; I may make it seem harder than it really is w/ my version of instructions... It only took me a couple of hours including the prewiring which I did in front of the TV while my 'other half' watched the bachelor. Therefore I find this mod very worth it. Since I can open the windows and roof from the key fob, I'd like to be able to close them all from there too. Also when I walk away from the car and hit the lock button twice and hear the "beep" I know everything is shut tight and locked up.
But here is the initial reason as to why I wanted to do this mod, the mod in the picture below would restrict me from being able to perform the function of closing everything up as it was designed to do from the lock core and I wanted to retain this feature.
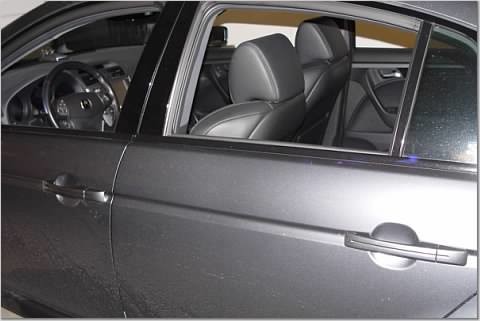
What's better than to have this feature right from my fob?!!!