You must be logged in to rate content!
5 minute read

How-To: Replace HID bulbs in headlights on 4th gen TL
Compliments of pimpin-tlv @ http://acurazine.com
7-15-2012
I decided to upgrade my fogs and lights with 6k bulbs and since I didn't see many good how-tos figured I would make one since I use to do a few.
How To replace/install HID bulbs in your 4th gen 2009+ Acura TL factory headlights.
Tools Required:
1 - Small flat head screwdriver
1 - Drop light
Parts Required:
1 - D2S HID Bulbs. These were 6k HID Extra ones.
Procedure:
1) Jack the car up and remove the front wheel from the car on the side you plan to work on.
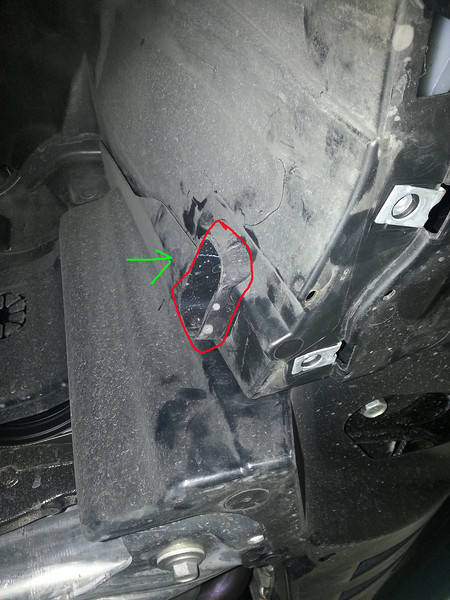
2) Look inside around your fender liner, and you will see some snap in connections. See both pictures below with green arrows. 2 of the snaps have a slot while the rest do not have any.
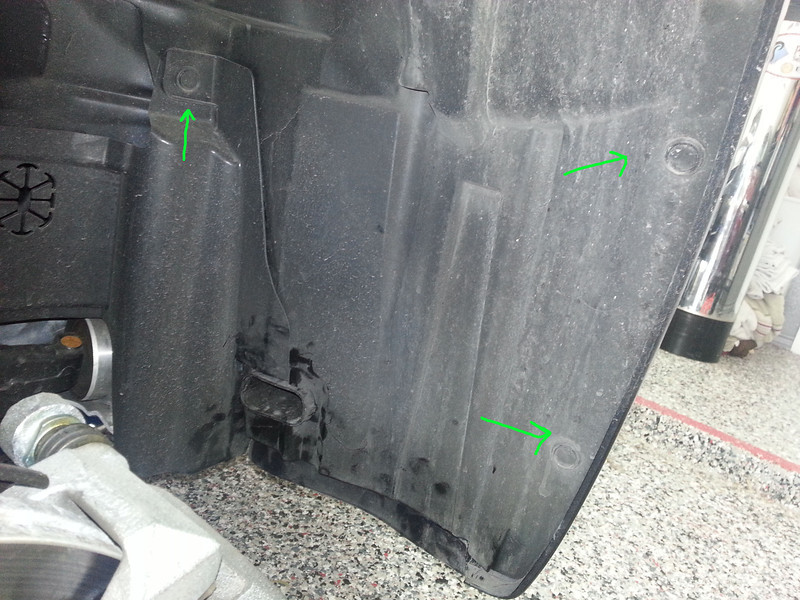

3) Remove those connections with a flat head screwdriver as seen below in the picture. Stick iit between the outer plastic and inner plastic and twist the screw driver to pull the inside portion of it out. It will not come completely out. Just get it to release then you can pull the whole snap out of the fender liner.

4) Next you need to PULL the fender liner down. It will be a bit hard, but it will come down. It's going to give you room where it's bent into a V near the the strut assembly. Don't worry it will form back into shape once you are done.
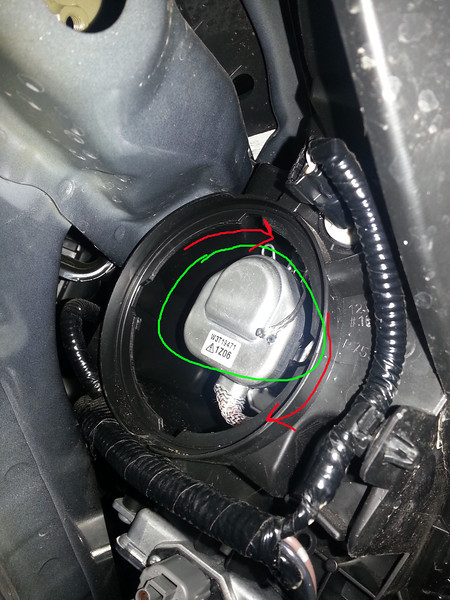
5) This is the one area I forgot to get a picture. But as seen below, this is the silver CONNECTOR that goes into the back of the HID bulb. There was a BLACK cover with a sticker on it that you twist off to show this part.
6) You want to switch that silver connector (Picture Below) (circled in green) to the right (clockwise) in RED, and you will feel it stop around 2pm direction. Once it stops, pull it straight off. It will have some ground cables attached to it so there is little play. What I did to move it out of the way was stick it in the bottom of the headlight housing.
7) Should look like this once you have it out of the way.

8) Next you need to unsnap the little metal clip from the bulb (See picture below) (Green circles) (this holds the bulb in it's slot). Slide the circle ends in GREEN towards the inner part (RED Arrows) and once you reach the inner part pull down (Blue Arrows) towards you. This will lower that clip assembly out of the way.
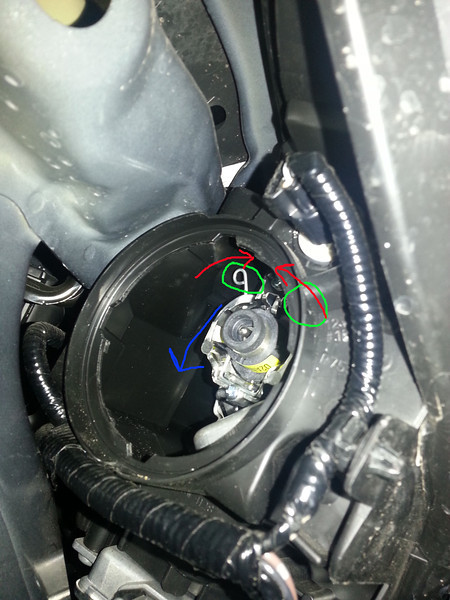
9) Next grab the bulb base and remove it straight out. Keep an eye on the orientation of the bulb so you can place the new one back in the exact same way. It has a SLOT on the top that guides it into the correct position of the headlight. Don't touch the lightbulb directly so the grease wont get on it!
10) Once removed, re install the bulb with the slot opening to the top. You should feel it slip into that slot and feel flat in the socket. Once you do that, re install the clips the same way you removed them.
11) Reinstall in reverse order as you did taking things off and you are good to go. Make sure as seen below, the brake cooling duct (red circle) liner is all push in around this vent, and the clip that sticks out is in it's slot (green arrow).
12) Completed! Hope this helps you folks do this on your own!
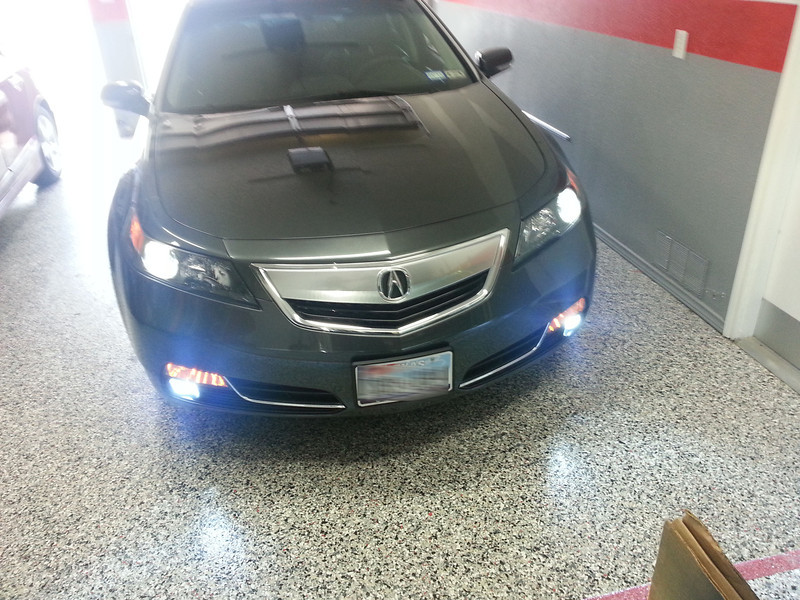
Pictures on how the headlights look vs the stock ones below:
Stock:
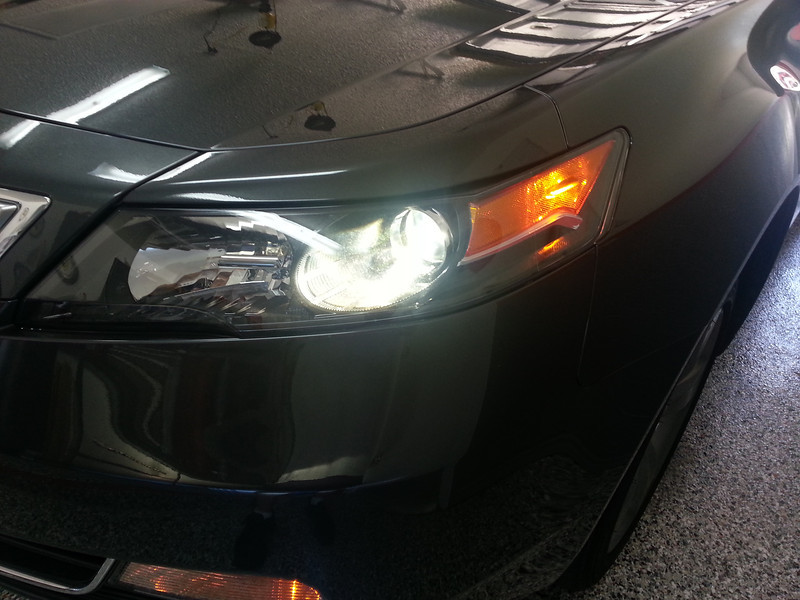
HID Extra 6k D2S: