You must be logged in to rate content!
5 minute read

92-94 ACURA VIGOR INSTALLATION INSTRUCTIONS
1. To remove the old shift boot, first you will have to remove the center console. It is secured with four #2 Phillips-head screws.

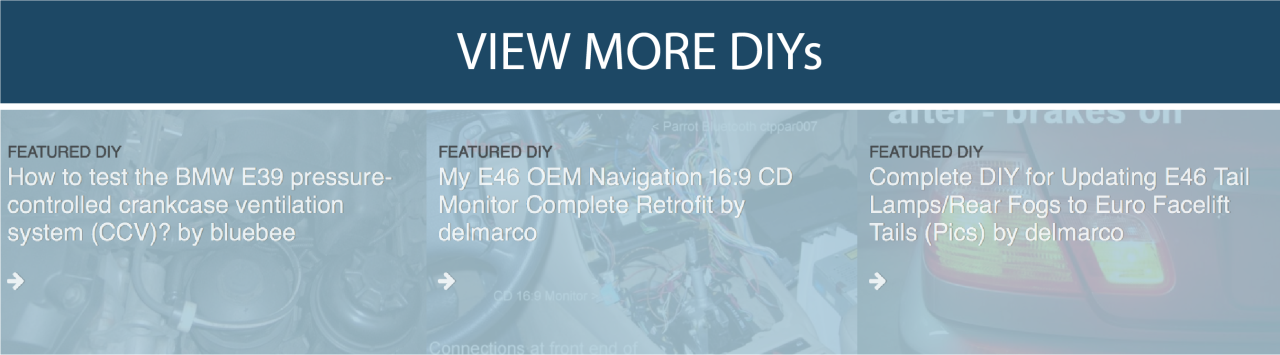
2. The first two are on either side of the console, right about where your knee would be while you're sitting. They are covered by plastic trim caps. Gently pry out the trim caps with a small blade screw driver, and remove the two screws.
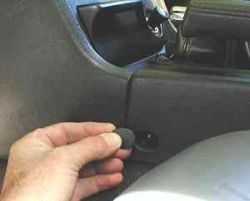
3. Next, open the console bin under the armrest. The bottom of the bin is fitted with a piece of carpet. Lift up the carpet and you'll see the other two screws. Remove them.
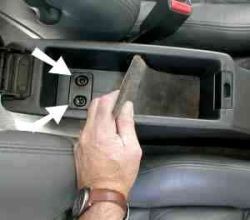
4. Next remove the gearshift knob. Notice the "chrome" trim ring immediately under the shift knob. Grasp the ring and push it straight down, gently. It's a friction fit. (Sometimes it helps to rock the knob forward and back gently to get it moving.)
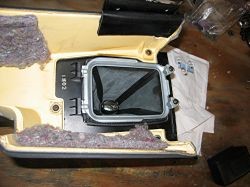
5. Once the shift knob has been separated from the boot, unscrew it, counting the number of turns. Use the same number of turns when reinstalling. Now you can lift out the center console, with the boot still attached. Place the console assembly upsidedown on your work table, being careful to protect it from getting scarred.
On the underside there are two screws that secure the shift boot and its mounting plate to the console. Remove the screws, and then remove the plate and boot.
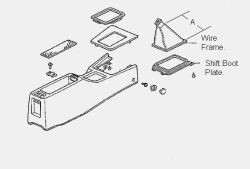
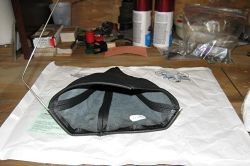
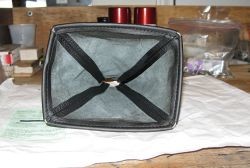
6. Notice that there are two parts that are integrated into the original boot: (1) the chromed plastic retaining ring that secures the shift knob; and (2) a rectangular wire frame sewn into the base of the boot. Both of these pieces will be reused with the new shift boot.
7. The distances along each side of the boot from the chrome ring to the wire frame are important, deceptively so. If the distances are too short the boot will tug on the chrome ring while shifting, causing undue stress on the boot material, and can even pull the chrome ring off the shift knob. So, before removing the chromed plastic retaining ring and sewn wire frame from the old boot, measure and write down these distances (dimension "A"). When reassembling these parts into the new boot it is a good idea to increase dimension "A" along each side by approximately 1/4 inch. This will help prevent the shift knob frm tugging on the boot when shifting.
8. To remove the chrome ring from the boot gently invert the boot (like inverting a sock), and then clip the cable tie. Then gently snip the threads that hold the wire frame inside the boot edge to remove the wire frame.
9. Assembly is pretty much the reverse of the removal process. A couple of points are worth noting, however. First, the wire frame can be tricky to snake through the seamed edge. It helps to use a lubricant such as WD40. (Or, if you prefer, you can use four pieces of new wire from a common coat hanger cut to length.)
10. Once the boot, chrome ring, and wire frame are assembled, the rest is simply a matter of putting it all back together.
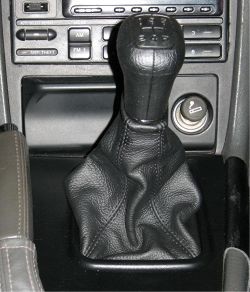
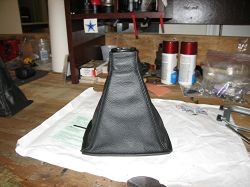
11. When it's all done, it's better than new.
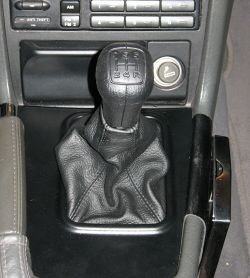
CONGRATULATIONS - YOU HAVE SUCCESSFULLY INSTALLED YOUR NEW LEATHER BOOTS!
Useful tip
You have installed a product made out of genuine leather. As you know, to maintain a leather product in good condition, you should take care of it. We suggest occasionally (every 4-6 week for example) applying some leather conditioner/UV protector to keep your leather from drying up in the sun and cracking.
Redline Automotive Accessories Corp. will not be held liable for any labor, incidental or consequential damages of any kind. Proceed at your own risk.