You must be logged in to rate content!
6 minute read

INFINITI I30/I35 00-01 (5SPD) SHIFT BOOT/E-BRAKE INSTALLATION INSTRUCTIONS
1. Start by removing your shift console. First, open your ashtray and take it out. There is one philips head screw you need to take out. 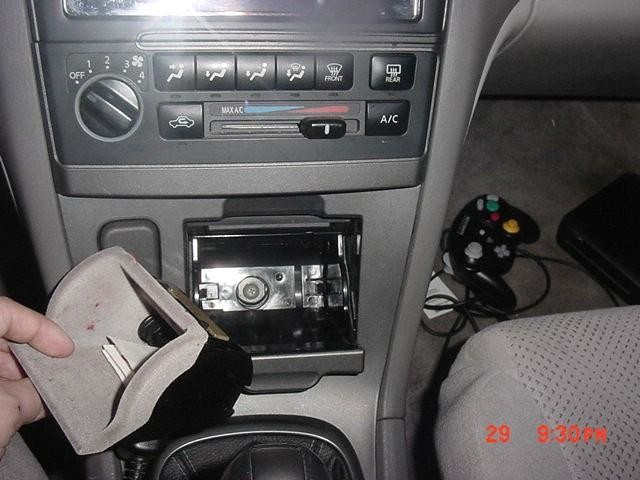
2. Pop out your shift console by grabbing the lower portion of where the boot sits. Pull up, and the shift console should pop out.
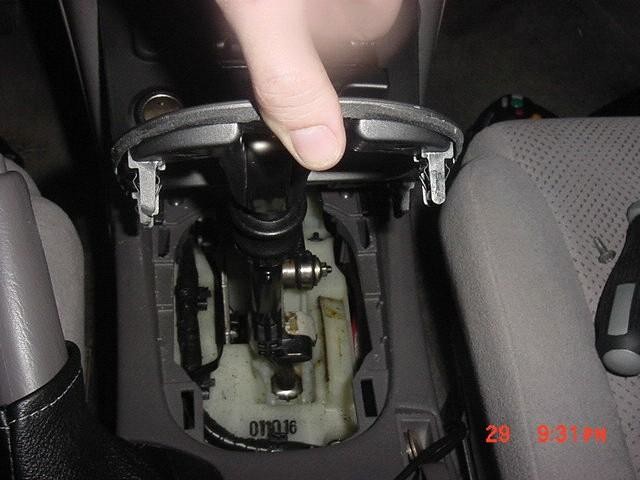
3. Remove the top portion of the shift console by using both hands. Wiggle it out. There are 3 connectors in the back that you should disconnect. (ash tray light, hazard plug, and the power socket)
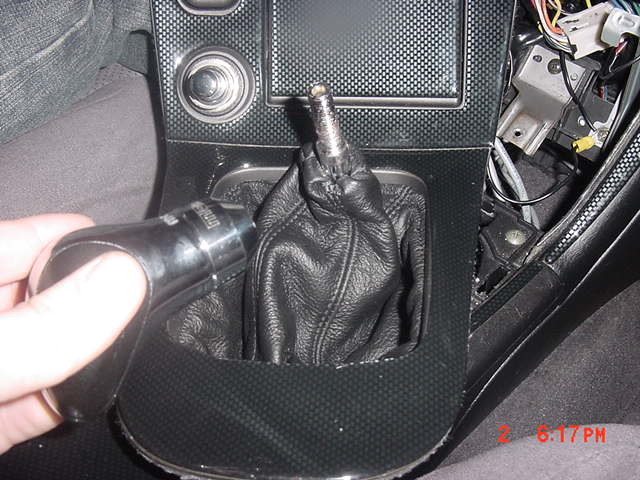
4. Remove your shift knob. Just twist it off anticlockwise. If it's never been removed, this will not be easy as Nissan puts special glue on the threads. Wrap the knob with a towel to protect it from scratches and use large vice grips to unscrew it.
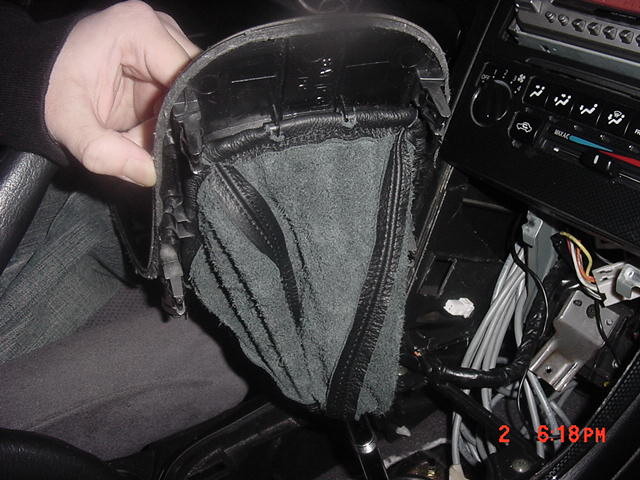
Once you unclip your stock shift boot (turn the console upside down and when you see it, you'll know how to do it right away) there is a metal wire inside the boot, on the base where it clips onto the underside of the shift console. You can re-use the existing wire (and slide it into the fold at the bottom of the new boot after cutting off the weld from it), but you'll need to cut the old boot for that. When done, proceed to #7 below.
Alternatively, you can make a new one as described below.
5. Take a metal coat hanger and cut the top portion off. Bend the hanger so its basically a straight line.
6. Put the hanger where the stock shift boot clips on, and bend the hanger where necessary to make a square-ish shape (your basically copying the stock pattern with the hanger)
7. Now your going to fish the wire, stock or self-made through the NEW shift boots base. If
you are having problems fishing the hanger all the way through, don't be afraid to use a blade or knife to cut/unblock the hole, the lower part of the shift boot will be invisible anyway.
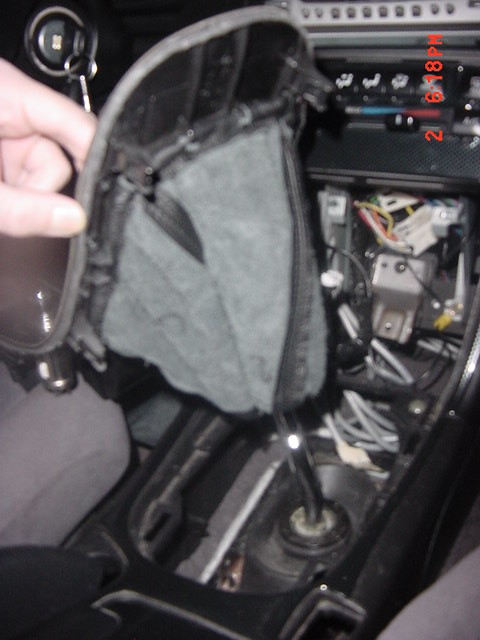
8. It might not sit correct, so what I did was cutting the leather so that only the hanger would clip in. (all 4 sides) Be careful when doing this. Its going to look like this (look at the top part, there are bits of leather missing around the wire to make the assembly more flush with the console).
9. The top section of your boot that sits under the shift knob will need to be zip tied from the underside. Turn the boot inside-out, slide it top-first on the shifter, take a ZIP-tie and tighten it as much as possible around the top part of the boot. It will look like this.
10. Put everything back and enjoy. If you have purchased just the shift boot, you are DONE!
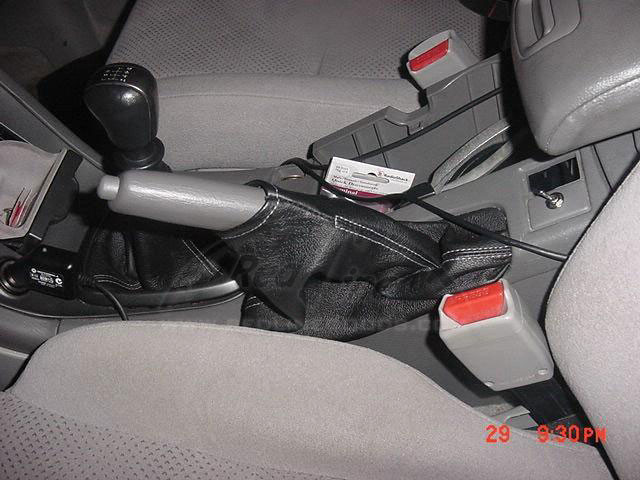
11. In order to install the ebrake boot, it is better to remove the armrest console. This will make it look easier since you need to attach the boot to the same holes/slits as the stock rubber boot. There is a screw inside the armrest, accessible from the back...
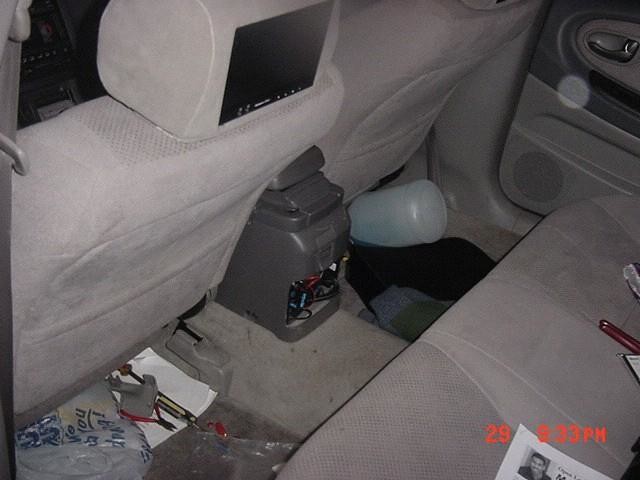
12. ... and two more, one on each side of the console.
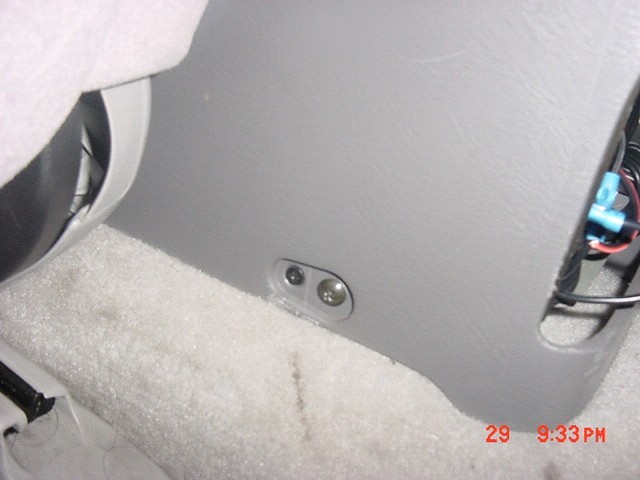
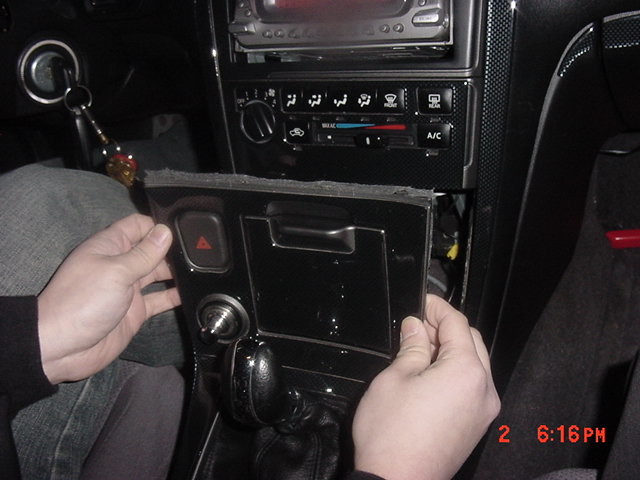
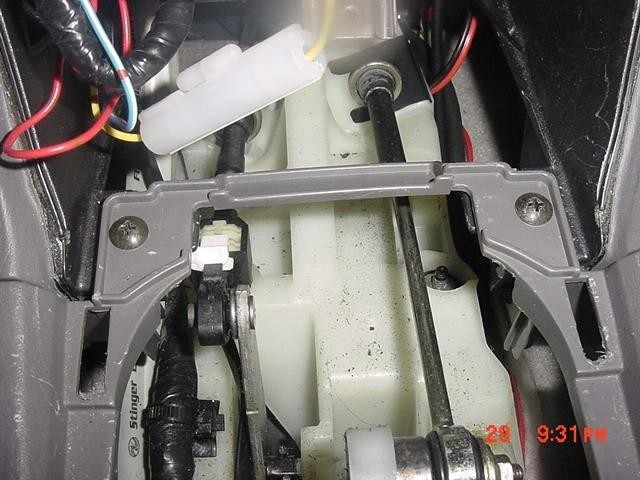
13. Remove the 2 screws you will have noticed after removing the front section of the console in #2 above. You will also see that the armrest console is connected with 2 snap-ins from the sides of the center console. You can pull those on the side to separate them. It sounds confusing, but once you do this... the whole armrest console comes up.
14. When installing the ebrake boot, we suggest you take the rubber boot off and put the ebrake boot on it's it place. It's obvious which side is which, since one side is all slits, and the other side is a line of studs. once you have it in, put the the rubber boot back on.... It will hold the leather boot in place. It feels like a tight fit, but it'll make the leather nice and snug.
Putting the center console on is the reverse order of removing it: put the 3 back screws back in (1 in armrest, 2 on the rear sides) and then the front 2 screws under the shifter, 1 in the ashtray and the 2 clips on the sides of the center console.
If you want to have the top of the ebrake boot at a certain point, here's a suggestion: the boot is folded on the top. if you make a small slit on the underneath of the fold, you can fit a cable tie through, line up to where you want it, then tie it up, and one is the wiser. It can't be seen since it's on the underside of the ebrake handle.
ENJOY YOUR NEW LEATHER BOOTS!
Useful tip
You have installed a product made out of genuine leather. As you know, to maintain a leather product in good condition, you should take care of it. We suggest occasionally (every 4-6 week for example) applying some leather conditioner/UV protector to keep your leather from drying up in the sun and cracking.
Redline Automotive Accessories Corp. will not be held liable for any labor, incidental or consequential damages of any kind. Proceed at your own risk.