You must be logged in to rate content!
6 minute read
XJ X350 door actuator repair
Compliments of henry crun @ jaguarforums.com
12-11-2014
The front passenger door of my right hand drive (Australian) 2006 XJR had an intermittent unlocking failure. It would lock consistently, but frequently fail to unlock when the central locking dash button was pressed. In this case, I was able to resolve the failure by lubricating the door latch actuator internal mechanism. Unfortunately, lubrication requires removal of the actuator from the car and partial disassembly.
These procedures apply equally well for replacement of the actuator (part numberC2C30696?) if it is not to be reconditioned.
Removal and replacement is performed with the car battery connected because power is required during these processes. This is a relatively easy job and does not require any special tools and equipment other than the following:
male torx drivers with ratchet
screw drivers
small pick
long cable ties
lubricant grease
clean rag
Allow about an hour for actuator removal, half an hour for replacement and another hour if the actuator is to be disassembled, lubricated and re-assembled.
Step 1Remove the door card
From within the door lever recess, remove the small round plastic cover with a pick, then the small torx screw underneath. From under the door armrest, remove the 2 torx screws.
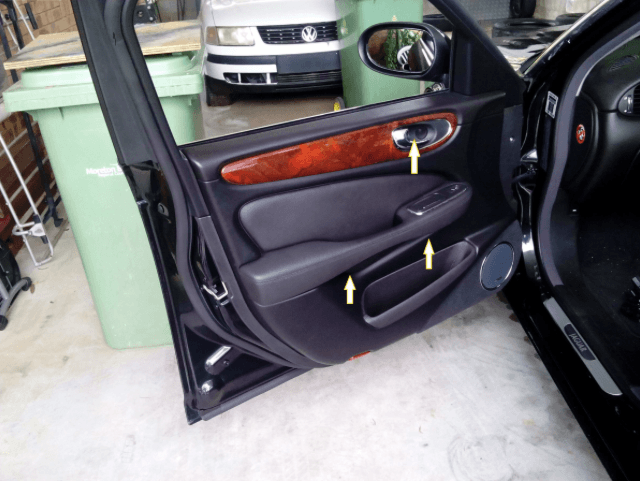
Lever off the door card, by inserting a large flat-bladed screwdriver in the gap under the edge of the door card at the positions shown, starting at the door bottom edge and working your way up both sides as the clips release
These are solid clips and will not break or pull out of the door card. Support the door card while disconnecting the wiring loomplug inside. Release the cable from the internal door lever. Set the door card aside.
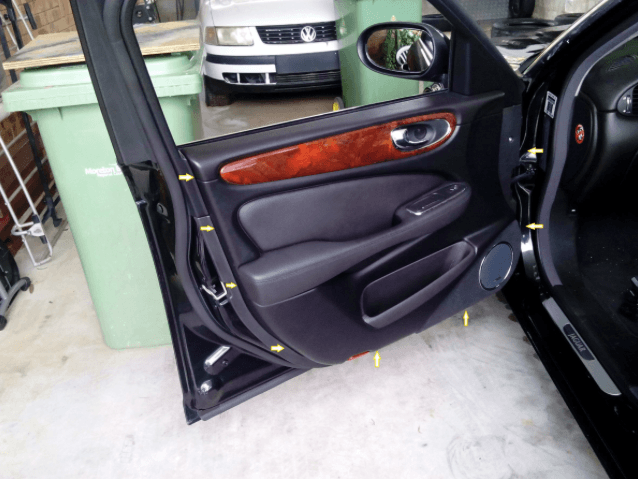
Step 2Remove the inner plastic door cover
Remove the torx screws retaining the cover.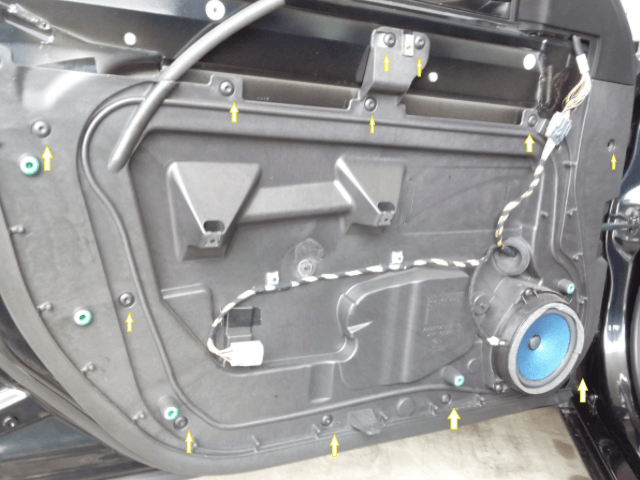
Do not disconnect the wiring loom plug (to maintain power to the window winder and actuator). Simply swing the door cover up out of the way and tie it to the window frame with a large cable tie

Note the position of the cable tie and also the internal door lever cable and the window glass support strut.
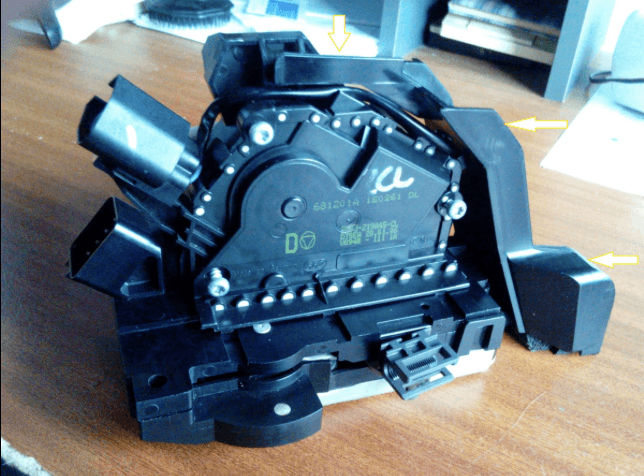
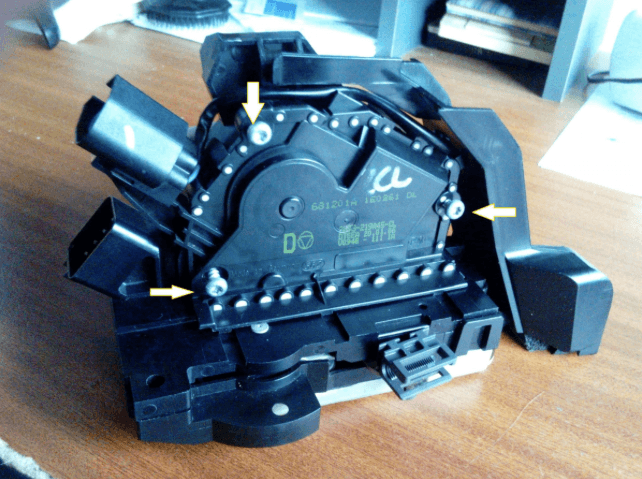
Step 3Remove the actuator
Wind up the window most of the way, remembering the cable tie! From the outside edge of the door, remove the 3 torx screws retaining the actuator.
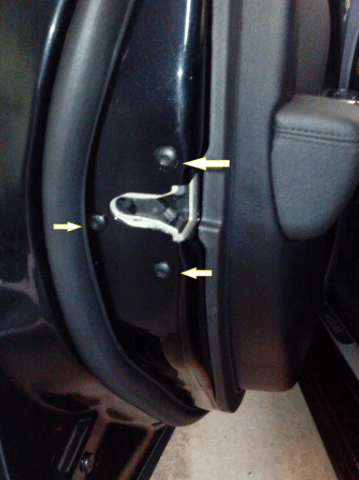
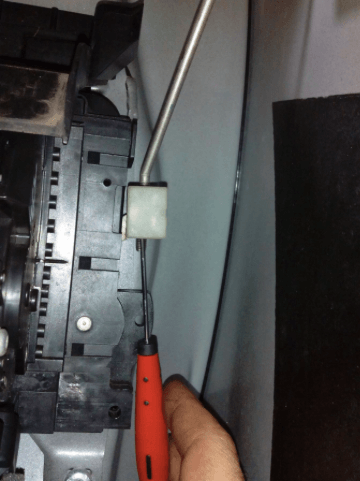
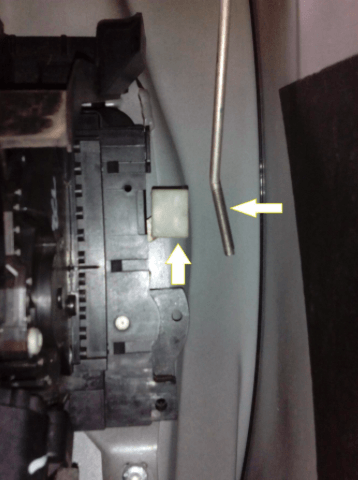
When the actuator is unbolted, reach inside the door frame and disconnect the external door lever rod from the actuator, by levering off the white clip with a small screwdriver.
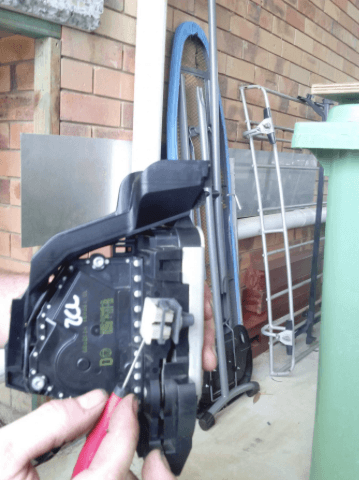
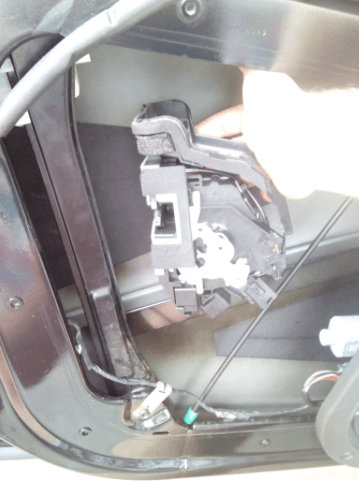
Disconnect the two wiring loom plugs. Re-route the cable for the internal door lever behind the window glass support strut. Slide the actuator out behind the window glass support strut. It is a fairly tight fit.
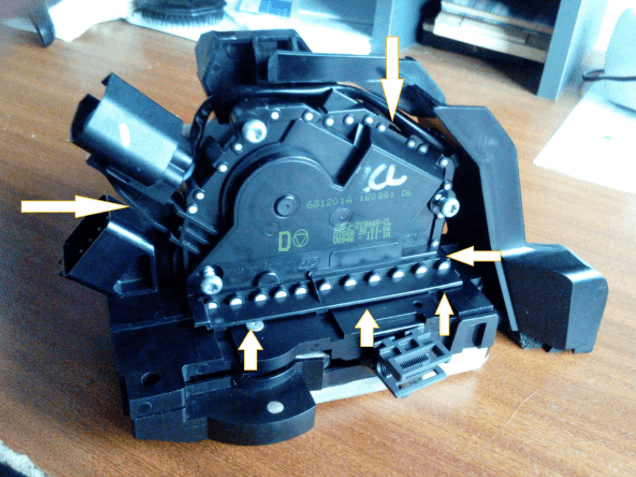
Step 4 Open the actuator housing (if actuator is to be repaired rather than replaced)
Remove the moisture shield. It is retained by clips on the top and right side of the housing.
Remove the 3 torx screws retaining the cover to the actuator housing.
Remove the cover by releasing the large clips on the top right and top left of the housing. Along the bottom edge, insert and slide a small flat-bladed screw driver between the cover and housing, until the 3 lower clips are also released. The cover will then come off easily.
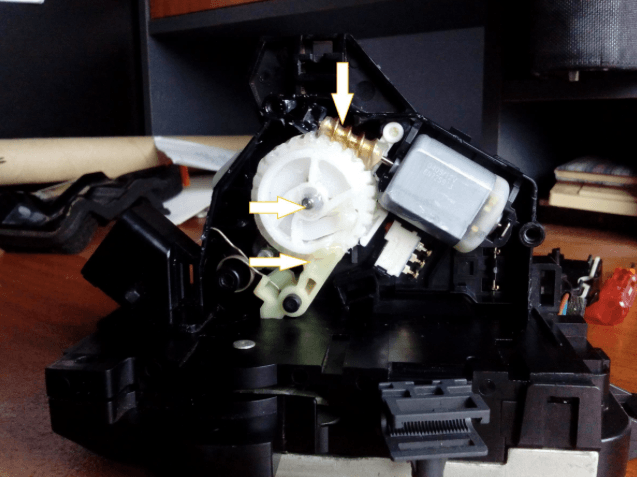
Step 5 Examine the actuator to determine cause of faulty operation
Once the cover was removed, I examined the internal mechanism for failed components but found none. The mechanism basically consists of a motor driving a rotating cam gear, which locks and unlocks the actuator latch. The motor is powered from pins 5 and 6 in the 8 pin female socket. Polarity reversal is used to reverse the motor for locking/unlocking operations. A 3 pin micro switch switches the current from pin 5 to the motor. The mechanism is designed to interrupt current to the motor during part of the unlocking operation during which it ‘free-wheels’ for some as yet unknown reason, possible to reduce noise and vibration? Using a 12v power supply, I confirmed the fault symptoms, by operating the actuator to lock, by applying positive current to pin 5 and negative current to pin 6 and then reversing polarity to unlock. The actuator can also be connected to the cars wiring loom plugs for this process. Before applying power, clamp the motor in its open housing to prevent its escape.
I concluded that the unlocking operation was failing because of excessive friction in the mechanism, stopping travel during ‘free-wheeling’. The unpowered free-wheeling phase relies on the mechanism to be correctly lubricated.
Step 6 Lubricating the actuator
Remove the actuator cam wheel and grease its bottom side cam groove as well as the components as shown on its top side with lithium or other plastic-safe grease. Note that the amount of grease is critical. Too much will increase friction rather than reduce it. Add/remove grease as required and test the actuator to ensure it operates correctly, before replacing in the car.
Actuator reassembly and car re-installation is the reverse of steps 1 to 4.
Good luck and please let me know of any errors or omissions.
Nice DIY!
Posted by Diggymart on 2/16/20 @ 10:40:45 PM