You must be logged in to rate content!
7 minute read
Window Glass Adjustment & Rattles - Let's Dig In!
Compliments of H20boy @ jaguarforums.com
5-26-2010
I've accumulated some knowledge about these windows, so I'd thought I would share some of it with you fine folks. Remember, when I do this, I speak from convertible experience, and the same may or may not apply to you coupe owners, ok?
A Rattle Found
I contributed to a thread awhile back confirming that I too also had a rattle inside my driver's door. Since I have been in and out of that thing for months now (read down the page for why), I explored a bit, and have found what was making all the racket in mine...and I fixed it (well, sorta) I in fact, buffered the source of the rattle, let me explain.
Imagine you have your door panel off (for a thread on removal of the door panel, see here.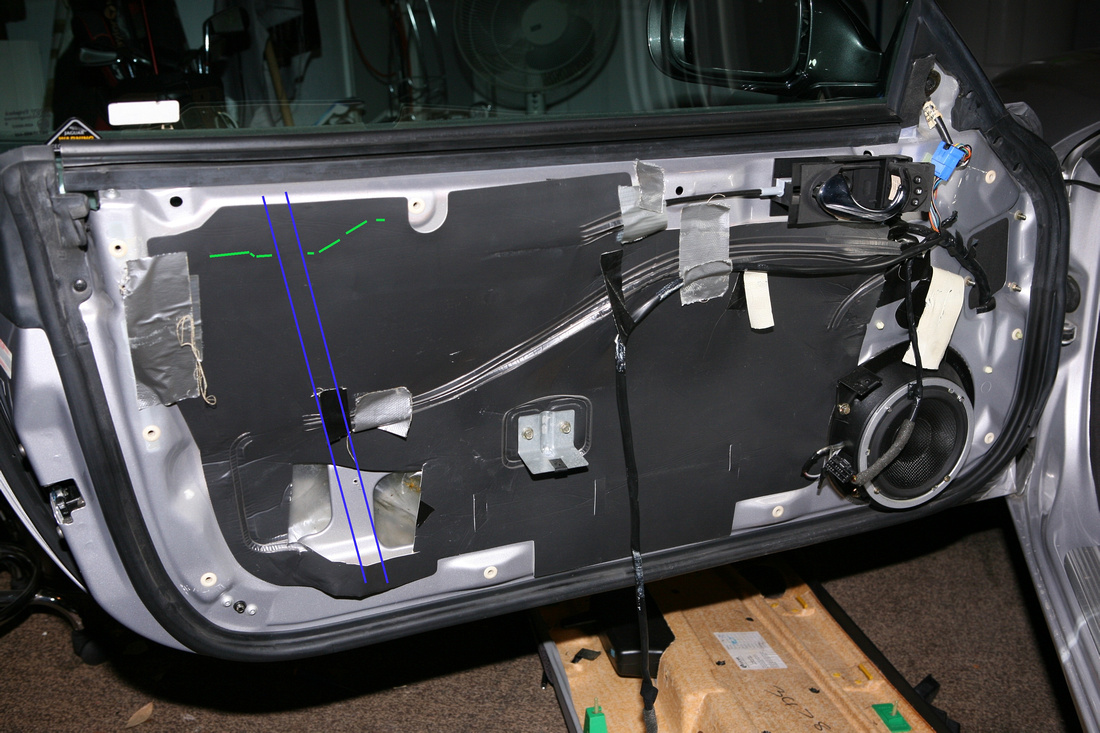
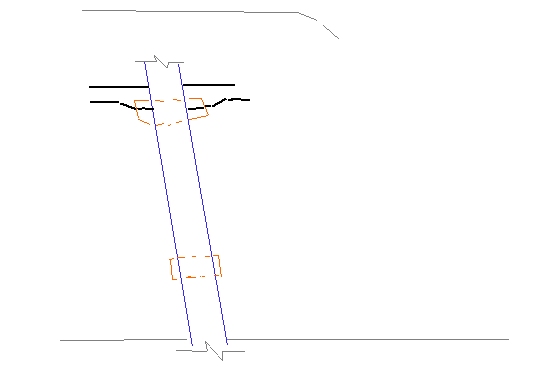
I apologize for the lame sketch, but I didn't have a photo of the that material removed to show the inside of the door frame.
In my case, my window moved freely out and in, hitting a couple items in the process. I am fairly certain that there is something holding that glass secure, probably right at the guide rail, I'm not sure, as you can see, the inside door frame is pretty continuous, not many access points to get up and inside easily.
So, I did the next best thing. There are these vertical metal 'guide rails' (to put it basic terminology, and displayed in Blueabove) that the window travels along. One of them shown in blue above, closest to the latch. In my door, the window glass itself could rattle between this rail closest to the door latch (not the hinges) and a lip of sheetmetal on the other side. Its just vibrated loose from all the years I presume. Not seeing how I could actually tighten ANYTHING in the door itself with all of that metal blocking my way, I went for a simple fix...felt (or in this case, loop from the 'hook-n-loop' tape, that had an adhesive back. A big piece along the metal flap (brownish-orange color above), and one between the glass and the vertical rail...and the door closes quiet, and no banging around. Problem one solved.
Now, the other issue I faced was my car had acquired a gap between the glass and the seal along the small convertible window. (whatever thats called...lol) The dealer service guy tells me these things need to be adjusted about every 2 years, and its alot of labor for them to do it. So, I got into the JTIS, and found this.
Window Adjustments
Ok, you've got several adjustments you can make to your window.
(1) You can 'tilt' it (and I think this is the most needed, and probably will fix your issue if you are seeing a little 'gap' in between the window and rear 1/4 glass. This is obvious from the exterior, as the spacing is uneven all along the seal.
(see representative Yellow line)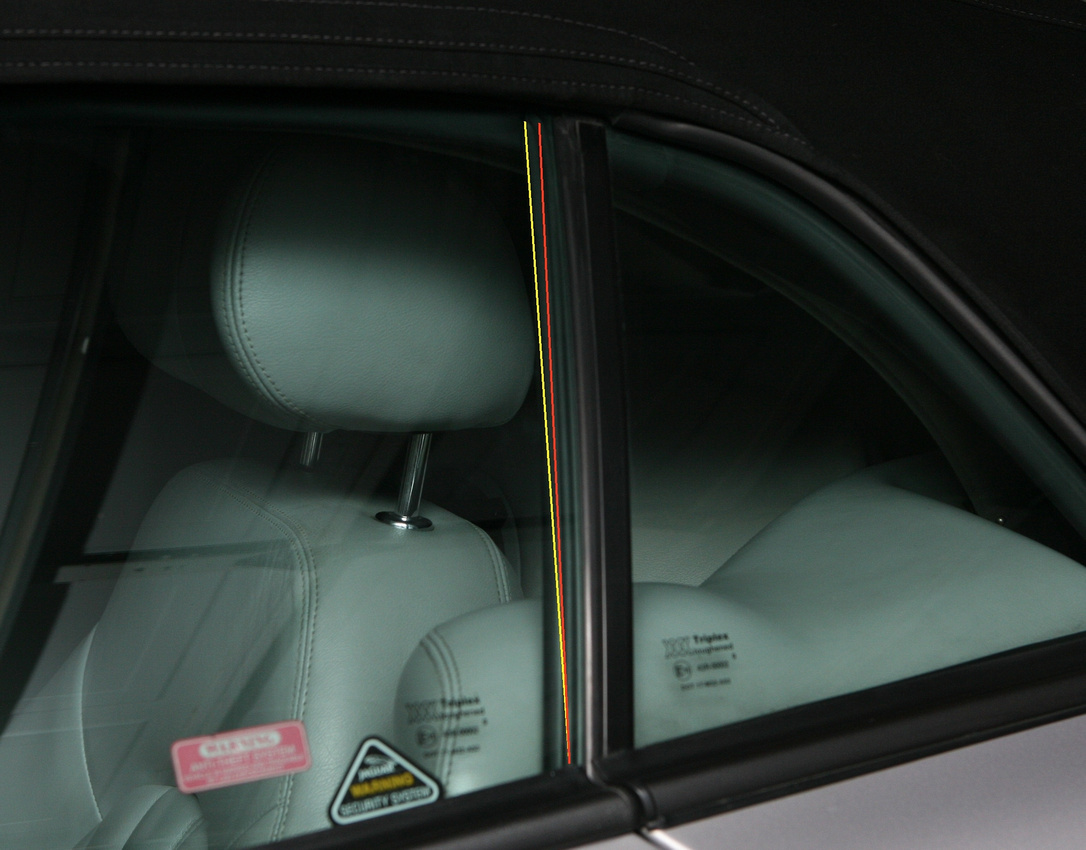
To fix this (and get it to be more accurately like the Red line), you need to remove the door panel (see above link). Once there, peel back the left side of that dark grey paperish cover to expose the bolt shown below.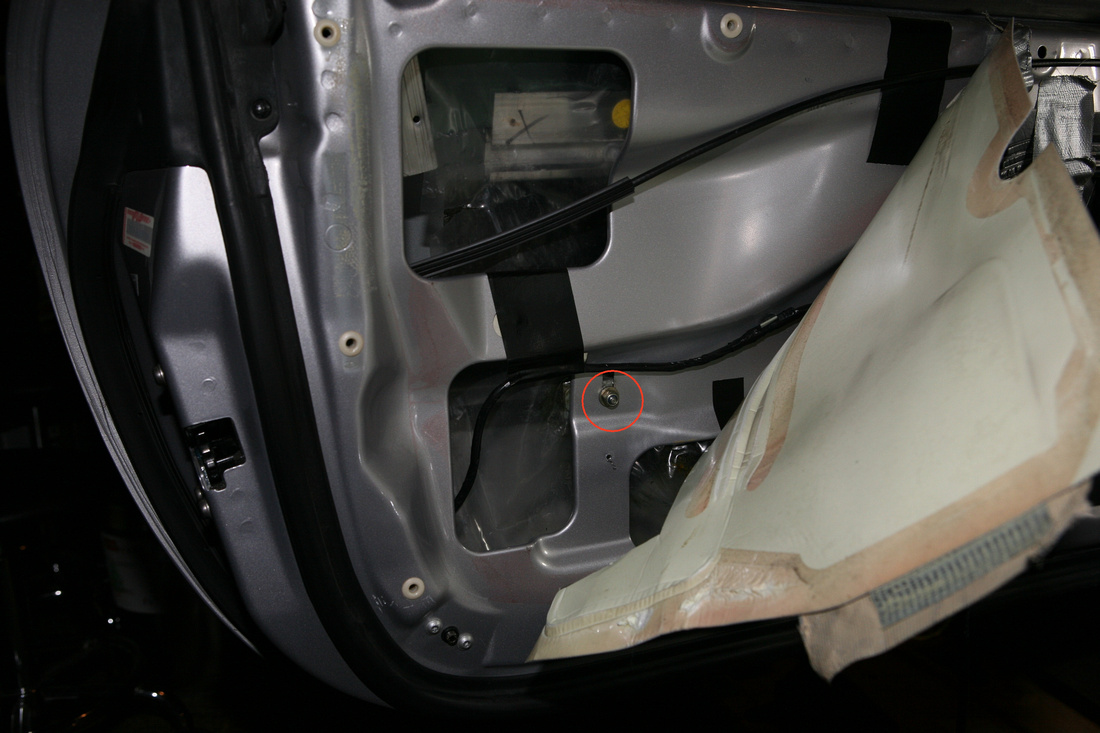
Loosen and the window on that side will now raise/fall, so you can trial-n-error it until your gap is closed, and it snugly fits against the rear 1/4 glass and has a nice parallel alignment with the adjoining trim. Remember, after making an adjustment, do a full window cycle up/down, and test the programming. It may need a little tuning after doing so. Don't put that panel back on until you've tested it.
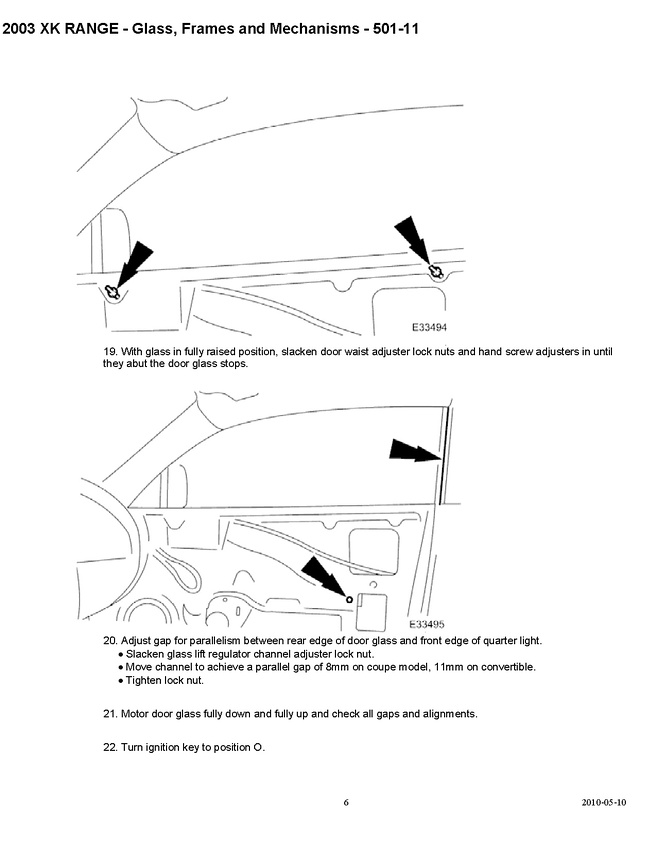
(2) Now, if you've got a good seal, stop there. Depending on how far you had to bring the latch side of the window down to parallel the rear 1/4 glass weatherstrip, you may find it necessary to 'fine tune' the height of the glass. You can do this in two ways (actually three, but we're not going to mess with the full window travel here, by adjusting the regulator nut (see JTIS instructions below, if you're brave enough). There are two hex-head adjustment screws hidden, but easily accessed w/o removing the door panel. See the pic below.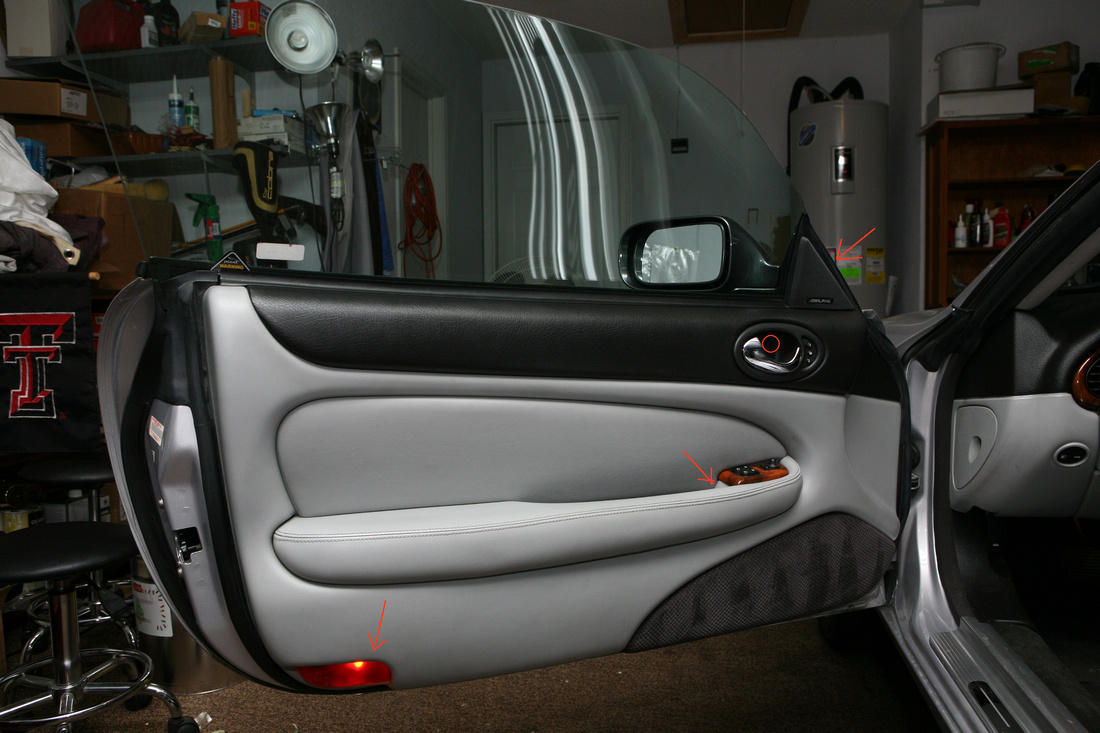
Behind that puddle lamp lens on the lower left corner, there's a hole with a small hex-head screw that will finely move up/down that edge of the window. To remove that little lens, get a flat head screwdriver, look underneath, and place the head between the plastic guide and the door, it should easily release. Unfortunately, I can't remember which direction on the screw is which, so you'll to play with it to find out.
On the hinge side of the window, to 'finely tune it's height', you'll need to remove the speaker cover there. Again, no need to remove the door panel. Under the speaker cover (get low) you'll see two small phillips head tap screws, undo those, and wiggle the cover out of its flapped inserts. You'll see another hex head screw access hole next to the speaker (lower right side, IIRC)
(3) Remember, you can always adjust your door striker a bit, either up, or in/out, so consider that option when getting your door perfectly sealed.
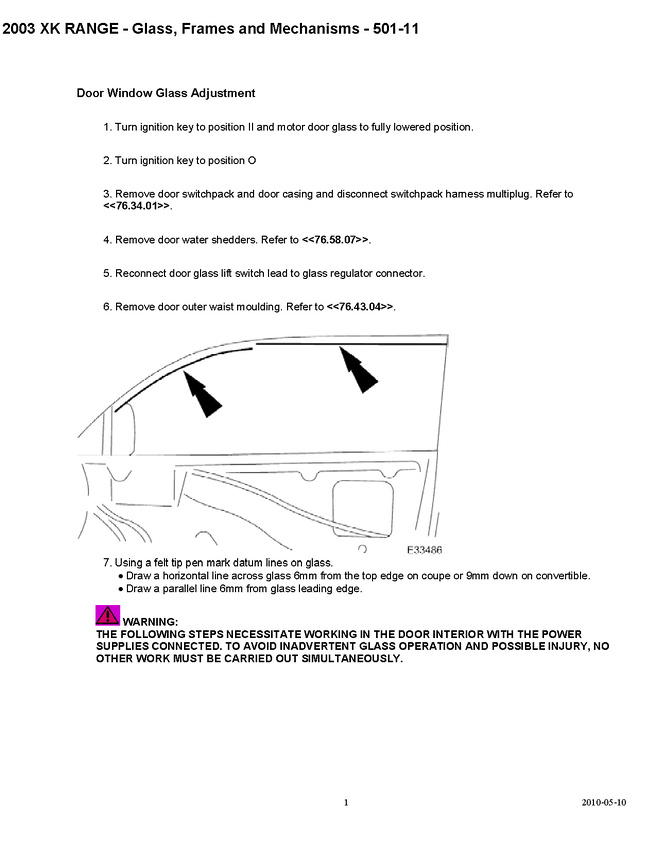
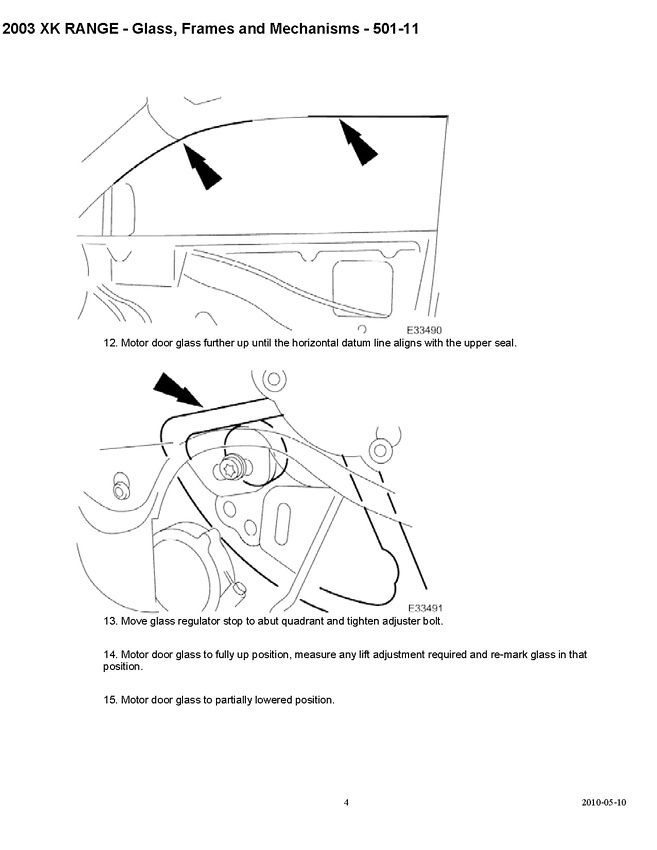
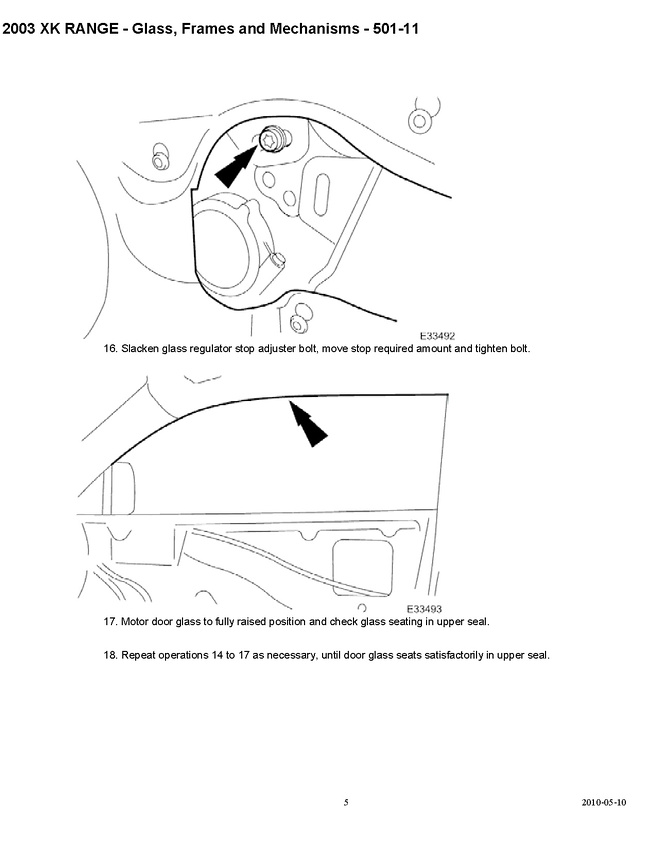
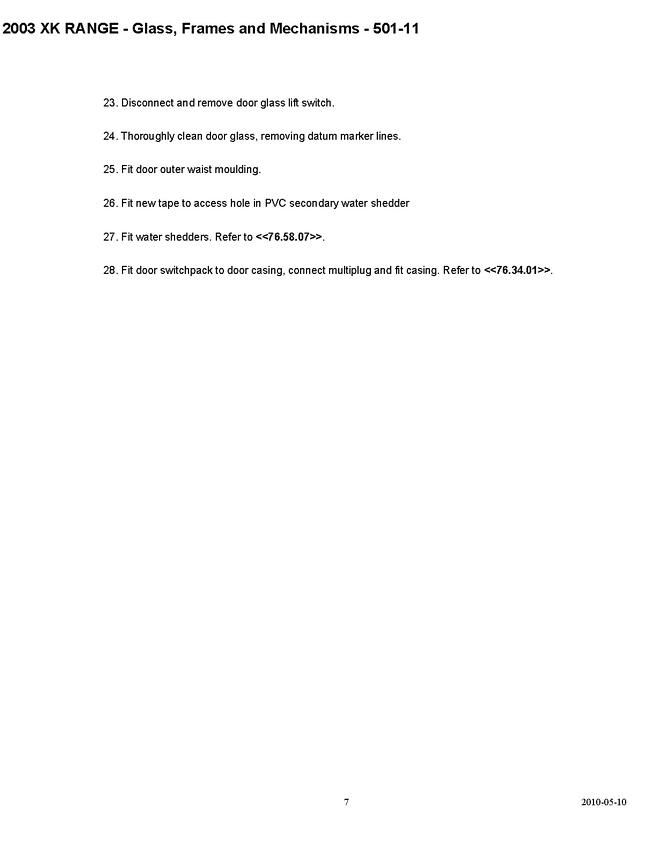
The JTIS pages below show other adjustments, but I didn't find any need to go any farther after the above. You can, however, if you're froggy. Go hear for the full size versions of the page images.
--------------------------------------------------------------------------
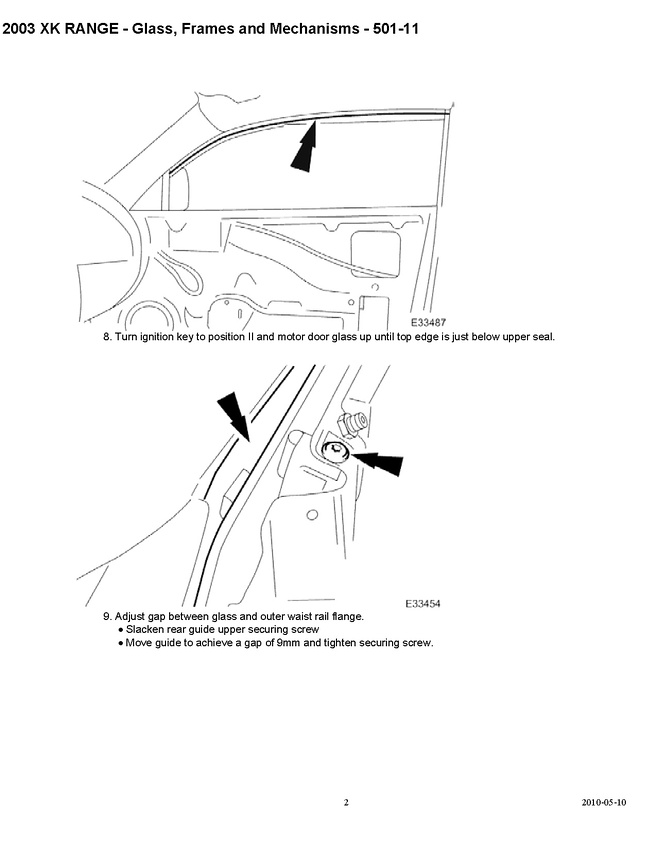
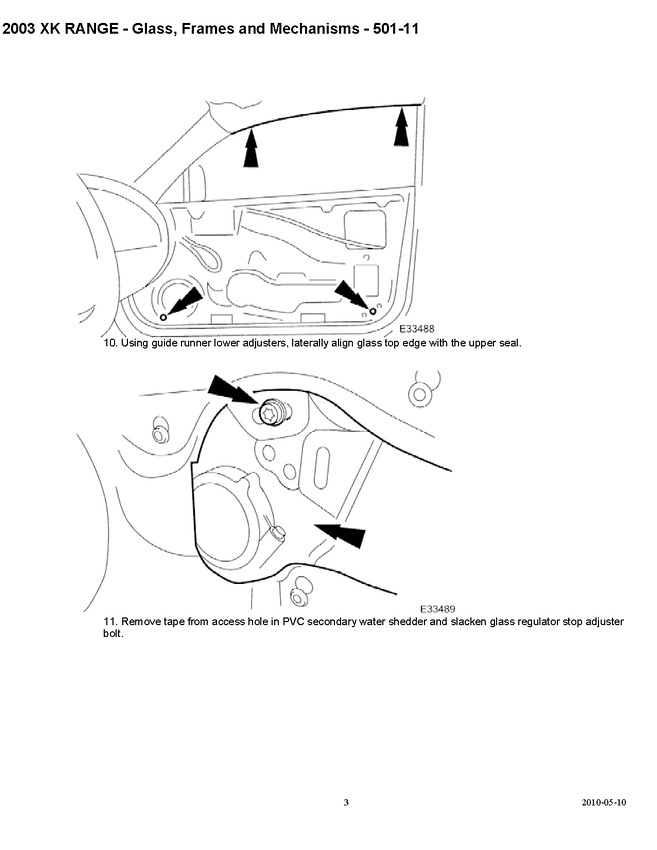
Great details!
Posted by Diggymart on 1/22/20 @ 9:23:03 PM