You must be logged in to rate content!
10 minute read
A/C Heater Blower Motor Removal, Cleaning, Oiling, Installation
Compliments of SuperSport @ https://landroverforums.com
1-2-2013
Ok, after a couple weeks of hearing my Blower Motor squeal on left hand turns, I've finally gotten tired of it and decided to remove it and grease the bearings if possible. Here's what I did (Attached in PDF format are the 2 pages from RAVE on this procedure):
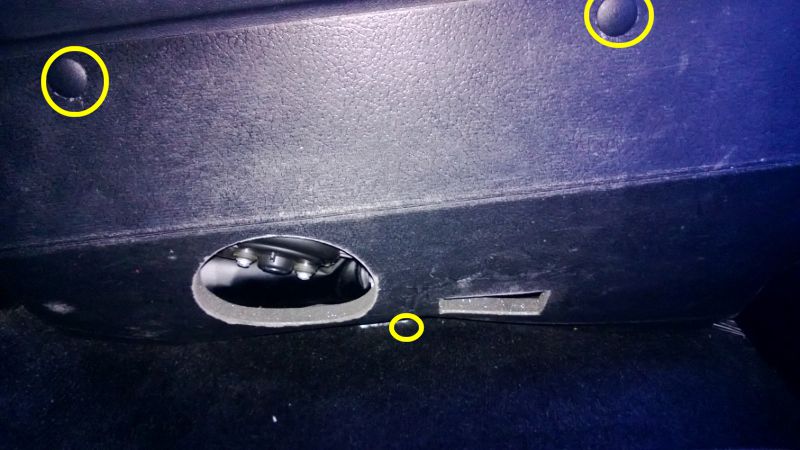
First, I removed the Kick Panel. It has 4 plastic plugs. Three are direct pull, and 1 you screw out. The Screw one is nearest the Firewall and is larger. Start it with a stubby straight screw driver, then you can use your fingers to finish it. The three smaller ones I pried using a screw driver to start, then I used Needle Nosed Pliers to grab the shaft and pull gently out so as to not break them. I did NOT remove the Glove Box as described in RAVE.

Here is the Kick Panel out.

Now I'll Pull the Motor and Squirrel Cage:
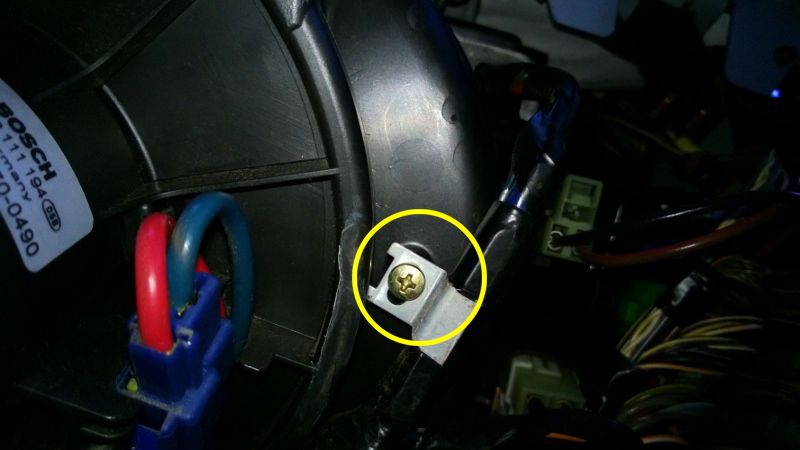
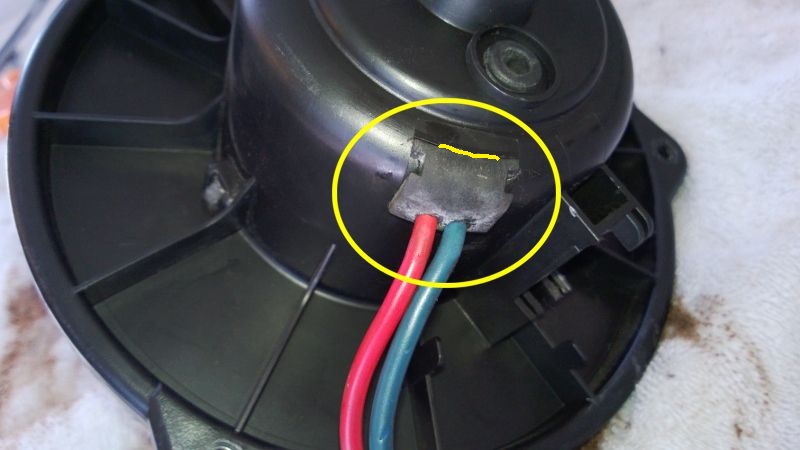
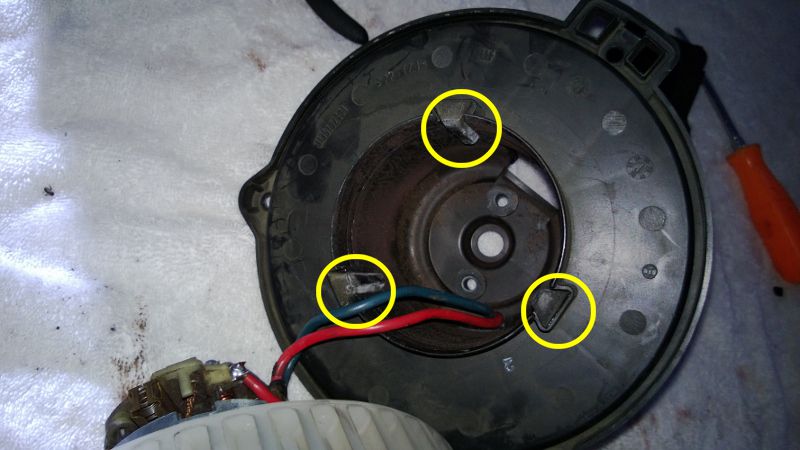
First, Disconnect the Blue Power Connector on the Motor and then remove the Phillips Screw holding the wiring in place
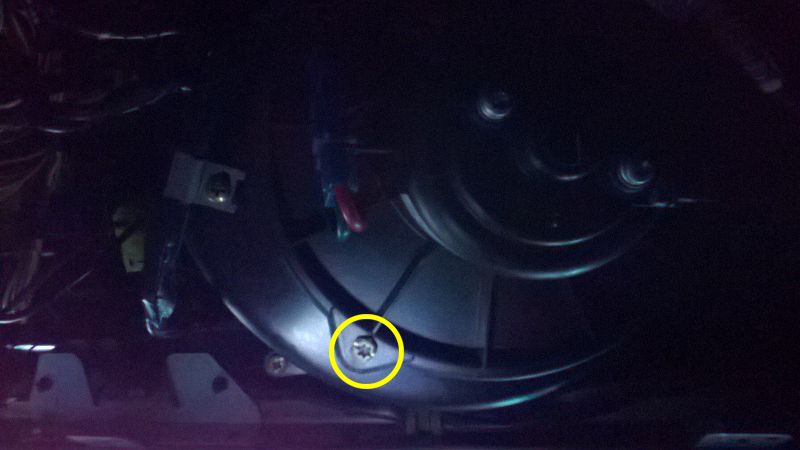
Now, using a T-20 Driver remove the Three Screws holding the Motor in place
I normally store all my screws in the Cup Holders so I don't loose them when I'm working on interior.
To Remove the Motor and Squirrel Cage, I needed to push the LARGE (1 1/2" - 2") Wiring Loom tighter against the Firewall to clear the Squirrel Cage. You will see what I mean if it's needed on yours.
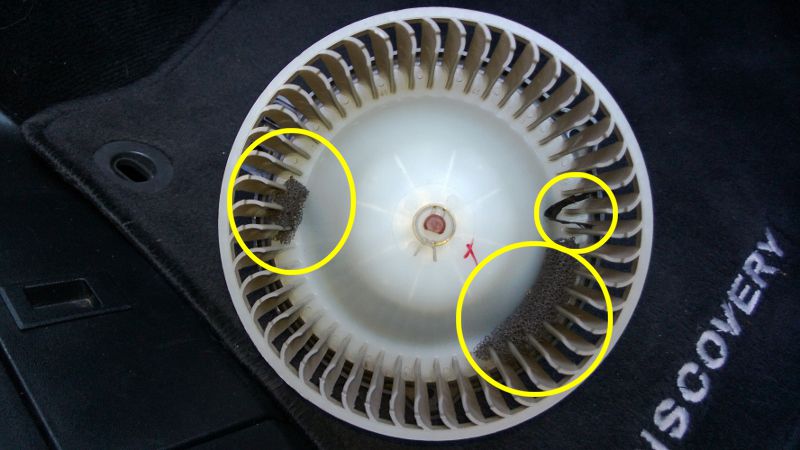
After It's out, this is what I found in mine. Some Plenum Filter Parts, and a piece of Black Tape. On the other side under the Oil Inspection Plug, I found a Bug Sleeping.
Pull it apart and find all the dirt! Clean it, and then Oil it. I was not able to use grease on this unit.
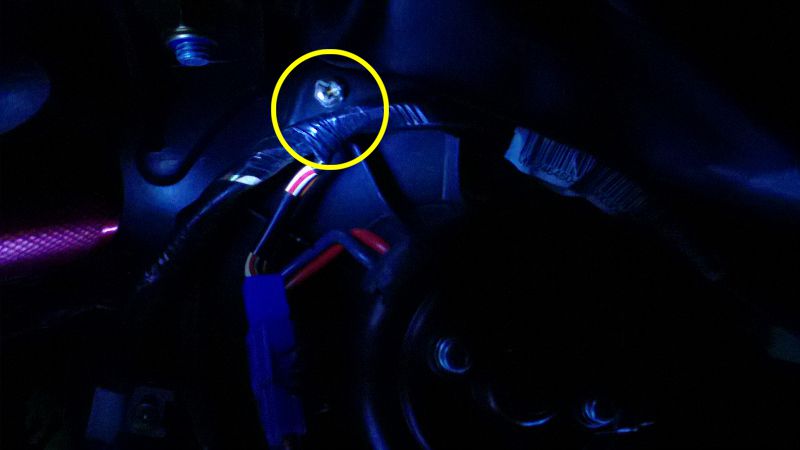
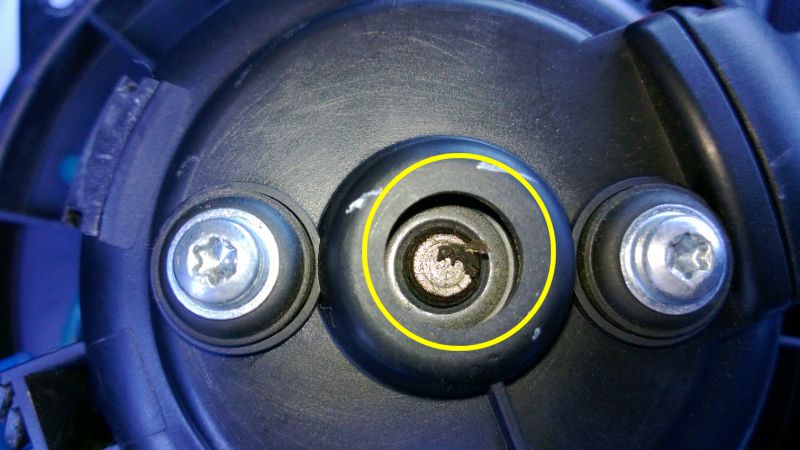
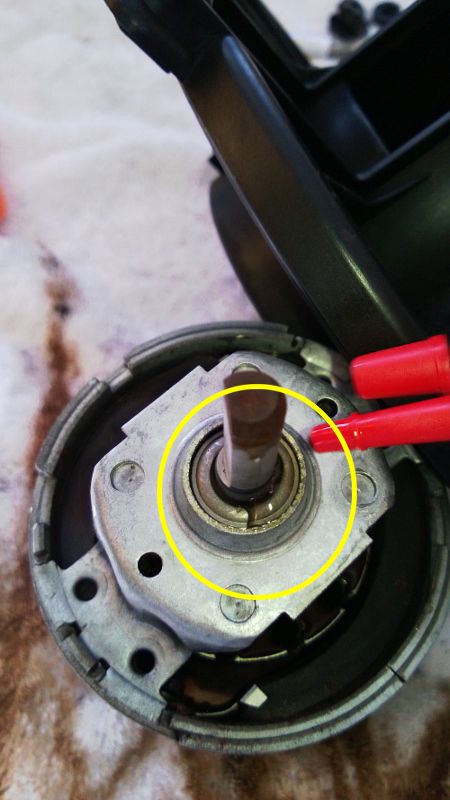
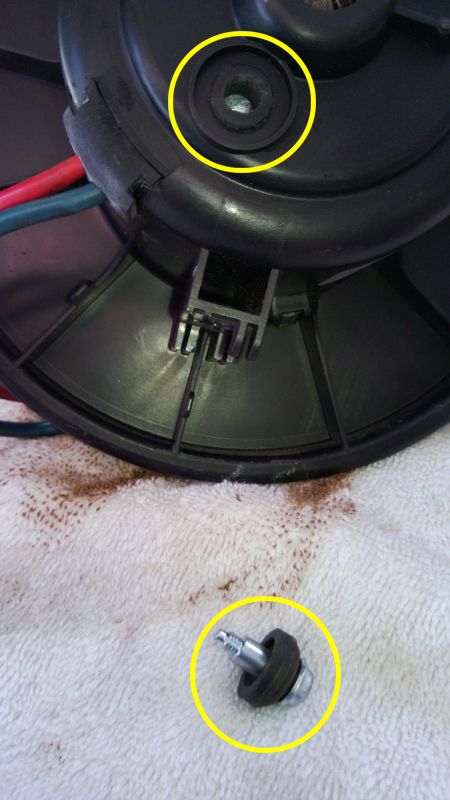
Next, Using a T-20 Driver, Remove the Two Screws that hold the Motor to the Plastic Housing, and then using a Flat Screwdriver, Pry out the Rubber Grommet from the Wiring at the point marked in Yellow.

At this point, you can pull the Motor from the Plastic Housing. It will be firm, but slowly it will slide out. There are three rubber bumpers in there that hold it firm.
Now, using Pliers, remove the Clip that holds the Squirrel Cage to the Motor Shaft. Place your pliers on both tongs and then squeeze. This will open the clamp so you can remove it.

VERY carefully, but VERY firmly, use two screw drivers (or a puller tool) to pry the Squirrel Cage from the Motorshaft. It's hard, but it does come off. Be CAREFUL not to break the Plastic Cage.
Now, you can see all the DIRT! Inspect the Brushes and Stator for wear. I have around 50% brushes left, and the Stator is in GREAT shape, so no need to replace.


I used CRC Electronics Cleaner on the Motor, and Simple Green on the Squirrel Cage to clean it all up. Spray PLENTY of Electronics Cleaner through the Motor until it runs clean, then be sure it dries thoroughly.

Simple Green in the Sink


Motor after being Sprayed Clean and Dried

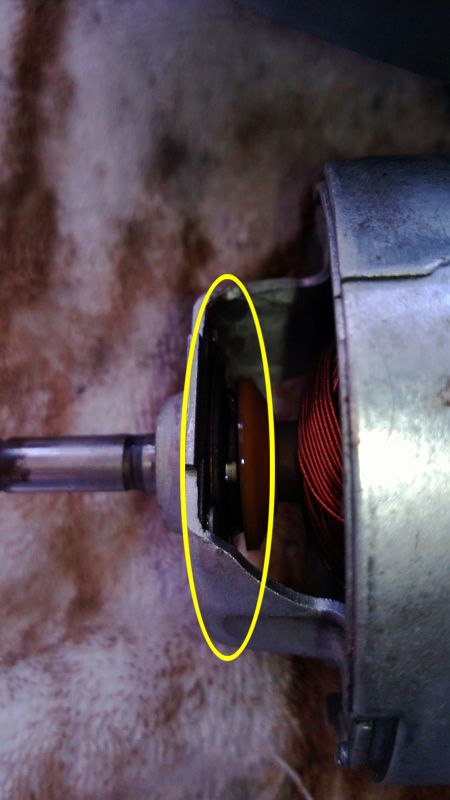
Unfortunately, I was not able to use Grease for the bearings due to being sealed units. I'm going to use 3-in-1 oilthat is specially formulated for these types of motors. It's a little heavier than normal 3-in-1.
I oiled all four sides of the bearings and spun the motor quite a while to work in the oil, then I used a rag to remove the excess oil so it did not spray into the motor or Squirrel Cage and become a dirt accumulator later.

Now, it's time to put it all back together.
While pulling the slack on the Wiring, press the Motor back into the Plastic Housing. Be sure to line up the Screw Holes.
Slide the Rubber Grommet back into place as seen in the previous photo


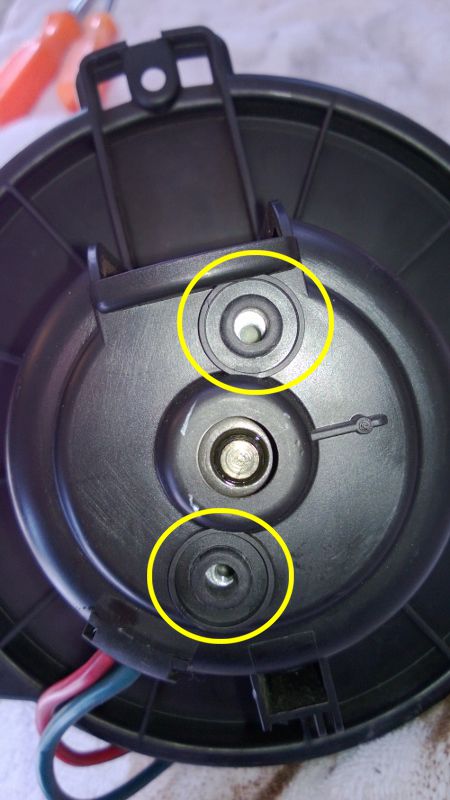
Be sure the Grommet Washers are on the Screws correctly and replace them getting them into the little shoulders correctly.
If you removed the inspection cover like I did (NOT necessary) then replace it. It just snaps back into place.

Press the Squirrel Cage back onto the Motor Shaft being sure to line up the flat spot on the shaft. Now install the Clip back on to hold the Cage in place.

Cleaned, Oiled, and Ready to Install

Now, reverse the removal process. But FIRST, reach up into the opening and pull out any debris you find. Push the LARGE Wiring Loom out of the way to clear the cage back into the opening.

Line up the Screw Holes for the Motor Housing and replace the Three T-20 Torx Screws.
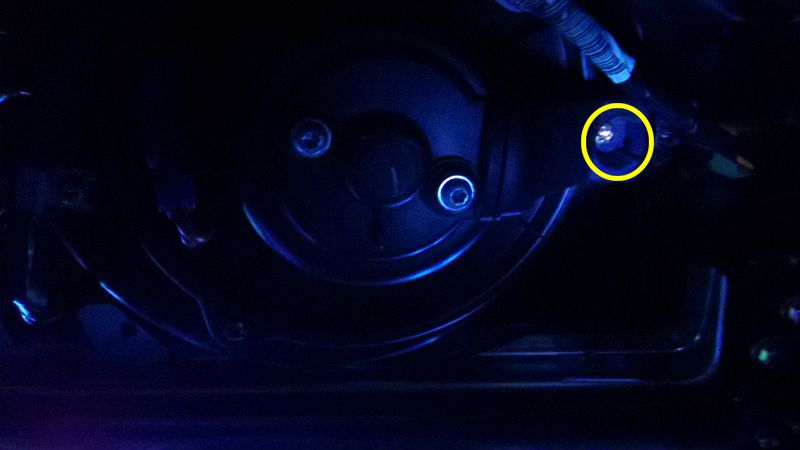
Replace the Phillips Screw that holds the Motor Wiring in Place.
Plug the Blue Power Connecter back into the Wiring Harness.
Reposition The Kick Panel and PRESS all 4 Plastic Plugs into place. Be sure the Larger Screw Plug is lined up with the small stud inside. No need to screw in the larger one, it's press on, screw off.
That's it! Now, hopefully your motor will be cleaner, and quieter like mine. I'm not sure how long this will last due to Sealed Bearings, but I'll let you know if/when the squeal comes back.
2-8-2013
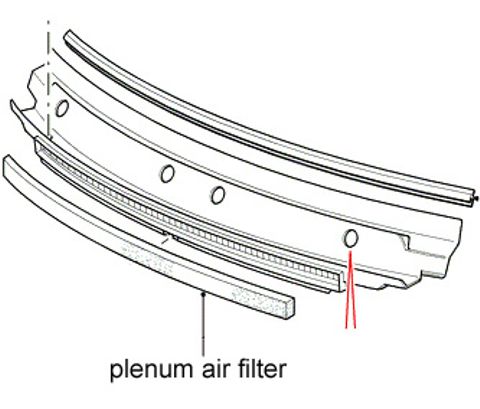
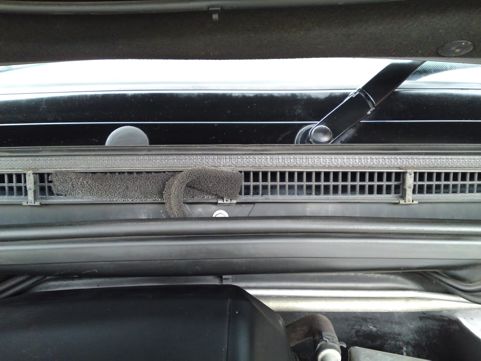
That's a good idea. I still have not replaced my plenum filter. I need to get on it. And for those who don't know what I'm talking about, here are graphics to show what I mean.
6-10-2013
UPDATE: It's STILL quiet, and running beautifully! It's on EVERY day, Summer and Winter, and still no squeaking sounds or other issues.
This appears to have been a permanent fix for me.
1-29-2014
It looks like your brush housing is leaning at a good angle. That's the part in Green. And the plate that it connects to is probably melted, or broken. That's in Red.
I don't know if you can get creative and fix that, or maybe you might be looking for a new motor. There was a thread on here that talked about changing out the motor for a more common GM one, or something like that. I'd search for that and see if it's cost effective to go that route.
Personally, I'd see if I could fix that plate, but it looks pretty buggered up.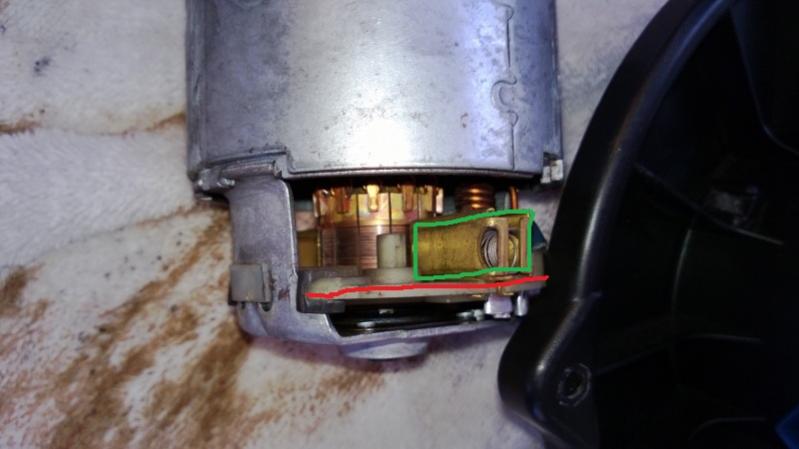
? DIY
Posted by Diggymart on 1/30/20 @ 10:59:33 PM