You must be logged in to rate content!
6 minute read

Rear Differential Removal
Compliments of BrandonS @ https://landroverforums.com
11-17-2012
Well, my rear differential was leaking so I figured I'd take some pics along the way to help others out who maybe aren't too sure on the process. I'm pretty sure this is in order, but if not sorry, I didn't follow a book and just took it apart as I saw fit. Please be aware that if you follow these instructions you do so at your own risk and I take no responsibility. Use jackstands and be careful; you can seriously hurt yourself.
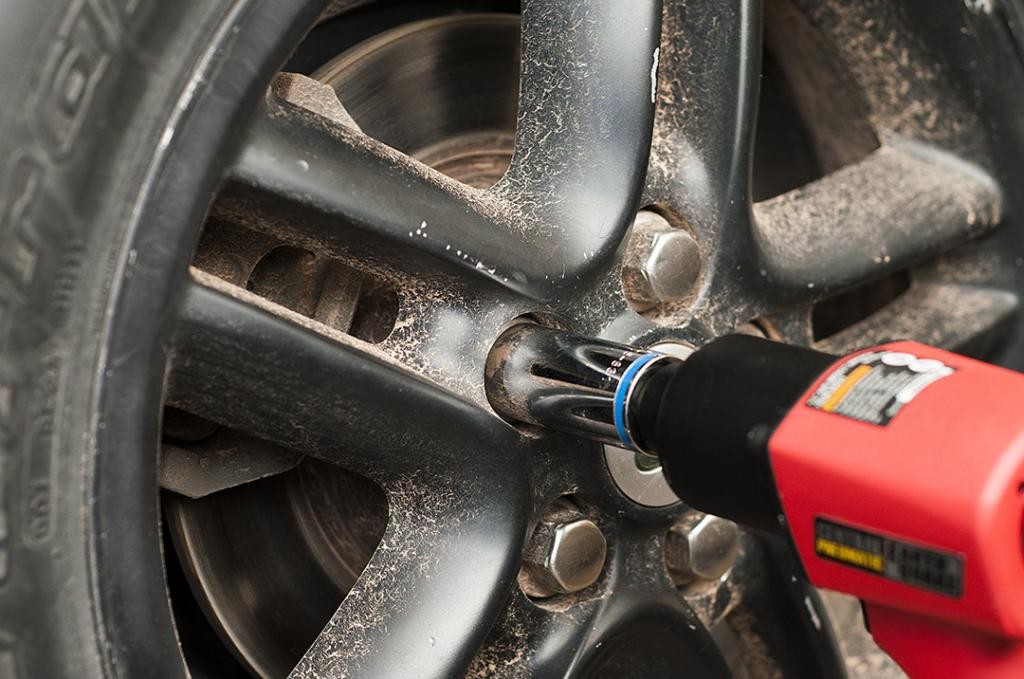
Step 1: Loosen all your lugnuts and remove your wheels!
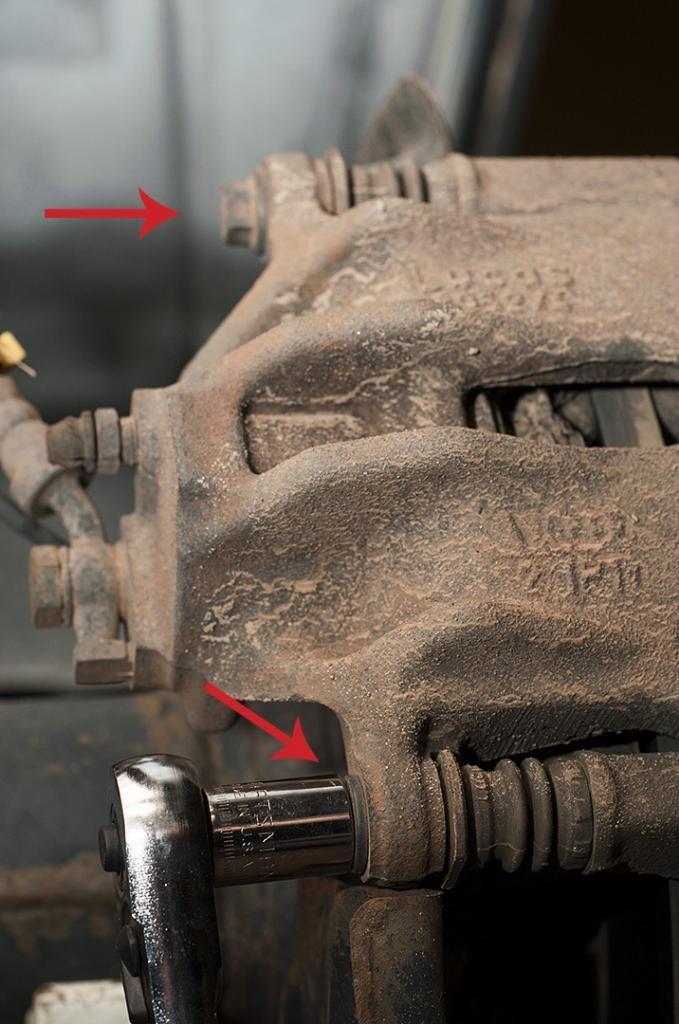
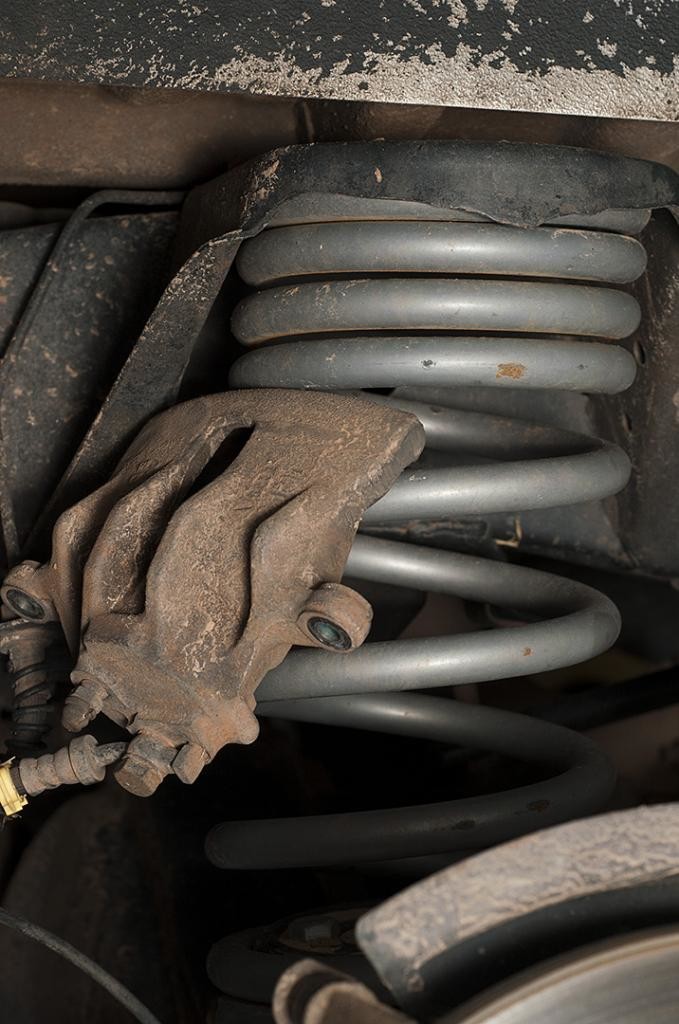
Step 2: Remove two bolts holding caliper to caliper bracket. Slide caliper off and remove brake pads. Do not disconnect brakeline. Just hang caliper out of the way. I stuck it on one of the loops of my springs.
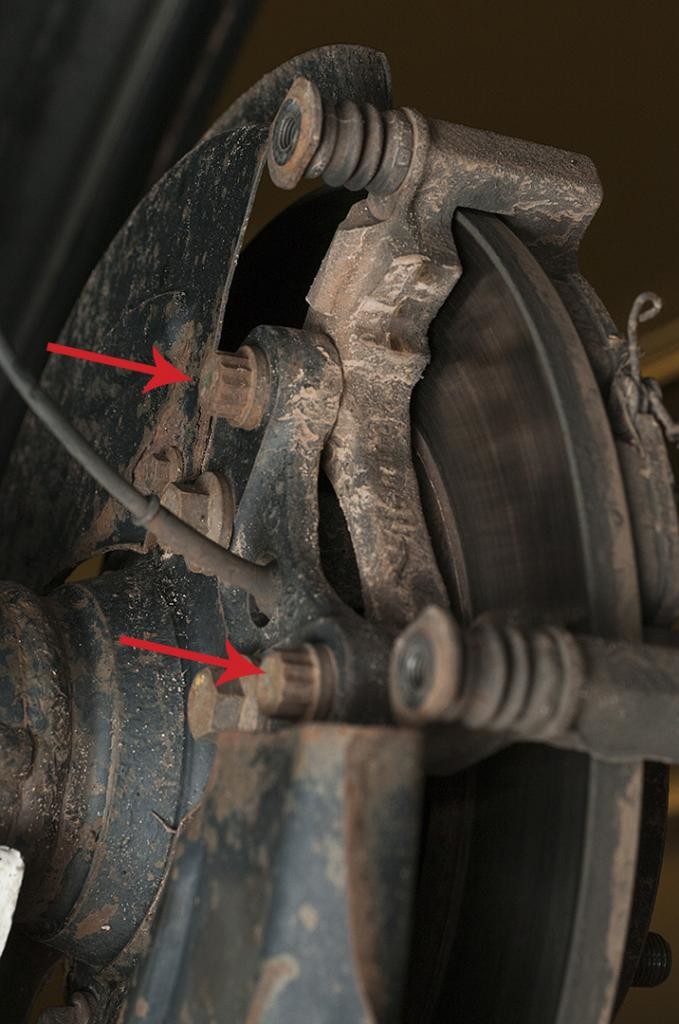
Step 3: Remove two 12-point bolts holding caliper bracket to hub.
Step 4: Step Removed
Step 5: Remove brake rotor retaining spring. I had to drill the other side out. I did not replace these as the wheel keeps the rotor on. Remove your rotor. I ended up removing the dust shield; held on by 3 bolts. I had to coax the rotor off with a rubber mallet. Do not use anything metal to pound off your rotor as it will cause damage to the rotor face.
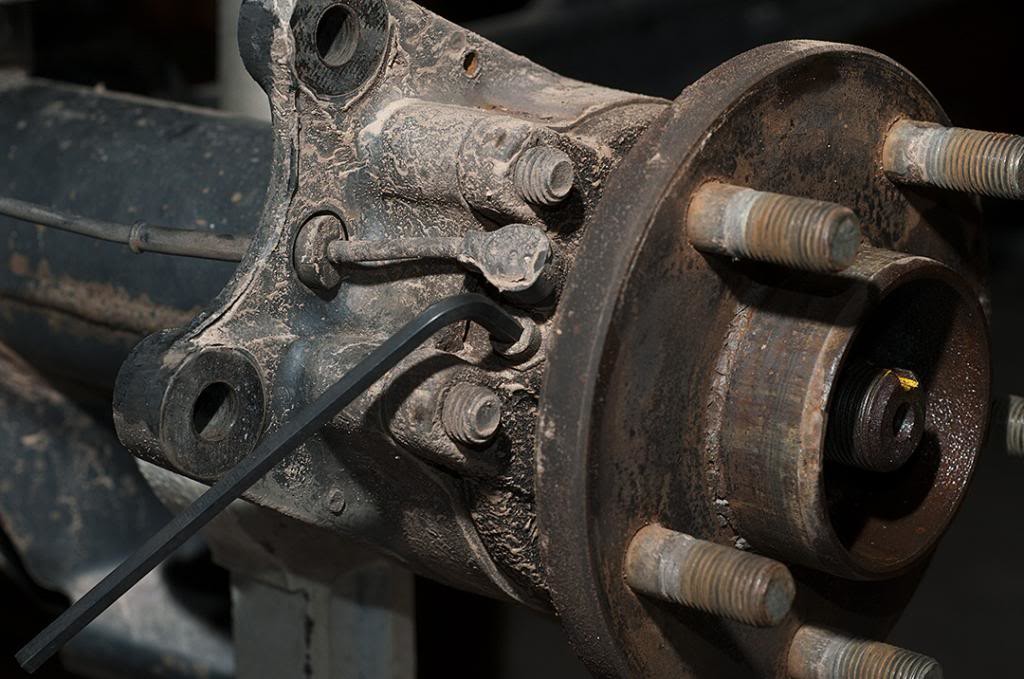
Step 6: Remove the wheel speed sensor retaining bolt with an allen wrench and pull out your wheel speed sensor. This may not be necessary, but I didn't want to risk it getting damaged.
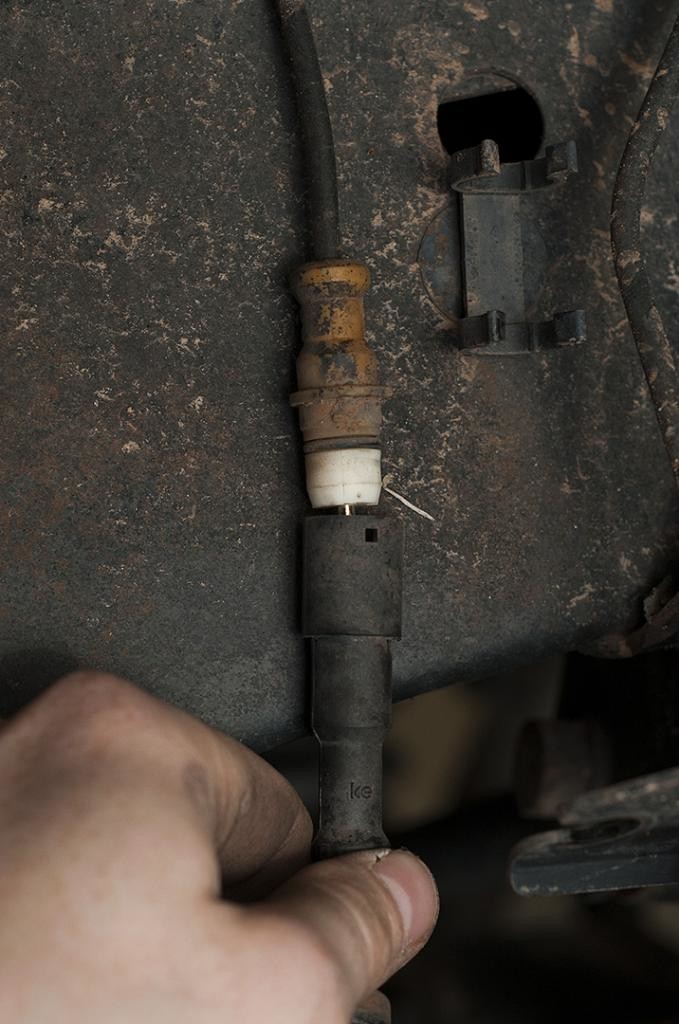
Step 7: Disconnect your wheel speed sensor connector from the vehicle wiring. The connector is located on the frame rail in two retaining clips.
Step 8: Remove 4 bolts from the back of the wheel hub. There are two in the front of the axle and two behind it.
Step 9: Pull your axle and hub out. If you plan on using the same o-ring seal when you reassemble be careful prying too close to the center of your hub as the o-ring sits here and may be damaged. Notice mine was WAY overdue for a rear fluid change.
Step 10: Do the same as above to the other side of the vehicle.
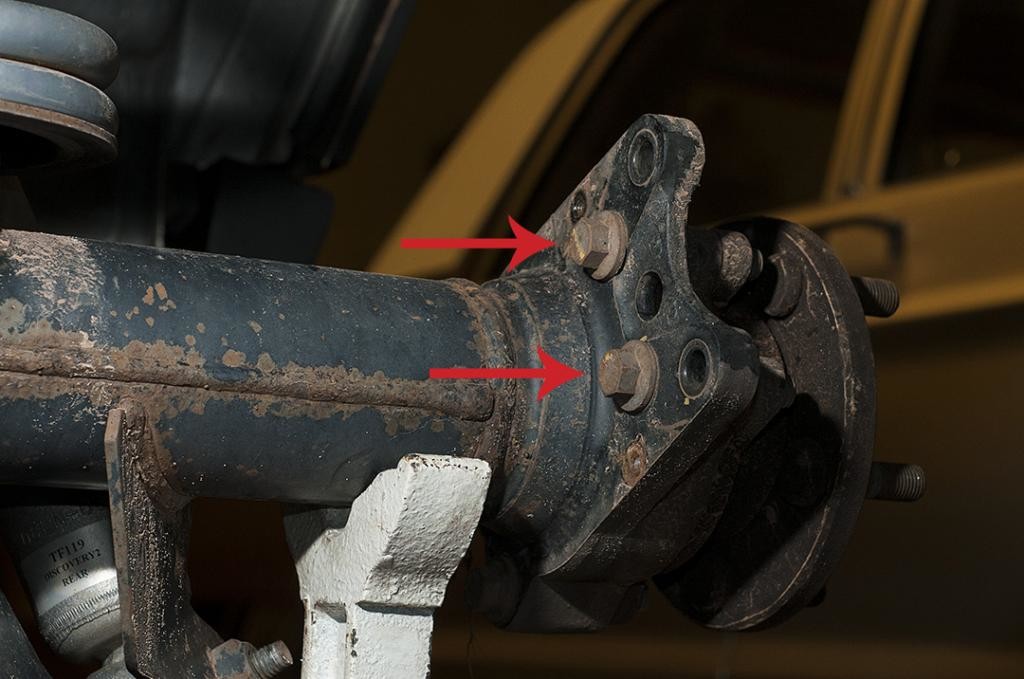
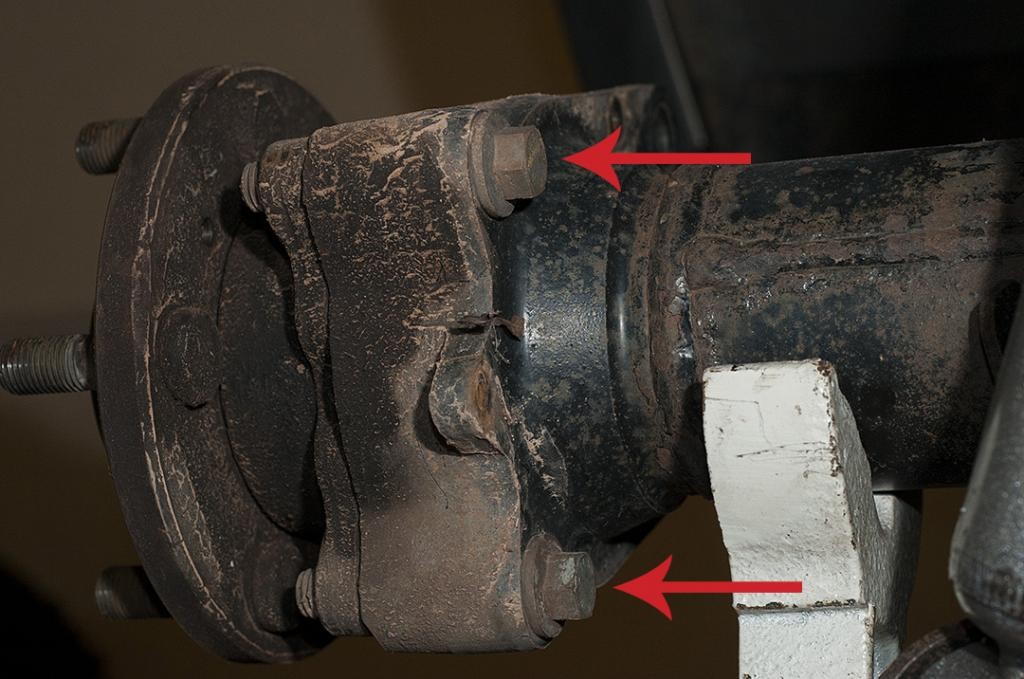
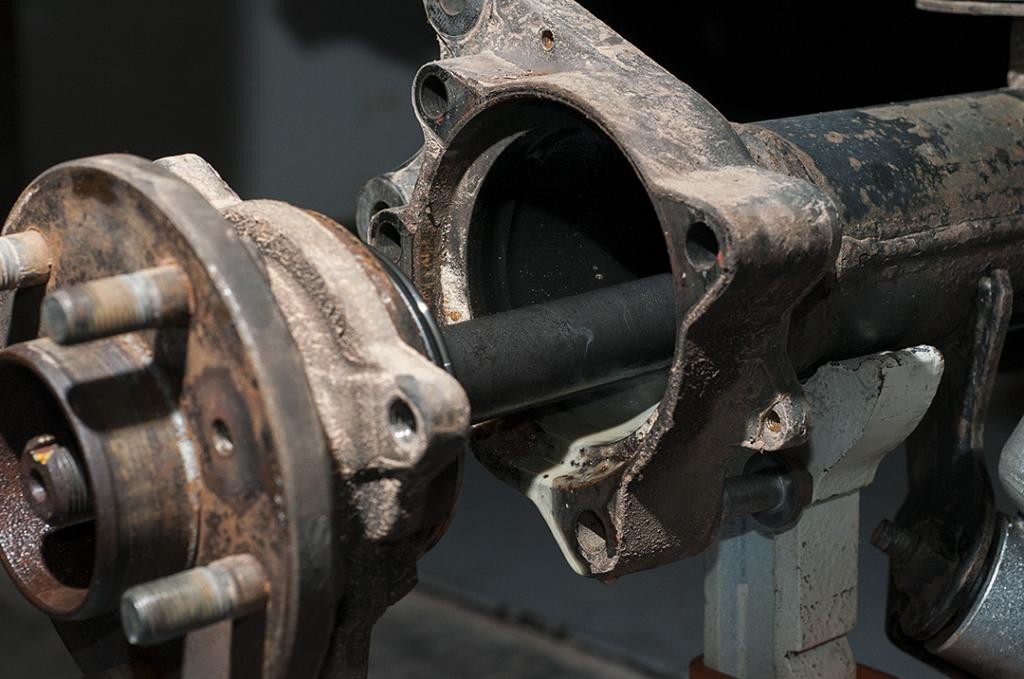
Step 11: Remove all the bolts holding the biscuit on your vehicle. 6 total. 3 are removed in this picture already. Once this is done you can push on the driveshaft towards the front of the vehicle and it will telescope in to give clearance. Once you pull it away from the rear differential you can mark the the front portion and rear portion and just pull it apart. It's way faster than trying to remove the 4 bolts connecting the driveshaft to your parking brake.

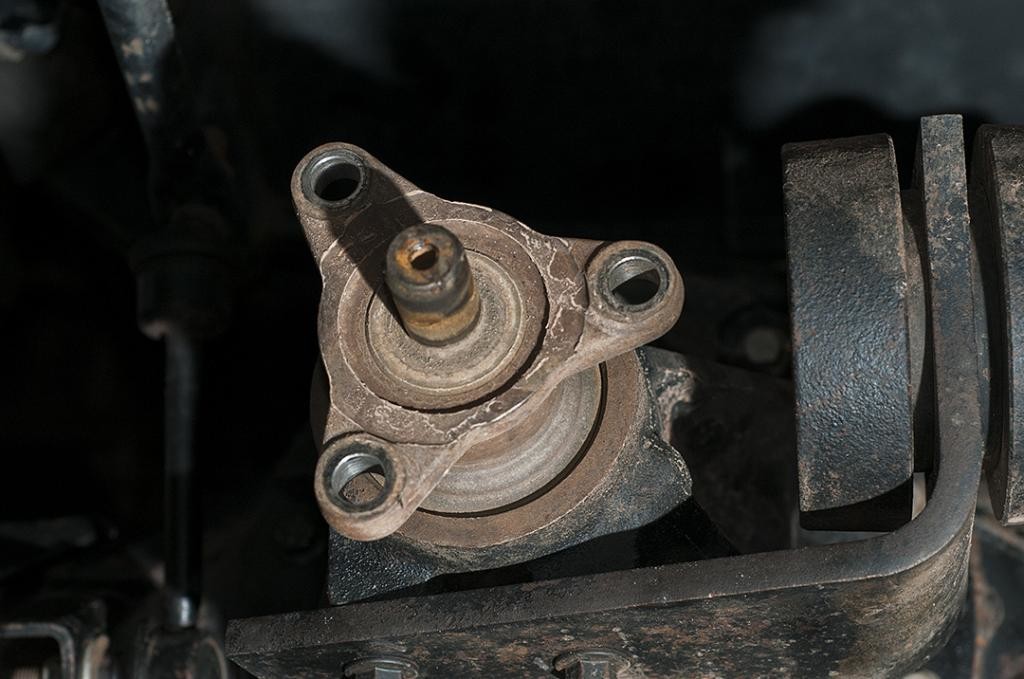
Step 11b: Inspect the input of your differential for leaks. If you see marks from fluid here; this will be a good time to replace this seal. There are instructions in the RAVE.
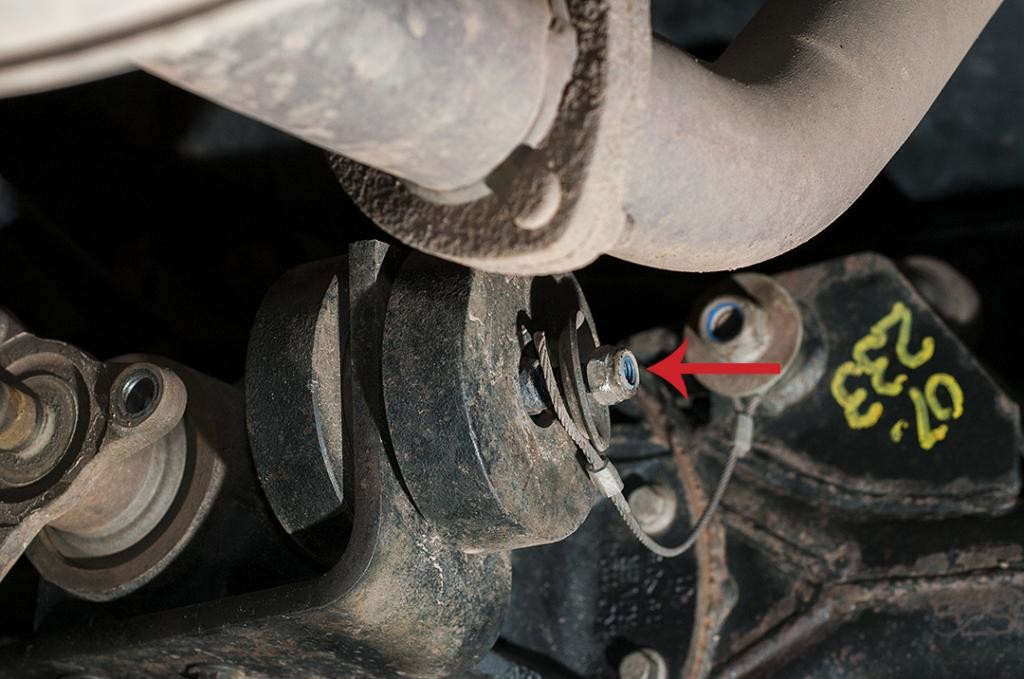
Step 12: Remove the nut and washer from the side bracket of your differential and remove the cable.
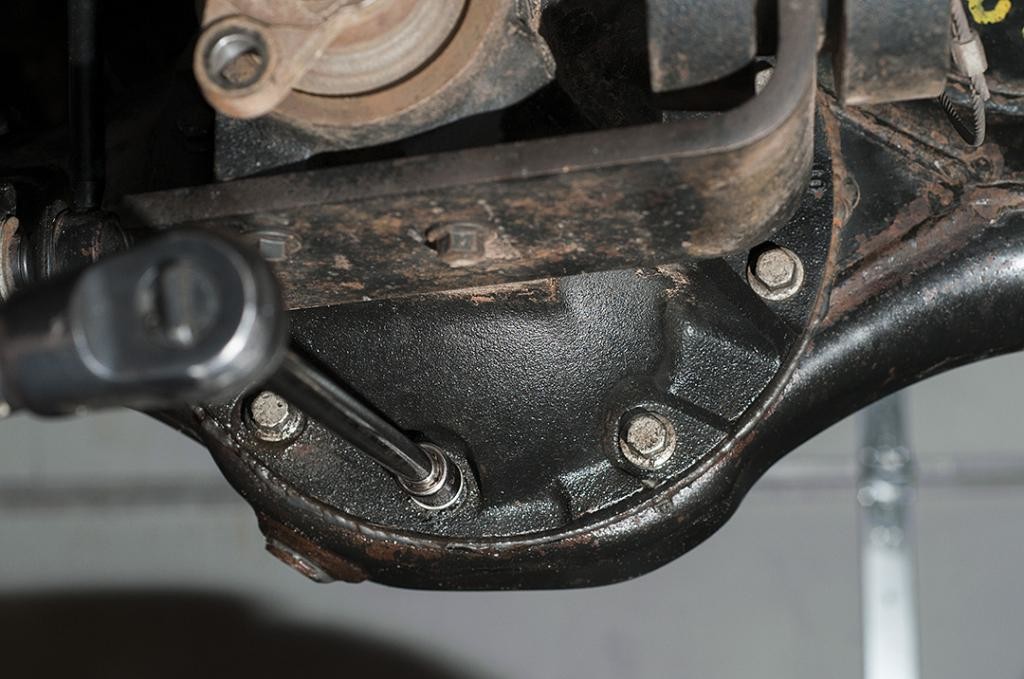
Step 13: Drain your differential. It's the bolt on the bottom left of the housing in the picture below. You need to use a 1/2" wratchet or breaker bar to remove it. Remove all bolts attaching the differential assembly to the axle housing.
Step 14: Brake the bond of sealant and pull the differential out. You may get hung up on your sway bar endlink, but it will clear it.
Step 15: Inspect your differential assembly. Turn your input shaft and inspect all the teeth on your pinion gear (the large outer one) and the input gear. You want to check for any broken/missing teeth or excessive wear. The gears should be flat on top and have a nice edge that is not too over rounded. Also inspect your spider gears on the inside of your center differential section. Also check for any binding or grinding as you turn it. This could be an indication your bearings are bad.
Step 16: If you have an air compressor, blow our your vent tube to make sure it is not clogged. Then, if all checks out, reassemble sealing appropriate sealant in reverse order.
I'll post pictures of a bad differential tomorrow when I remove the front one. It had tons of metal shavings on the drain plug.