You must be logged in to rate content!
8 minute read

1. Remove the bottom part of the console but pulling on the silver peices on each side, then unscrew your knob by turning it counter clockwise, put it in neutral, pull e-brake.
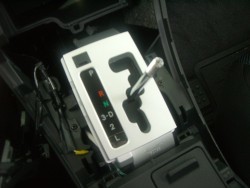
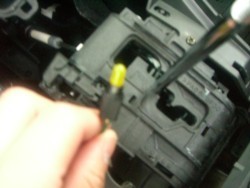
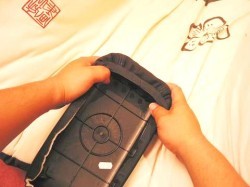
2. After removing the console, it's time to remove the PRND32L peice. There are 4 clips holding the peice down. Tug on the bottom left corner and wiggle it around while pulling upwards. The first clip should unclip and then the rest should be alot easier to unclip. This requires a little strength but be gentle, you don't want to break anything. After unclipping all four peices the PRND32L peice should come off. Look Behind the peice and you should see another clear plastic
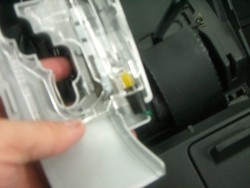
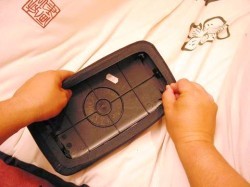
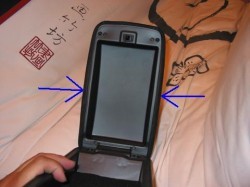
3. Remove the Clear plastic by pressing on the bottom of peice. It should come right off. The Shift light is fairly simple to remove. Turn it and it should come right off.
4. You can be creative and extend that bulb to another part of your car such as the Cup holder but otherwise just tuck the light away.
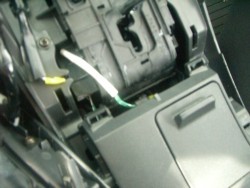
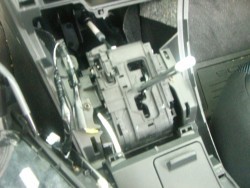
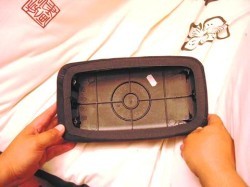
5. Now, remove the long plastic peice remaining where the shifter is. Now you see the bare part of the shifter.
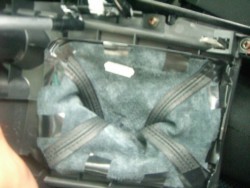
6. Take some electrical tape or any kind of really sturdy and sticky tape. Slip the Leather shift boot over the bottom of removed console. Position it right so that each thread (theres 4 threads) matches each corner of the bottom of the console. Flip the console over to position correctly too.
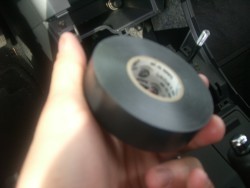
7. Tape behind the corners of the shift boot first so that the boot will not move around alot. This will ensure its position. Now tape every single part of the sides of the shift boot to ensure that the leather will not move around while you shift. *** If you want a cleaner install, take a metal coat hanger and twist it to the shape of silver bezel surrounding the top of the console and stick the hanger behind the console (where the tape would be).
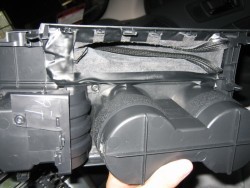
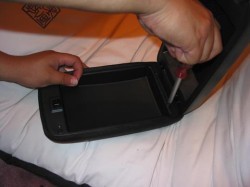
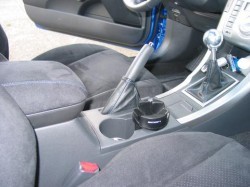
8. Pull the rear part of the center console free. It's held on by clips. It shouldn't be a prolem to remove it, just pull it at the front first and then release the sides. Once there, remove the plastic welds holding the rubber ebrake surround in place. Just cut them off and remove the surround.
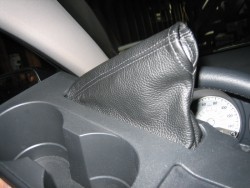
8. Glue the boot with duct-tape or epoxy-based glue to the underside of the console. Trim it where necessary (unless you like the super-baggy look, you will want to trim it down on both long sides). First tape down the back one without trimming it. After securing the position wanted, trim down the side with only one tape and tape it. Then on the other long side, it happened that the plastic housing has something in the way, so cut it like /\ to have a better fit. Then trimm and tape down the front, there wasn't any problems because there was enough space for taping. After all 3 sides are secured, take off the back tape and trimm it down so it was held more tight and upright.
8. Slide the back part of the center console over the ebrake handle and snap it back into place.

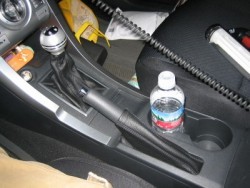
8. Snap the front part of the center console back on and slip the boot straight over the shift stick. Alternatively, flip the boot inside-out, slide it on the shifter thin-end first, secure it around the shifter with a zip-tie and then snap the bottom console back on. This will create a nice, rolled edge on top of the boot. Or, if you have a shift knob that has a special mounting for the shift boot, use that instead: Fold the top part of the shift boot inside. Guide the base of the knob through the folded shift boot. The fold on the shift boot will hold.
Screw back on the shift knob.
9. The center armrest cover can be easily replaced without actually disassembling the armrest assembly. It was only removed for photographic purposes and ease of assembly. If you wish to remove it simply unscrew the two screws under the armrest unit. This will remove it from the hinge.
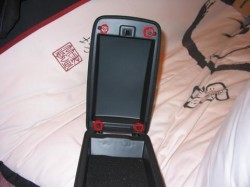
Remove the center armrest cover by opening the top cover and unscrewing the four screws, as indicated in red. The cover should easily come off after the four screws are removed.
10. Notice the armrest has a slight wedge shape. Your new Redline armrest cover is matched perfectly to this wedge shape, so make sure you install it correctly.

11. Start by slipping the taller end over the original cover. Check the stitching and make sure it is centered over the armrest.
12. Now finish pulling the Redline cover around the front of the original cover.
13. If your Redline cover is not evenly centered as pictured remove the front portion, reposition the cover and repeat the previous step. The Redline cover should not be totally covering any of the four holes for the screws.
14. Reinstall your cover starting with the two screws at the top, followed by the two next to the hinge. Remember, the thinner end points to the front, the thicker end to the hinge. Since there is more material between the armrest cover and the armrest, you may find it necessary to hold the hinged area tightly together while remounting the last two screws. If you are installing the cover outside of the vehicle you can push down with the screwdriver, as pictured.
15. Check to make sure there is no excess material on the sides. This may prevent the top cover from properly closing. If there is, loosen the four screws slight and use a credit card to gently push the material in.
16. This is the expected end-result. :)
CONGRATULATIONS - YOU HAVE SUCCESSFULLY INSTALLED YOUR NEW LEATHER BOOTS!
Useful tip
You have installed a product made out of genuine leather. As you know, to maintain a leather product in good condition, you should take care of it. We suggest occasionally (every 4-6 week for example) applying some leather conditioner/UV protector to keep your leather from drying up in the sun and cracking.
Redline Automotive Accessories Corp. will not be held liable for any labor, incidental or consequential damages of any kind. Proceed at your own risk.