- Spray adhesive
- #8 x ¼” piercing screws
- Flathead Screwdriver
- Philips-head Screwdriver
- 2 close pins, towel
- damp cloth
- cordless drill
You must be logged in to rate content!
4 minute read

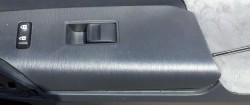
1. Remove the plastic cover on the backside of the side view mirror.
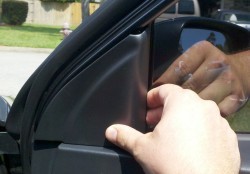
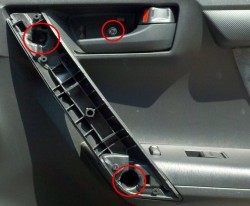
2. Remove door handle...
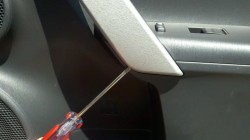
3. ... and door release covers.
4. Pop the window/door lock control piece out so it is loose. (This will not come off completely).
5. Remove the 3 exposed screws. Pull the door panel straight out from the door to unhook the fasteners. Unclip the tweeter harness and slide the door release and window/door lock control pieces out from the door. The door panel should now be free from the car.
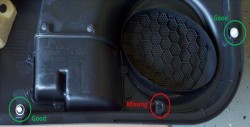
6. Check the backside of the door panel for missing retaining clips. Any clips that remained with the car should be removed and installed back in the door panel prior to reassembly.
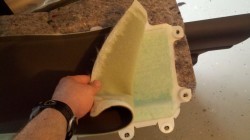
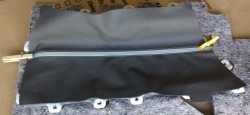
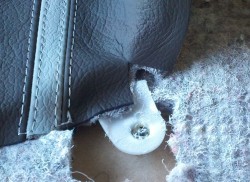
7. Laying the door panel with the backside exposed, carefully drill out each of the 13 plastic welds holding the insert in place.
CAUTION: Do NOT drill too far or you will put a hole in your door.
NOTE: The welds can be broken by simply pulling the plastic door panel insert, but there is an increased risk of damaging the connector.

8. Remove the original cover from the insert by pulling.
9. Align the RedlineGoods cover on the plastic insert, being sure it fully covers the area that will be visible, and clip it in place just above the curve using the clothes pins.
Flipping one side of the leather cover down, apply a generous amount of spray adhesive to the back of the leather cover and the plastic insert.
Carefully fold the leather piece back and smooth with your hands. To smooth, start in the middle and work your way to the edges.
Allow the adhesive to dry enough to hold the cover in place and remove the clothes pins.
10. Flip the other side of the cover over and repeat step 9.
NOTE: To get the insert to curve around the edges of the panel, you may need to make small cuts. Be careful not to cut too far that the cuts show.
Once the adhesive has dried, lay the door panel face down and set the insert back in its place.
Using the #8 – ¼” screws, screw in 3-4 screws where the plastic welds were and check the front of the door panel, looking for fit and form issues before doing the remaining screws.
CAUTION: Do not put the screws in so far as to pierce the front of the door panel.
Complete steps 1-6 in reverse order to reattach the door panel.
ENJOY YOUR NEW LEATHER PRODUCTS!
Useful tip
You have installed a product made out of genuine leather. As you know, to maintain a leather product in good condition, you should take care of it. We suggest occasionally (every 4-6 week for example) applying some leather conditioner/UV protector to keep your leather from drying up in the sun and cracking.
Redline Automotive Accessories Corp. will not be held liable for any labor, incidental or consequential damages of any kind. Proceed at your own risk.