You must be logged in to rate content!
5 minute read

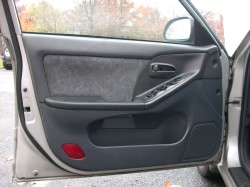
FRONT DOOR INSERTS Elantra 01-05
10. Start by removing the side mirror mounting screw cover (the black triangular piece of plastic that is above the door panel on the right side.) This is a snap-on piece and can be removed by prying off with a small pry tool. Next, remove four screws – two on the left, and two on the right, of the interior panel.
11. Next, remove four screws – two on the left, and two on the right, of the interior panel.
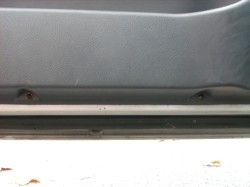
On the outside edge of the door panel, the two screws will have plastic caps covering the heads. To remove the caps, get a sharp pointed knife and pry the inner circle out (DO NOT PRY OUTER CIRCLE – IT IS RETAINED BY THE SCREW.)
12. Remove the two bottom screws on the interior door panel.
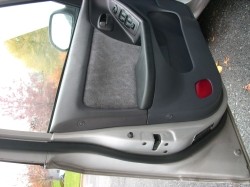
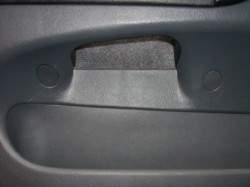
13. Remove one screw located at the door handle, in front of the lock, on the interior panel.
14. Remove two screws located behind the plastic circle, under the arm rest on the door panel. (In order to remove the plastic circle, use a sharp pry tool.)
15. Firmly but gently, pull the panel away from the door. (It may help to hold the side arm rest of the door panel and use that to pull the panel away from the door.)
16. Pry all plastic snap-in anchors from holes. Once removed, lift up on the panel and slide out.
17. Disconnect the window switch wire attachments.
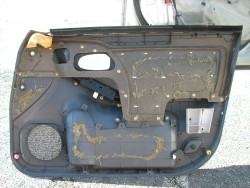
18. Remove sound dampening insulation from back of panel.
19. Remove 14 screws that attach the two pieces of panel together.
20. Metal prongs are inserted through the top part of the two door panels. Straighten the prongs out from the back side, so that you can pop the door panel out.
21. Using spray adhesive glue the leather cover to the insert, wait until the glue settles and reverse steps 10-20 to reinstall. Repeat for other door. :)
REAR DOOR INSERTS
22. In order to disassemble, you will have a total of 5 screws to remove. Remove two screws – one on the left, and one on the right, of the interior panel.
23. On the outside edge of the door panel, the one screw will have a plastic cap covering the head.
24. To remove the cap, get a sharp pointed knife and pry the inner circle out (DO NOT PRY OUTER CIRCLE – IT IS RETAINED BY THE SCREW.)
25. Remove one screw located at the door handle, in front of the lock, on the interior panel.
26. Remove two screws located behind the plastic circle, under the arm rest on the door panel. (In order to remove the plastic circle, use a sharp pry tool.)
27. Firmly but gently, pull the panel away from the door. (It may help to hold the side arm rest of the door panel and use that to pull the panel away from the door.)
28. Pry all plastic snap-in anchors from holes. Once removed, lift up on the panel and slide out.
29. Disconnect the window switch wire attachments.
30. Remove sound dampening insulation from back of panel. Remove nine screws that attach the two pieces of panel together.
31. Metal prongs are inserted through the top part of the two door panels. Straighten the prongs out from the back side, so that you can pop the door panel out.
32. Using spray adhesive glue the leather cover to the insert, wait until the glue settles and reverse steps 22-31 to reinstall. Repeat for other door. :)
CONGRATULATIONS - YOU HAVE SUCCESSFULLY INSTALLED YOUR NEW LEATHER BOOTS!
Useful tip
You have installed a product made out of genuine leather. As you know, to maintain a leather product in good condition, you should take care of it. We suggest occasionally (every 4-6 week for example) applying some leather conditioner/UV protector to keep your leather from drying up in the sun and cracking.
Redline Automotive Accessories Corp. will not be held liable for any labor, incidental or consequential damages of any kind. Proceed at your own risk.