You must be logged in to rate content!
5 minute read

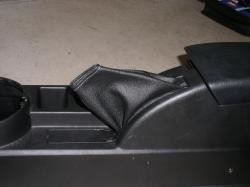
HYUNDAI TIBURON 03-08 SHIFT BOOT/E-BRAKE INSTALLATION INSTRUCTIONS
1. Remove dash console around shift boot by reaching in and under edge of hole around the shift boot and pulling up. The console should unlatch and lift easily.
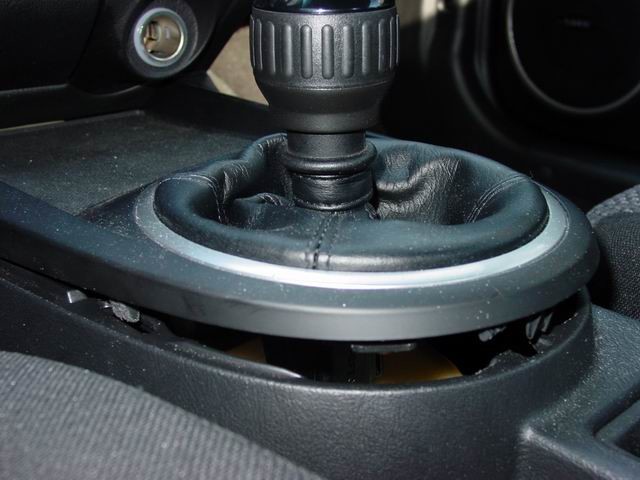
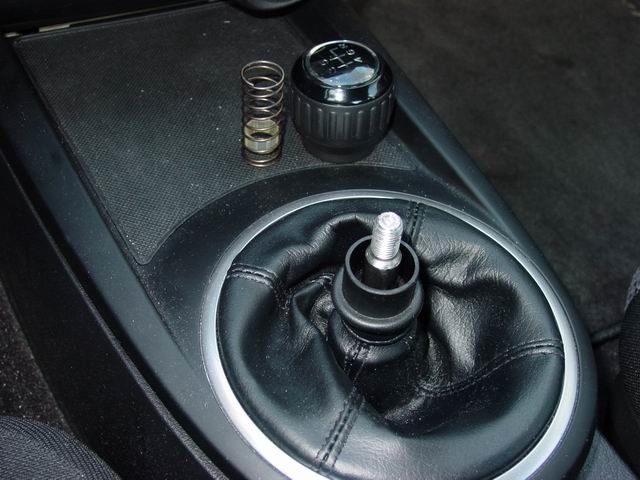
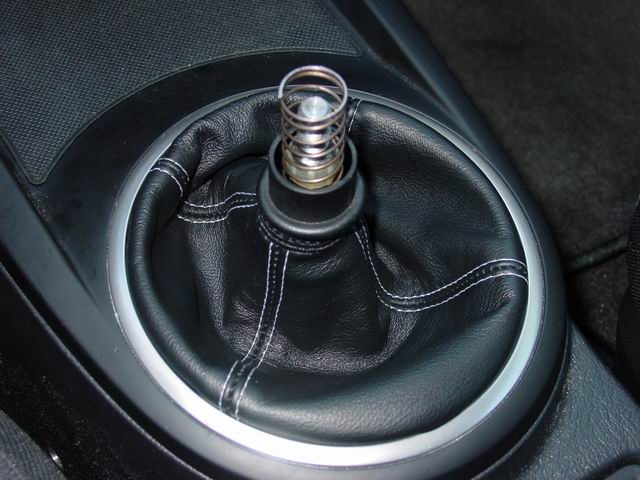
2. Remove shift knob by wrapping a towel/cloth around stem of shift knob and using a wrench to loosen. Unscrew and remove. Then remove the spring and the plastic trim piece (6-spd only, 5-spd owners will be able to remove the plastic trim piece once the boot is completely disassembled, see below)
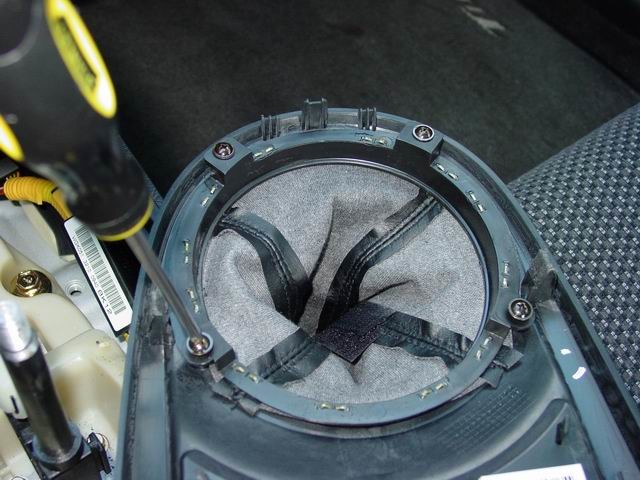
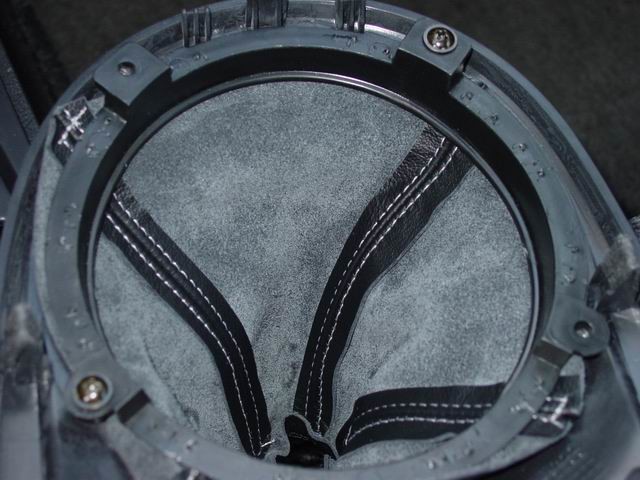
3. Turn the console inside out. Remove the 4 screws holding the shift boot assembly to the center console. Remove the staples holding the shift boot to the round trim piece.
4. Install the new shift boot. You don't have to re-fit the staples, if you screw in the round trim piece to the center console tight, it will hold the boot by itself. If you can easily replace the staples - use them. If it's difficult (lack of tools, etc.) try driving without them first.
NOTE for the 5-spd owners: You need to remove the top plastic trim piece from the old shift boot and mount it on the new one in the same way.
5. Reinstall everything in the reverse order of disassembly and you're done! Don't to that just yet if you are installing the ebrake boot. You'll do it later, when you're done with it.
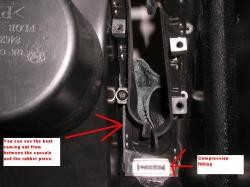
6. Remove the rear part of the center console (the part with the armrest cover and the ebrake). It's very easy, just take your time. :) Turn the console upside down. On the underside, there is a rubber piece that is held in place with 6 small screws (3 on each side) and a compression fitting on the part towards the back of the car. Remove the 6 small screws and the compression fitting, being careful not to break the compression fitting because you're going to need it to reinstall the rubber piece.
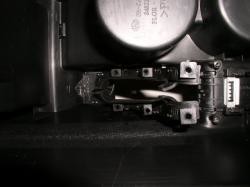
7. After you remove the screws and compression fitting, take the rubber piece off.
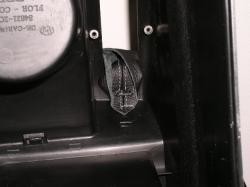
8. Place the bottom of the boot through the hole the rubber piece covers up. Next cut a small hole in the part of the boot that goes at the back. I did this to help hold the boot in place. It will not ruin the boot, so don't worry. You can see the cut vertically at the bottom of the boot, a plastic tooth is coming out of it. That tooth is part of the center console.
9. Starting at the back, place the boot around the holes that the screw goes into. Do not cover the hole, cause you will be putting the screw back in. Place the part of the rubber piece that goes over the screw hole into place and replace the screws one at a time. The boot should be held in place with the rubber piece. Do this with all 6 screws.
10. When you replace the center console with the shift boot in place, You will need to do one of two things. Either pull the emergency brake handle even more then usual, or play with the position of the boot, in order to get it to slide over the ebrake. Reinstall the rear and the front console. Congratulations, you are done!
ENJOY YOUR NEW LEATHER BOOTS!
Useful tip
You have installed a product made out of genuine leather. As you know, to maintain a leather product in good condition, you should take care of it. We suggest occasionally (every 4-6 week for example) applying some leather conditioner/UV protector to keep your leather from drying up in the sun and cracking.
Redline Automotive Accessories Corp. will not be held liable for any labor, incidental or consequential damages of any kind. Proceed at your own risk.