- • 3M Vinyl Adhesive Spray (Can #80)
- • Scissors
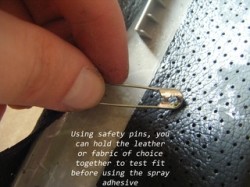
- • Safety Pins
- • Flathead screwdriver or butter knife (Whatever your preference)
- • Large cardboard piece for your workspace
You must be logged in to rate content!
5 minute read

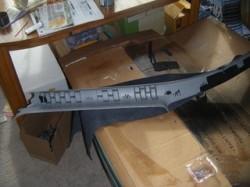
HYUNDAI TIBURON A-PILLAR COVER INSTALLATION INSTRUCTIONS
1. First take your a-pillar and place the fabric up to it, slowly aligning all the pieces together to your preference. For example, I made sure that the piping was centered along the pillar all the way down. You can do this one of two ways:
1) Start at the top of the pillar, or the end that faces towards the rear of the car, above where your headrest when sitting in the car.
2) Start at the middle of the pillar where there is a slight curvature in the piece as you will have to maneuver the fabric for it to fit properly.
Having done it both ways, I will recommend the 2nd way as it is MUCH easier to start at the most difficult part of the pillar.
2. You will now see the excess fabric that needs to be cut to be able to apply the pillar properly and with the best fitment for the best overall look!

3. Once you have aligned the pillar and fabric to your preferred placement, use safety pins as shown above to hold it in place. Repeat as you move down/up the pillar, facing it towards you every few segments, ensuring the fitment is where you want it.
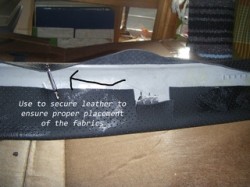
4. Use the pins to secure as shown here:
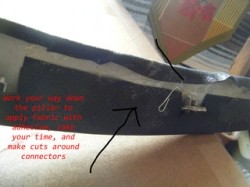
5. Once you have discovered how you want to fit the fabric to the pillar, use the scissors to make cuts along the fabric to apply around the separators and connectors, moving slowly along the pillar, taking your time! Measure twice and cut once!
6. Once you have utilized the safety pins to help secure the placement of the fabric on the pillar. It is now time to work your way with the adhesive spray.
I recommend doing this indoors, in a well ventilated space, where the temperature is 65 degrees or above. I worked inside, but in colder temperatures, making it more difficult to work with the spray. Make sure when you store the can it is stored at room temperature.
You will want to have the safety pins held together until you are ready to use the spray. Only use the adhesive in spurts, about 6 inch segments, apply, allow to dry, and continue on the pillar.
This is the example of how I applied the Fabric to the Pillar half way down where the angle is made from the top corner of the window
I recommend going slow at this point, carefully making cuts and adjustments to the fabric to ensure proper fitment.
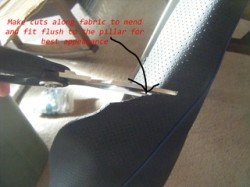
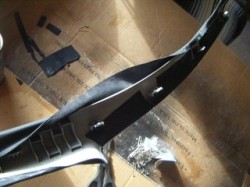
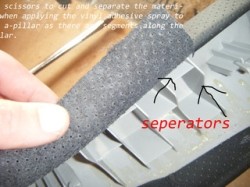
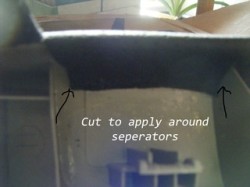
7. Once you have done this, you now need to make cuts around the "separators" in the pillar to help mend and apply the fabric smoothly to avoid bumps in it when finished.
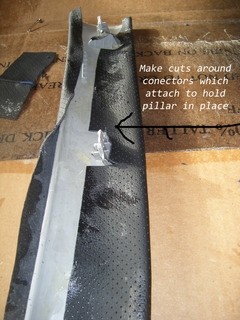
8. As you work down the pillar, you will need to make sure you are making cuts in the fabric, around the connectors which hold the pillar in place once installed, as to avoid a difficult install.
9. Here is an example of how I cut around the "separators" to ensure flush fitment
10. Once you have cut around the "separators" and connectors on the pillar, you will begin to tuck in and apply the adhesive to the remained of the pillar.
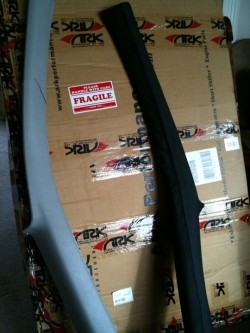
11. This is the before and after you will and should have after completing!!! Reinstall the pillar into the car and proceed to the next one.
ENJOY YOUR NEW LEATHER BOOTS!
Useful tip
You have installed a product made out of genuine leather. As you know, to maintain a leather product in good condition, you should take care of it. We suggest occasionally (every 4-6 week for example) applying some leather conditioner/UV protector to keep your leather from drying up in the sun and cracking.
Redline Automotive Accessories Corp. will not be held liable for any labor, incidental or consequential damages of any kind. Proceed at your own risk.