You must be logged in to rate content!
5 minute(s) of a 97 minute read
3-18-2014
There are other options, but I am looking for the cheapest, easiest route, stock or workbench modified early RX7 when possible. I have always found the factory carb to be simple and reliable, once you get all of the junk off of it and the manifold, and plug a truckload of resulting openings. The main jets can be rejetted with Weber jets, too. The venturies are also removeable, if one wants to enlarge them, so the Nikki has some performance potential, within reason. We might mechanicalize the vacuum secondaries, but we will cross that bridge when we get there. A stock 100hp+- rotary with header should do just fine for zipping around on the street (hoping for a 0-60 in the nines, which should be all you would want on little bitty wheels and tires). The side draft Webers and the sexy looking 180 intake manifold are way up on the cool factor, but they cost money and get away from the boundaries of the project (not that the car may not get them someday).
Like most of the rest of the early Mazda RX7 stuff, factory Nikki carb parts are unobtainium (one reason I have gone MG, thank you Moss and VB), so keeping a carb in good order over time means having some extras laying around.
4-27-2014
Sorry for the long delay, spring planting season and all.
Getting back into the swing of things, a question came up in a private message exchange, concerning hood (bonnet) clearance. It looks like ordinary spark plug wires that exit the top of the distributor cap are not going to clear. Note that on post #25 of Feb 24th, the wires I am using exit the cap to the side, not straight up. Looks like that sort of plug wire end is going to be a necessity on this sort of project.
The front engine bracket is done, I have laid it in place at the front of the engine, and everything clears. The holes drilled in the right side mount in the photos (left side of the car) were drilled out to 7/16". There is some width adjustment by elongating the holes in the right side mount, the one mounted behind. For fine tuning the height, I plan to spacer the mounts where they go into the fender wells. The fender wells will need to be reinforced as well, as the MG engine mounts are removed, and the rubber and steel Mazda doughnuts will not fit. I intend to place some thin hard rubber on either side of the fender well, and back the outside, away from the motor mount, with some steel.
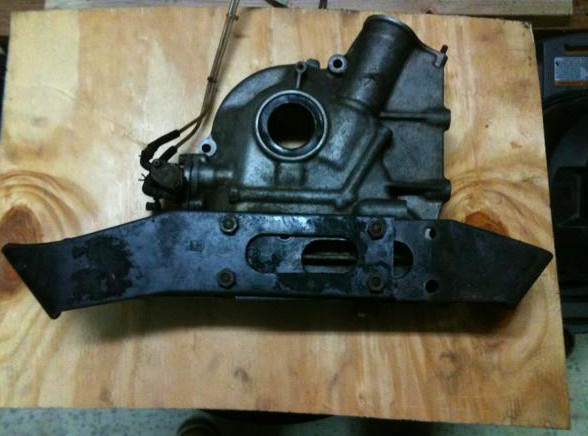
The first photo shows the twin mounts mounted on a front cover. The factory front cover has studs, which will fit both mounts plus the nuts. The later photos show the mule engine, and the motor mounts are fitted in place with long bolts. The factory studs will work better, but the mock-up shows the orientation of the parts in the engine bay.
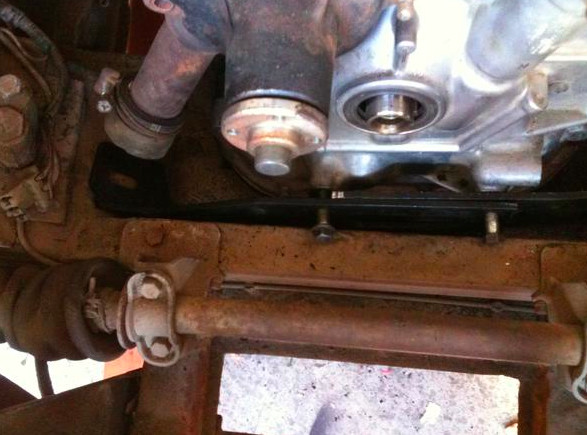
The second photo shows the left side mount (in the photo orientation), looking at the right hand side of the engine bay. A nice, easy fit.
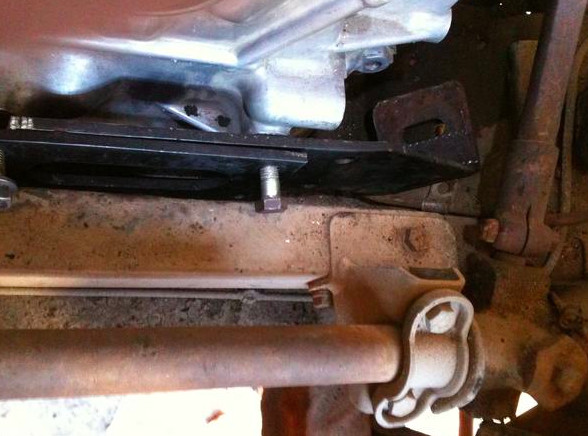
The third photo shows the other side. The fit is tighter, and the factory hard fuel line comes right through where the mount goes, so the fuel line will be moved.
Now, to mount the transmission. I will run two bolts through the factory MG crossmember, through a thin rubber pad, and into the two threaded holes for the transmission mount. Note that here, too, the factory Mazda rubber and steel mount is being eliminated. The MG crossmember is about 2 3/4" high. We also need length on the bolts to thread through the rubber shim, and the Mazda transmission bracket itself. Came up with a junkyard solution here. Note photo four. Those studs, threaded on each end, are about 3 1/2" long. The threads just happen to fit the Mazda transmission mount threads. These studs are for the water pump mounting. Four of them are used for the water pump. Find two more, and you are good to go. A plate will be fabbed up to go under the crossmember, rather than use the two fender washers in the photo, however.
This application will not use much rubber between the powerplant and the frame. For this application, it should be ok. The rotary does not have much of the traditional NVH issues. However, bolts will need to be either nilocked or loc-tited to keep the small high frequency rotary vibrations from loosening things up.
There are three more big issues, the radiator, the driveline (driveshaft and rear axle), and the exhaust system. We will try to hit those next, starting with the radiator and cooling system.
Beyond that are a myriad of small issues, such as air cleaner and intake piping, moving the brake proportioning valve to the left side of the engine bay, away from the hot exhaust, adapting the gauges, building a throttle cable, rerouting the fuel line, mounting a battery box in the trunk, and so on. We will try to hit the three big issues first, over the next few months, then double back to the smaller stuff (after the engine bay has been cleaned up and the "for real" engine has been dropped in).