You must be logged in to rate content!
3 minute read

66-74 MIDGET SHIFT BOOT INSTALLATION INSTRUCTIONS
This Redline shift boot will work for any of the following applications:
(a) Replaces tin cup with rubber grommet used on 948cc, 1098cc, and 1275cc MG Midgets and Austin Healey Sprites through 1971.
(b) Replaces OEM vinyl boot used on 1275cc MG Midgets and Austin Healey Sprites from 1972 on. (c) Custom boot for all of the above models when installing the Rivergate Restoration 5-speed conversion kit.
This series of photos depicts a 5-speed conversion on a 1967 MG Midget, but these instructions apply to all of the above models.
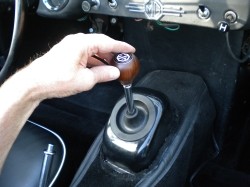
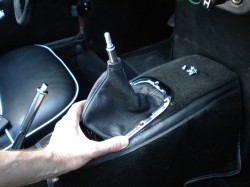
1. Unscrew shift knob and unsnap carpet covering the transmission tunnel.
2. Lift carpet from the tunnel and set aside.
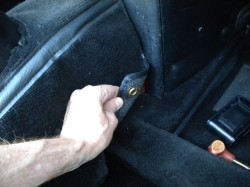
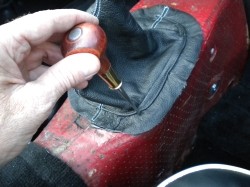
3. If you have an early car with the tin cup, remove the screws securing the cup to the tunnel and slide the cup and grommet up and off the shift lever.
If you have a later car with a vinyl boot, remove the screws securing the retainer plate to the tunnel. Remove the plate, and slide the vinyl boot up and off the shift lever.
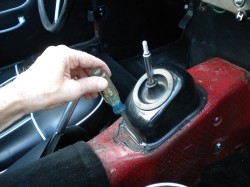
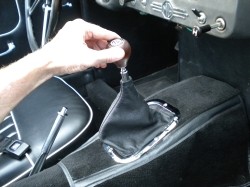
4. Slide the new Redline leather boot down onto the shift lever, taking care not to damage the seam around the opening at the top. Arrange the hem around the opening in the tunnel.
5. Using an awl or ice pick, make holes for the screws by piercing the flap of leather outside the sewed hem.
If you are replacing the tin cup on an early car as in this photo series, you will first have to drill holes in the transmission tunnel for the screws, using a retainer plate as a template. OEM retainer plates are no longer available. This installation uses a chrome shift boot plate from 62-67 Chevrolet Nova with a Hurst 4-speed, available on-line from www.DreamersHotrods.com. Oval-head, no. 8 x ¾” stainless sheet metal screws were used here.
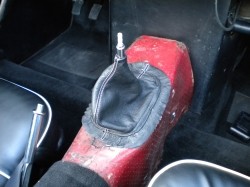
6. Reposition the carpet on the tunnel and install the retainer plate. The awl is useful to align the holes in the shift boot hem and the transmission tunnel before inserting the screws.
7. Replace the shift knob
Useful tip
You have installed a product made out of genuine leather. As you know, to maintain a leather product in good condition, you should take care of it. We suggest occasionally (every 4-6 week for example) applying some leather conditioner/UV protector to keep your leather from drying up in the sun and cracking.
Redline Automotive Accessories Corp. will not be held liable for any labor, incidental or consequential damages of any kind. Proceed at your own risk.