You must be logged in to rate content!
35 minute read
Dash light colour change
Compliments of zirconmr2 @ totalmini.com
6-18-2013
This is a write up on how to change the colour of your dash lights. Read on….
If in doubt of your abilities to do this don’t try, get a pro to do it (and charge you for it!) or ask me, i`m cheaper than anyone else by a long way!
Im a Panasonic engineer and work on plasma tv`s etc so the components here are actually huge to me, so much so I did the majority of this with a simple gas powered hobby soldering iron, but again this is second nature to me and I understand not everyone has the confidence to attempt this. But the fact is, its not hard or even a specialist thing to do. I did it with the gas iron to show it can be done without specialist gear.
Take photos as you go along, this will aide you on reassembly. And take a note of everything you remove.
To do this you need to swap out SMT`s . basically surface mount leds. they come in a variety of different colours. red, green, white, yellow, blue, amber (as the mini is standard), warm white, pink and purple.
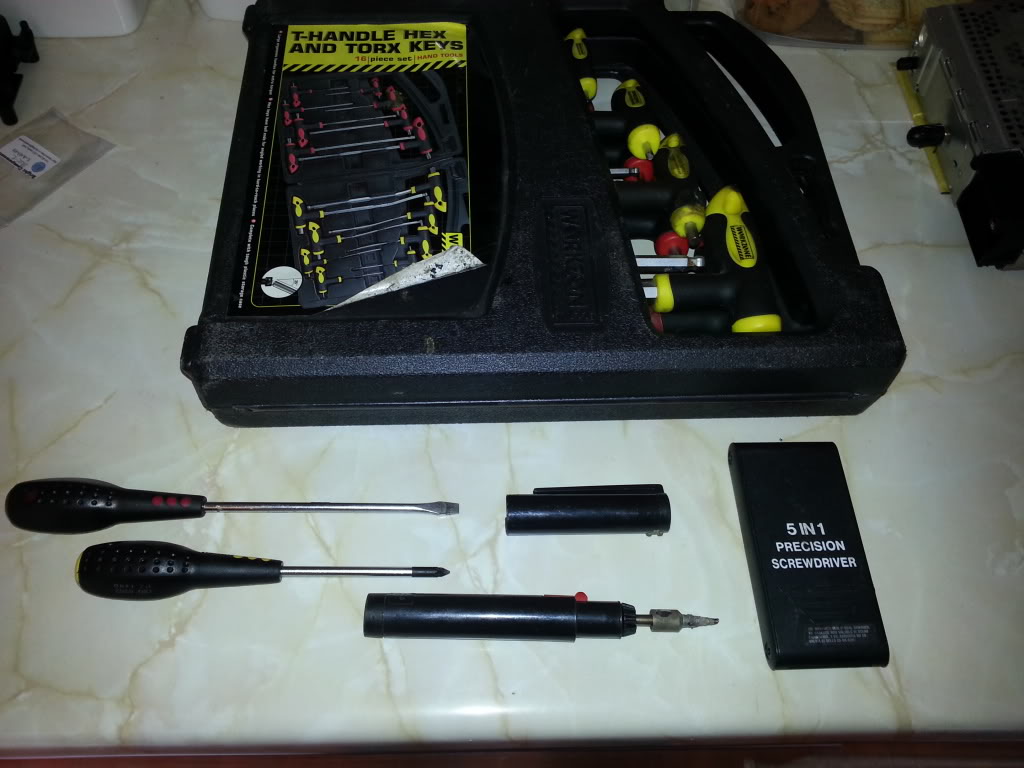
these are the tools i used and what smt`s look like and a picture of the finished job.


First you will need to remove the modules you intend to change
I RECOMMEND YOU START WITH THE CLOCK IN THE ROOF
Why? It’s the simplest.
Remove the clock and then open it up. It has three SMT`s
Note the polarity while they are still on the board, there is a cut-out in one of the corners, this is the cathode (marked K for kathode on some of the boards) make sure when you replace them you get them the same way round, unlike a bulb they wont light if placed in reverse.
see later in the thread for pics of the clock opened up etc
Hers a pic of the finished clock

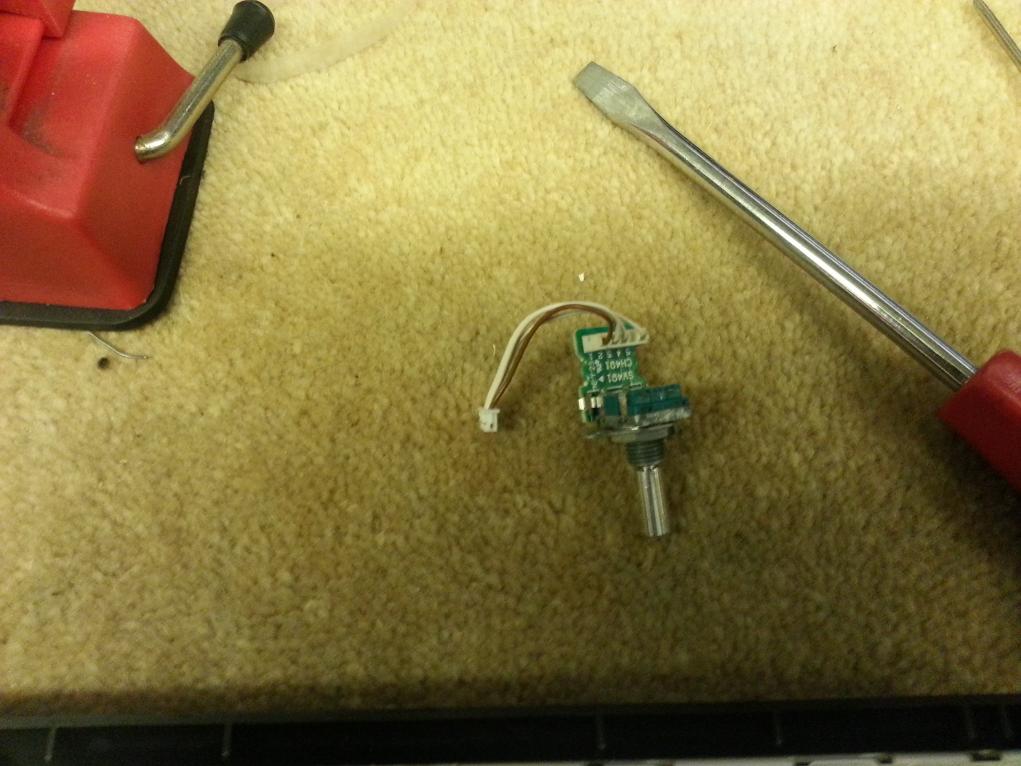
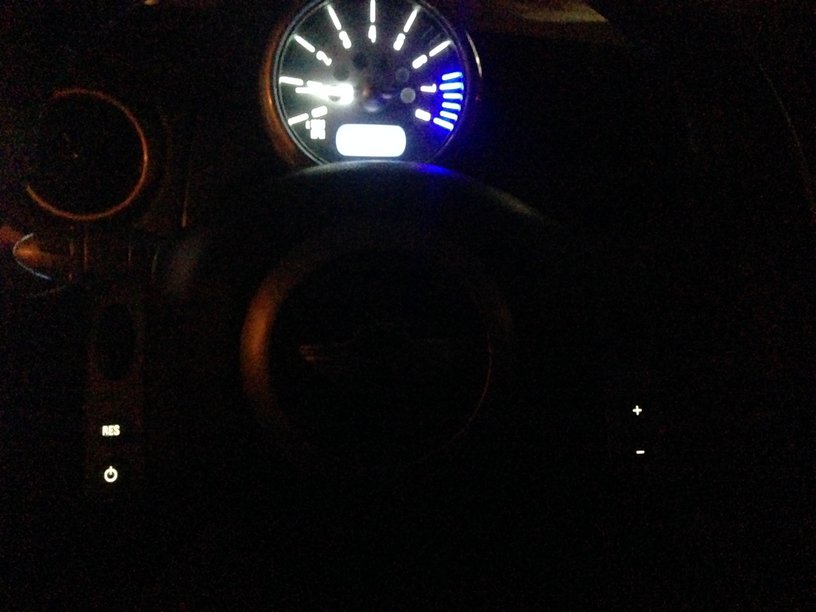
Next I did the tacho and speedo, if you have a centre mounted speedo the principle is the same.
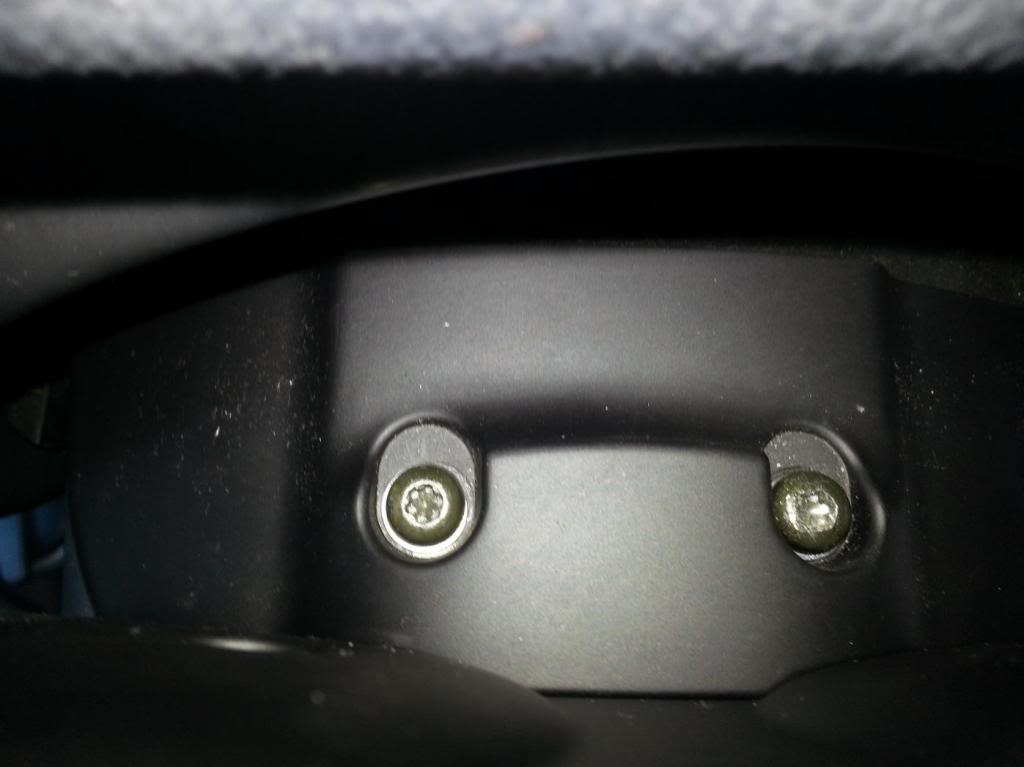
First removed the two torx screws behind the tacho, drop the steering wheel to do this
Now unplug the green connector, and remove
and remove the Philips screws from the back
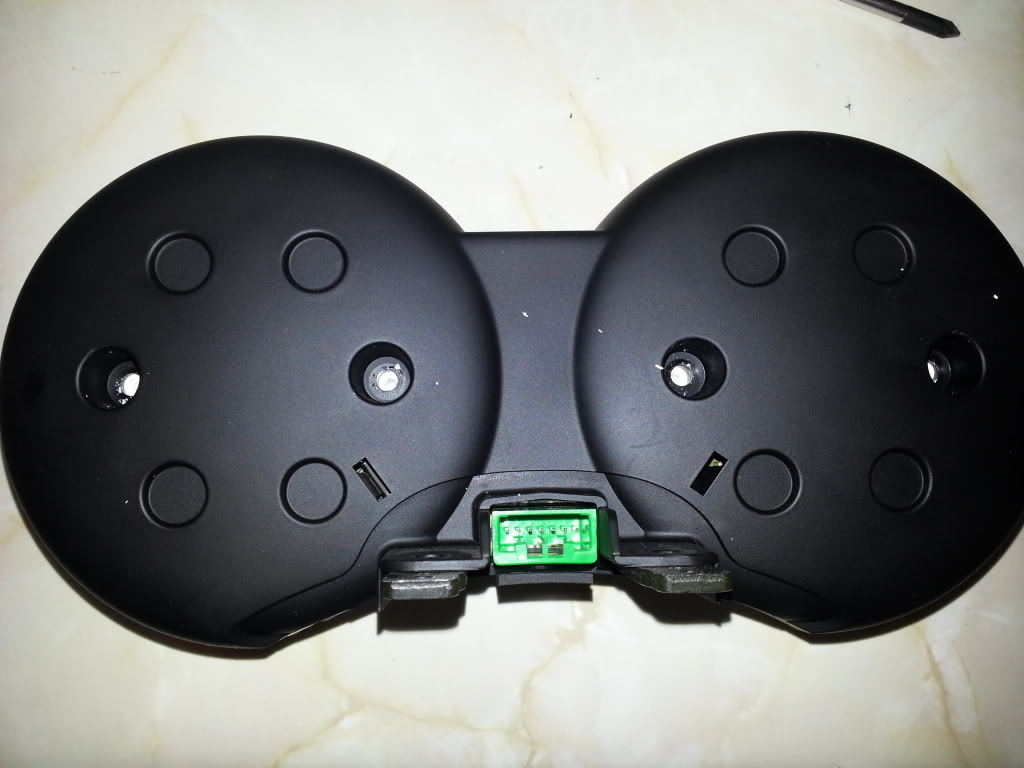
Unclip the front
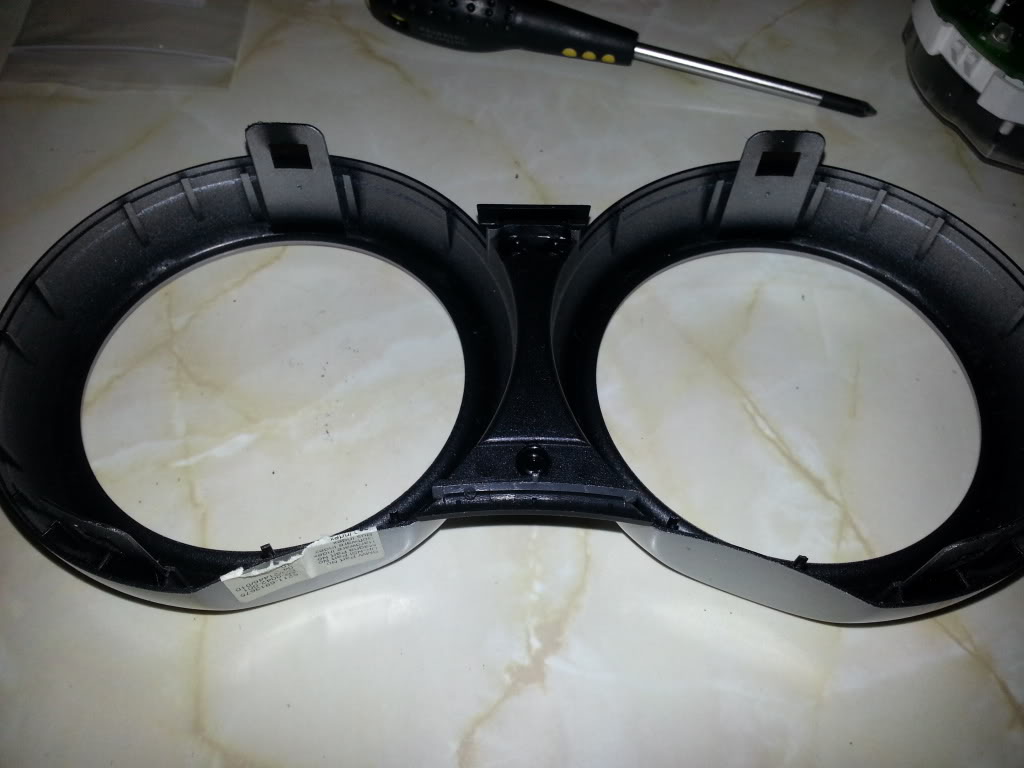
you will be faced with this

unclip the lens from the white plastic and put somewhere safe

Now you need to removed the needles, be careful but they just need prising off.
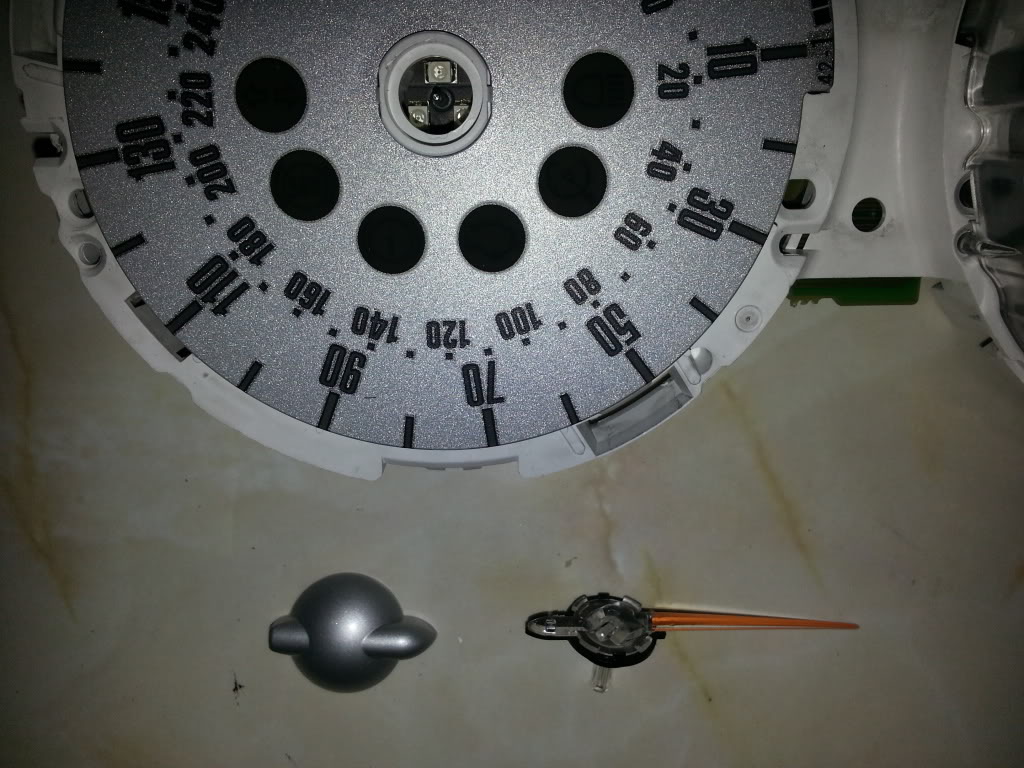
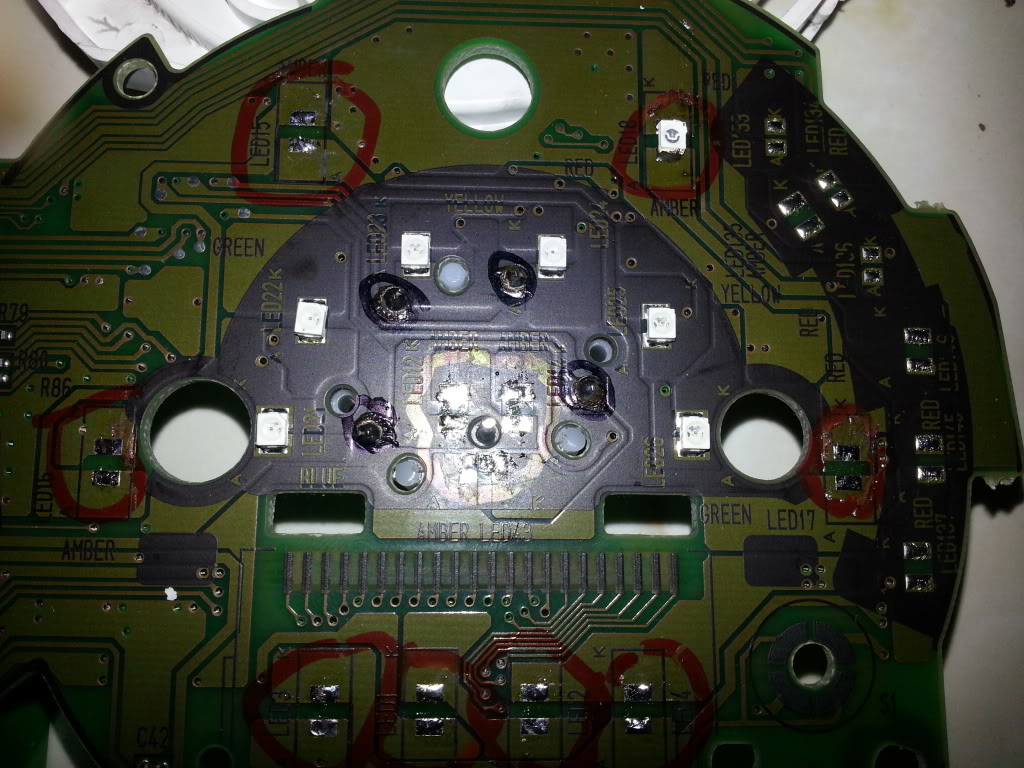
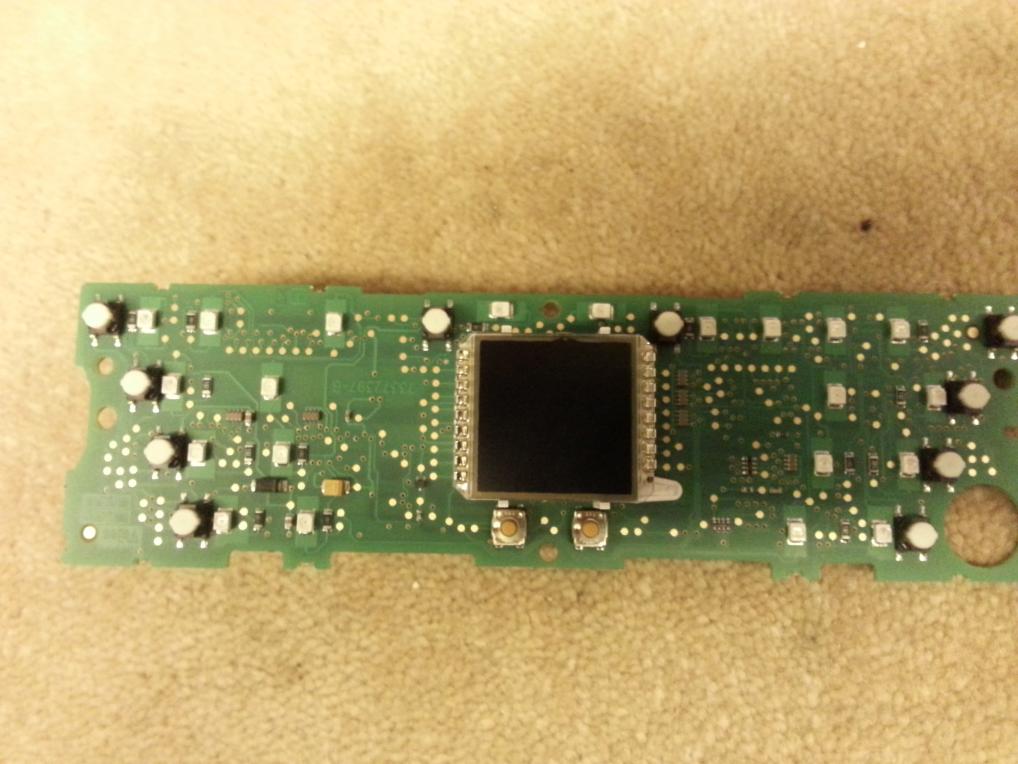
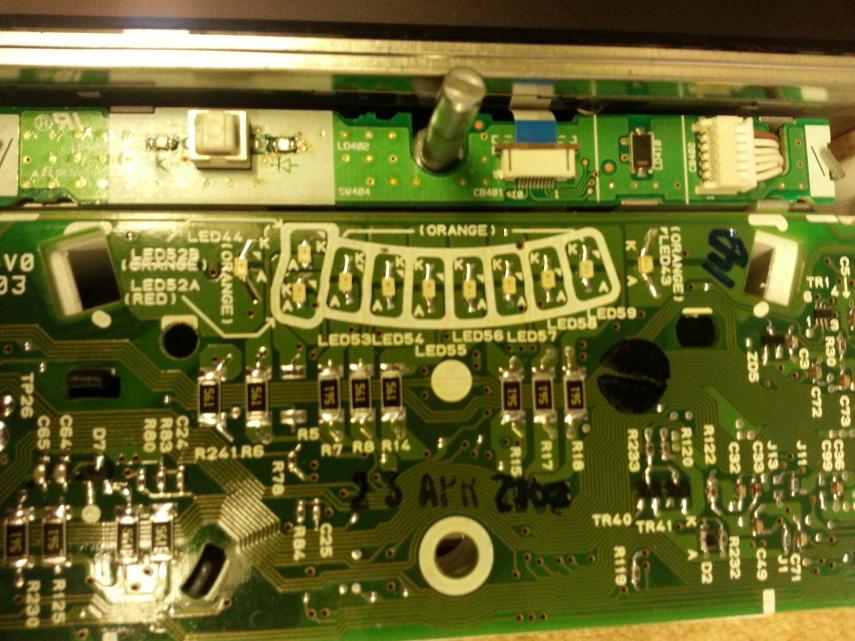
Now unclip the white plastic from the board, turn it over and you will see the smt`s, I have marked the ones I wanted to change in the picture
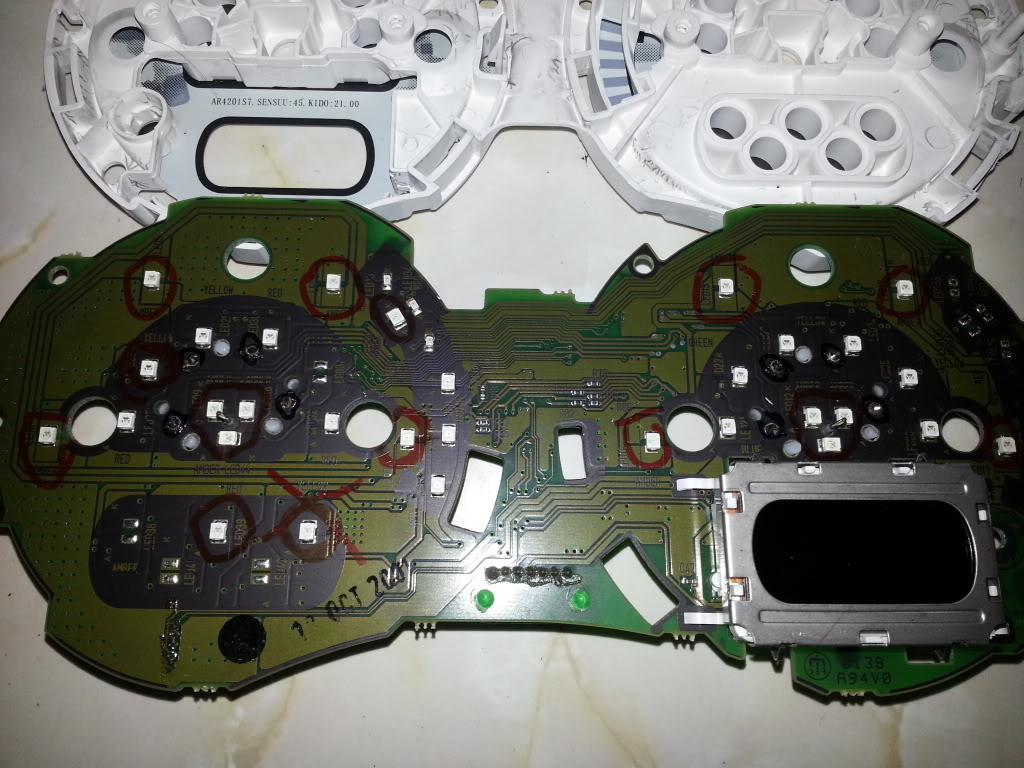
Now the display needs to be removed, four metal clips and its off, there are 4 smts under here.
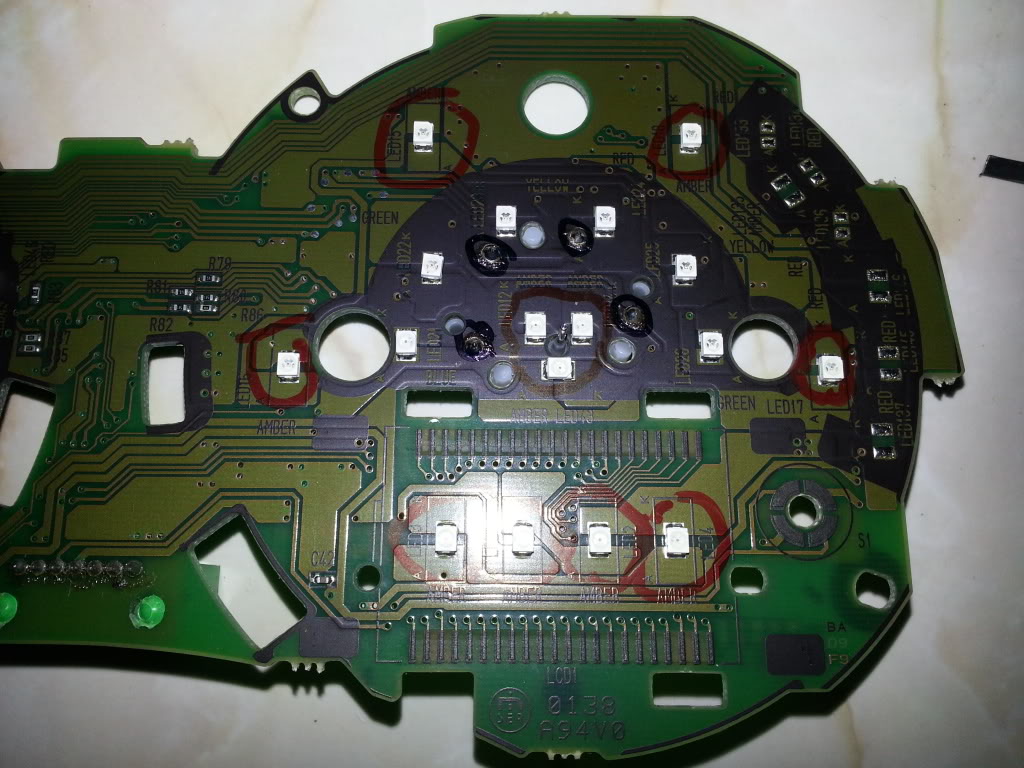
How to remove smt`s from the board, remember for the sake of this diy, and using bog standard equipment, we are using the ghetto method here! if i was to do it again i work use my very expensive gear.
i didnt have a free hand to take a photo but, Quickly heat one side and then the other while putting a small amount of force on the smt and it will pop right off! On this board the polarity is marked, “K” is the end where the cutout on the smt goes and “A” is the other end.
So now just go around and replace the ones you want to change,
How to fit smts, observe polarity!! if its your first go get a friend to help, hold the smt with tweezers,place the smt over the solder connections on the board and while you hold down the smt, dab the iron on one end, it should just attach easily, then do the same for the other end. Here you can see I have removed the smt`s and replaced the one in the top right.
Once you have them all done you need to reassemble, don’t forget to put this bit back, the reset button, the black ring goes against the circuit board.

When all is back together it should look like this.
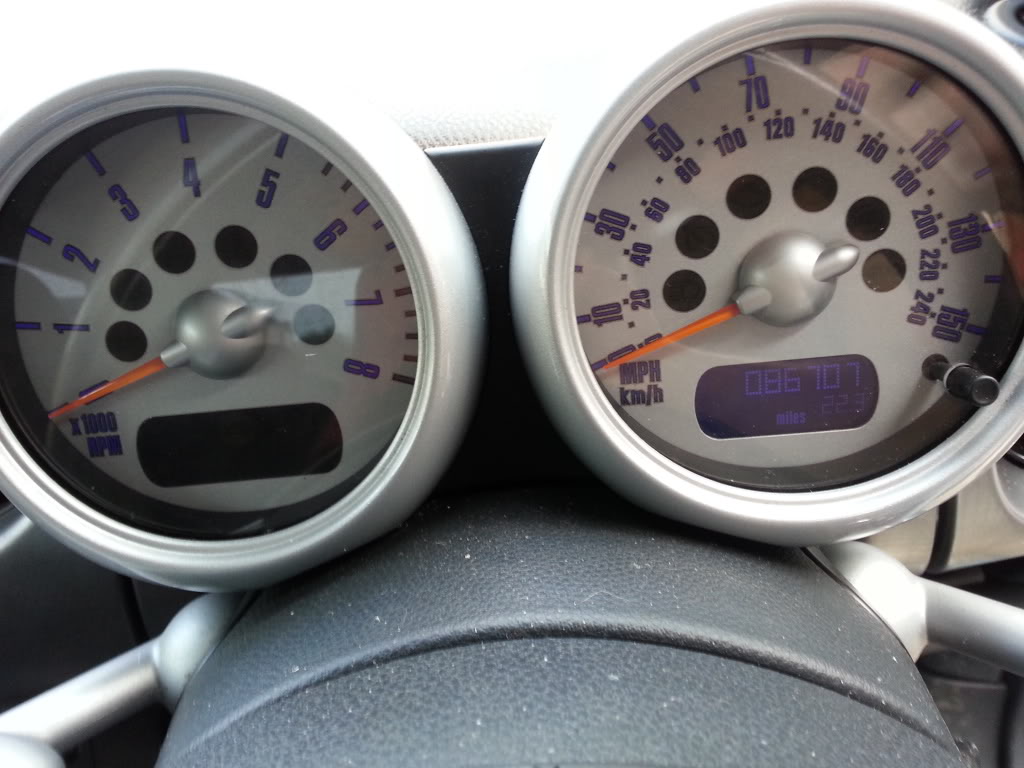
cant wait for it to go dark
Its not only the tacho and speedo that can be done.
Next I did the switch bank
Remove the downtubes from the centre console
Remove the 2 torx screws holding in the switches and remove the module.
Now unclip the back of the module, be careful here as all the parts of the toggle switches can drop out.
Set the front carefully to one side
Removed the white rubber sheet to expose the smts, replace as previously written, reassemble and its done.
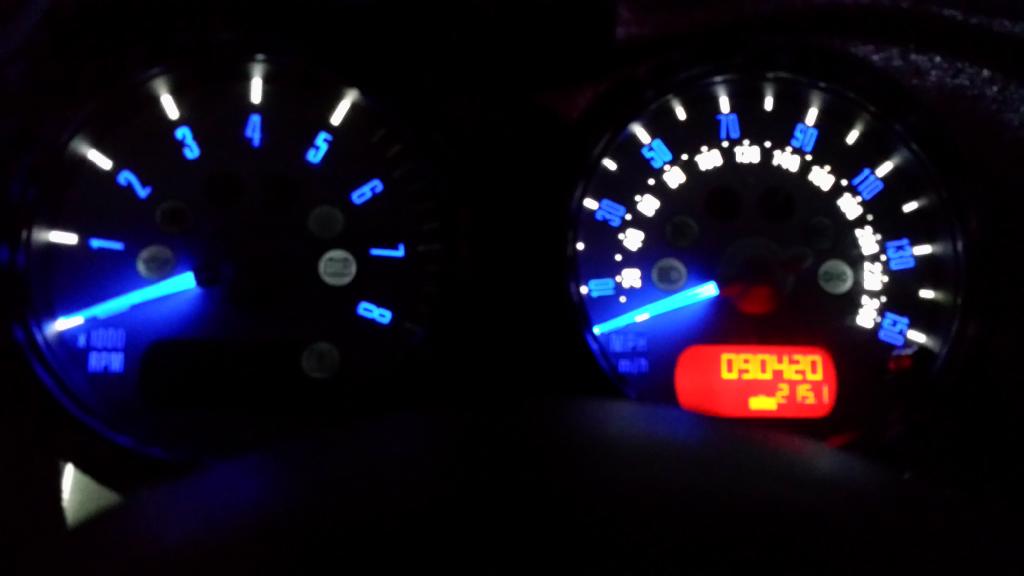
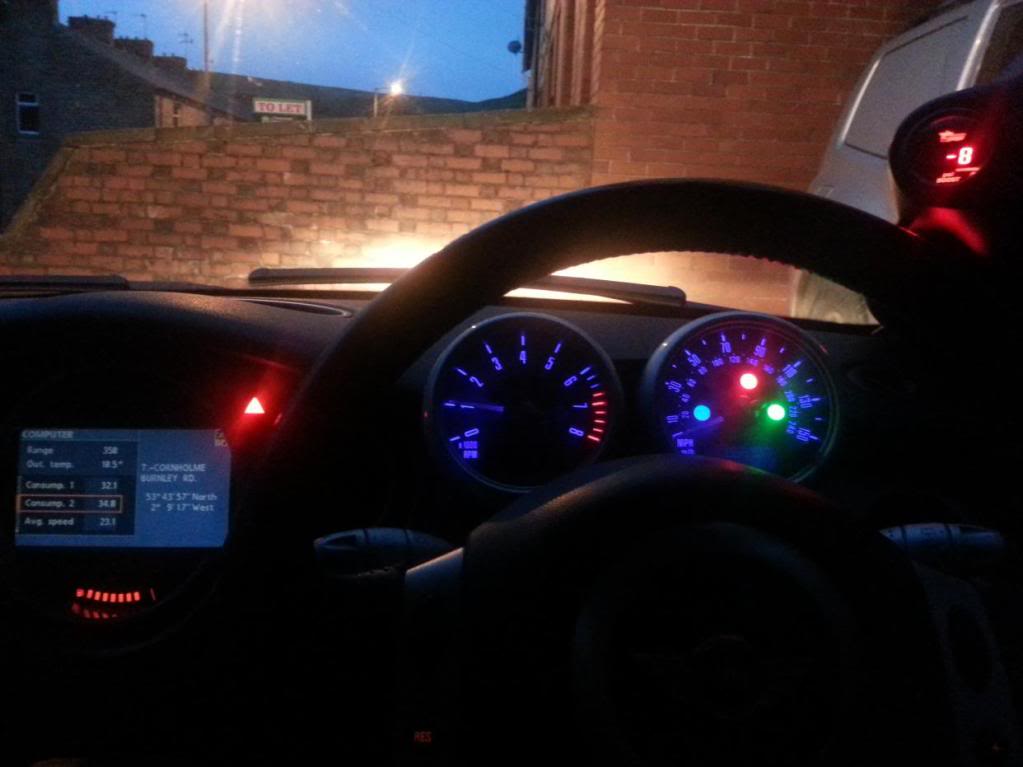
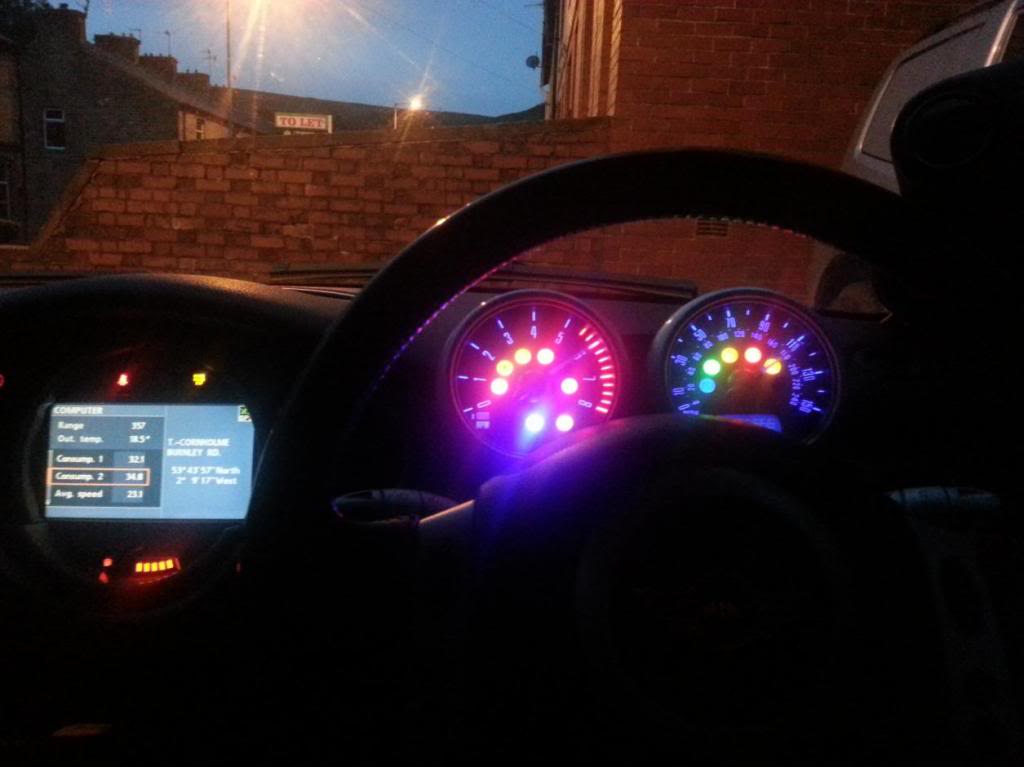
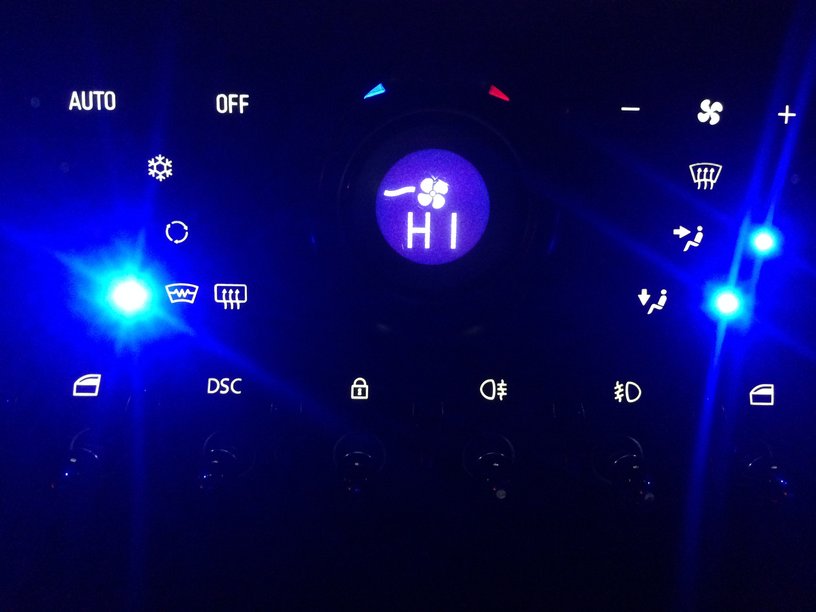
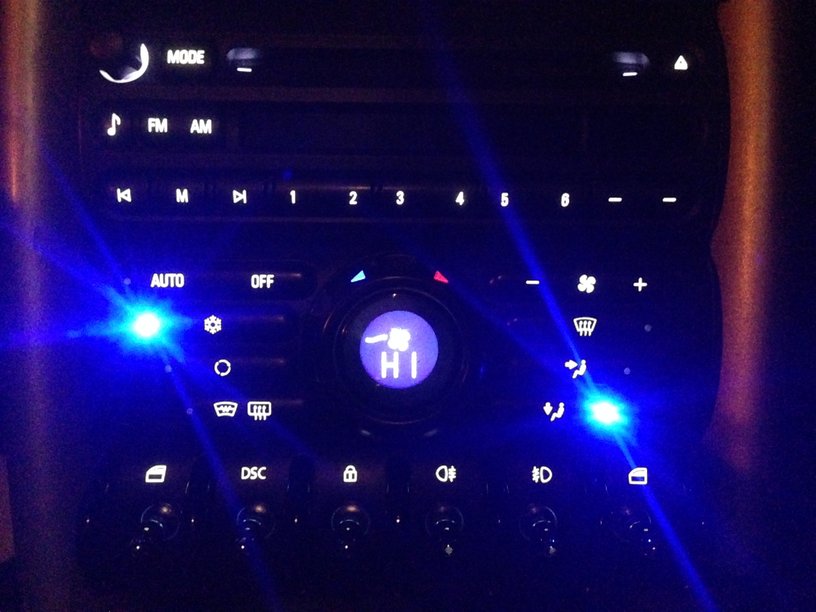
its nearly dark so a couple of pics, second one is in test mode. if you look close you can see my redline starting earlier in blue!
also second pic is with the dimmer at full, a bit too bright for me. usually set it at half way.
6-19-2013
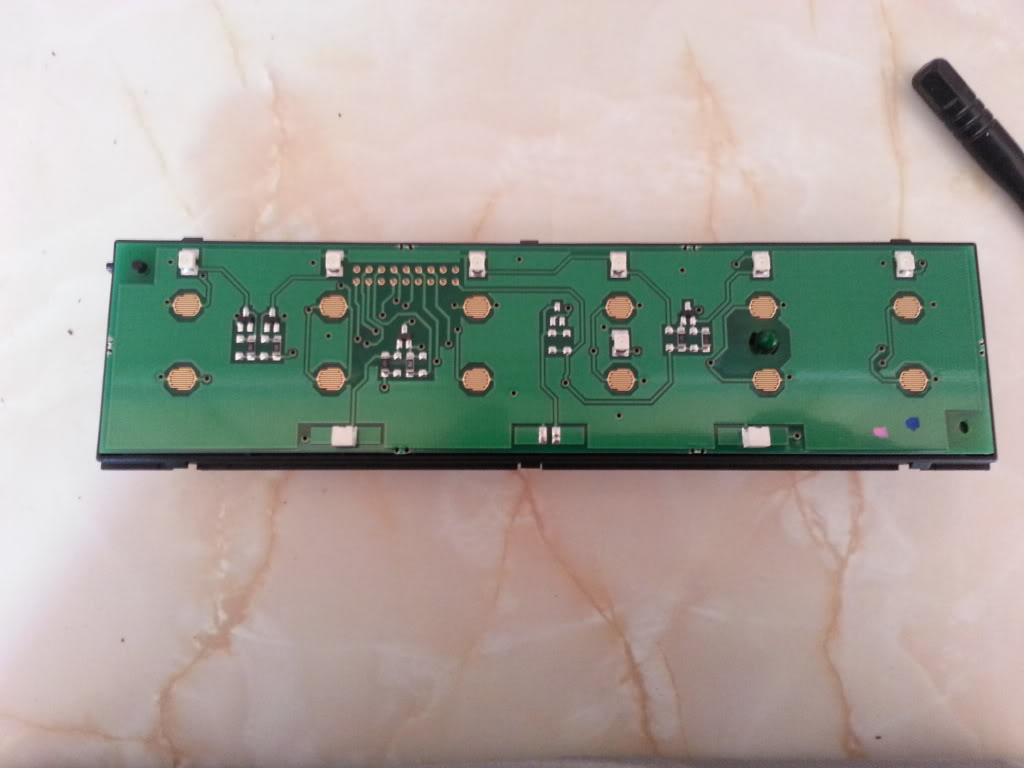
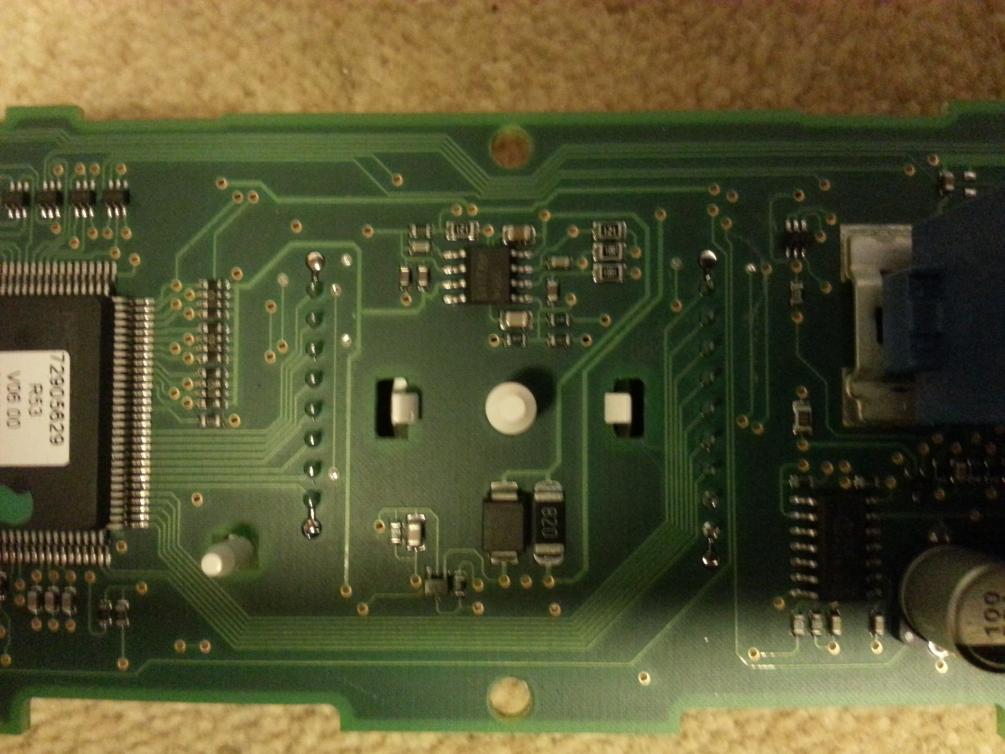
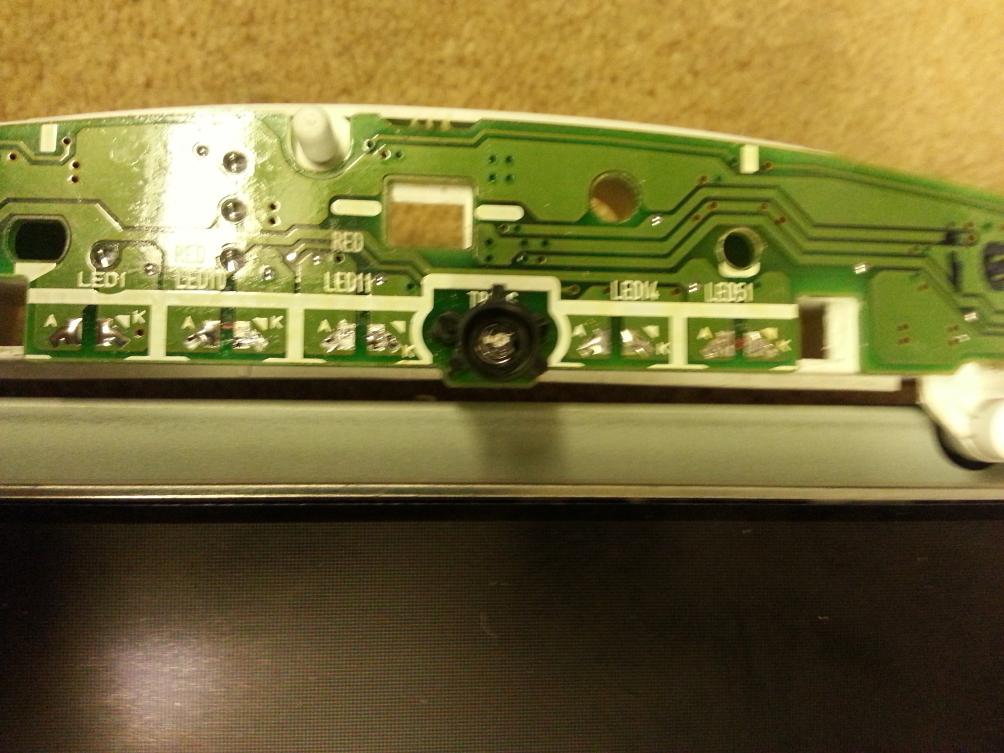
Today I started on the air con unit, once removed from the dash lay it face down and remove the 4 torx screw, don’t undo the clips.
Now you can wiggle the back off and take out the pcb, you can see here all the smts you need to change, there are also some under the display so if you want that changed it will need to be removed.
Pictured below are the connections you will need to desolder. When you start to remove the smt`s note the polarity as its not marked on the board!!
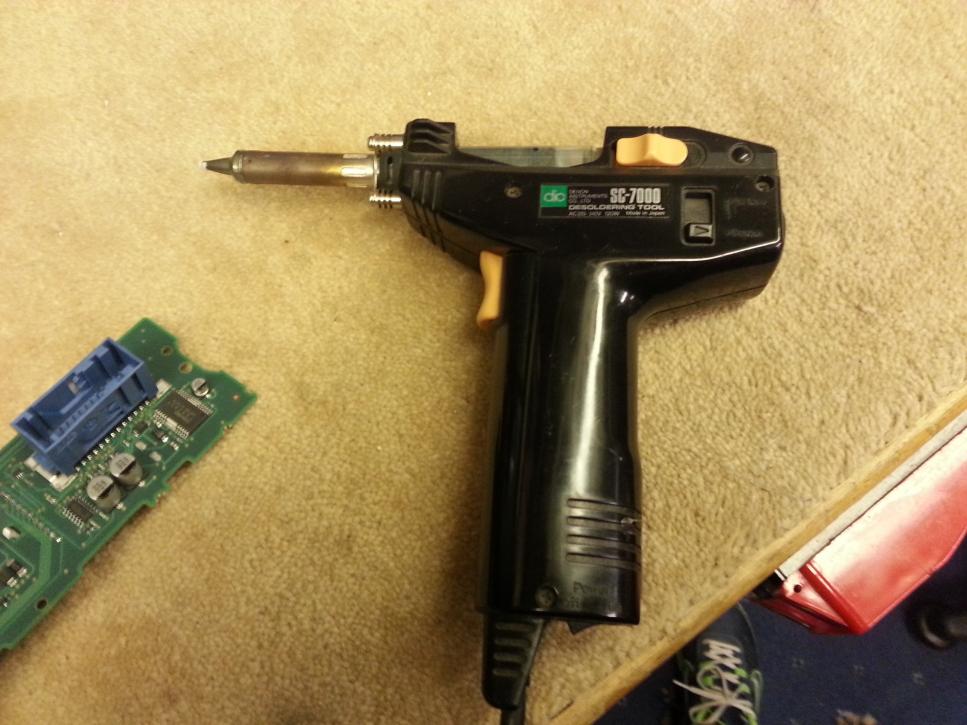
It helps if you have access to a workshop equipped with the tools needed. from this point on i used my workshop. With the vacuum gun its off in seconds with no mess at all. Reassemble when you have changed required smt`s.
Next I had a look at the sat nav unit. The dash trim needs to be removed to get at the screen, google dash trim removal, there are loads of guides for this. When you have it removed, take the ring off its face,and unclip the black plastic surround, unclip the fuel gauge and airbag light covers,

now we have a problem! The smt`s for the lights at the top (airbag etc) are as before,
the lower smt`s for the fuel gauge are much smaller!
if you have a r56 the fuel gauge in the centre speedo uses these smaller leds
if you have the chrono pack or the speedo in the centre of the dash, this can be done too, it will be similar in design to the tacho/speedo that i have but bigger!
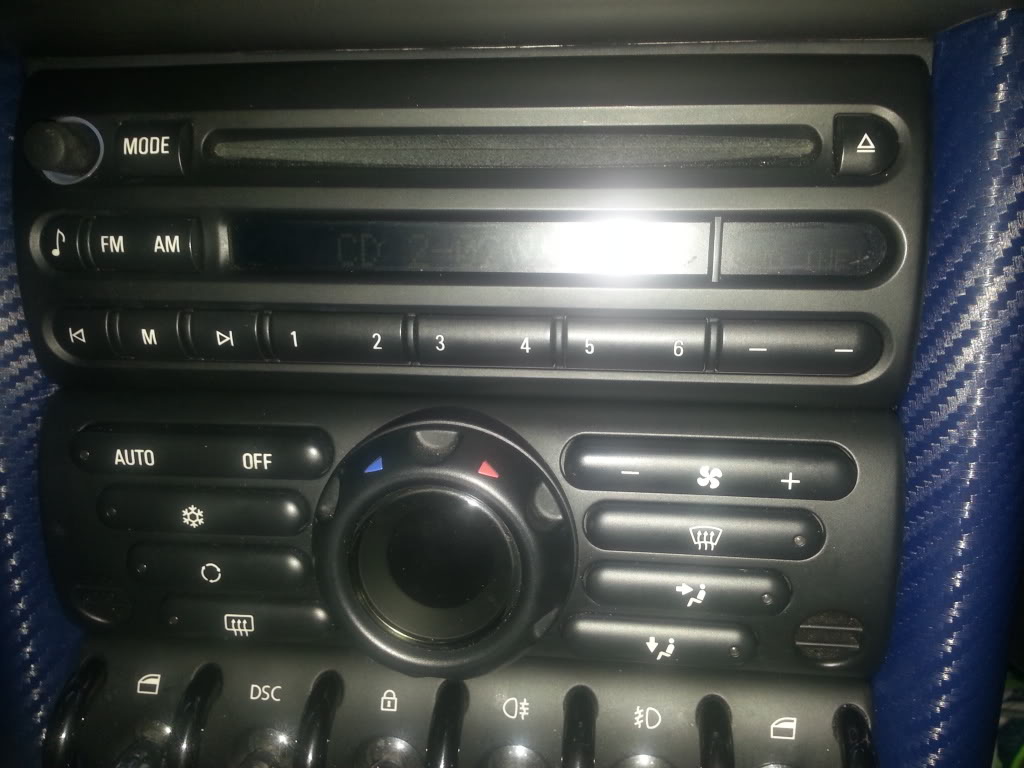
Next the radio, THINGS ARE GETTING MORE COMPLEX. remove it and then start to disassemble it. Remove 2 screws from the bottom at the front,

1 from the side at the front,
3 from the top, now take the lid off
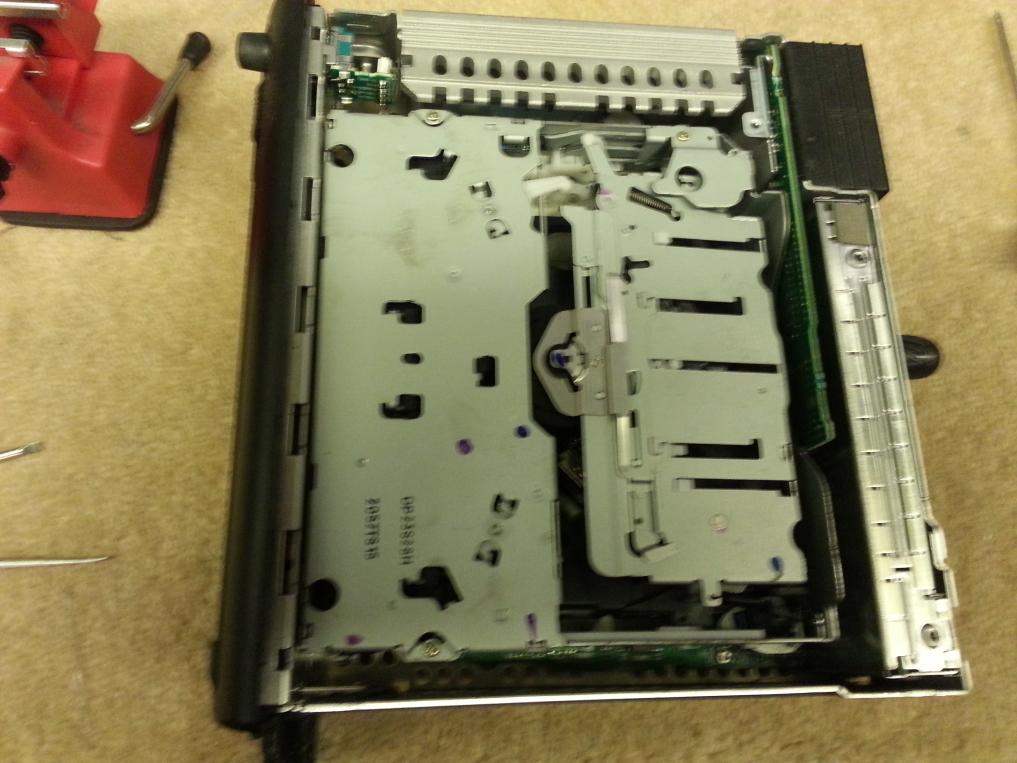
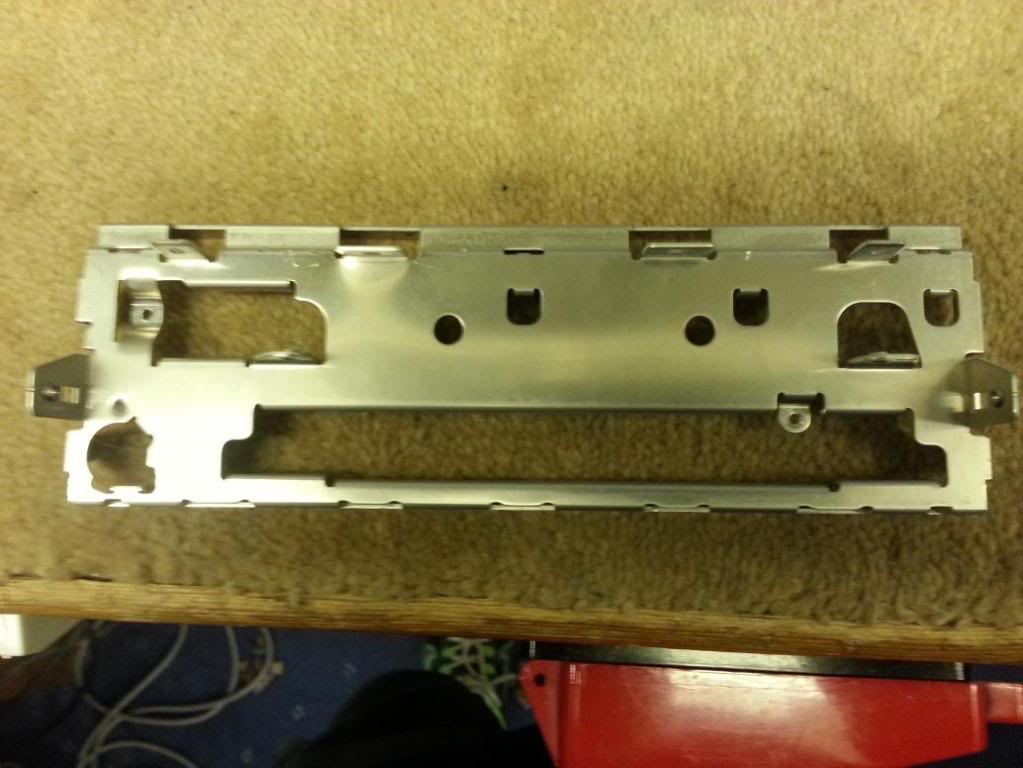
Now take out the cd mechanism, it is held in by 4 screws, 2 at the back, and 2 down holes at the front

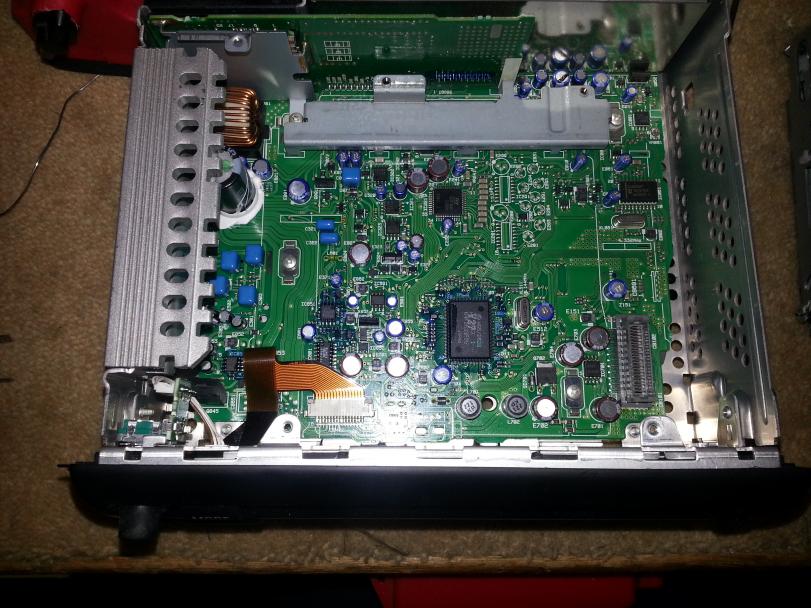
Now unclip the ribbon cable that connects to the front panel,
prise the front panel away from the shell and lay it face down.
First remove the 3 screws you can see. This allows you to remove the volume control, unplug it and turn it then lever it up.
Now the whole silver part can be removed.
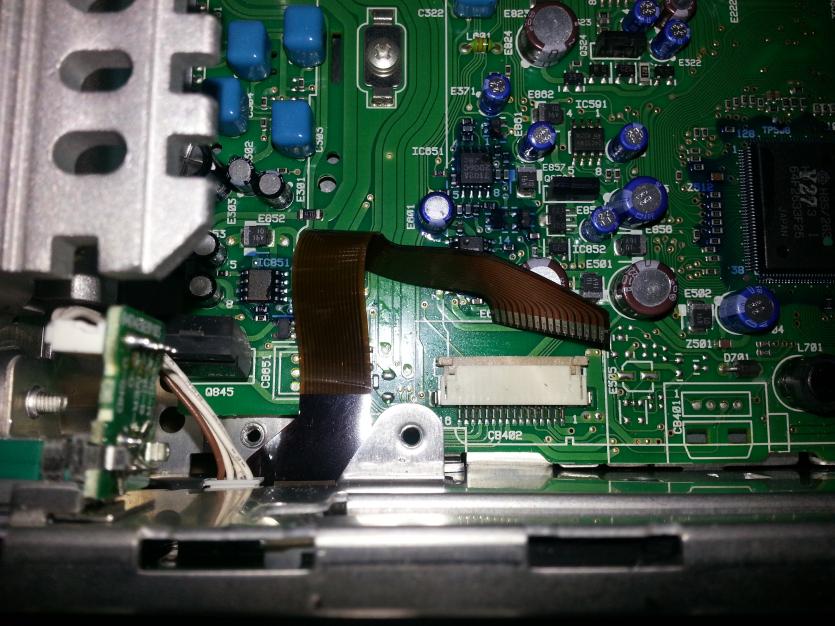
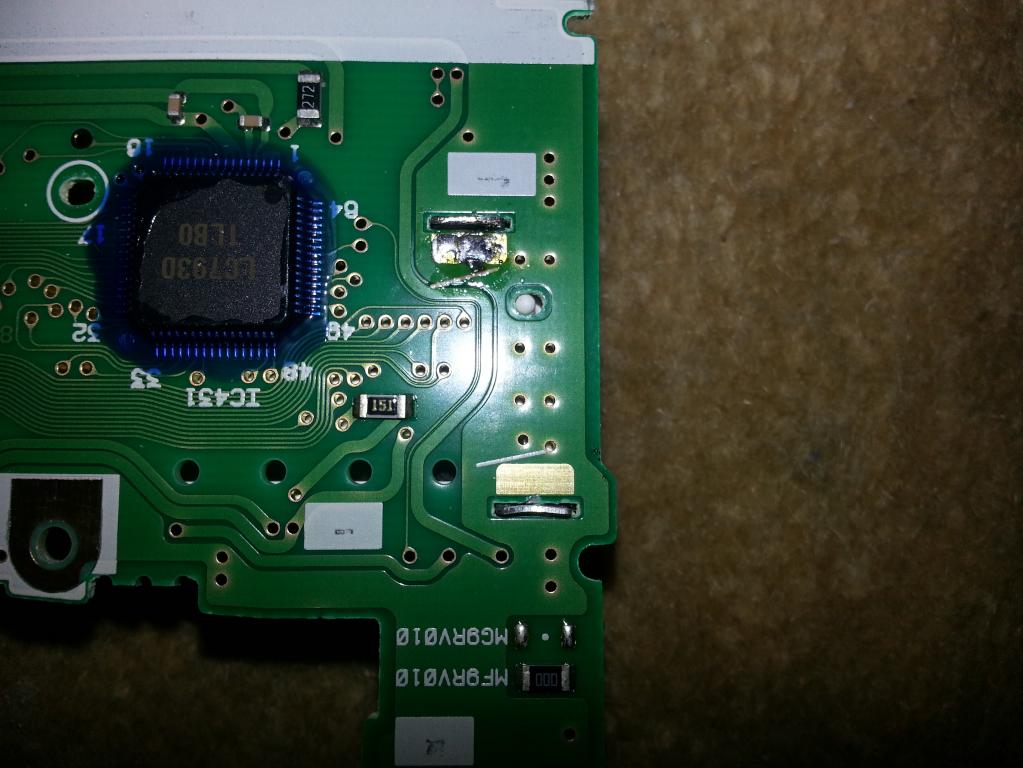
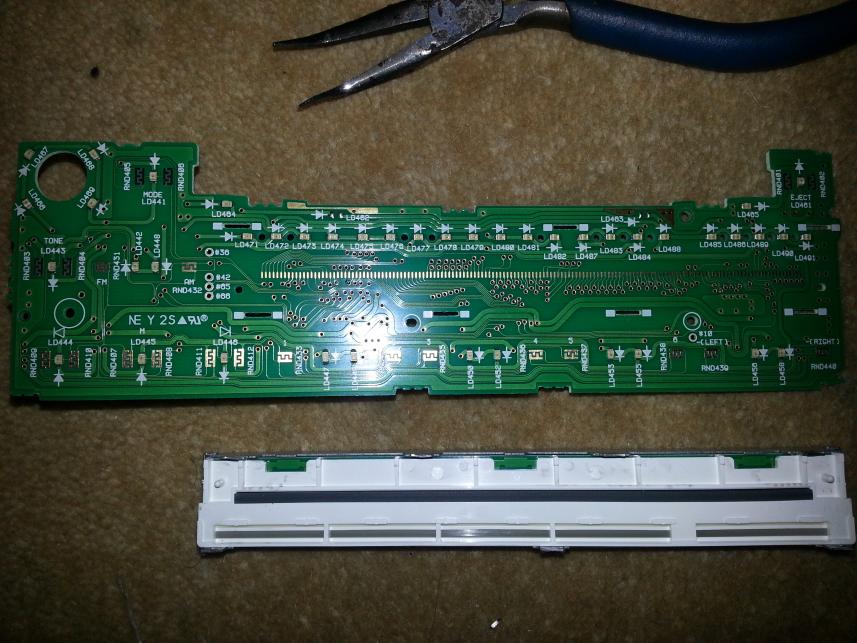
To remove the front panel pcb remove 2 small screws and gently remove the pcb,
turn over the pcb and you will be greeted with yet more of the smaller type smt`s,
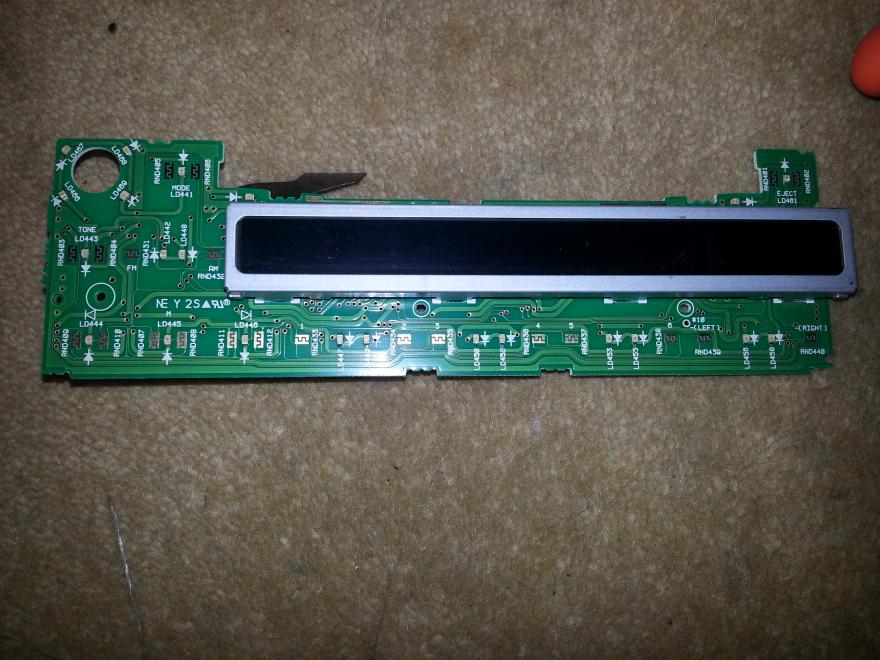
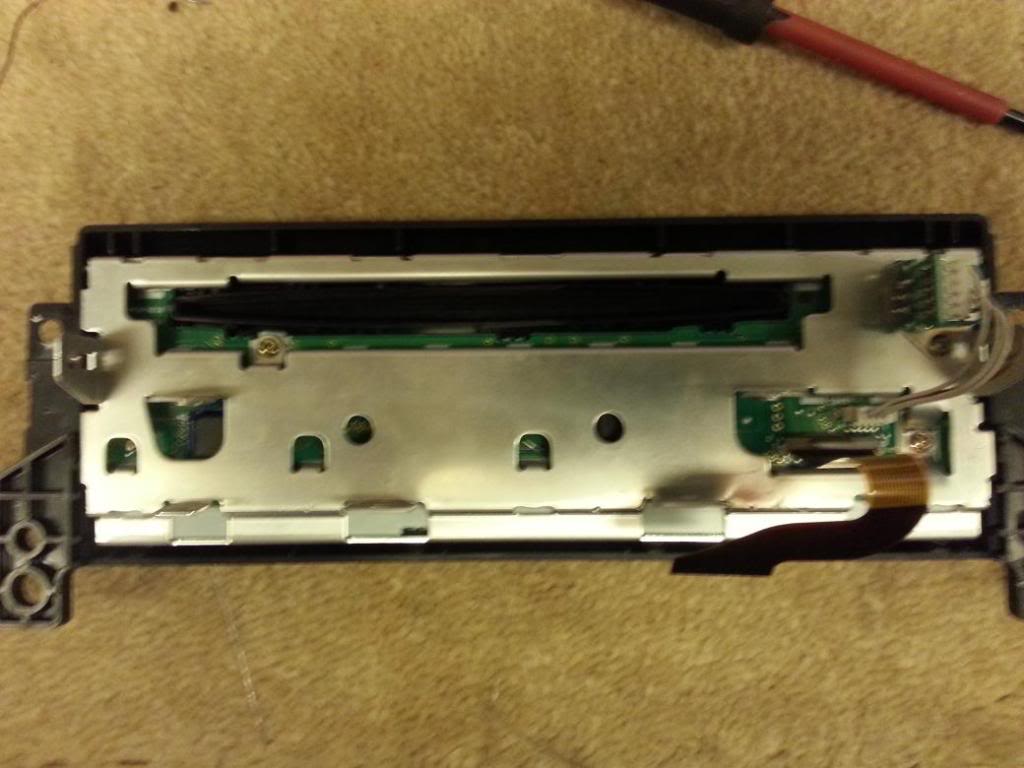
there are also loads under the display so that will have to come out, there are 7 clips holding the display in, bend them straight to get the display free (2 clips are soldered in place).
Turn over to see just how many little gits there are to change
reassemble when you have swapped out the leds you want to change
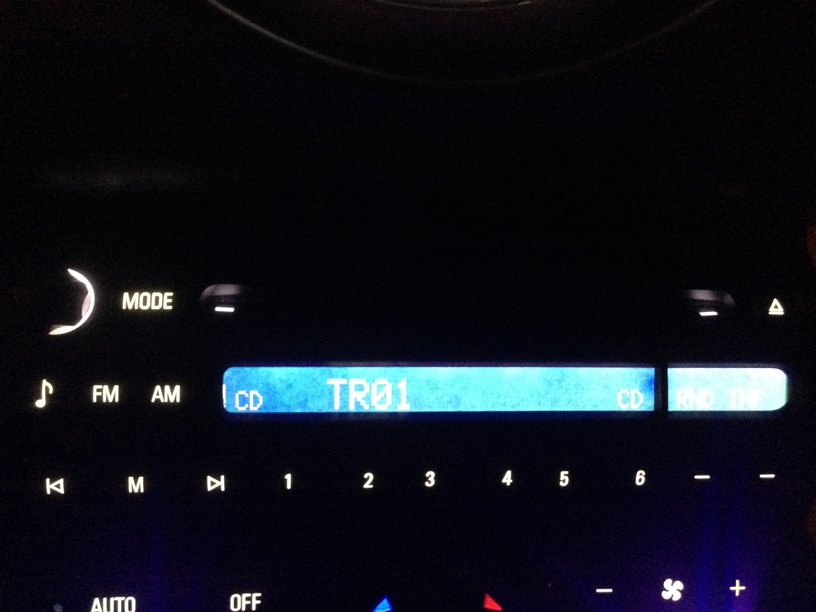
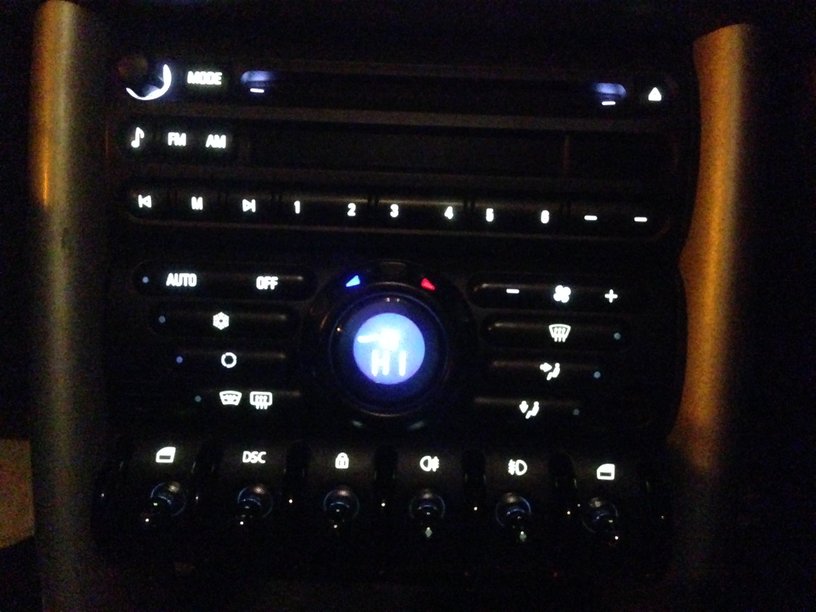
.i have done the radio display and volume control in red, its actually less orangy in real life and more a vivid red (i dont know how to do low light shots from a crappy camera phone)
all other lights are cool blue. very pleased.

6-30-2013
if you have read the rest of this thread you will know i wanted my lights a little different to the lights on mickyb`s, no reason why, just because its different.
so today i changed things........ again!
i changed the aircon display from blue to red,
the rev counter display back to red
the needles from blue to red
the redline from red to white
and the "on" lights in the aircon buttons from blue to white
i also changed out the downlights in the switch unit from the original amber to blue.
i was going to do the needles white, but to do that you need to remove the orange from the back of the needle and colour it white. i didnt have a suitable paint to do the job.


the white redline looks awesome in daylight.
i also did the air duct lighting blue (thanks to randap for posting a how to)
heres my how to (with pics)
first get some led`s, i went for blue 5mm wide angle
now you need to wire them together, measure the disance between the ducts and cut lenghts of wire to match.
for this application i wired them in parallel, 4x led`s at 3.6v forward voltage is over 12v and they wouldnt light if wired in series.
to wire in parallel, look closely at the led, one side has a flat edge, this is the cathode, or negative in this case, link the leds legs together with black wire. now do the anodes or postives with red wire. see pic 2
once you have your chain you will need to attched a positive and negative lead so you can wire it to the cars loom somewhere.
there is a good earth just under the far right airduct. the easiest place to wire into the lighting circuit is at the ciggy lighter, there is a bulb attched to it under the trim, tap into that, if you cant find one closer to the top of the dash.
next i taped it up so it was more rigid and to avoid shorting out.
its always a good idea to put a bias resistor in circuit with led`s for this i needed 100 ohms, 2x 220 ohms in parallel gave me 110. solder this to the end of the red lead and tape it up.
it might not look pretty but it will all be hidden so no sense in taking ages making it look nice.
you need to remove a few dash trim to get to the air ducts
remove dash end panels

remove 2x torx screws from each end

once these screws are out, lift the dash top panel and pull it towards you and out of the way.

now remove this screw at the bottom left of the centre trim and pull the centre trim off,

there are more gold coloured screws ago the dash remove the ones you need to be able to pull the end pieces off.
pull the vents out of the ducts
your dash should now look like this


if you have 5mm led`s, drill a 5mm hole in each of the ducts as far back as you can
thread your chain of led`s through the dash so they are near the holes you drilled
place leds into holes, fix it place if needed, mine held in well enough
wire your chain to your 12v and to ground.
replace the bits you removed in the reverse order and youre done.

7-5-2013
modified a large speedo and single rev counter today. put it in my car to test and ive gotta say im very tempted to keep them in they look awesome. but i like the sat nav too


7-11-2013
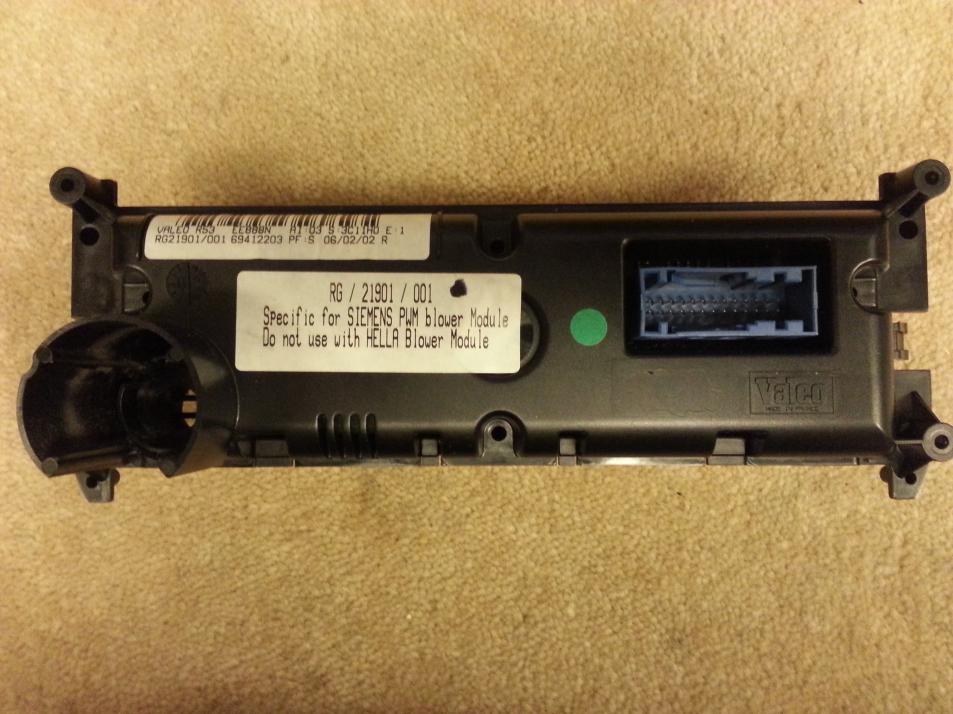
got hold of a manual A/C control.
opened it up and.....
inside there are 2 white bulbs and 4 leds
the front panel is painted orange inside

orange paint wont allow blue through, removing this paint allows blue (or other colour) light through.
the switches for rear heated window etc and the knobs with the arrows on pose a problem. inside these is an orange plastic piece,

these pieces cant be removed (ok, ive taken them out for the pic but the switches wont work without these bits in) to get other colours to the switches, these plastic pieces need to be clear (they act as a fibre optic) i guess it would not be too difficult to fabricate some for the switches, but the round ones? tricky.
i have replaced the bulbs with blue leds, i`ll post some pics of the results tomorrow as i need to plug them in in my workshop (different plug to the electronic A/C on my car).
for those wondering about the r56 lights.............
here we have pics of the rev counter
the first pic shows the r56 next to the r53. it looks much more complex, but it isnt really.
in the second pic i have highlighted the ones to change, ringed in blue are the backlight of the revcounter, i did these white, all the others i did red.
the redline will always be red as the dial is red there.
8 for the big display
4 for the small display
3 for the needle
3 for the backlight
1 for the redline, i put a red in here to make it more vivid red
we now know these are not plug and play and a scrapper wont work on your car properly. but on my workbench this looked good, forgot to take a pic before sending it to stuart doh!


7-12-2013
plugged in the manual air con control today, the blue isnt uniform, bulbs not leds would be better here, and the logo`s in the switches are barely visible due to blue light not being able to travel through orange plastic , as are the arrows on the dials.
so in summary, the manual air con controls cant be blue, or white or green for the same reasons, red will be ok as it is close to amber on the EM spectrum.
sorry guys with the manual air con, it cant be done without chopping and glueing the switches and fitting clear plastic bits in the switches
you cant even retro fit the electronic air con controls without a new wiring loom. if you really want to get rid of the orange, do this bit with red bulbs, and design a layout for the rest of the car that you like.

7-30-2013
a fellow forum member had sent me his clock after seeing one one fleabay that had been coloured, they wanted £40, i said i would do it for much less for him.
for those of you who want to diy this, heres how.
remove the clock from the headliner (just unclips, and then unplugs)
remove 2 large screws to get the clock out of its housing
at this point i sprayed my housing black
grab the clock module and unclip the white section
it will look like pic1
now remove the 2 small black screws
lift up the circuit board and serarate it from the display so it looks like pic 2
in the 3rd pic you can see the various different components
so change the leds as said earlier in this thread
depending on what coulour you are going for, filter may be needed
the orange piece shown in the pic is the filter already fitted as stock, if you are going red, you can still use this,
rick is going blue, so i used stage lighting filters to get the results required
the blue and white rectangles are the filters.
put the blue filter against the display, then add frosted filters, this helps the light spread out and also reduces brightness. to go darker and more to go lighter add less.
then replace the white plastic piece with the 3 holes.
now refit the circuit board and go test.
i have used a different maker for these filters and im not sure as yet just how bright or dark it will turn out.
will test when i go outside later today and post pics.


clock done rick, read your pm. this is with one blue and 2 white filters, if its too light or dark for you, just remove or fit white filters. ill send a couple of spares with it.

8-14-2013
got the tyre pressure switch to light up blue today. to do this you need to source a used switch from a scrapper. that way if you **** it up you still have your original part.
you could use your existing switch if you like but dont go blaming me if break it.
pull back the handbrake gaiter and push out the switch from behind.
use a small screwdriver to pop the 4 clips on the switch to get at the inners pic1.
now cut the pastic top off the amber led leave as much as possible of the legs stll attached to the switch.
now solder a smt led across the legs, use one of the small leds mentioned earlier in this thread so the white section can still move up and down.
dont put the switch back together just yet, plug it in the car and turn on the lights to check, if it doesnt light the polarity is wrong and you need to turn it through 180 degrees. once its lit. put it all back together.
for this you need a small vice so you can compress the white section of the switch leaving 2 hands free to solder on the tiny led, a fine nibbed soldering iron is pretty much required too.
shown without the switch casing on as it was still light at the time


8-24-2013
well youre best placed for telling folks how to rip it all apart!
anyone looking to diy this, the principle is the same, it just takes longer to remove the speedo etc because there are far more screws holding everything together.
some other notes about the r56 leds.
the backlights in the rev counter and speedo can be any colour.
if changing the needle colour some modification will be required, carefully remove orange paint and redo in chosen colour.
fuel gauge uses smaller leds like the ones on my sat nav unit.
warning indicators can be changed any colour but best left really.
redline will always be a shade of red as its the dial that is red unlike the r53 which is backlit red.
backlight for displays in the rev counter can be any colour.
there are plcc-4 leds in the rev counter for fuel low warning, service lights etc
leave these alone unless very confident in your abilities.
as yet i have not taken apart any other pieces in the r56, like the radio display, radio control keys, heater controls etc, it is possible just time consuming.
hope this helps you diy`ers
ordered a load of leds which came today, going to do something wild in the wifes bmw e46 coupe, with plenty to spare!

9-1-2013
got round to changing the dash lighting on the wifes bmw e46 coupe, ok, its not a mini but pics are to show other effects you can do with different colours, this was a real pig of a job, far more difficult than even the r56, i started at 5pm and finished at 2am.
the pictures are a bit crap, i apologise for that but they were taken on a phone and it wasnt set for low light, the colours are far more vibrant in real life.
the wife absolutely loves it, so ive earnt some brownie points, hmm what do it want for me![]()

i think the lcd display could do with being green here

here you can see what happens if you dont fit a thick enough filter, you can see the leds behind, the camera has increased the effect, you can read the display better if you are sat in the car.

the e46 uses more types of led than the minis, and more of them are in specially made housings which need to be modified/cracked open, think i would prefer to do the r56 dash than this one. after doing this i might just decide to do my own again, the colours blending into each other really looks smart, i must get a better camera as the pics shown dont do the modification justice.

10-20-2013
bored with the sat nav display in my car, i decided to change it for a speedometer, heres a few pics showing how to change its colour.
first remove it from the car, doh!
now you need to strip it down.
remove the from lens, it unclips from the back

now unclip the black plastic casing, there are clips all around the outside.

now remove the three needles, gently twist anti-clockwise while pulling up does the trick

now you need to remove the white plastic casing, again it is just held in place by clips

now remove the dial and the lcd display in one piece, clips again!
inthe picture you can see to the left the rubber pieces for the reset button, dont lose these and remember to fit them on re-assembly

you should now be looking at this, the leds are numbered and the polarity is marked on the board for each one, they are marked K and A, K for kathode (german spelling) and A for anode, the corner of the led with the little cut-out is the K.

if you look at the differences between the next picture and the one above you can see which leds are to be removed for the backlighting, also removed in this picture are the 2 at the top (dimmer and hazard). there are 8 around the dial and one next to each of the smaller needles for the backlight. i forgot to number one of the backlights in this picture it is numbered led37 on the board and is next to my added number 11, so there are 12 for the backlight

this next picture shows which to change for the centre needle and for the backlight of the lcd display

and in this one the 2 leds for each needle are shown removed

its quite easy to work out which to change, but if you are struggling, hold the circuit board against the white plastic of the dial and see whicl led lights up which section.
12-6-2013
Ok folks, the next stage of project r56.
Stuart kindly sent me his heater control panel for investigation/modification, heres how its going so far.
First remove the unit from the car, there are screws down each side, remove all of this section.
then remove the heater controls so you end up with this
now you need to remove this piece, you just push it off, its quite a tight fit
once the above trim is removed you can access all the clips that hold the back on the controls, carefully unclip them and remove the rear cover
you can now access the boards and unclip them
this is the lower board with the electric window switches etc, there are 5 leds here, there will be 7 if you have heated seats, type 3528, the polarity isn’t labelled on the board so make the board with a sharpie before you remove any, look carefully at the leds and you will see one end has a cut corner, mark this end on the board with a letter K, this means cathode, when fitting new leds make sure the corner matches or it will not light!
now remove the white gear shown here
there may also be a gear here to remove, but it may be attached to the rear cover you removed earlier, if attached to the board, take it out.
now unclip the board and turn it over, there are 17 leds on here, 5 are of a different design to the 3528 leds, you can simply mount a 3528 on its side to do these.
If you have the electronic climate control there will be slight difference, but the principle is the same, again the polarity is not marked, mark before taking off any leds.
heres what each led does
1. fan speed control wheel top
2. fan speed control wheel bottom
3. air con “on” indicator led
4. air con logo
5. heated windscreen “on” indicator
6. heated windscreen logo
7. circular part of the MINI winged logo
8. circular part of the MINI winged logo
9. circular part of the MINI winged logo
10. circular part of the MINI winged logo
11. circulated air logo
12. heated rear window logo
13. circulated air “on” indicator
14. heated rear window “on” indicator
15. temp level wheel top
16. temp level wheel middle
17. temp level wheel bottom
when you have changed all the leds you want to, don’t assemble just yet, plug it in to the car for testing, if everything lights as it should, carefully reassemble and fit back in the car. Make sure the gears are properly aligned and that the wheels move as the they should.
I don’t have a r56 to plug into, so have only bench tested as yet, pics of the final results will have to wait until I get it back to stuart.
12-22-2013
back to gen 1.
this morning ster50 came to me wanting to retrofit a rev-counter to his MINI one, one of the early cars that didnt come with one from the factory. we were unsure if this could be done (wiring loom difference? etc
things went pretty well,
i had a spare rev counter, so i modified the leds to green with red display and needles, then checked on my car
then it was fitted to the one, the green plug for the rear of the rev counter was hidden under the column but when we plugged in things worked well,
the temp gauge showed -40! its cold outside but not that bloody cold, i think the problem here is that the exterior temp sensor isnt fitted to the car, why would BMW fit a sensor if there is no way to monitor it?
everything else worked great, so if you have a one without rev counter and want to fit one it can be done easily.
you will also need a different trim cover and a couple of screws, these are about £15 from the dealers.
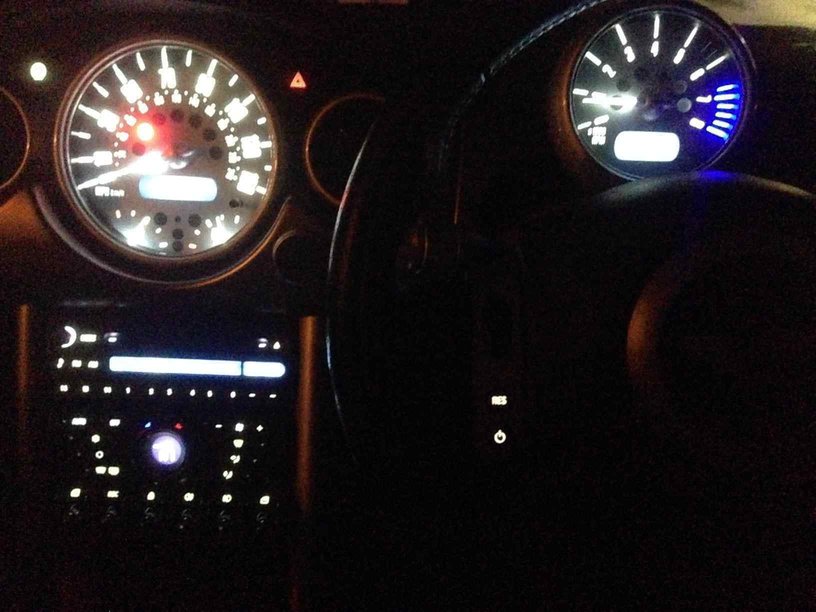
with the rev counter now green, i also did the leds in the speedo to match, looks pretty smart imo

2-13-2014
just a little update on the stock radio/cd display
tj had asked my to look into getting the blue/white/green and purple colours to light properly. they appeared to dim.
after a little thought i decided to try something.
if you want to do the radio display the above colours you need to remove one in 3 leds and short the connections. there isnt enough voltage to light 3 leds but ample to light 2.
short the ones out with the red dot
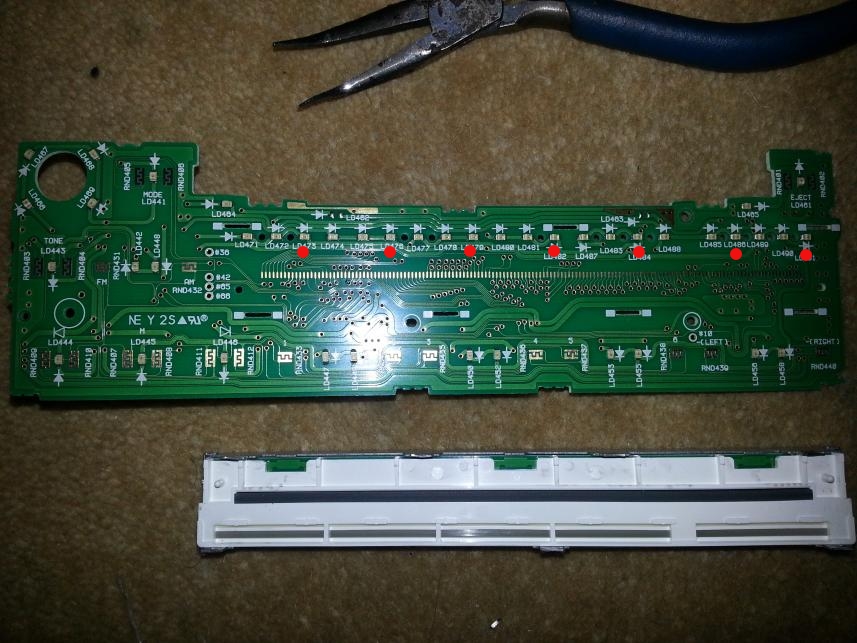
when you put things back together....

previously it was like this when all the leds were changed to blue.
2-20-2014
a few images of tj`s lights done in white. cant take credit for the whole lot, i did the aircon, radio, mfsw, heated seat switch and runflat switch.

a couple more pics of all white
heated seat switches and runflat switch

centre console
like this alot!
MFSW
im considering changing mine from blue to white after seeing this complete
7-31-2014
more faffing about........