You must be logged in to rate content!
6 minute read

90-97 MITSUBISHI 3000GT / DODGE STEALTH
INSTALLATION INSTRUCTIONS
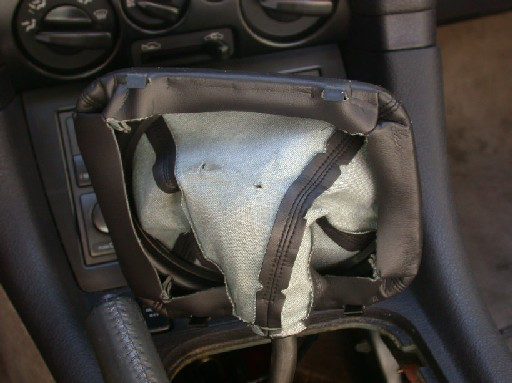
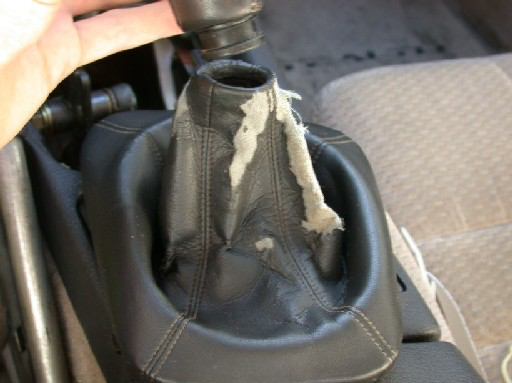
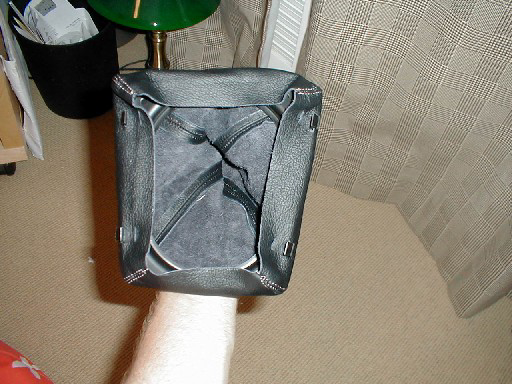
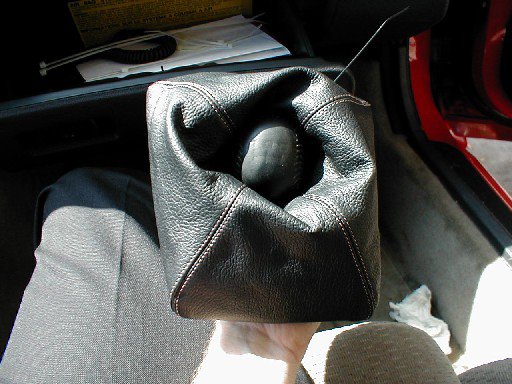
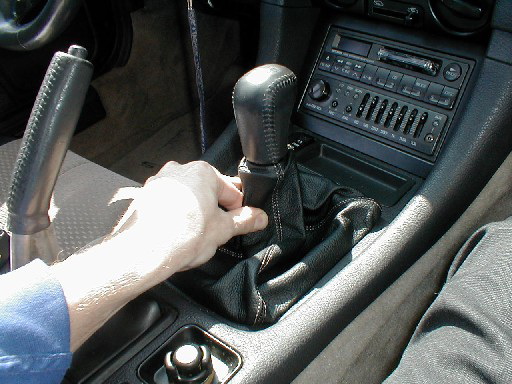
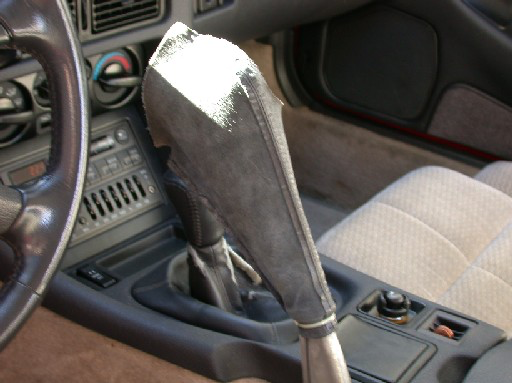
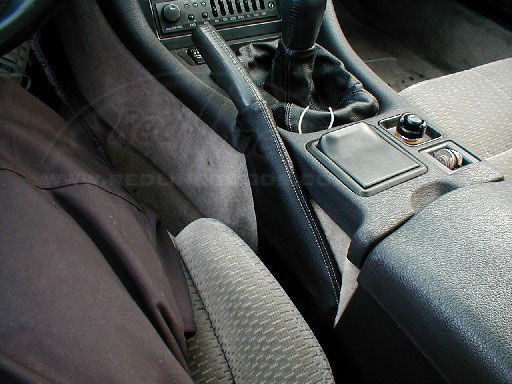
1. Unhook the plastic shift plate out of the center console. Next remove the shift knob (still attached to the boot) by turning it counterclockwise. After removing the shift boot, shifter plate, and shift knob from the center console, turn the boot inside out as shown.
2. Remove the plastic zip-tie to separate the boot from the knob. We recommend a razor blade for this.
3. Remove the shift boot from the shift plate.

4. Here's were you need to be careful: Before making any slots in your new genuine leather shift boot for the shift plate hooks, place the shift plate within the boot and experiment with where you want to make the incisions. Note that the boot is customized for the 3000GT/Stealth, and as such, make sure the running edge is longer on the left than on the right. Depending on what look you want in the final result, you can play around with the shift plate within the boot. For a baggier look, make the incisions 1 cm from the edge of the boot. For a tighter look, make the incisions 2 cm in. TIP: If your not sure what look you're aiming for, try the baggier look first since you won't have any incisions on the exposed leather.
5. Once you've made your decision, make the incisions so that they match-up with the respective hooks on the shifter plate. Then attach the plate to the boot.
6. Before you install your new boot into the center console, attach the shift knob to the boot. You may use a zip-tie as shown in the picture, however We prefer rubber bands - its gives a nicer look and can always be fixed. Note: make sure the knob is facing the right way before affixing it to the boot.
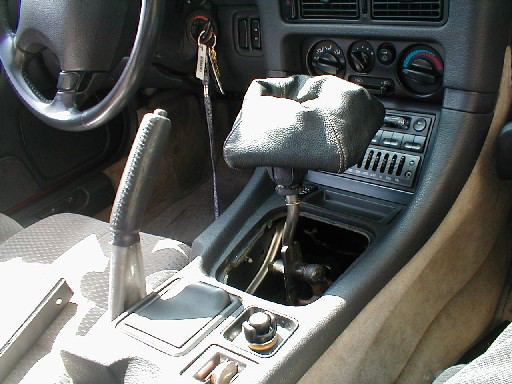
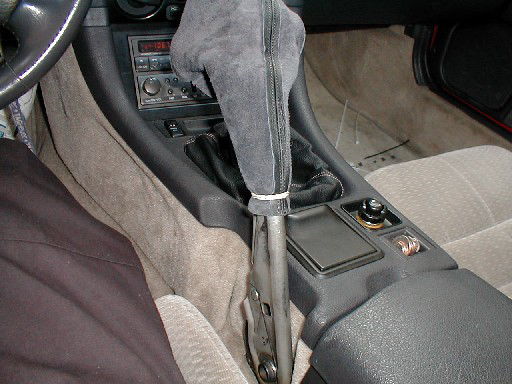
7. Screw the shift knob back on to the stick by turning it clockwise and pull the shift plate back down (which will pull the boot along).
8. Click the shift plate back into the center console - this may take some patience to make sure you get the right look.
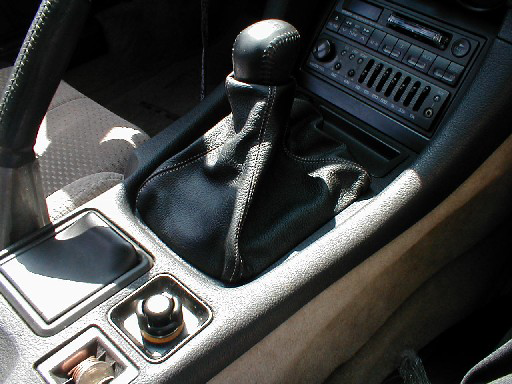
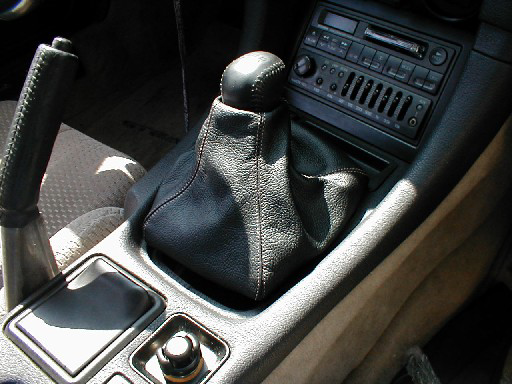
9. Notice how the body of the boot will allow you for forming it the way you like it to be.
IF YOU ARE INSTALLING THE EBRAKE HANDLE AS WELL, PERFORMS STEPS 14 AND UPWARDS ALONG WITH THE EBRAKE BOOT INSTALL!
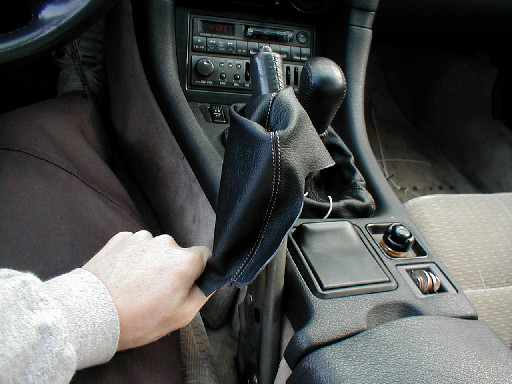
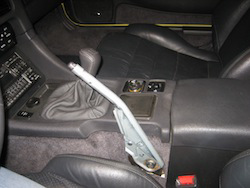
10. Pull the old e-brake boot inside-out as is shown in the picture.
11. Remove the plastic zip-tie to separate the boot from the e-brake. We recommend a razor blade for this.
12. Position your new genuine leather e-brake boot into the same position and use a zip-tie or rubber band to affix the boot to the e-brake. We again recommend using a rubber band.
13. Pull the e-brake boot back down.
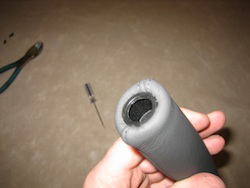
14. Take the boot cover that goes over the end of the handle and slide it down to expose the lower end of the handle.
Using a back and forth rotating of the handel, rotate it about 1/2 inch left and right of center while pulling the handle off. The handle pulls towards the release button on the end of the handle. It takes a little muscle to do this, and initially it is slow going. It will eventually come off, allowing you to remove the handle.
14. Using a small flat screwdriver, you will see where the factory leather has been tucked in at the end of the handle. Take the screwdriver and pop the leather out of the slot that it is tucked into from the factory. Once it is out, use a sharp knife to cut about a 1/4 inch strip of the original leather off. Take a small amount of glue, I used rubber cememt, and send it down the crease that used to have the orginal leather in it. Now use the same small screwdriver to push your new leather cover down into that crease, resulting in the finished product you see in the picture titled "handle after tuck".
Take a small amount of silicone lubricant and spray it down the inside of the handle that will slide over the metal core.
Once the release trigger button is a little less than 1/2 inch out, you have it back on, it won't go past that point, so keep sliding it down until it does not move anymore.
ENJOY YOUR NEW LEATHER BOOTS!
Useful tip
You have installed a product made out of genuine leather. As you know, to maintain a leather product in good condition, you should take care of it. We suggest occasionally (every 4-6 week for example) applying some leather conditioner/UV protector to keep your leather from drying up in the sun and cracking.
Redline Automotive Accessories Corp. will not be held liable for any labor, incidental or consequential damages of any kind. Proceed at your own risk.