You must be logged in to rate content!
6 minute read

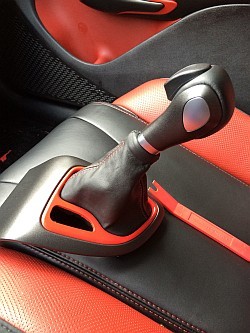
DODGE DART 2012+ AUTOMATIC SHIFT BOOT INSTALLATION INSTRUCTIONS
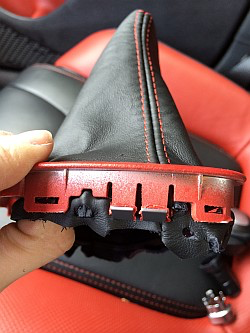
1. remove the boot by prying up the shifter bezel assembly from the inside edge, where it sits in the coin bin/mission plate.
2. Then, remove the shift indicator from the bezel assembly, it just clips right in. Hang it off to the side, so it doesn't get in the way.
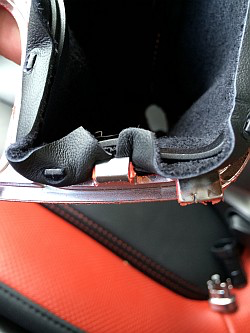
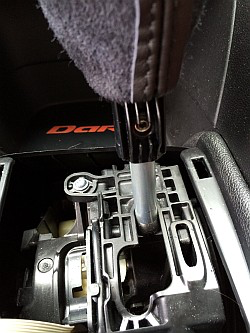
3. Now, pull the bezel up around the shift knob, exposing the neck of the shifter, where you'll find a small retaining screw. Loosen the retaining screw, but do not remove it all the way, as it is very easy to drop it into the shifter assembly down below.
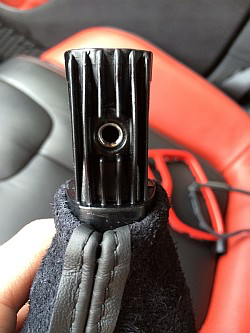
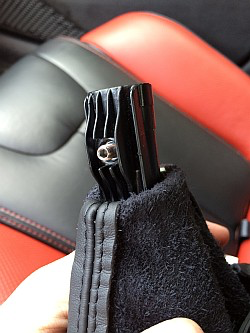
4. Once the retaining screw is loose, remove the shifter knob/boot assembly from the shifter neck, and set it aside.
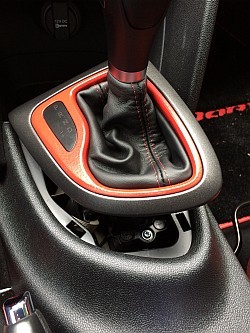
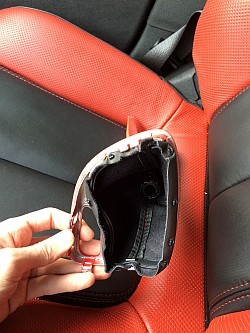
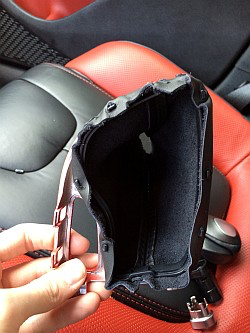
5. Now you can begin the process of removing the shift boot. First, you can remove the outer shifter bezel from the inner one (the red piece in the photo).
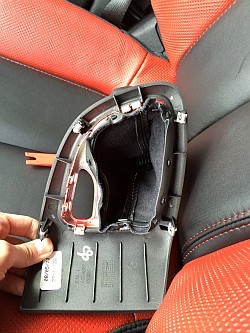
6. Then you can remove the boot retainer ring from the inner shifter bezel.
7. Now, remove the boot from the retainer ring.
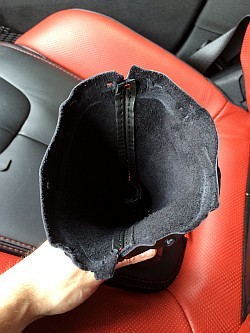
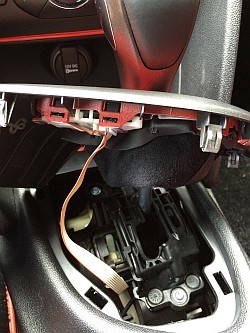
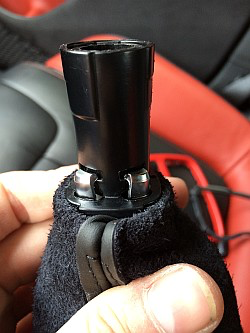
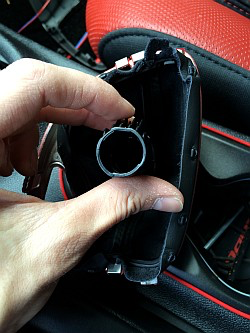
8. Next, you'll remove the neck retainer, which just clips on, but first, go ahead and unscrew that retaining screw the rest of the way, and twist off and remove the shift knob.
9. Now you can remove the neck retainer. Just unclip the two silver clips, and separate the silver piece from the black.
10. Now that you have your old boot off, get the new one and spend some time making sure it fits the retaining ring. There are mounting holes in it, but some of them may require a little stretching and widening to fit over the retaining pegs due to genuine leather being thicker and more stiff than stretchy factory vinyl. This is where your exacto knife and some patience come in.
Once you get all of the mounting spots matched up, get the boot seated where you want it on the retaining ring.

11. Now, bring your inner shifter bezel down from the top of the boot, and clip the retaining ring into it.
12. First clip in the back side of the retaining ring.
13. Then the forward side.
14. Now the bottom edge of the boot is mounted, we'll do the neck. Insert the black neck piece into the boot.
15. Then clip the silver neck retainer piece onto the black piece. The boot neck should fit snugly between them.
16. Then clip the silver neck retainer piece onto the black piece. The boot neck should fit snugly between them.

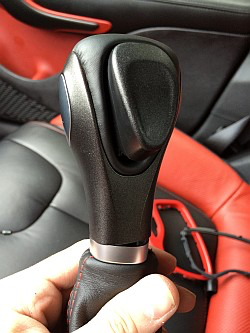
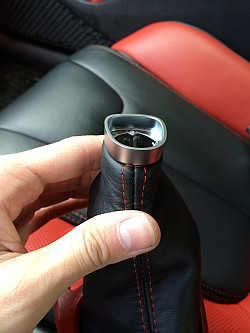
17. Twist your shifter knob back into place, and just barely thread that retaining screw back in.
18. Reposition the shifter knob onto the shifter neck, and tighten down the retaining screw. If the retaining screw is seated correctly, you won't encounter any resistance when tightening it. If you do encounter resistance, the screw isn't seated properly.
Before continuing, turn the car on, and verify that you can properly change the car from Park to Drive.
19. Now, replace the shift indicator in the shifter bezel, and re-mount the inner bezel in the outer bezel.

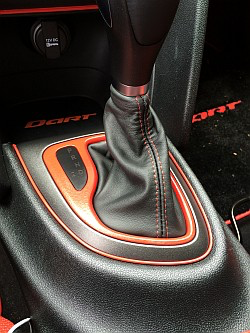
20. Then, snap the outer bezel into place, and you're good to go!
Useful tip
You have installed a product made out of genuine leather. As you know, to maintain a leather product in good condition, you should take care of it. We suggest occasionally (every 4-6 week for example) applying some leather conditioner/UV protector to keep your leather from drying up in the sun and cracking.
Redline Automotive Accessories Corp. will not be held liable for any labor, incidental or consequential damages of any kind. Proceed at your own risk.