You must be logged in to rate content!
8 minute read

DODGE DART 2012+ INSTALLATION INSTRUCTIONS
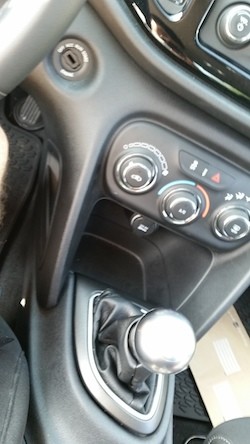
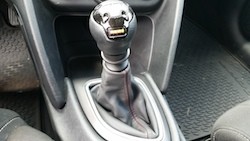
1. Here is your starting point, the stock shifter.
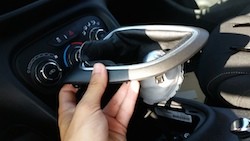
2. Take out the rubber mat in the cubby under the radio. Then reach under the black plastic piece surrounding the shifter and pull up. It is help in by a couple of plastic clips.

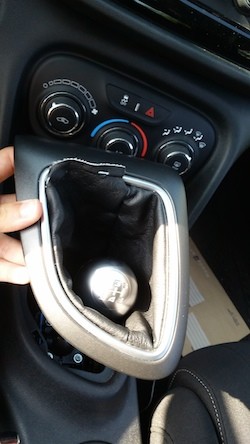
3. Once that piece has come loose, pull it up above the shift ball.
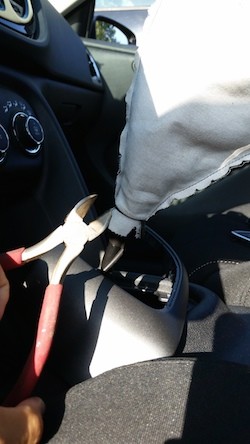
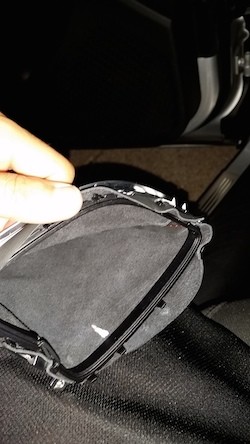
4. You can begin to unhook the shift boot from the locking teeth in the small black piece inside the shift boot.
5. Close up of teeth on black piece.
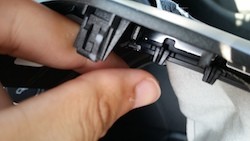
6. Continue your way around until the boot is free from the surrounding pieces.
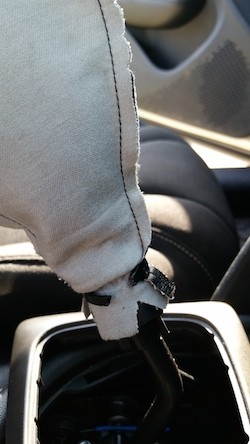
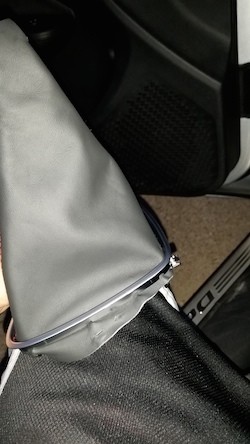
7. Now it is only connected to the shaft.
8. Connected by a single zip tie.
9. Get some cutters and snip the tie off.
10. Take it out of the car.
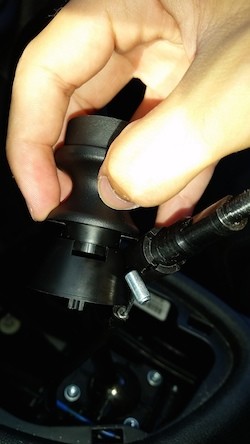
11. The hardest part of the entire job, is removing the shift knob. A lot of time, patience and force to break the top piece lose from the bottom. Be very careful not to break the top. it's just a plastic cover, but held in by 3 clips and 3 bubbles of glue. Yes, glue. Use a butter knife to wedge between all around, until it finally breaks loose.
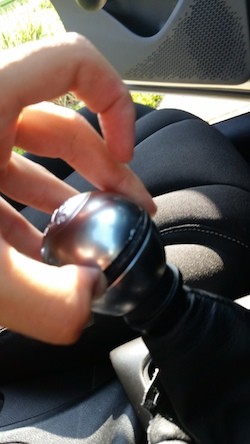
12. Once that's off, it will look like this with a 10mm bolt inside.
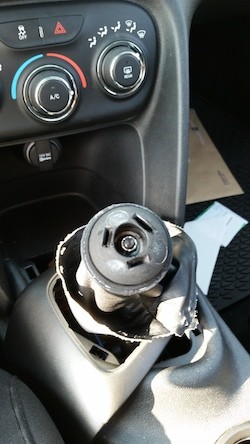
13. Use a 10mm tool to take the bolt off.
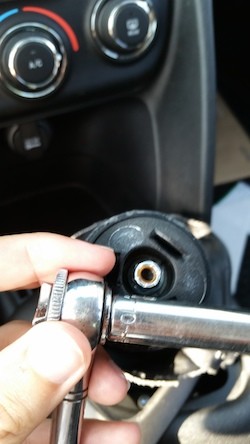
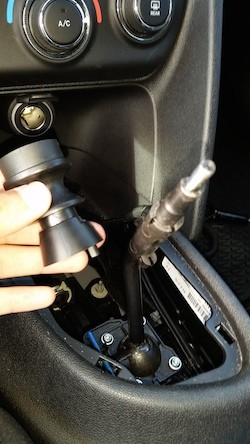
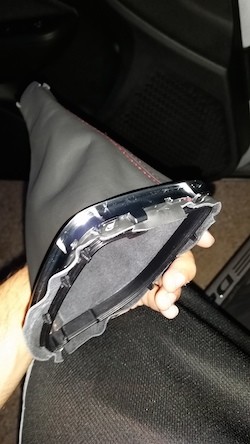
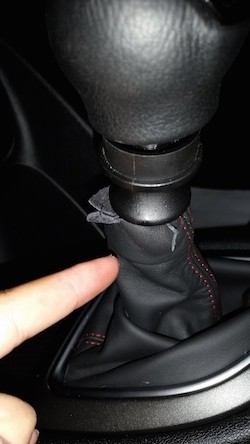
14. Once it's off the knob should come right off.
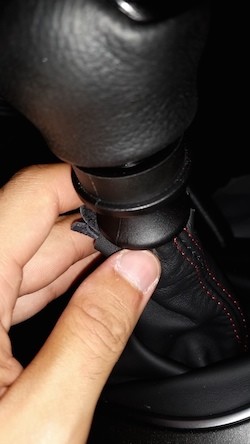
15. From there you should be able to wiggle it over the reverse lockout collar and the boot is off! if you can't get it off, try to cut the slits in the end of the boot a tad longer so it can be pulled over without removing the reverse lockout collar.
16. Reverse lock out cable must come out of the holding clip as you can see right above my index finger
17. Here is the end of the cable, and the small square hole in the collar is where it was originally placed.
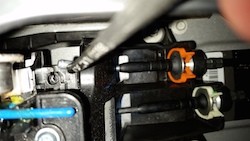
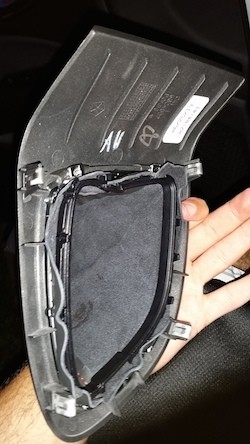
18. The reverse collar must be taken off. Once the cable is lose for the locking clip (TRY NOT TO DISCONNECT IT FROM BELOW THE ASSEMBLY), pull the collar up as far is it can go and rotate it until the end of the cable comes out.
19. If the reverse lockout cable comes unhooked from the base of the shifter like so, the open hole on the left side of the picture is where the wire will need to be placed in. From there, there is a white block below it that the end of the cable will click into.
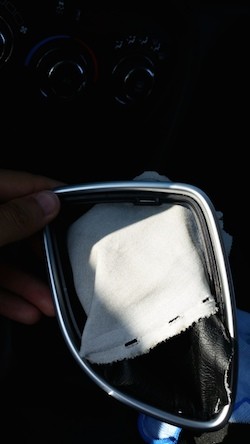
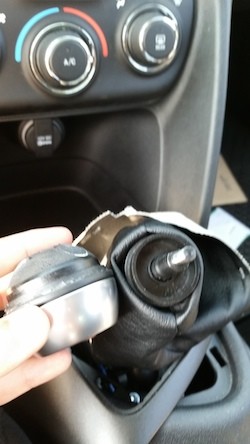
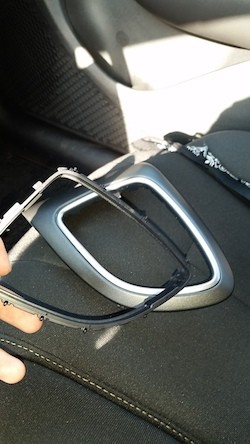
20. The surrounding pieces around the shifter are crucial to this install. The small black piece is used to hold the boot down with it's teeth around the edges.
21. The black piece will go INSIDE the boot, the teeth will then hook into the slits in the boot.
22. Outside view of the shift boot with black piece inside.

23. The silver piece can then be placed over the boot and should lock around the black piece inside the boot. Be patient and work with it. The leather is thicker than the previous material so this might take some adjusting.
24. What it looks like from the bottom.
25. Once the silver ring is on correct, the large black piece and silver piece lock together with some fins and a built in push pin on the silver ring.
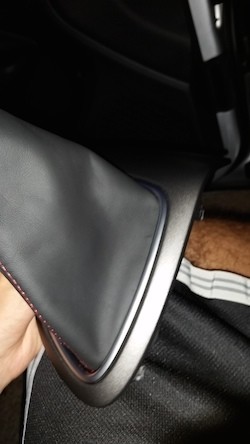
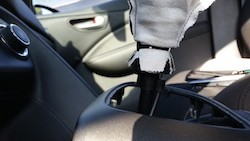
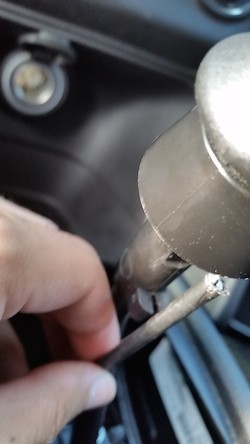
26. What this looks like from the bottom. The two silver fins can be noticed in this picture at the top where it's inserted to the larger black piece. Those go under, and go in first, then the rest just gets pushed down and clicks in.
27. Place the large black piece back into original position and pull the shifter and lock out cable through the hole of the boot. Then reattach the lockout collar the same way it came off, and put knob back on. For stock shift ball (not in picture) place bottom half of the shift ball on the shaft, reinstall 10mm bolt , then put the top cover back on the shift ball.
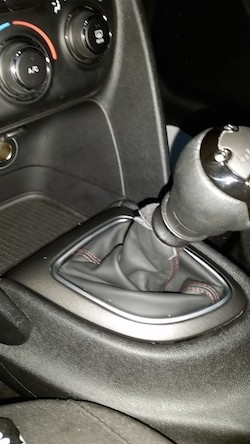
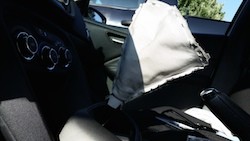
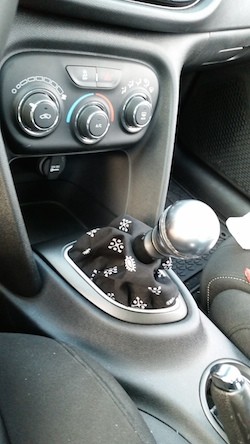
28. Pull the top of the boot up and over the bottom of the shift collar depicted to where I am pointing.
29. The top of the leather boot is then actually tucked back inside (folded back into the leather) it's self so the ends are not seen.
30. When you're finished it should look like this!
CONGRATULATIONS - YOU HAVE SUCCESSFULLY INSTALLED YOUR NEW LEATHER BOOTS!
Useful tip
You have installed a product made out of genuine leather. As you know, to maintain a leather product in good condition, you should take care of it. We suggest occasionally (every 4-6 week for example) applying some leather conditioner/UV protector to keep your leather from drying up in the sun and cracking.
Redline Automotive Accessories Corp. will not be held liable for any labor, incidental or consequential damages of any kind. Proceed at your own risk.