You must be logged in to rate content!
5 minute read

95-99 DODGE NEON SHIFT BOOT INSTALLATION INSTRUCTIONS
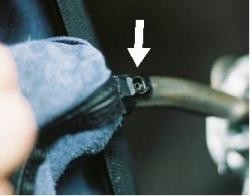
1. Maintenance manuals recommend disconnecting the negative battery terminal & waiting 2 minutes before removing the Neon's center column (step 5, below). The airbag controller is located underneath the column, close to the emergency brake. It's not directly in the area you'll be working, but you don't want to trigger an accidental airbag deployment. We suggest you follow that step or proceed at your own risk.
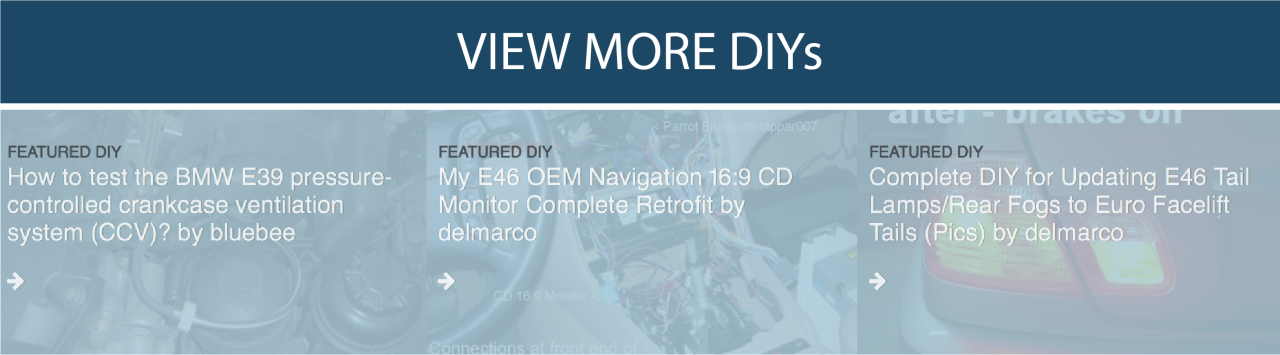
Remove the 6 screws that hold the center column in. 2 are in the front cupholders...
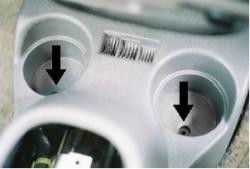
2. ...and 4 are inside the storage compartment.
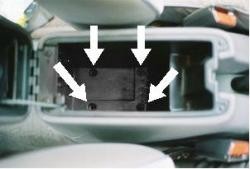
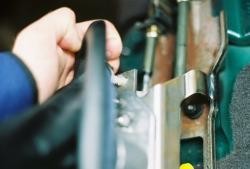
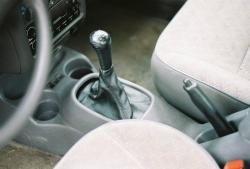
3. Raise the emergency brake as far as it will go. Remove the center console. Lift the rear of the console first -- clearing the emergency brake handle -- then pull the console up and back.
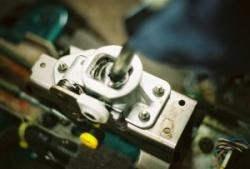
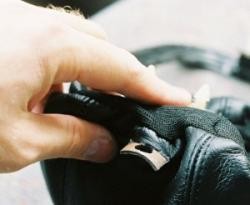
4. Remove the old shift boot & shifter knob. It's wrapped around a metal ring that's held down with 3 nylon pins -- you can simply pull the metal ring up, detaching the nylon pins. Lift the old boot assembly over the shift lever.
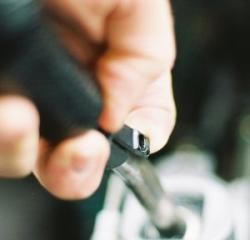
5. To detach the shifter knob, pull up the tabs on either side.
6. These tabs snap over pins on the shift lever. Pull the shifter knob out of the old shift boot.
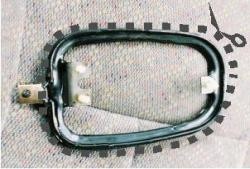
7. Trim the old shift boot off the metal ring.
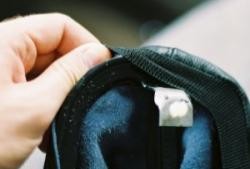
8. Stretch the new shift boot onto the metal ring. Push the metal tab at ring's rear through the slit in the new boot.
9. Then stretch the elastic around the rest of the metal ring. Adjust the new boot so that its seam sits evenly around the metal ring.
10. Push the shift knob into the new shift boot.
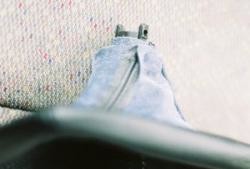
11. Make sure it's facing forward - the front of the boot is the side with only 1 nylon pin.
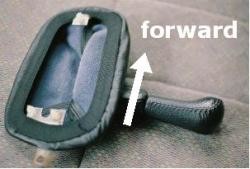
12. Pull the new shift boot partly inside out, and push the shift knob onto the shift lever. Make sure the knob snaps into place.
13. Push the metal ring's nylon pins back into place to secure the new shift boot. For the front nylon pin, reach under the shift boot to push on the pin. For the rear nylon pins, push through the boot.

14. Replace the center console. First, lower the front of the console into position under the dashboard. Then lower the rear of the console into place. You'll need to pull the emergency brake up quite far -- pull hard -- to get the rear of the console back down. You'll also need to move the shift lever as you get the console into place. Replace the 6 screws that hold the center column in. Reconnect the negative battery terminal.
ENJOY YOUR NEW LEATHER BOOTS!
Useful tip
You have installed a product made out of genuine leather. As you know, to maintain a leather product in good condition, you should take care of it. We suggest occasionally (every 4-6 week for example) applying some leather conditioner/UV protector to keep your leather from drying up in the sun and cracking.
Redline Automotive Accessories Corp. will not be held liable for any labor, incidental or consequential damages of any kind. Proceed at your own risk.