You must be logged in to rate content!
8 minute read
Restoration of frame beneath rear bonnett
Compliments of Easyrider7467 @ ferrarichat.com
5-16-2010
Refurbishment of frame beneath rear bonnett.
Tools Needed:
1. Eye Protection
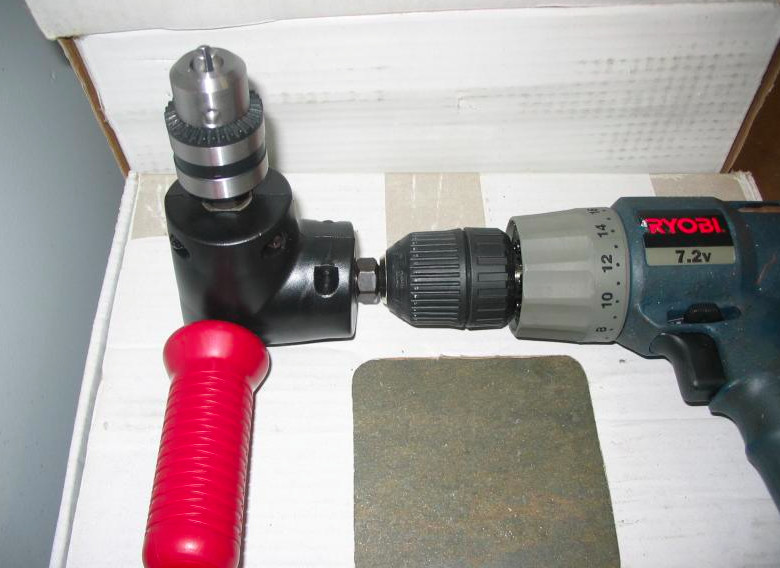
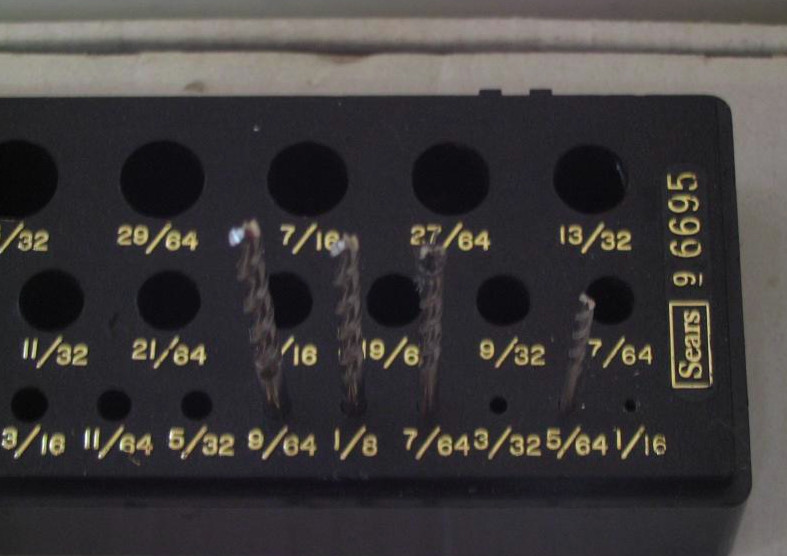
2. Drill plus craftsman 90 degree angle attachment.
3. Pilot point drill bits sizes: 3/16, 9/64, 1/8, 7/64, 5/64. (note: the pilot point aids the bit to stay in place, I used all the sizes as needed.)
4. White sheet
5. Blue Painters Tape
6. Work Light
7. Locate local Powder coater
8. Black Rivets from McMaster-Carr. Part # 97526A060 (Choose-A-Color Blind Rivet domed,1/8", 063" - 0125" Material thickness.)
9. Arrow swivel head rivet gun (see home depot) approx. $20.00
10. (Optional) Wurths Stone Guard (aerosol)See bottom of procedure.
First I draped the white sheet over the motor, securing with blue painters tape. The sheet also reflected the work light nicely too.. (see pic)
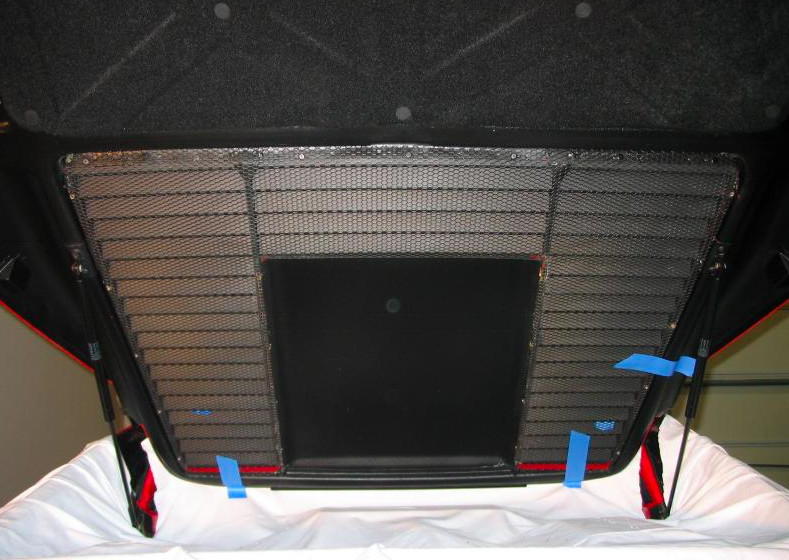
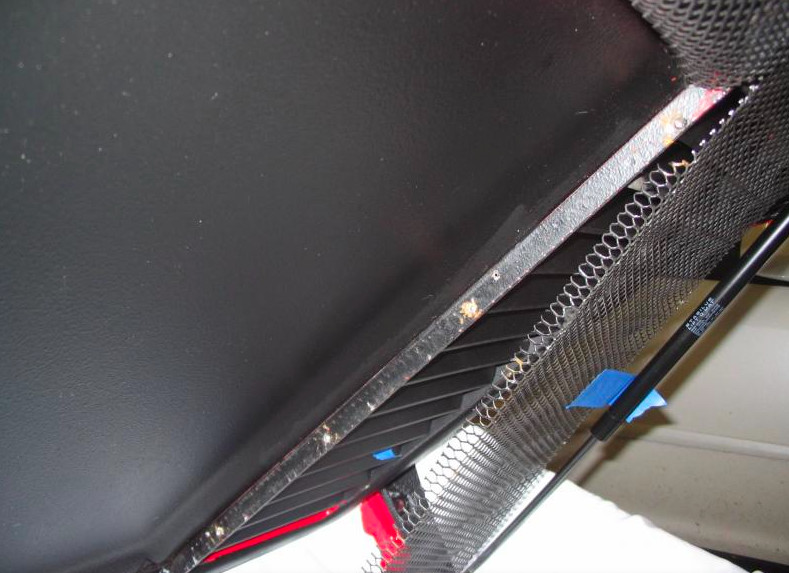
There are 5 rivets on the outermost left and right side and 4 on the inner most part (the area that covers the plenum)
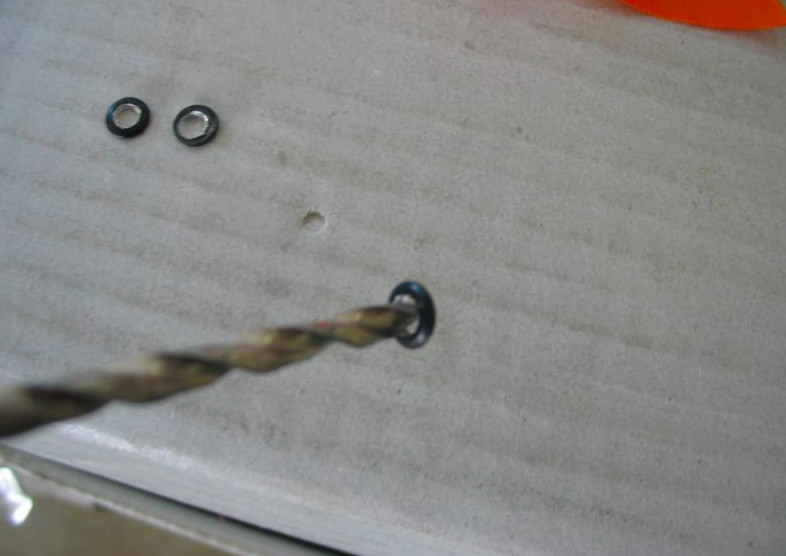
Drilling a Rivet: Essentially, your removing the flange of the rivet by using a bit larger (ie 9/64) than the size of the rivet (1/8") itself.
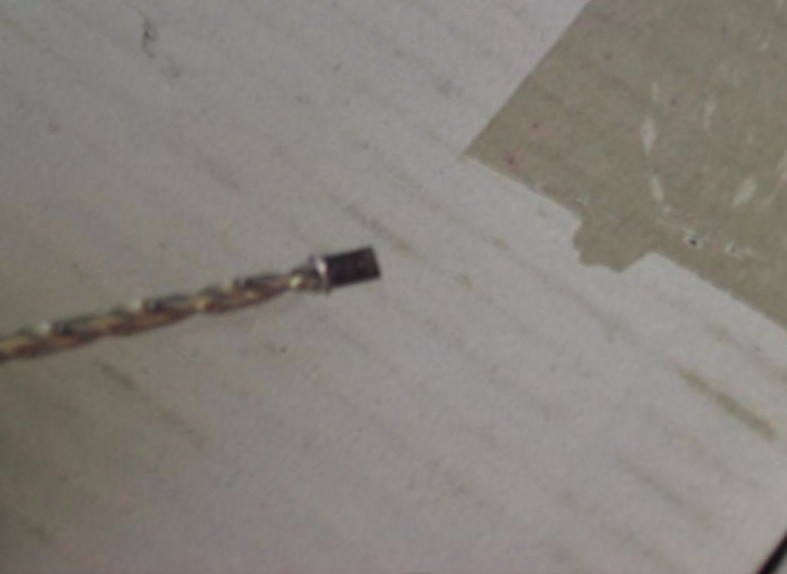
What will result is the “top hat”, so to speak, of the rivet comes off.. Sometimes riding up the bit. (see pic)
Now, you’ll be left with a “nub” (top hat off). We’ll get to how to deal with that later.......
Using the 9/64 pilot point bit, be sure pilot point is in the “hole” (where the mandrel once was), slowly drill off the flange for each rivet, all 18 rivets.
With respect to the 5 outermost rivets of the frame. Once you get these flanges drilled off, your done there for now. In fact, the 5 right outer most rivet flanges, once there off that piece will come off. If there are any rivets (now a “nub”) once the flange is off that remain. Approach this the same way. Slowy, drill down the nub using first the 9/64 then 1/8" bits. The rivet will usually fall out the back at this point.
YOU IDEALLY WANT TO MAINTAIN THE 1/8" HOLE THE RIVET GOES IN.
The eight (4 left & 4 right) inner rivets of the frame, the area that surrounds the portion of the bonnett that covers the plenum. This area once you have the “nub”left, can be approached in a couple of ways:
1. You can use 7/64" bit and drill out the center of the rivet and sometimes it will allow you to pull out the rivet. Or
2. You can carefully use a 1/8" bit and drill out the remaining rivet after you drill down the nub alittle with the 9/64 bit.
You will find that if you test a rivet in any of the holes, after the frame is removed in this area, that it may only go in say half the distance of the body of the rivet. This is correct. The flange of the rivet will not sit flush without the frame in place.
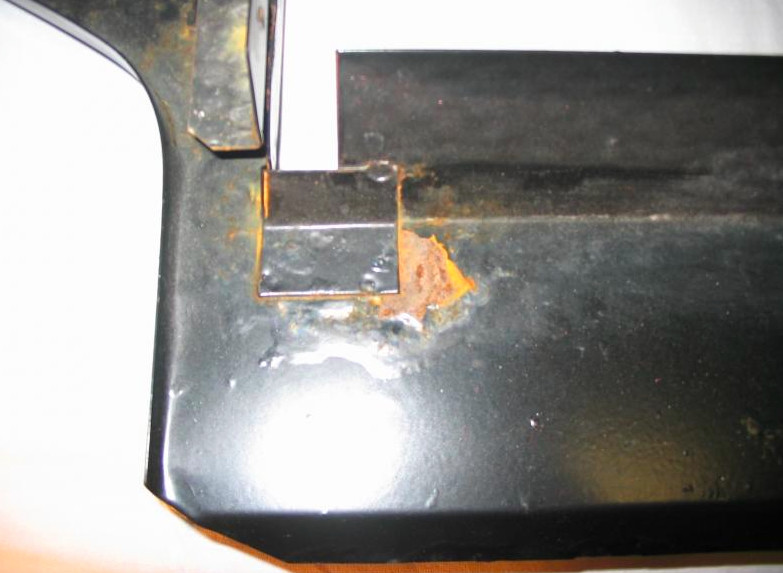
Unfortunately I don’t have pics of the newly powder coated frame.... Take my word it looked incredible!! There are pics of the finished project..
Re-installing the frame.
I found that having another person help insured that you can focus on just operating the rivet gun while they hold the frame inplace. This was especially useful doing the 8 center rivets, 4 left and 4 right inner rivets.
Start with the right side, the only part of the frame that is by itself. 5 Rivets here.
Next
Move to the frame itself. What I did was work right to left. First I placed rivets at the upper most area of the frame, the area in the center over the plenum. Put a rivet on the right then the left a the top.
Then have a person hold the right part of the inner frame against where it will be, first check alignment of each hole before riveting. Each rivet in each hole can be approached individually.
Then move to the left side of frame and repeat.
Finally, place 5 rivets in the far left of the frame. Your done !!!!! Congratulations !!!!
If you want while the frame is off, touch up the underside of the bonnet, the area that covers the plenum with Wurths StoneGuard - spray can. Before spraying mask area off, making sure that no Wurths will seek out of contained area. Also, spray a piece of cardboard to get the first shot out of can. It can shoot a lump very first time out.. Practice with the can a bit too. Short bursts of Wurths while keeping hand moving works best. But practice. THIN COATS TOO !!
Any questions please PM me... Thanks..
I also want to thank various members who posted info too.
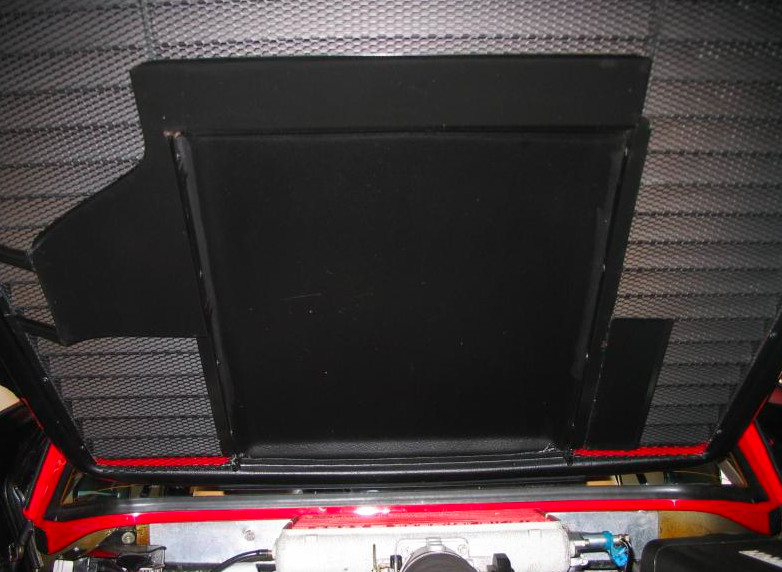
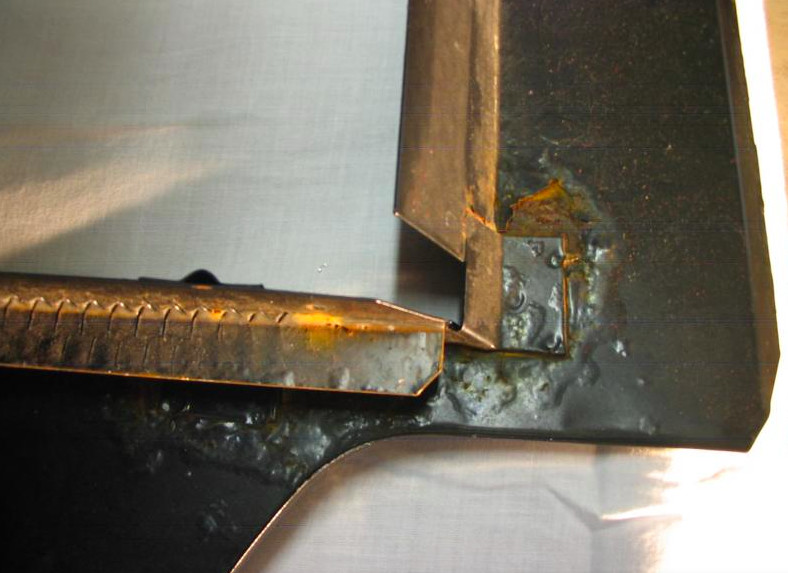
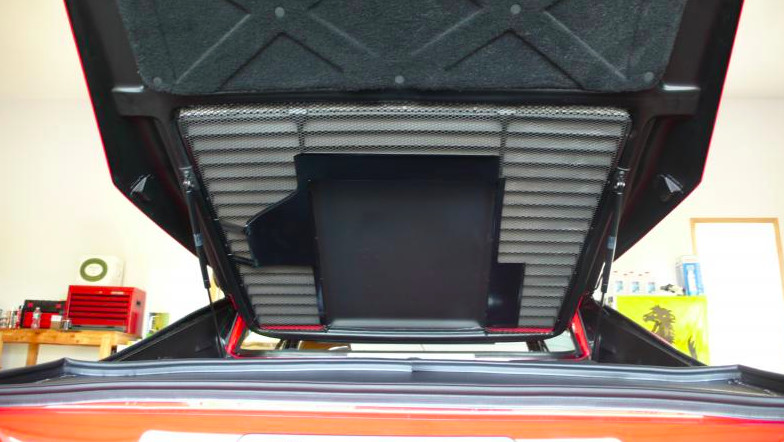
This first pic is a BEFORE resto.
These next shots are:
Pic 1.
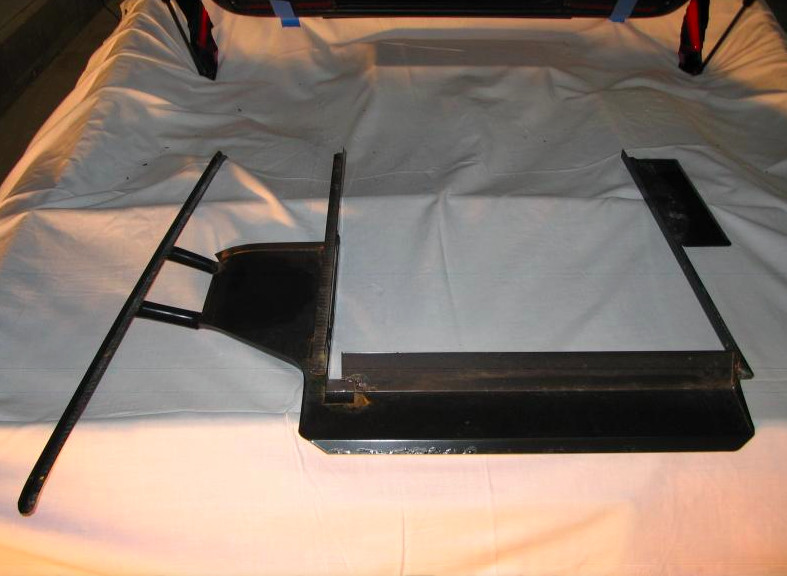
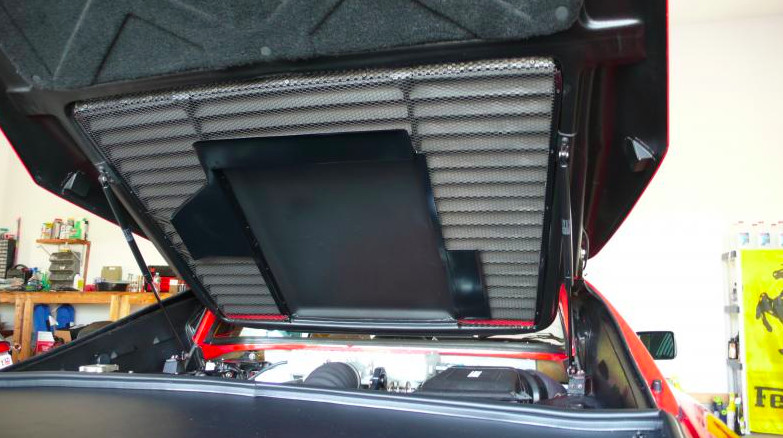
Frame Removed
pic2.
Support inwhich frame rests against.
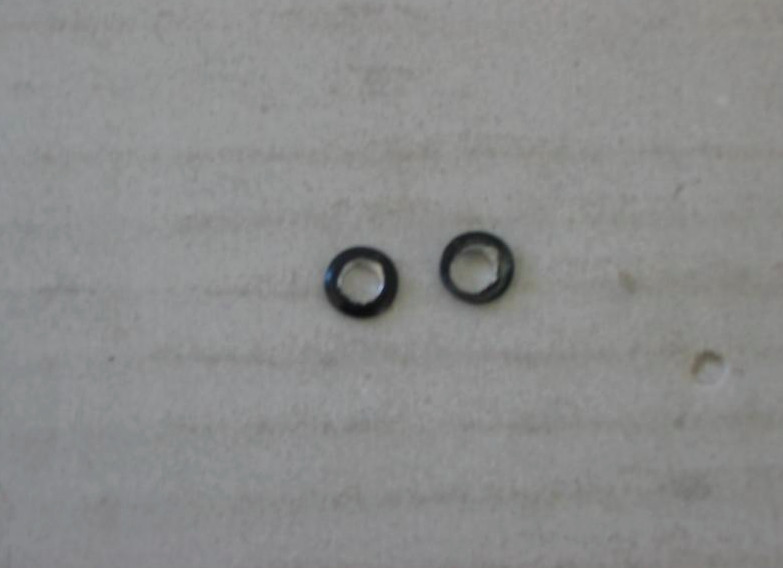
pic3.
"Nub" whats left after flange is removed.
Now here is where you can either drill down the nub using a 9/64 pilot point bit
OR
drill out the center using a bit that will fit within the hole of the rivet (this where the mandrel once was), 7/64 pilot point bit. One or two bit sizes smaller than the 1/8 size rivet.
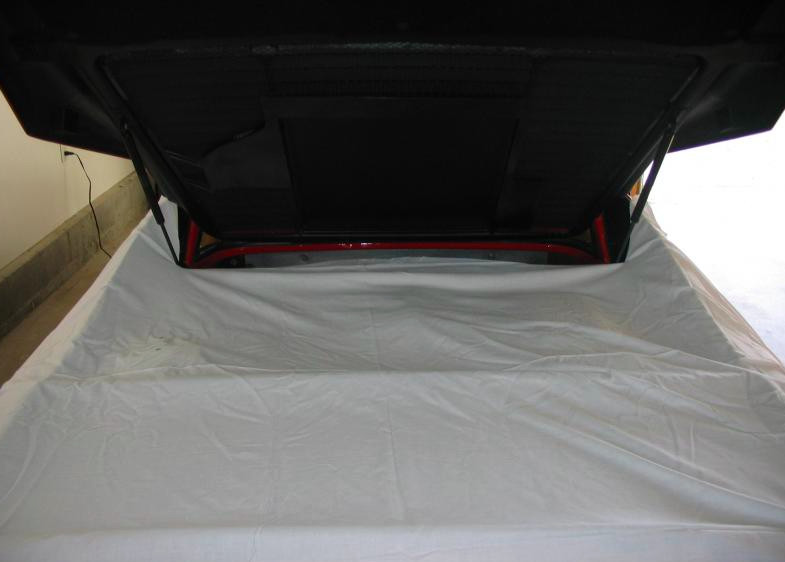
Once the frame is off use some blue tape at the back of the bonnett to hold it up the mesh. You dont want to close the bonnett down and accidently catch the mesh thus bending it.

Here is a shot of the 90 degree angle att and the pilot point bits
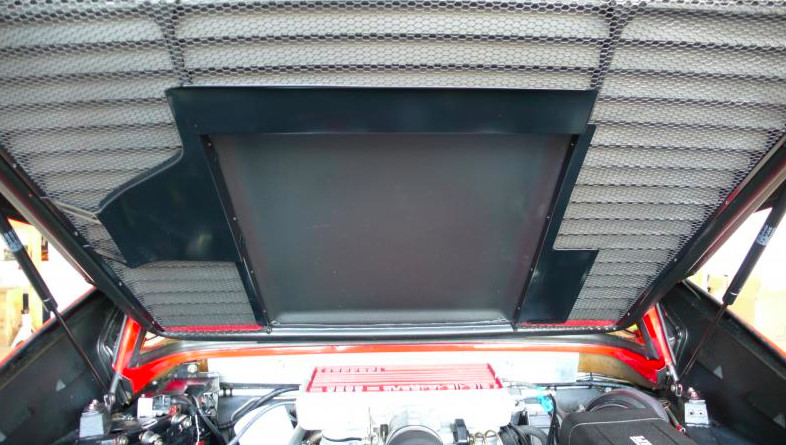
Here are shots of the Finished project....
I also LIGHTLY touched up the large black center square, the area that covers the plenum with WURTHS STONE GUARD.. It came out incredible!!
You can VERY lightly sand using say a 2000 grit wet/dry to smooth out any imperfections before spraying the area.
Use VERY THIN Coats. you coud always add but you cant take away.
I want to thank LenS for confirming the use of the Wurths beneath this area,
Thank You.
Thank You Mike, Please dont hestitate to contact me....
See one...Do one...Teach one...
5-17-2010
I didnt time myself, but if I had to estimate...
approx. 2 hours to remove the frame and drill out remaining rivets, maybe less time.. dunno
To re-install;
under 1 hour...
Had it back from powder coater in 4 days...
Thanks LenS.