You must be logged in to rate content!
43 minute read

348 clutch removal
Compliment by ernie @ ferrarichat.com
9-1-2010
Okay kids!
Can anybody tell me what time is it?!
It's Stooge Time!!!
Today we are gonna see how to remove the clutch from a 348 ..... Stooge style.
Since you guys have been bustin my balls about getting my car back on the road http://ferrarichat.com/forum/showthread.php?t=293205, I FIIIIINALLY decided to get off my but and gitt-er-dun. To give you a little back ground on what the problem was, I was having an issue with the clutch not disengaging. At first I thought it was a blown throw out bearing, but after I limped the car back home, I found that there was nothing leaking?!?!?! So I bled the clutch line for about an hour, and still no dice. The clutch peddle would go to the floor when the bleed nipple was opened, but when it was closed the clutch peddle was hard as a rock, and would not disengage. Meaning that I could not get the car in and out of gear when I was driving. So I just let the car sit since the fall of last year, until you jokers started busting my chops about getting it fixed.
What follows is how I removed my clutch and what I found. So sit back, relax, and enjoy the show boys.
Okay first things first.
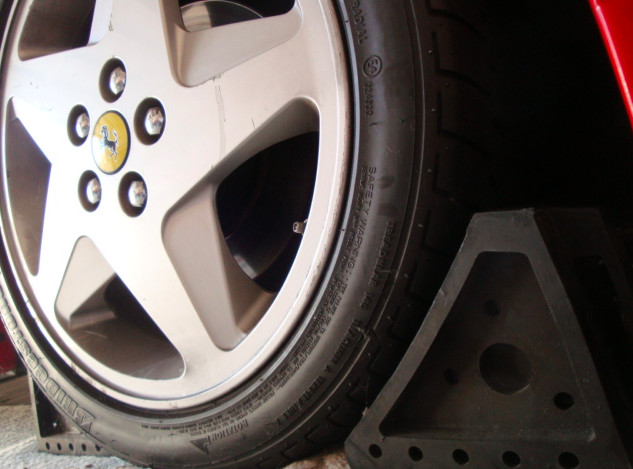
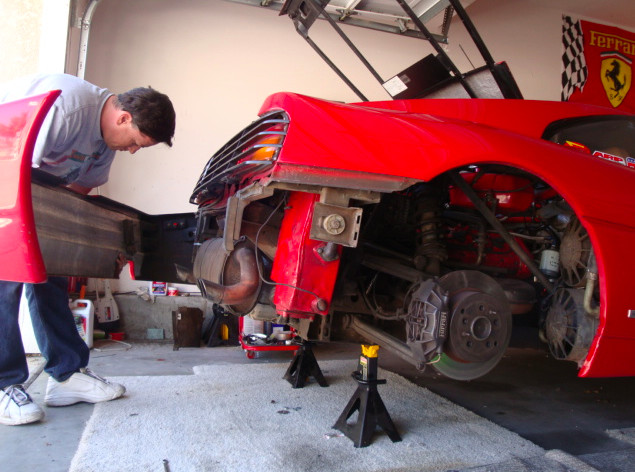
Since the front wheels don't have parking breaks, I blocked the car from rolling away with some wheel chalks.
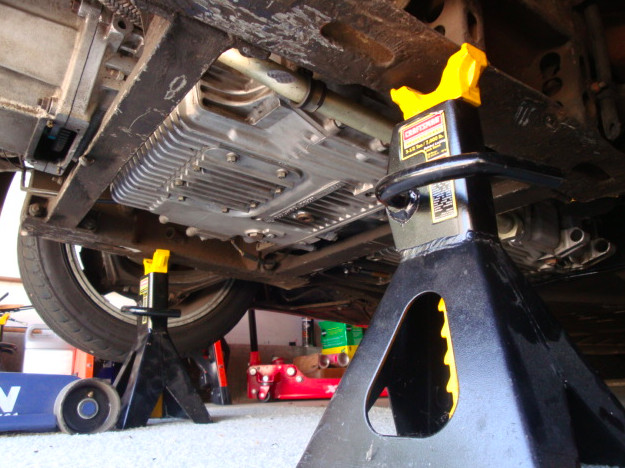
With that taken care of I went around back and positioned my floorjack under the subframe and lifted the car off the ground.
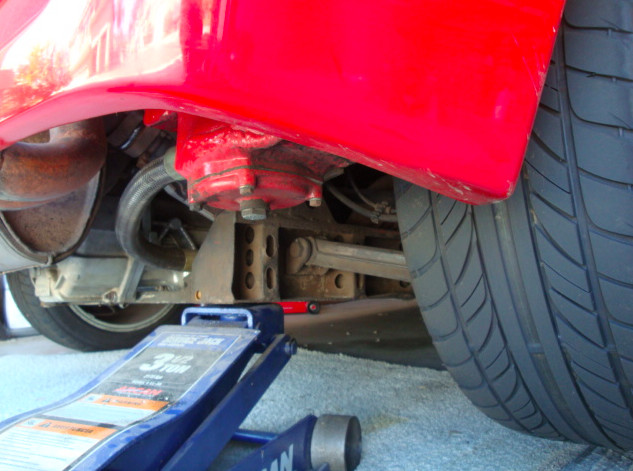
Be sure to put some jack stands under the frame, so that the car doesn't fall and split your dome open.
Safety first kids.
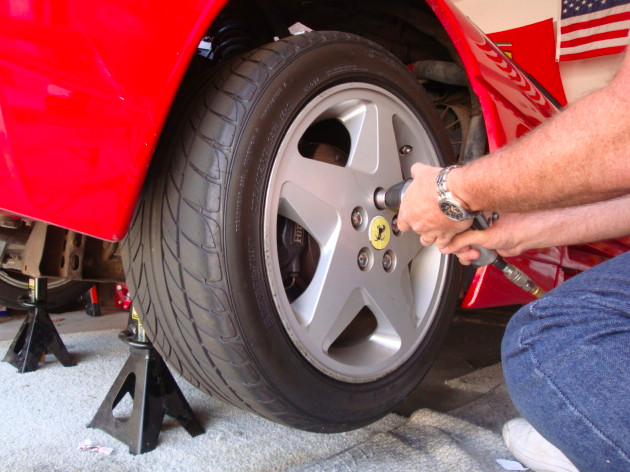
Next I removed the wheels, and the wheel well liners, from both sides of the car.
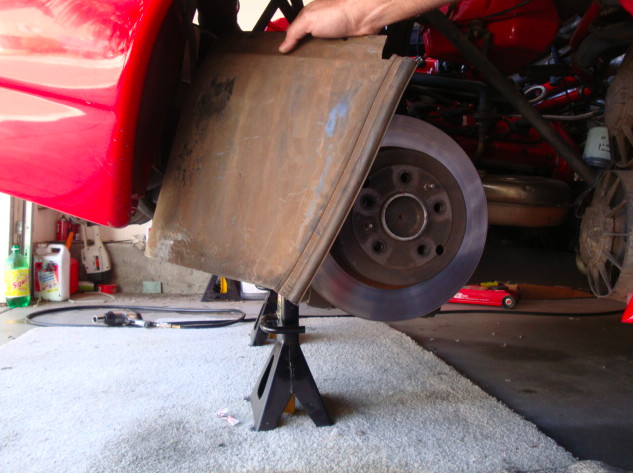
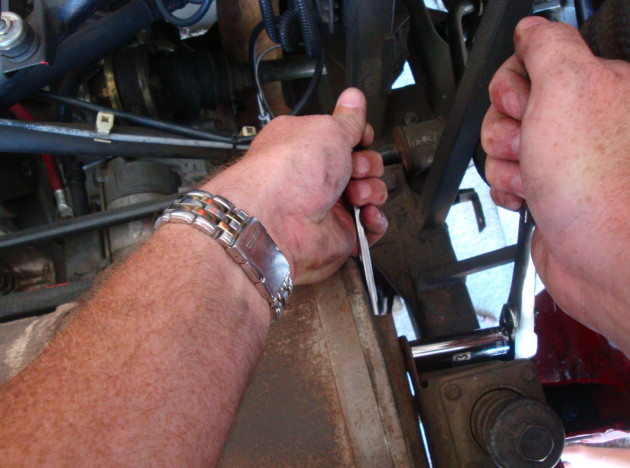
With the wheels and the liners out of the way we now have access to the side retaining bolts for the bumper.
We'll go ahead and remove the two nuts on each side of the bumper.
Now you're gonna need to remove the four bolts that hold the bumper to the rear frame of the car. They are located on either side of the muffler.
Since I have the battery in the left rear of my car, I took the battery heat shield out of the way so I had better access to the nuts.
Now that I have more room to work with I reached up and took the nuts off.
Now all you need to do is wiggle the bumper off.
But do it S L O W L Y!!!!
The reason is because you DON"T wanna rip the side marker lights out of the bumper. It's much easier to take the side markers lights out once the bumper is off. So once you have the bumper ready to come of REMEMBER to remove the side marker lights.
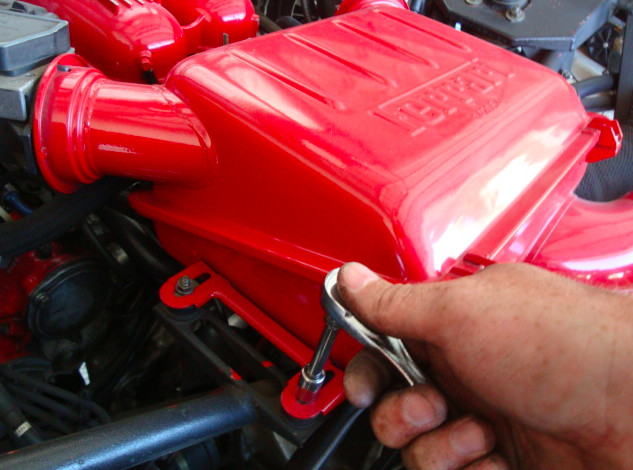
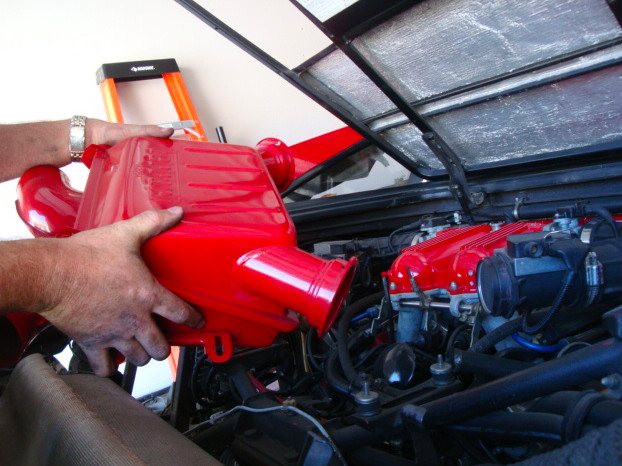
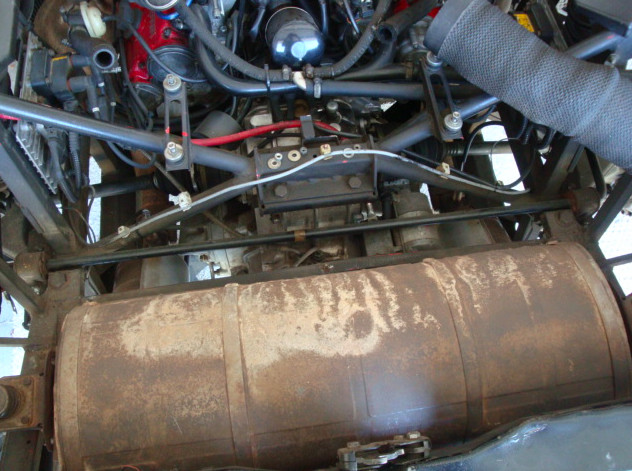
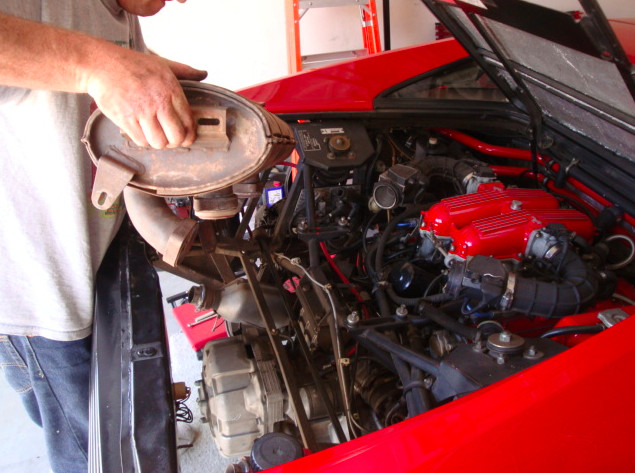
Since I have a 348 with the heavyass dual can muffler I'm gonna need to get it out of the way. And since I like having plenty of room to work with I'm gonna get the air box out of the way.
First remove the intake tubes from the rear of the box.
Then disconnect the secondary air injection tube from the bottom front of the air box.
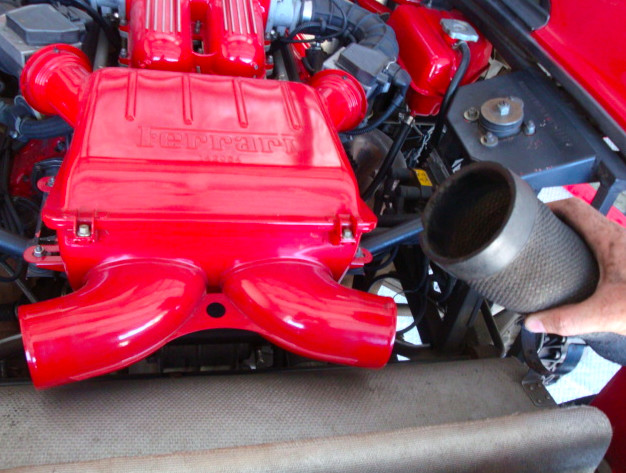

I then removed the four retaining nuts holding my air box in place, disconnected the MAFs from the front of the box, and removed it.
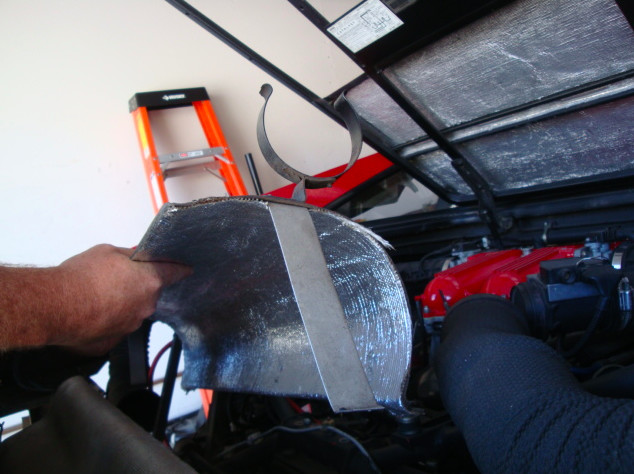
Next I remove the heat shield retaining nuts.
Get the shields out of the way.
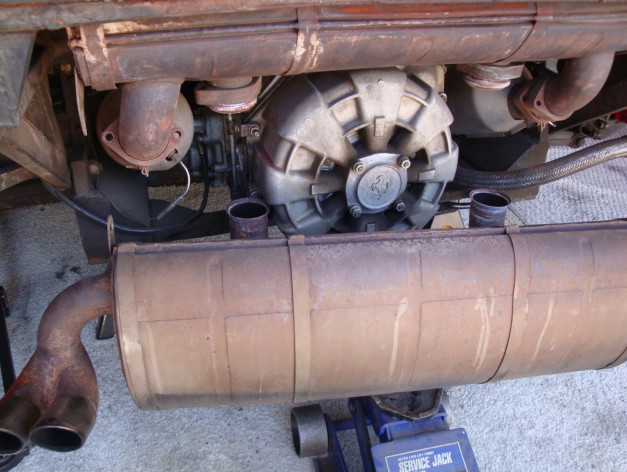
And now the top can is exposed. Is that thing ugly lookin, or what!
Since these mufflers are heavy, (35/lbs+ EACH) I supported the weight of the muffler by putting my floorjack under it, and lifting it just until it made contact with the bottom of the can.
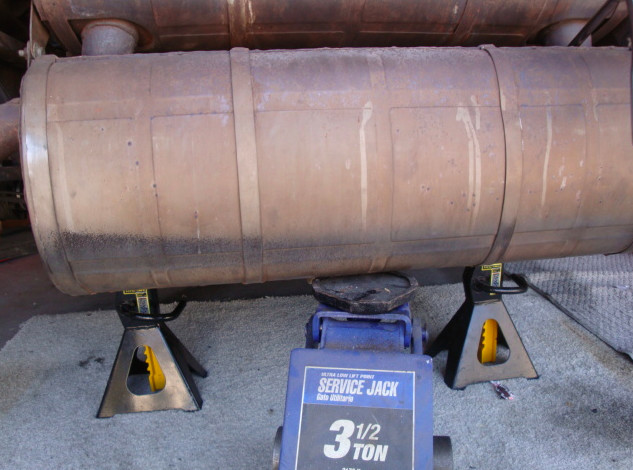 Now that I have the bottom can supported I can go ahead and disconnect everything.
Looking in between the top and bottom can you can see it's a straight shot to the bolts holding the catalytic converter to the top muffler. So I decided to disconnect these first. You don't have to, but like I said, I like to have PLENTY of room to work with. That and my Gothspeed Exhaust System needs to get put in when I'm done.
Even though it's a straight shot to the bolts, in between the cans, you will still need to hold the nuts still with a wrench on the other side. Other wise the bolt will just spin and never come undone.
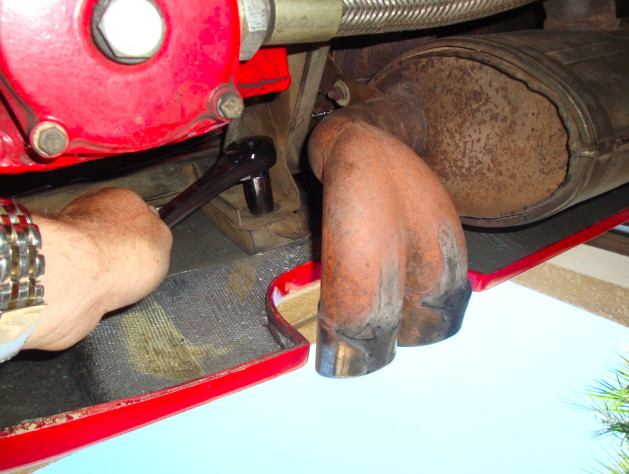
Next I crawled under the car, reached up, and disconnected the retaining bolts holding the bottom can to the top can.
Again, you will need to have a wrench holding the nut still so that is doesn't spin while you are loosening the bolt.
For those of you that don't have the dual can exhaust you won't need to do this.
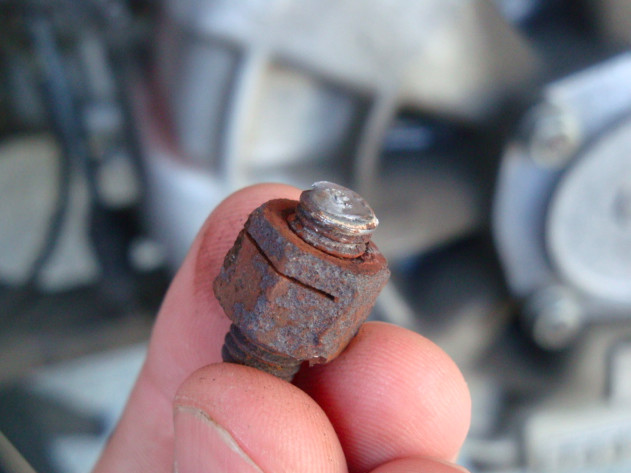
And wouldn't you know it. The last nut I was removing was rusted so bad that I popped the nut off with the top of the bolt.
Nice.
See Rick you aren't the only one who likes to just twist things until they just rip off.
Okay now double check to make sure you have everything disconnected from the cats, and the cans.
Everything looks good, so now I remove the nuts, and bolts from the brackets holding the two mufflers together.
Then lower the heavyass can down using the floorjack. You don't really need to lower it with the floorjack, but you do need the floorjack supporting the weight while you diconnecting everything.
At this point I could have stopped, but like I said I have a Goth Muffler weighting to be installed, and I like having plenty of room.
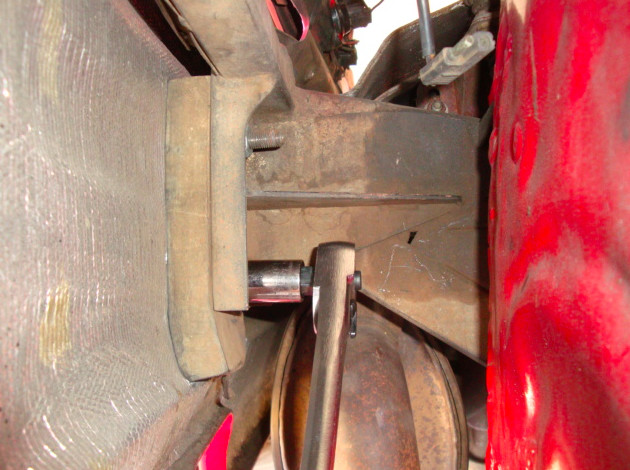
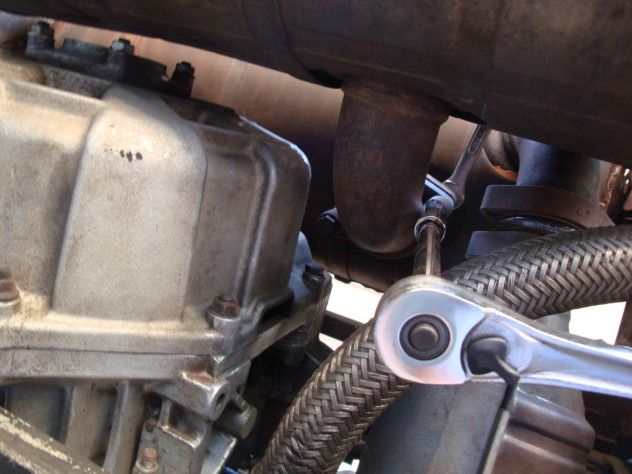
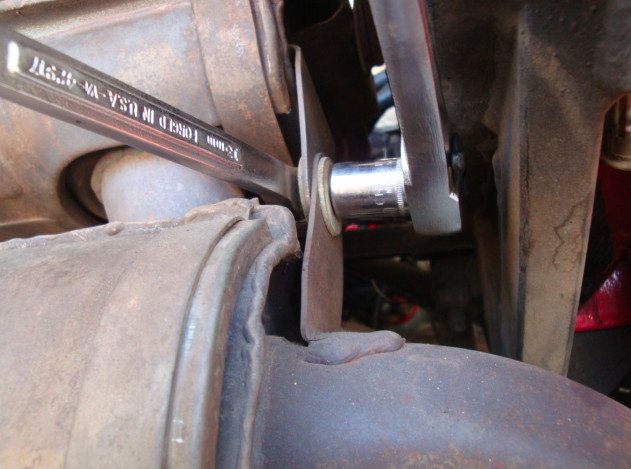
So last on the list is to disconnect the top can from the mounting brackets, holding it to the frame of the car.
When you do this you will need to feed a wrench inside the slot of the bracket, welded to the side of the can, to get it on the bolt. Then you can go ahead and put a ratchet on the nut and remove it, other wise it will just spin. It can be a bit of a pain getting the wrench to stay on the bolt, once it's back inside the bracket, but can be head in place.
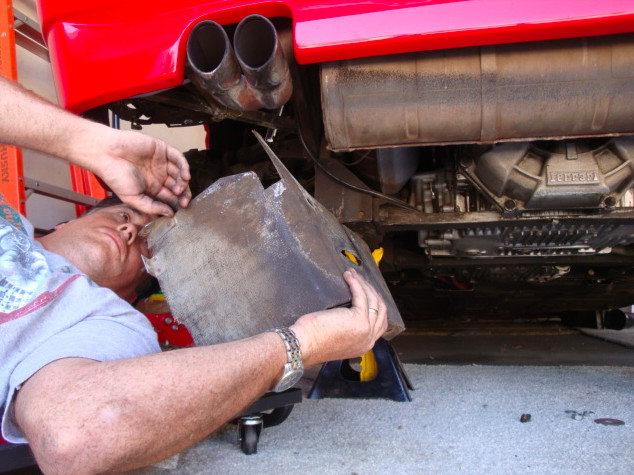
Once the retaining bolts are remove from the mounting brackets the only thing holding the top can in place is the connection to the cats. You don't want the cats supporting the weight of the can because they are connected to the headers, and we don't want bent headers. So get a hold of the top muffler, wiggle it off the cats, and out of the car.
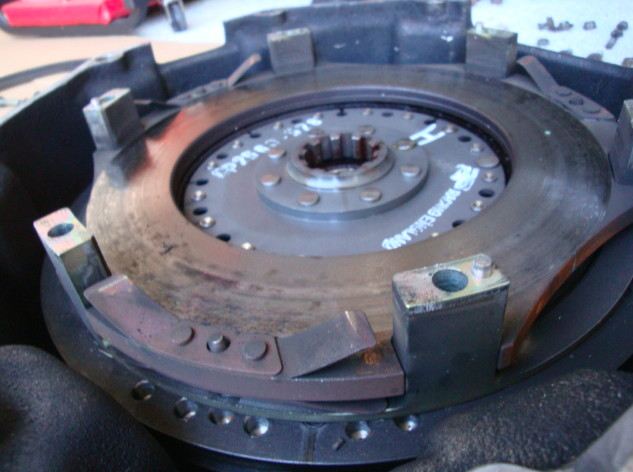
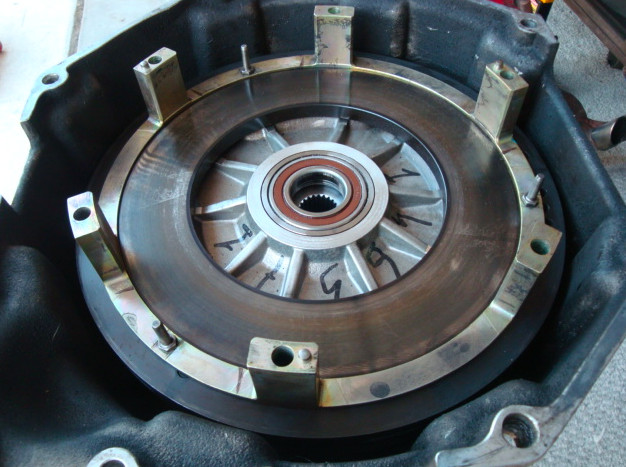
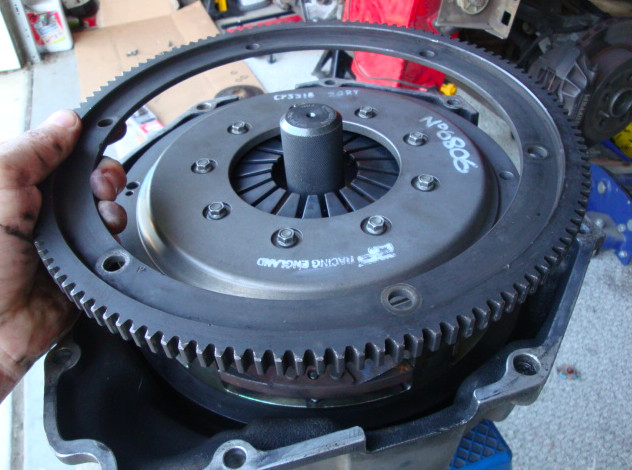
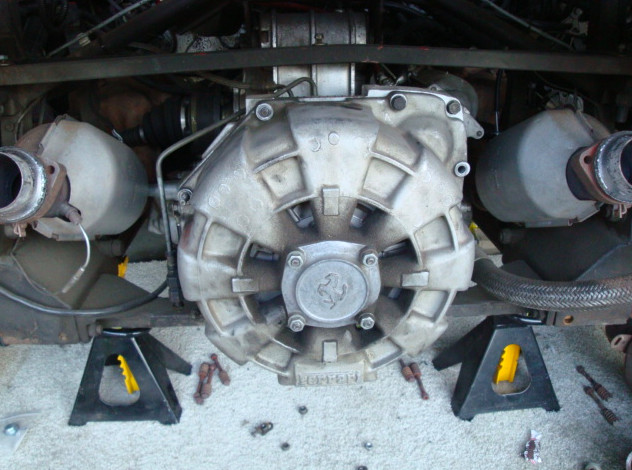
Viola!!
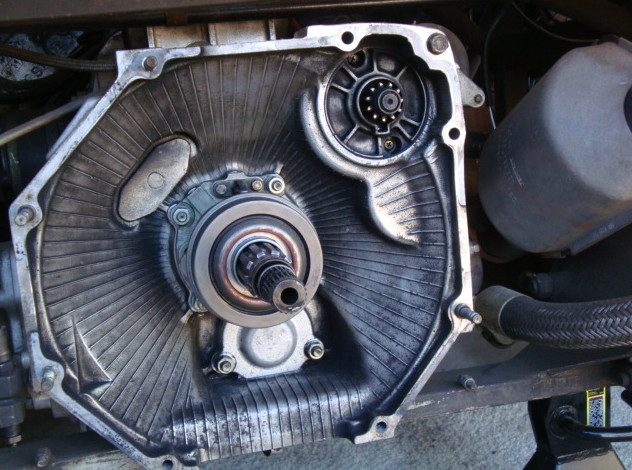
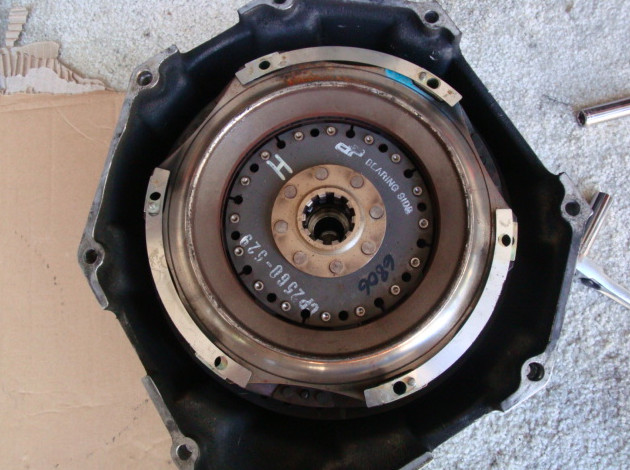
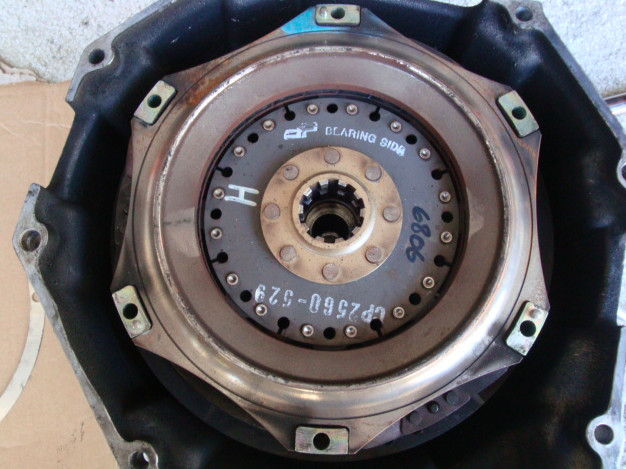
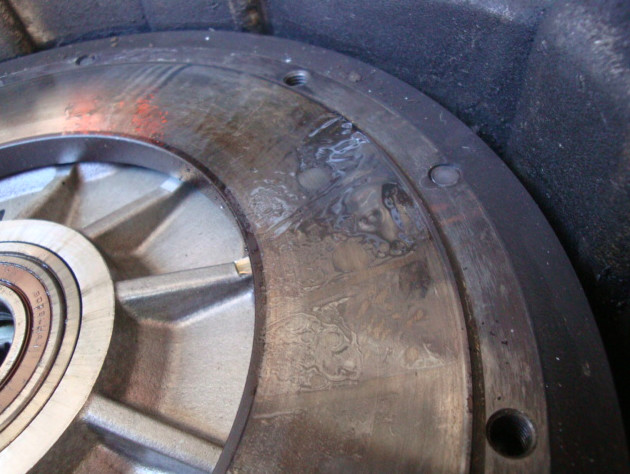
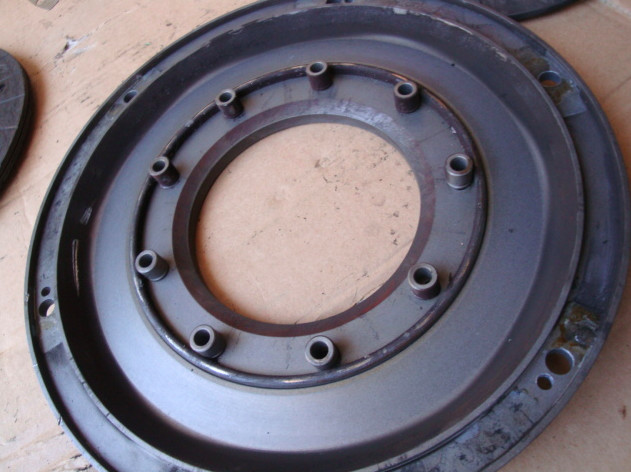
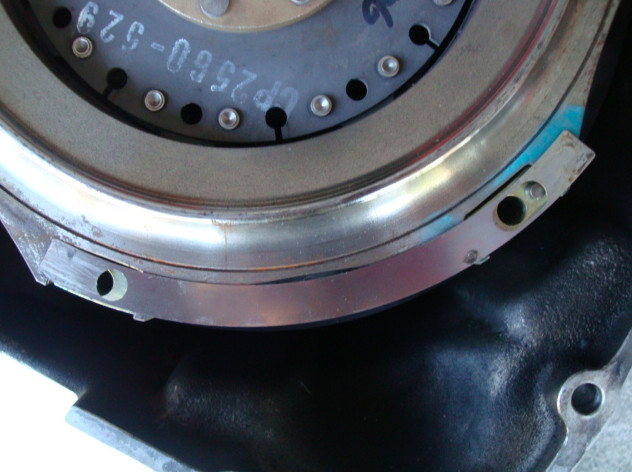
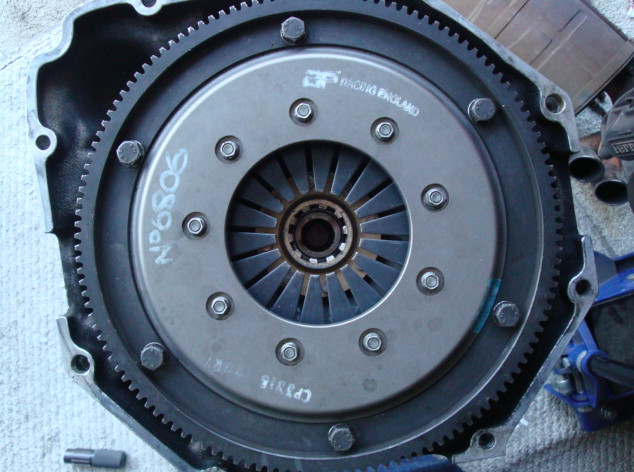
The clutch bell housing is exposed.
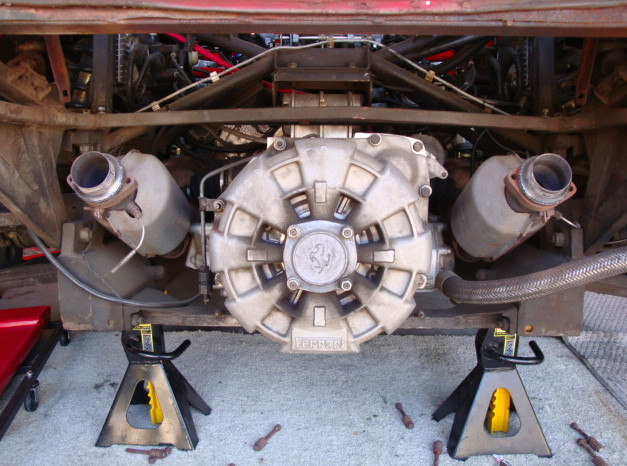
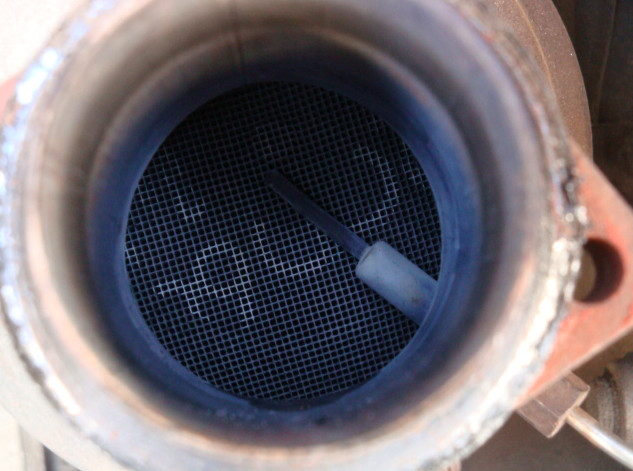
Had me a peek inside the cats, and they still look okay.
For those of you that don't know. The probe you can see sticking inside the catalytic converter is the thermocouple. That is what sends the signal to the cat ecu's telling them the temperature of the cat. The honeycomb looking squares is the ceramic matrix, coated with precious metals, which have a chemical reaction with the unburned fuel, causing the matrix to get read hot and burn off the excess fuel, or most of it anyway. It has an operating temperature range, which the thermocouple monitors and reports to the cat ecu. When you have a cat that has gone bad the matrix will be destroyed, melted, or even completely burned out, causing you to fail emissions. Which when is WORKS AS IT'S SUPPOSED TO...........the cat ecu's will tell you the matrix is to hot, and you are running the risk of burning up the cat.
Anyway, mine still looked okay.
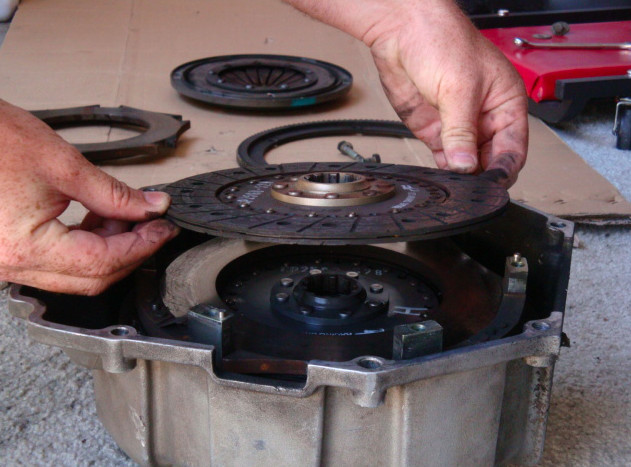
Okay back to removing the clutch.
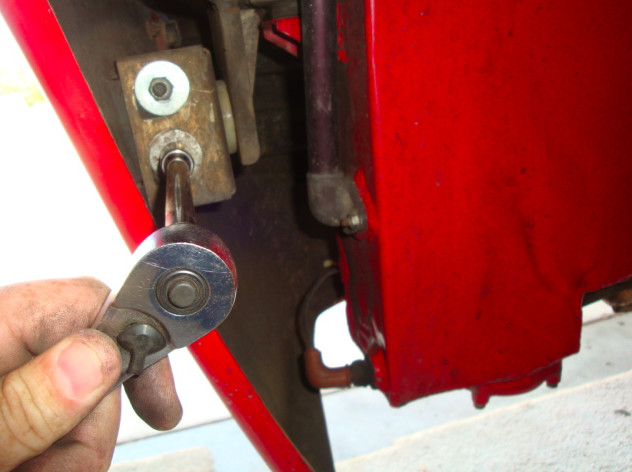
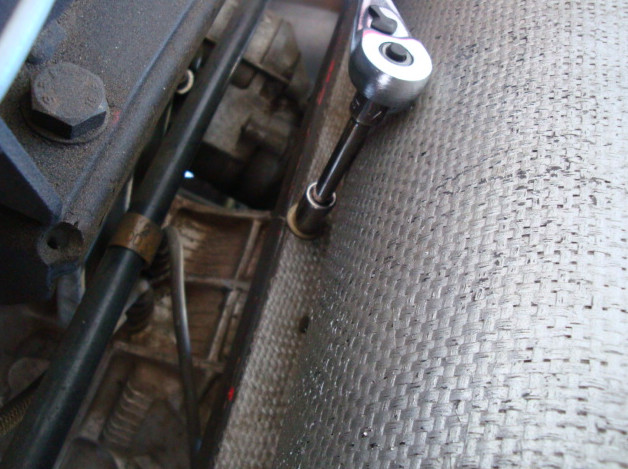
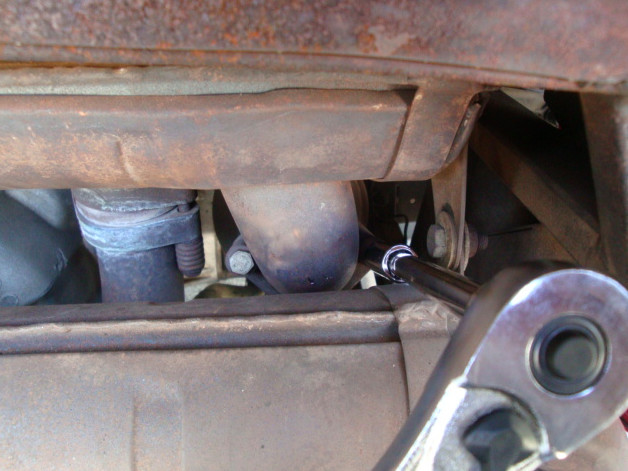
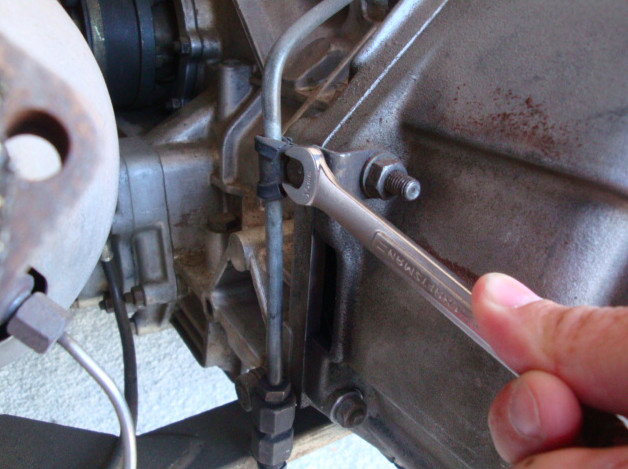
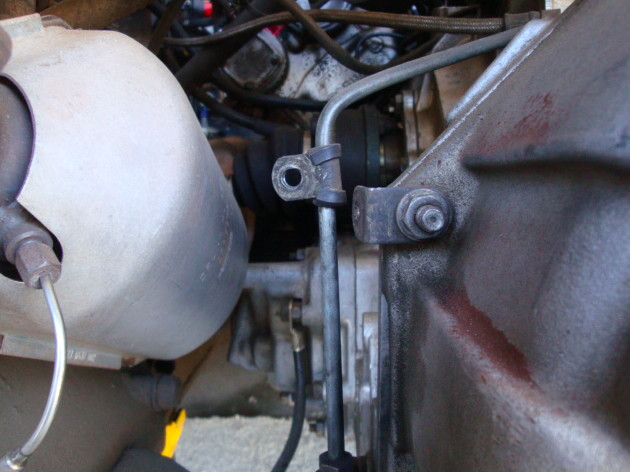
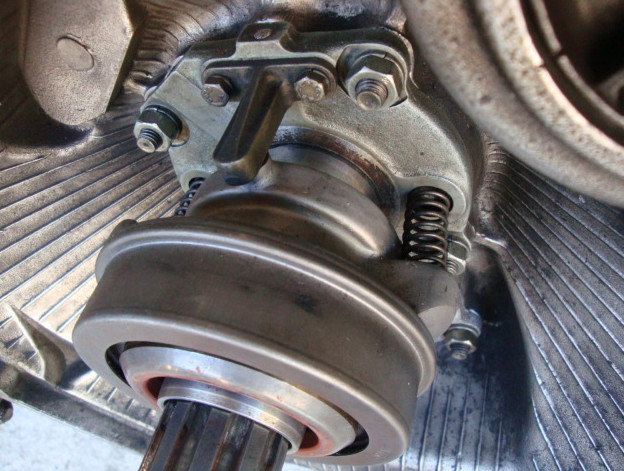
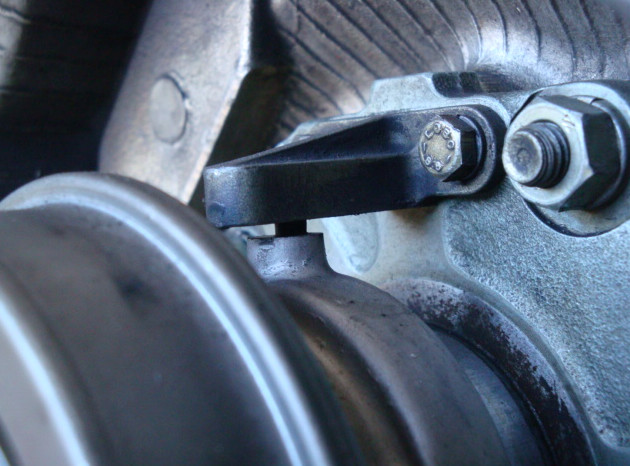
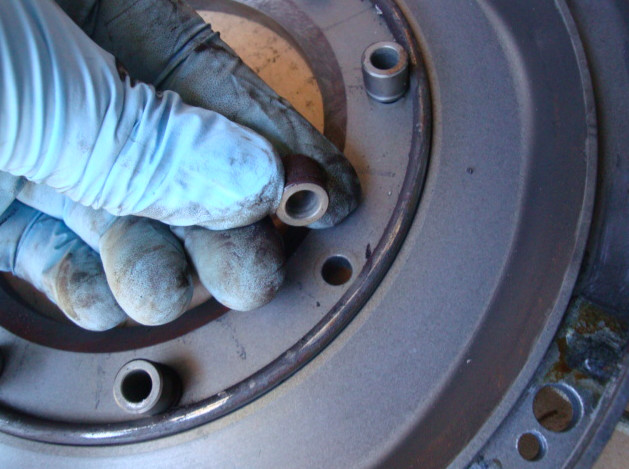
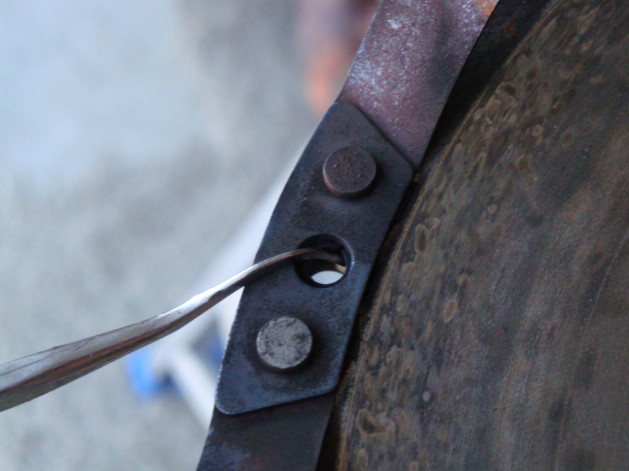
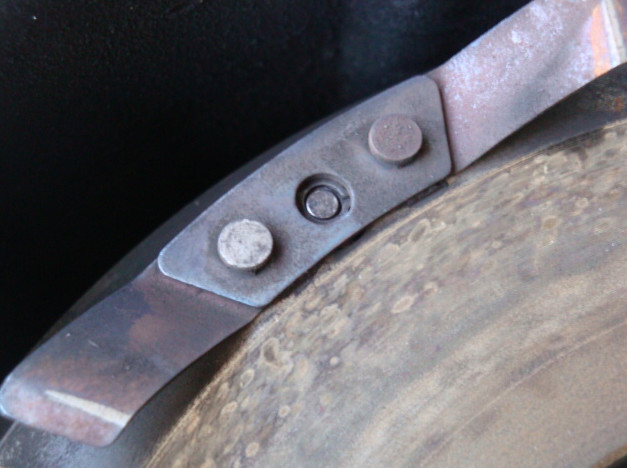
The bleed line doesn't need to completely removed. It's attached to the gear box housing, and not the bell housing (a.k.a the pumpkin). It only needs to be disconnected from the clamp holding it to the bell housing.
So remove the nut, and rotate the clamp out of the way.
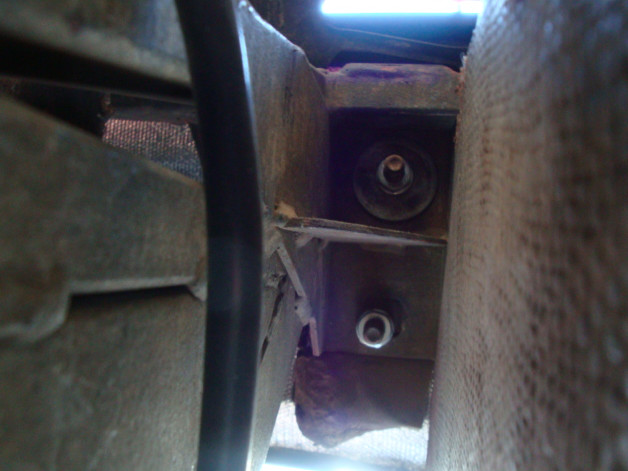
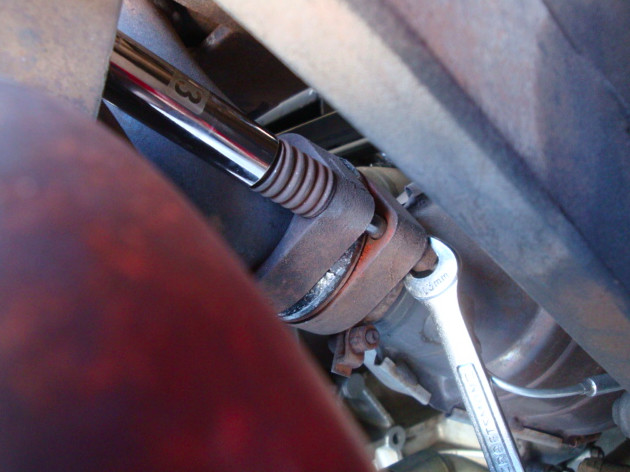
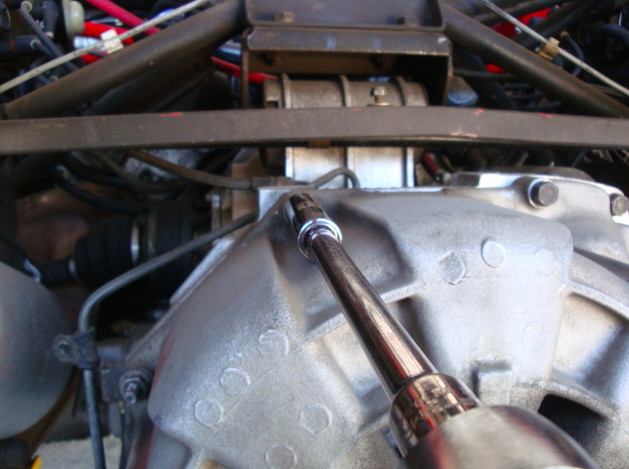
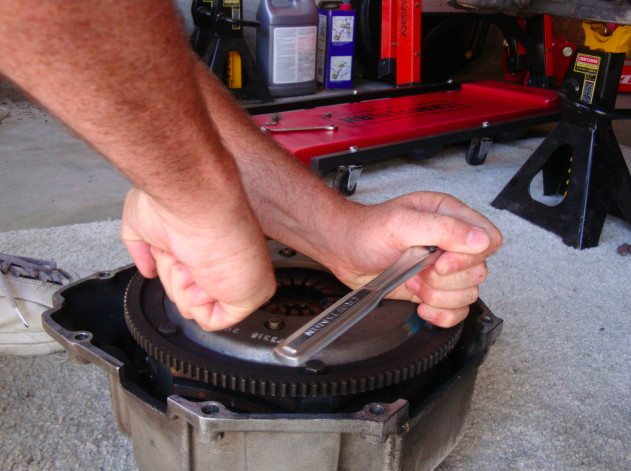
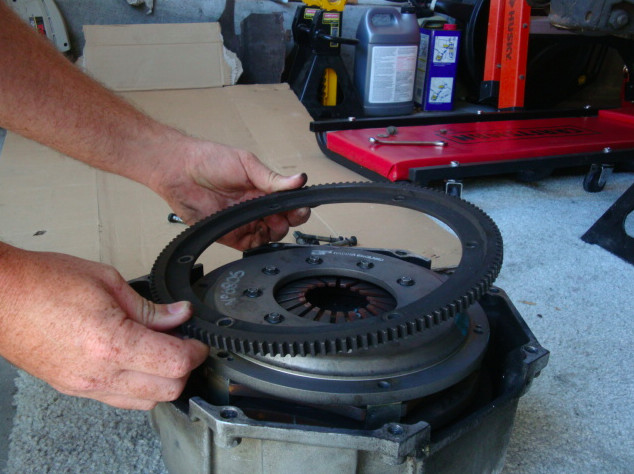
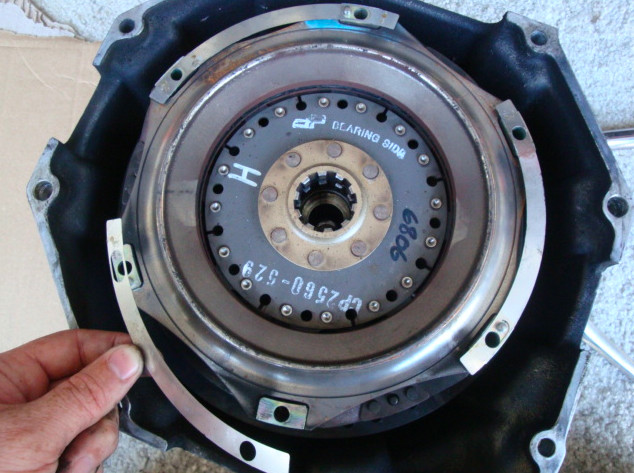
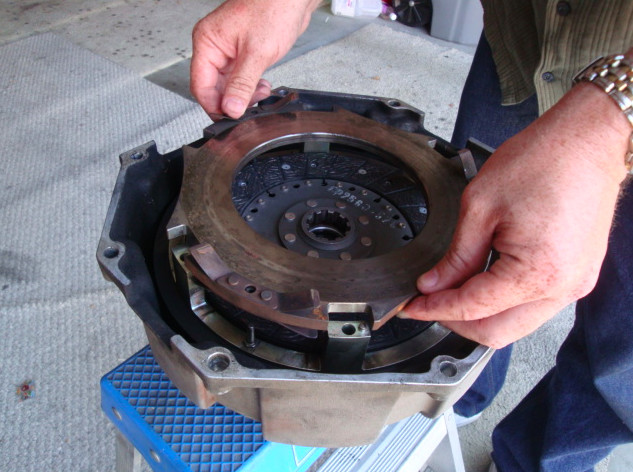
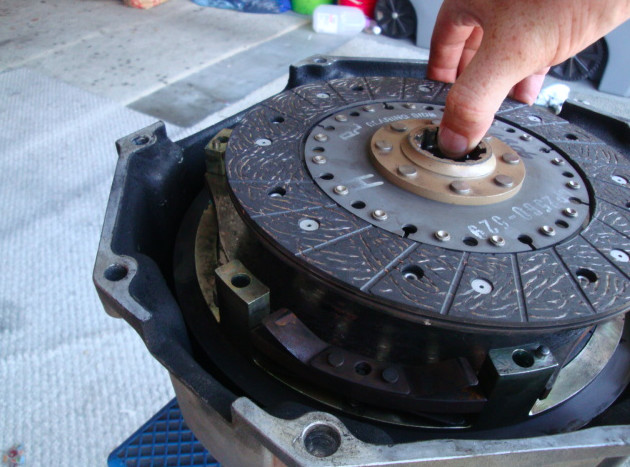
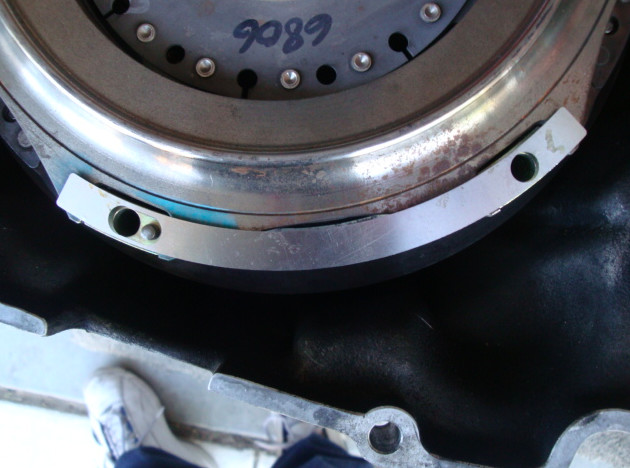
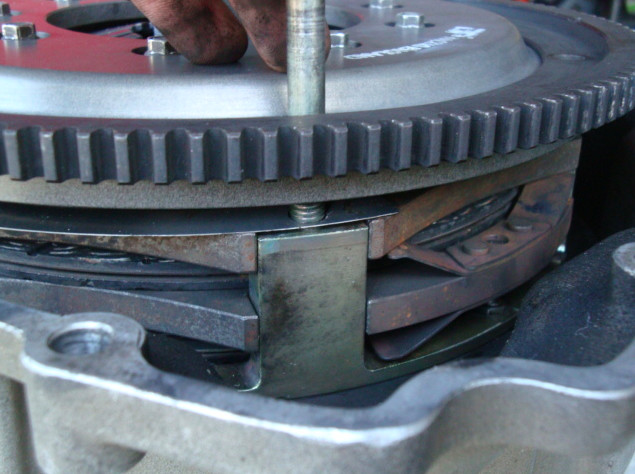
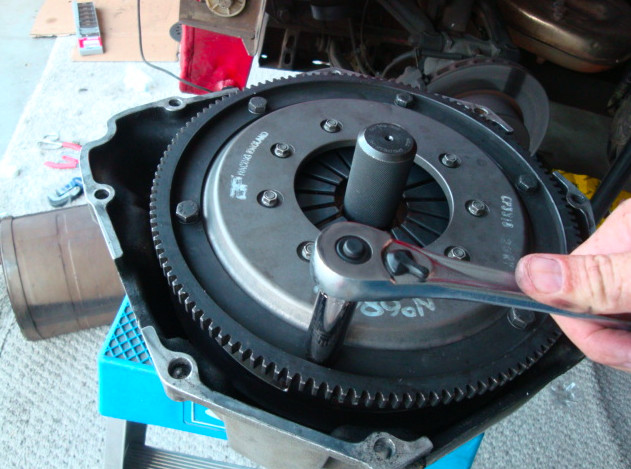
Next we remove the six nuts, and two bolts, holding the flywheel/clutch bellhousing to the gearbox.
You will notice that I only removed the to bolts holding the the housing to the box, and left the one bolt in place that holds the starter to the gearbox (I'm pointing to the bolt that stay in place with the tip of the bolt that gets removed)bottom pic).
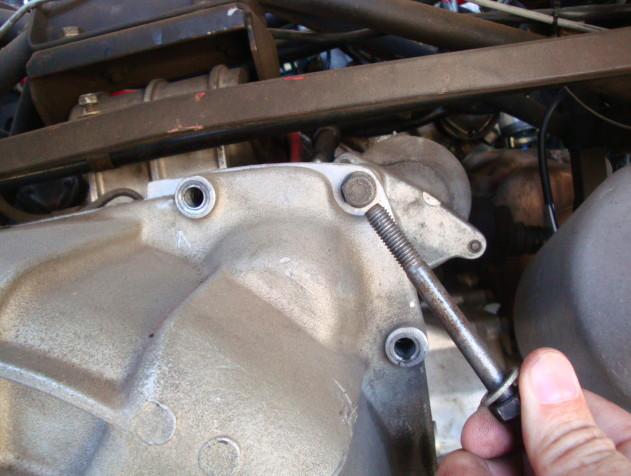
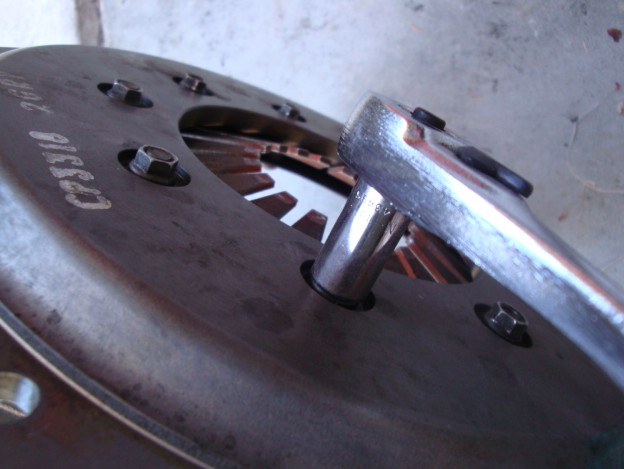
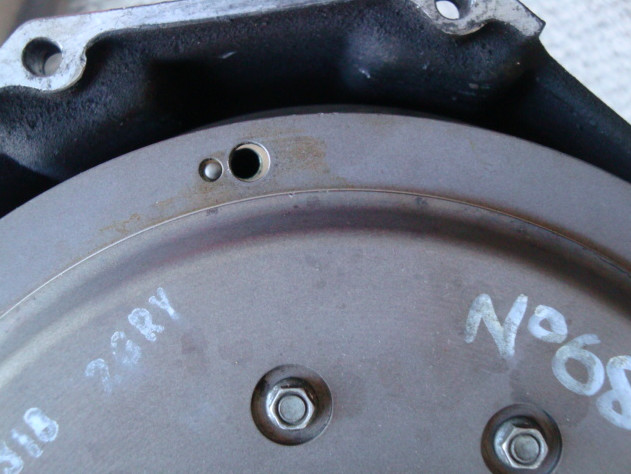
Next remove the inspection plate cover from the bottom of the bell housing and the box. (sorry fells, I forget to take a pic of that).
Now that you have that off, I used a ratchet to put inside the slot on the housing, to help separate it from the box. You don't need to use a lot of force to get the housing to separate from the box. Just some nudging on both sides, and even in the top slot.
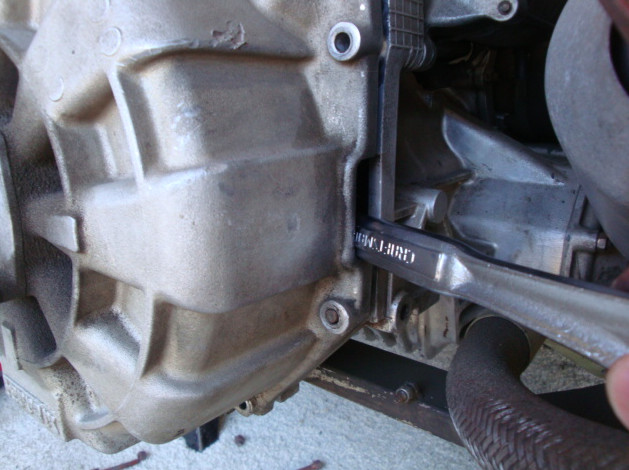
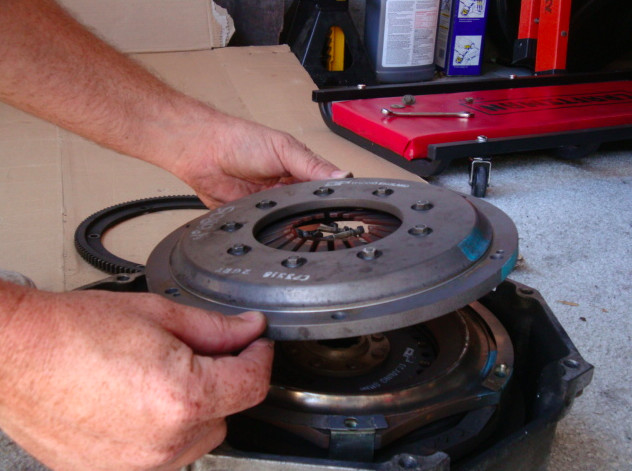
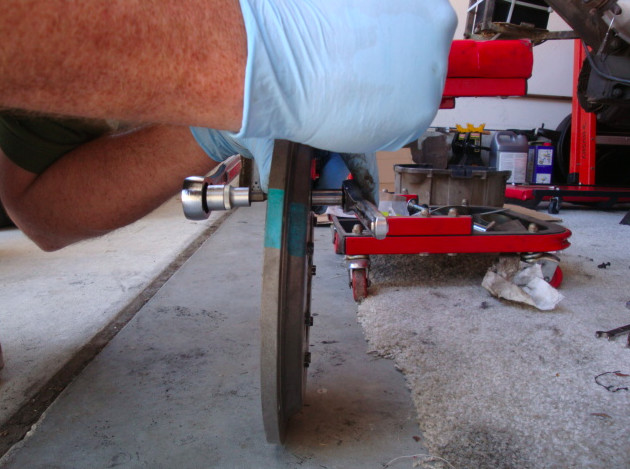
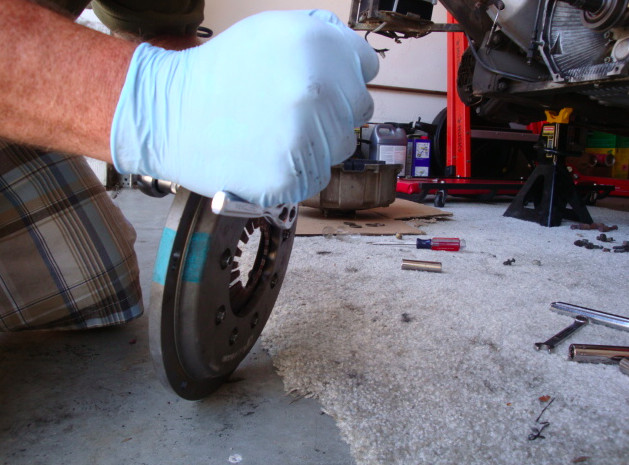
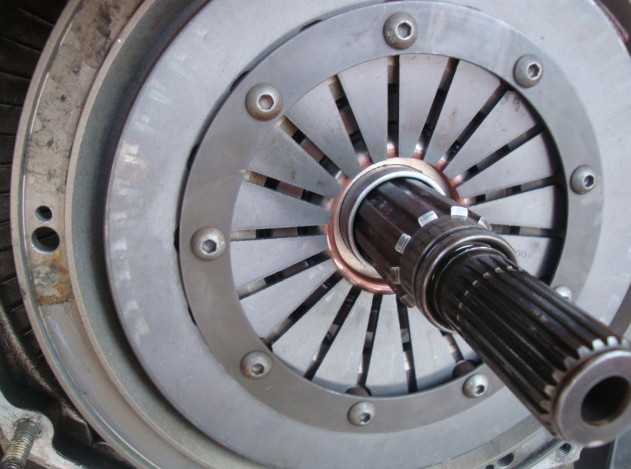
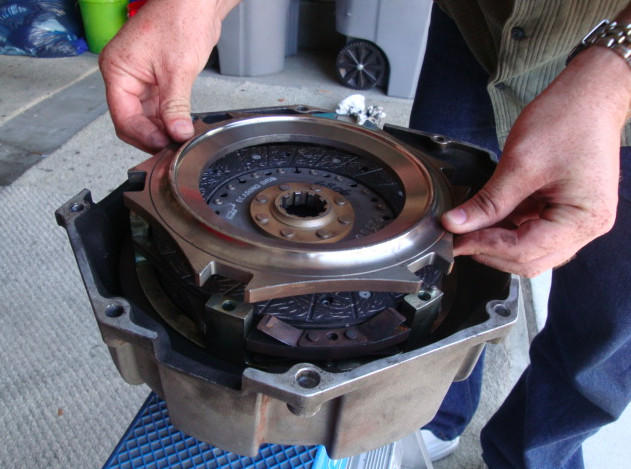
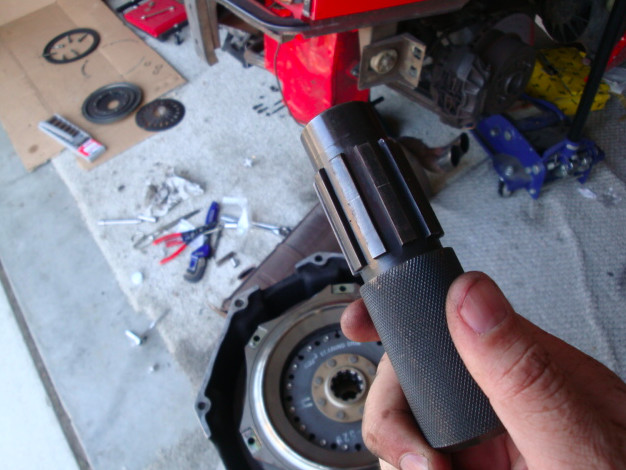
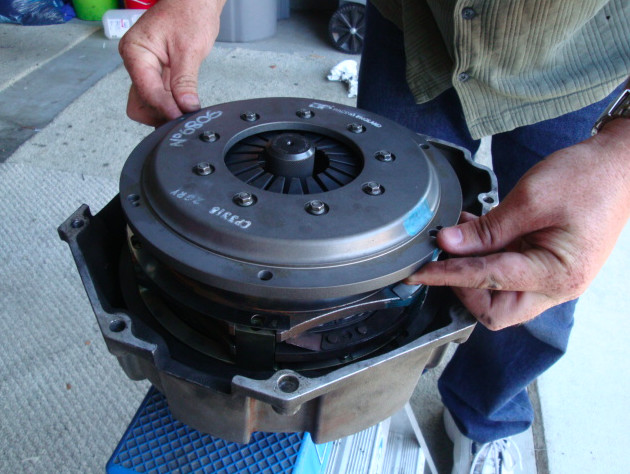
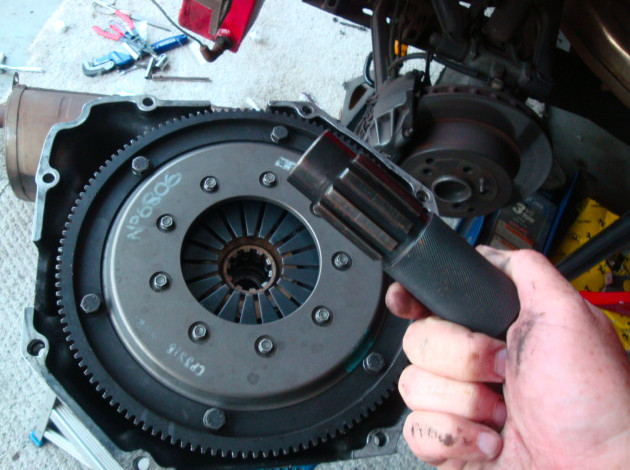
Once it's loose, slide the the clutch off and out.

Well kids........that's how the clutch from a 348 gets removed Stooge style.
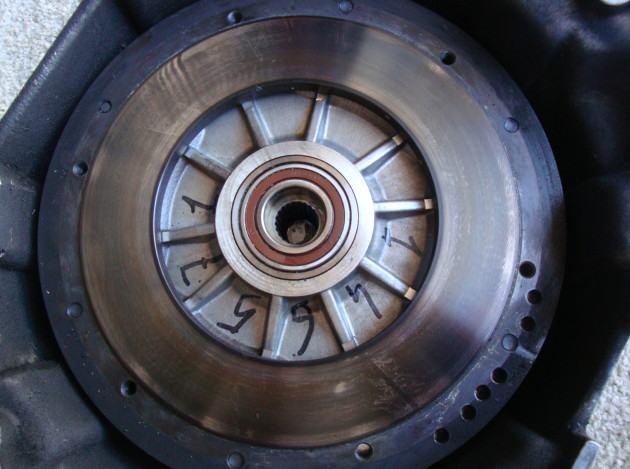
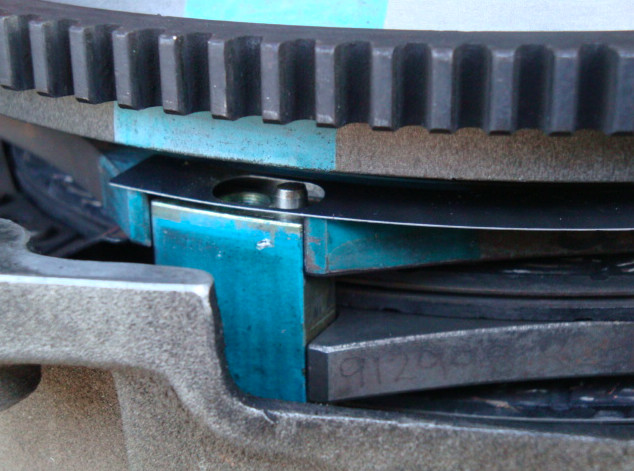
The throw out bearing looks okay. It's not blown out, and doesn't look as though it's leaking. Slave cylinder looks okay too.
But shouldn't the throw out be seated fully on the bearing stop??? (bottom pic) Maybe not, cause the pressure plate fingers are pushing it back? Or "where" anyway.
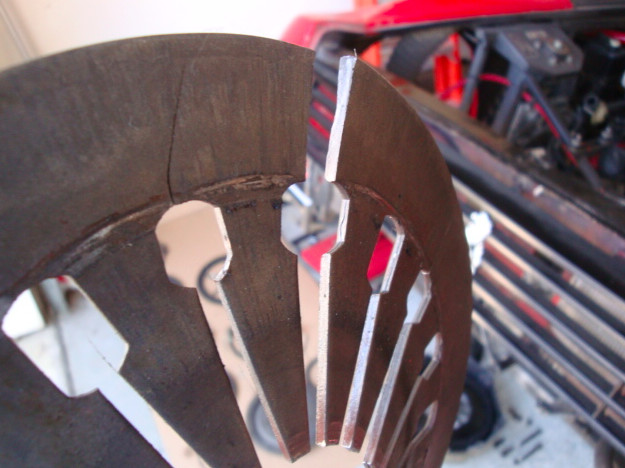
Speaking of fingers.
Me thinks me sees a problem. And possibly the reason my clutch wasn't disengaging? See the three fingers that are touching? They aren't supposed to be doing that.
Looks like it's off to the fatman's house to finish tearing this thing down. I have to go over to chubba-lard's place because I don't have the ring nut tool for getting the flywheel out of the housing.
Do you see what I see?
Yup.
Leaking triple seals. Looks like I'll be changing those suckers too.
See I told you guys. If it isn't one thing with this pile of crap, it's another. I should just bath it with gasoline and throw a match at it!!! When will the ***** end with this m@#therf#$^*ing car. Or better yet take it to the flipping smash-up-derby at the fair. Or how about letting some good-ol-boys smash the piss out of it with a monster truck, and then lighting it on fire.
Okay, okay.....
Take it easy Ernie.
Big breaths, big breaths. Easy there big fella.
You know I think I'm gonna call it a day and put one of these down my throat.

9-3-2010
Okay.
So I've show you guys how I removed the flywheel/clutch. Now I'm gonna show how to disassemble it.
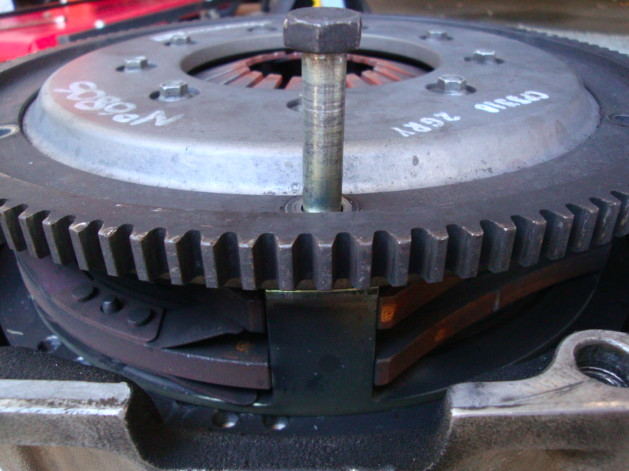
First we need to remove the retaining bolts, that hold the clutch assembly to the flywheel.
You don't need much force to get the bolts to come loose. Just sitting there the flywheel will spin on the bearing. So you will need some way of holding it still. What I did that worked just fine was, held the ratchet with one hand and then hit it with my fist to get the bolts to break loose. That did the trick and I didn't need to clamp down on the flywheel
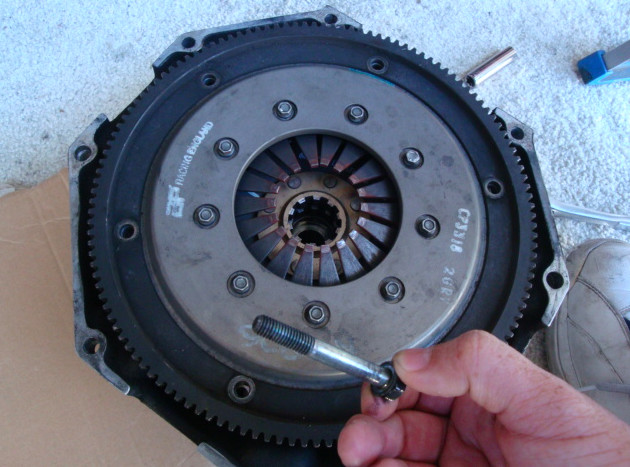
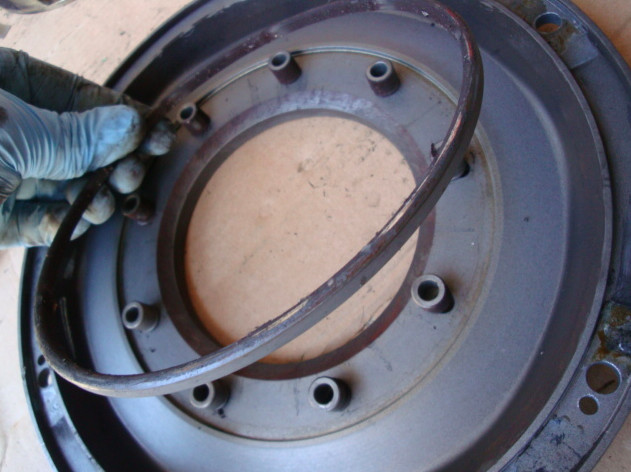
Once all the retaining bolts were removed I took of the starter ring gear.
It just lifts right off.
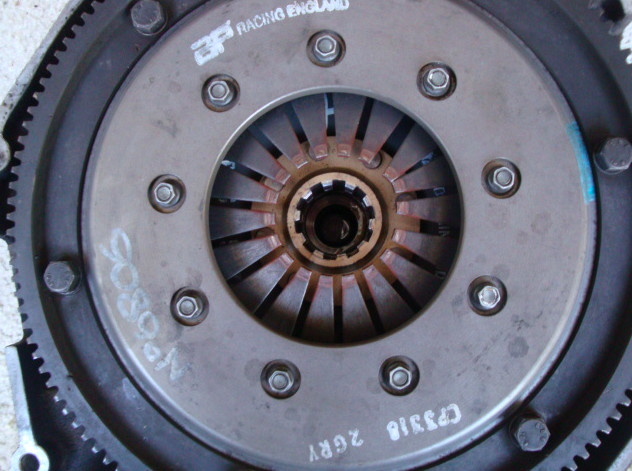
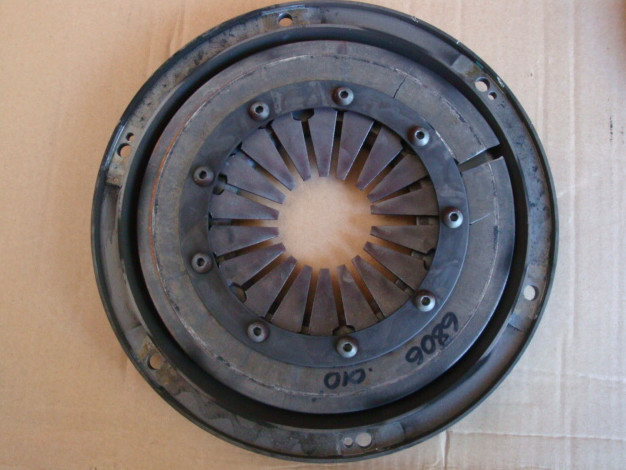
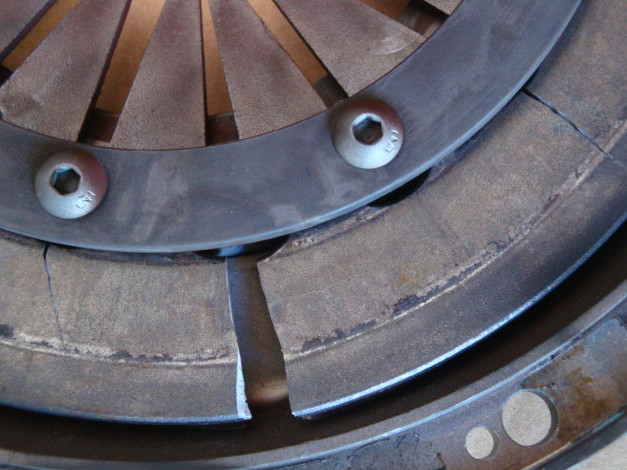
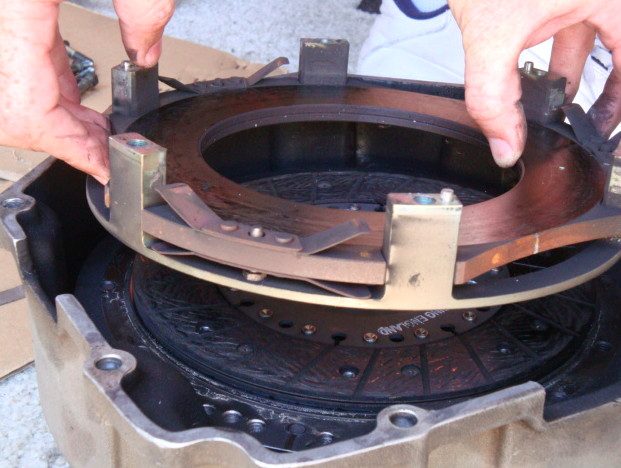
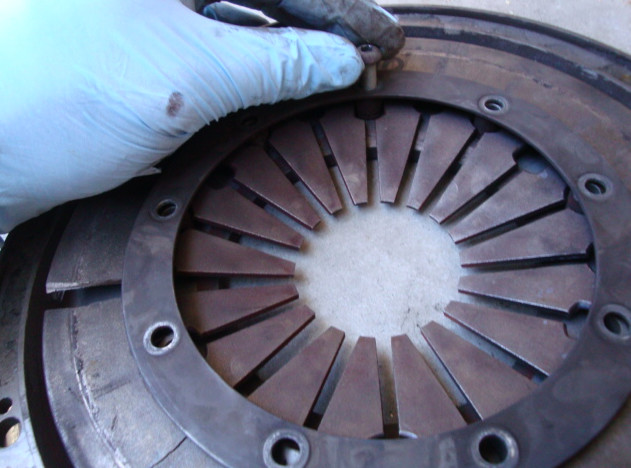
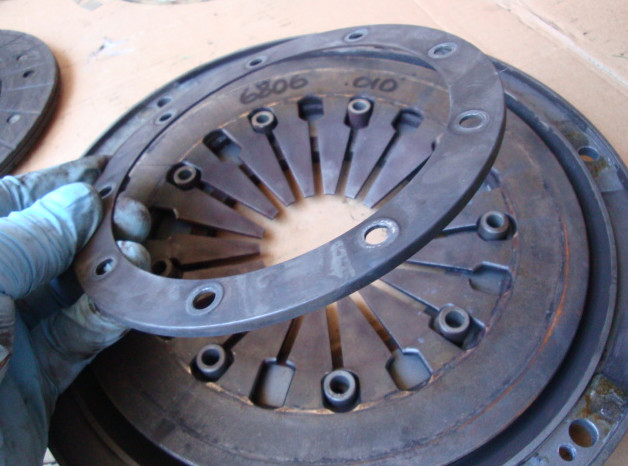
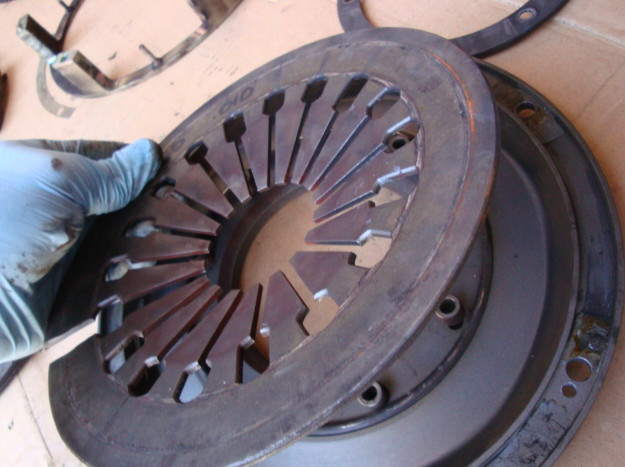
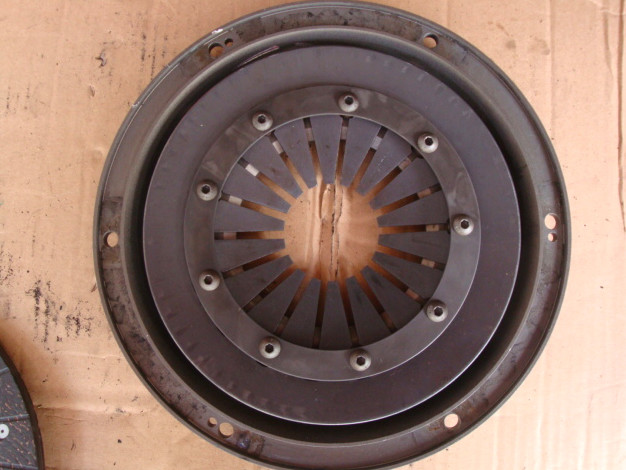
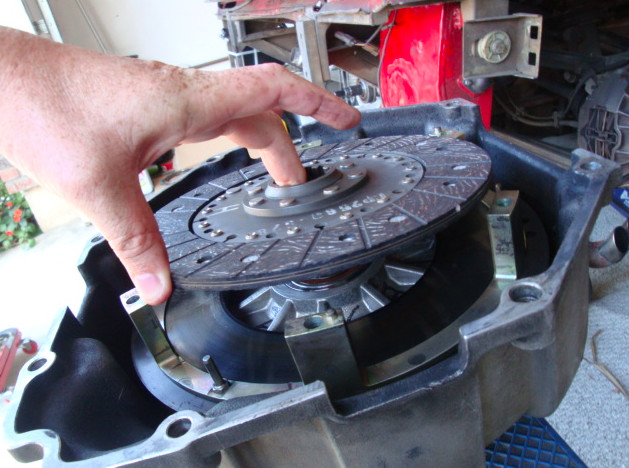
Next I lifted off the pressure plate, flipped it over and had a look.
S N A P !!!
There it is boys. My hard clutch peddle problem, and the reason I could not get the clutch to disengage. The diaphragm spring completely broke in half. It actually split in three different places
I'll get back to the pressure plate later.
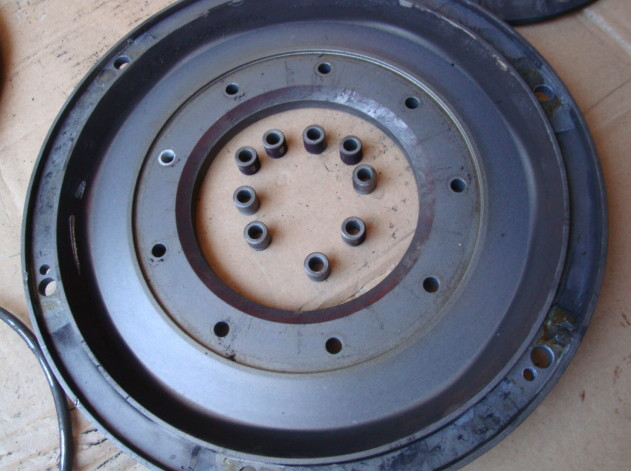
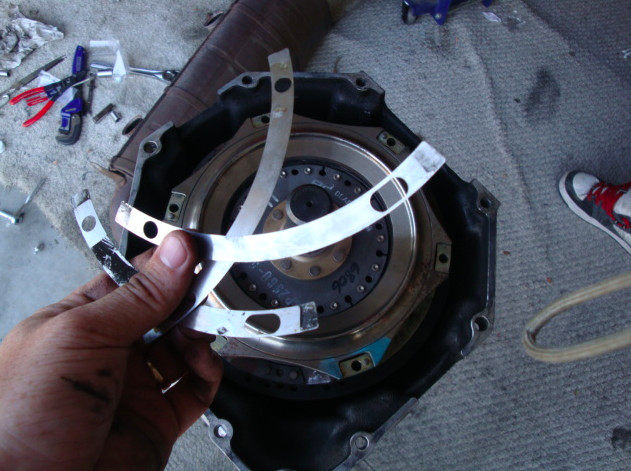
Now remove the three shims from the clutch assembly. You'll notice that on one side the hole is round and on the other it is oval. The oval side goes over the guild dowels.
In this picture you can see how the dowels allow the pressure plate to properly line up on the clutch assembly.
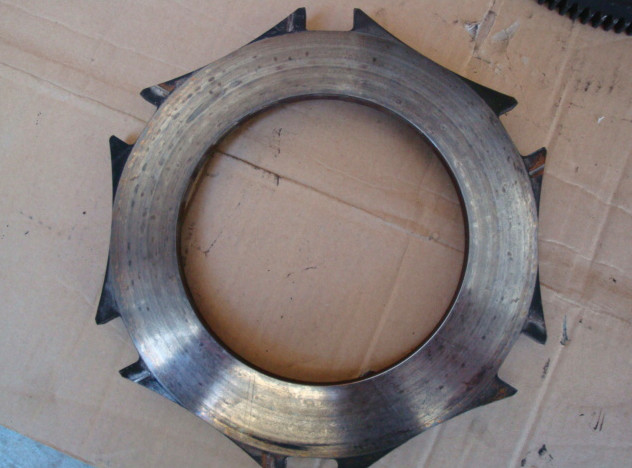
Next you are gonna need to remove the cover/top pressure plate from the stack.
In the second pic you can see how it sits in the stack.
All that's needed is to get ahold of it, and lift it out.

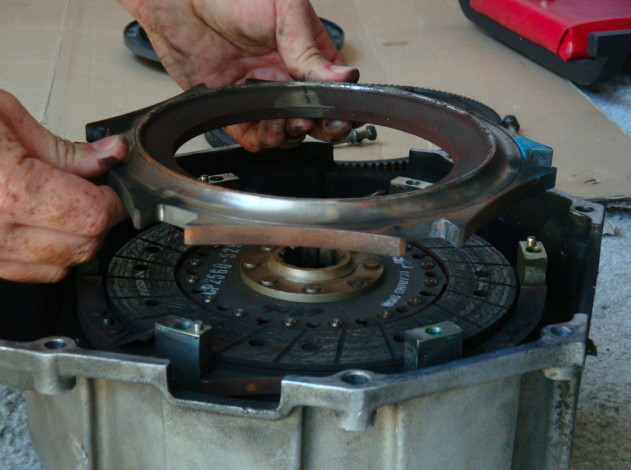
Once I pulled it out I turned it over to see what the face of it looked like.
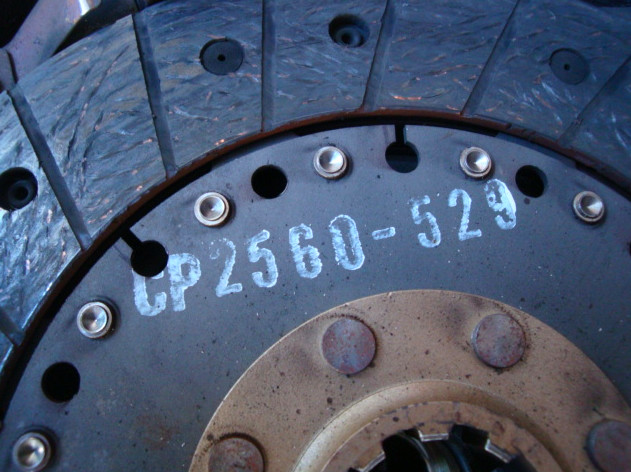
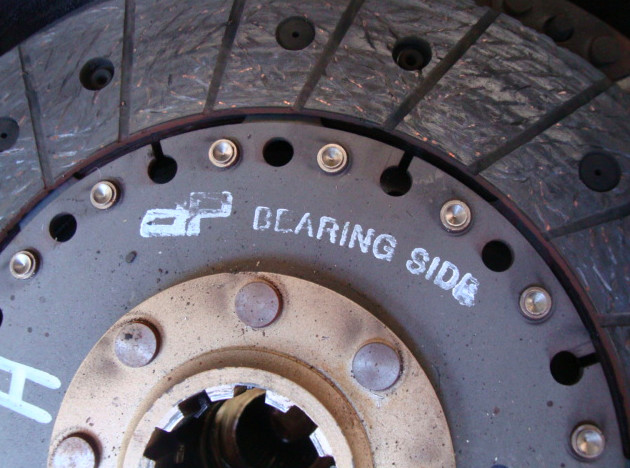
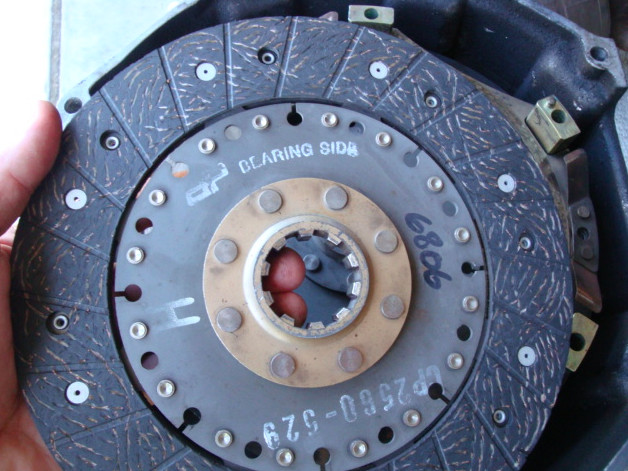
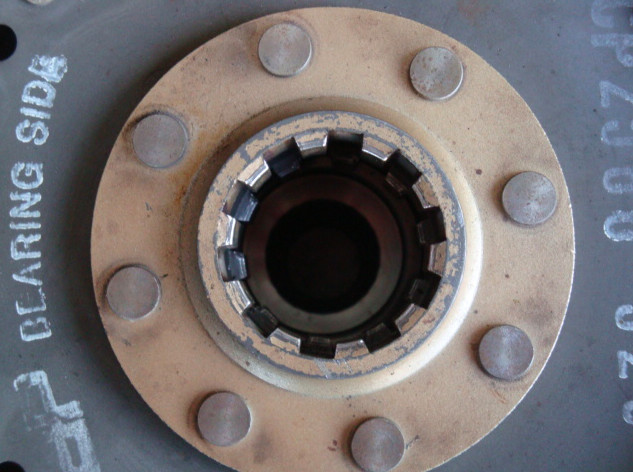
The bearing side clutch disk is next to get taken out.
It's not held in place by anything, and can get lift straight out.
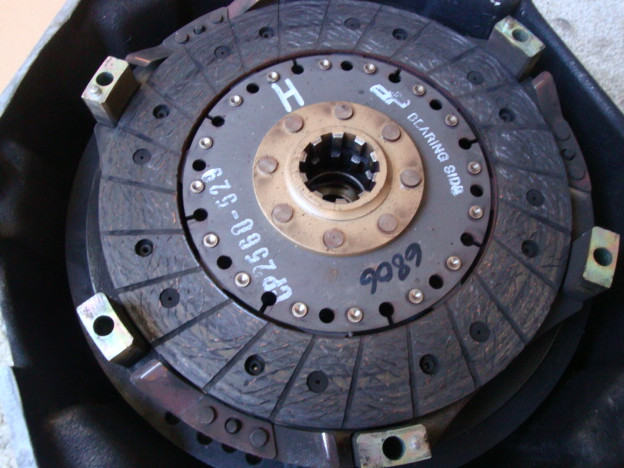
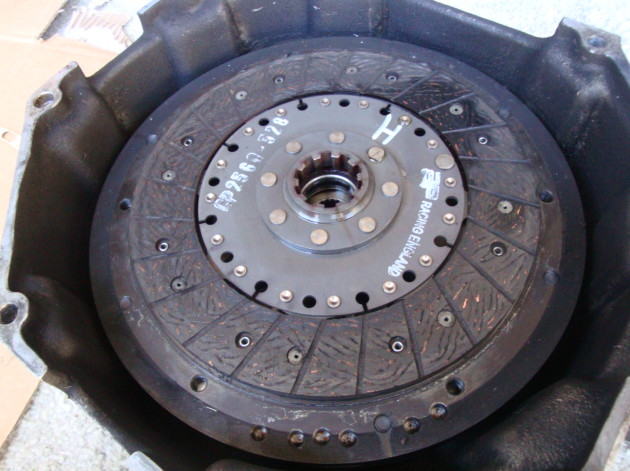
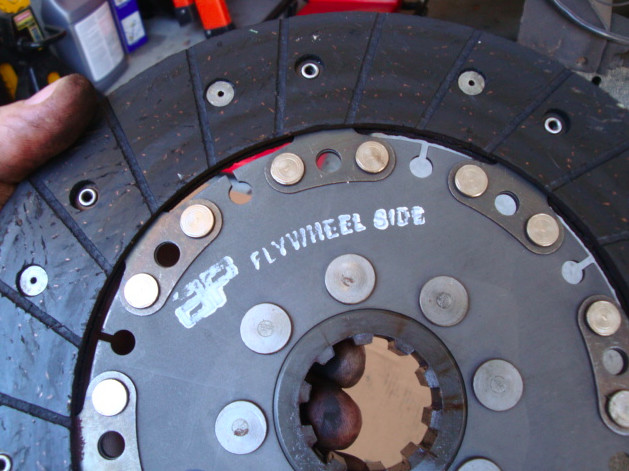
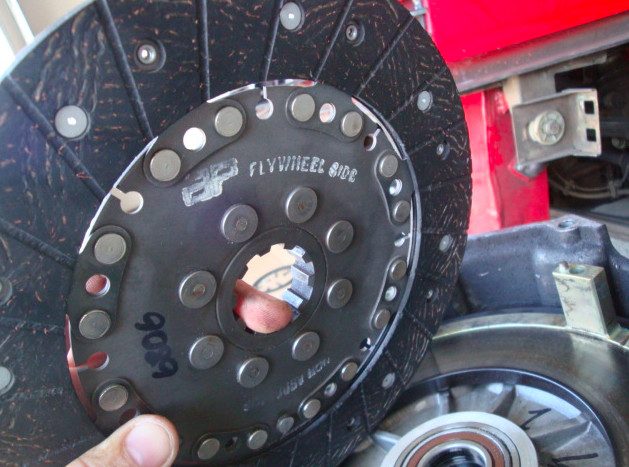
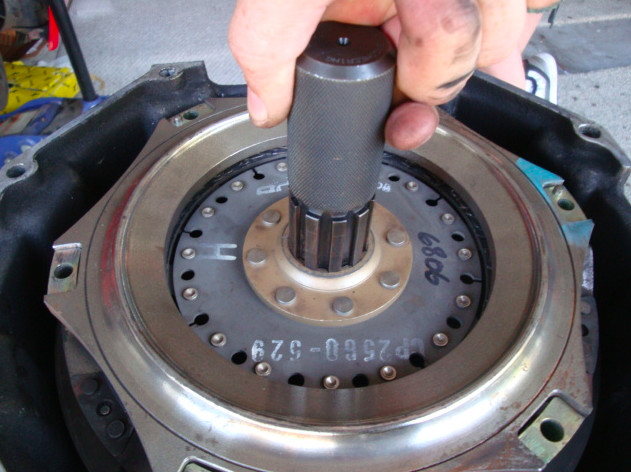
Here we have the AP Racing part number for the clutch, CP2560-529.
Noticed that AP printed what side of the clutch plate goes facing the throw out bearing.
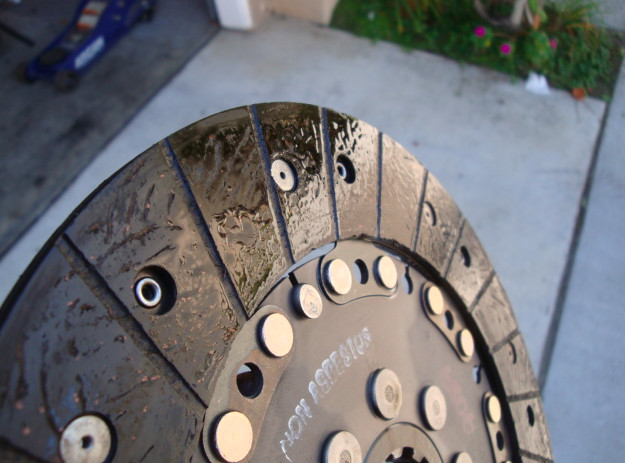
The third picture is the back of the clutch plate. How nice of them to let us know it's non-asbestos. Not like it's a good idea to be inhaling the dust anyway. But just incase you feel like snorting some up your nose........it's non-asbestos.
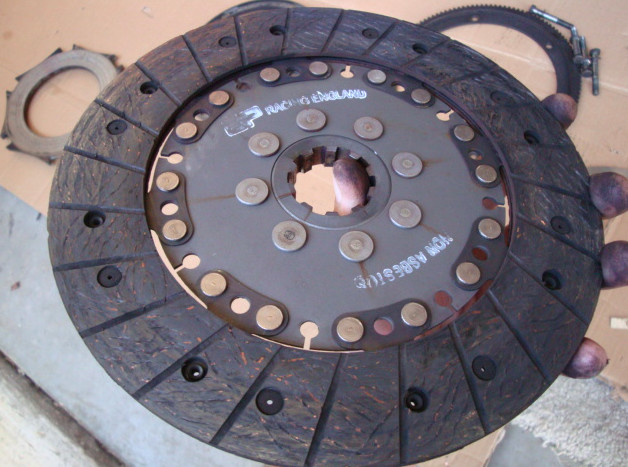
The intermediate plate is next to come out.
However it really didn't feel like coming out of the stack. Both the stack and the intermediate plate lifted right out.
So I had to turn it over and gently tapped it until it slid out.
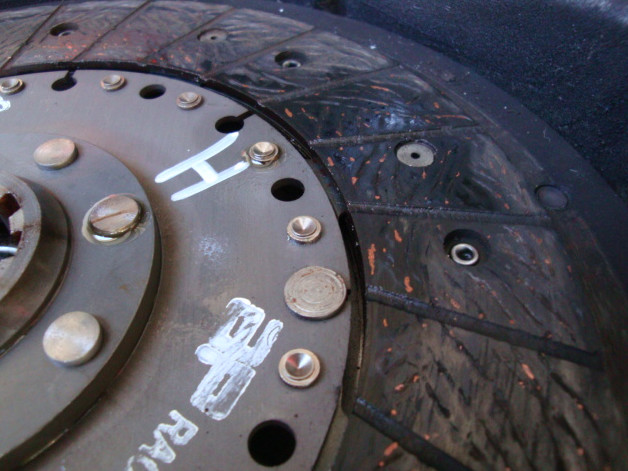
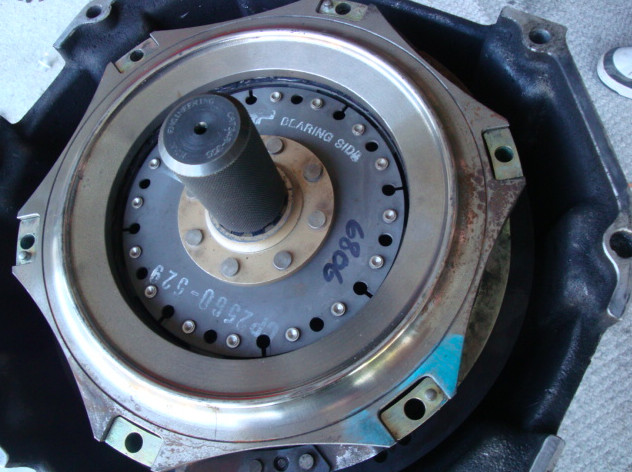
Here we have the is the clutch plate resting on the flywheel.
Do you see what I see? Yup sure do. Why it's some gear oil that got past the triple seals and on to the clutch.
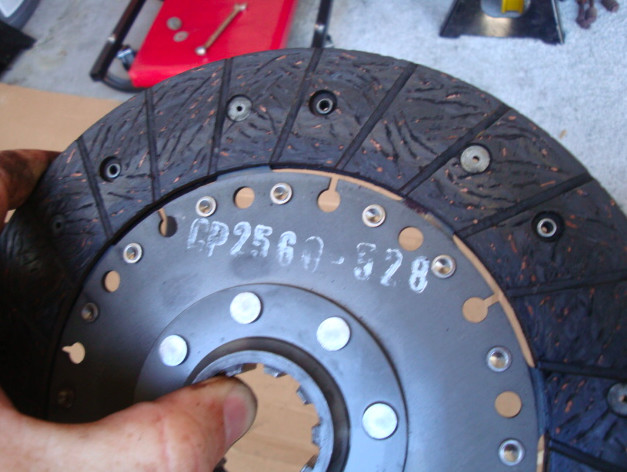
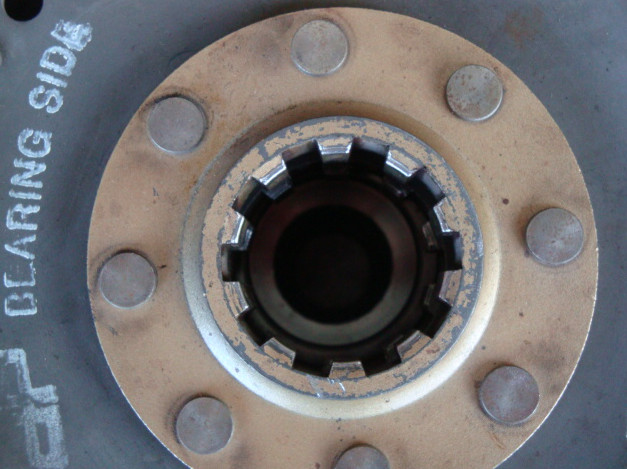
Same as the bearing side clutch plate, the flywheel side clutch plate just lifts out. On the third pic I you can see the back side of the clutch, with plenty of oil that got past the triple seals, and on to the clutch. Just flippin greeeeeeat.
AP did the same thing as with the first clutch plate. They printed the manufacture part number on it, CP2560-528.
They also printed what side goes facing the flywheel.
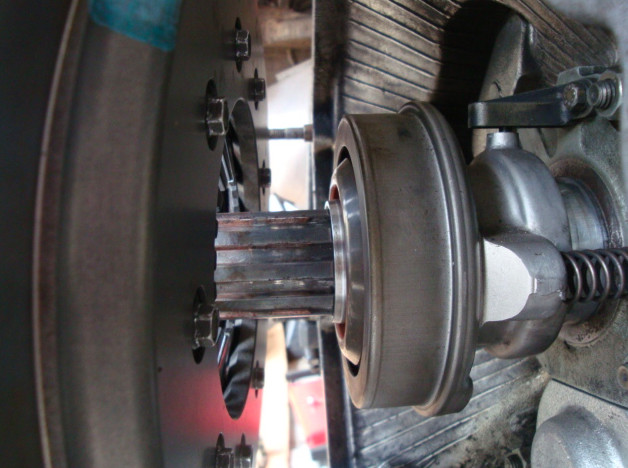
Once I took off the clutch, I also saw some oil on the flywheel.
This kids, is how I think these cars burn up the clutches so fast. And how the seal for the dual mass flywheel goes bad. I'm thinking we may need to make it mandatory to change the triple seals, every time you change the gearbox oil???
Here is a shot of the flywheel, after I cleaned off the oil, still bolted to the back of the bell housing.
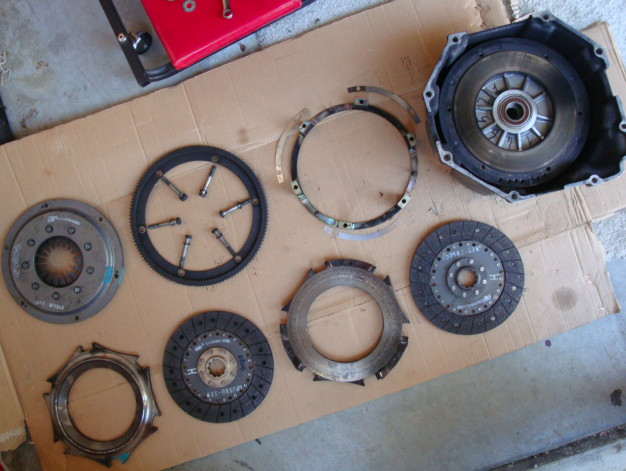
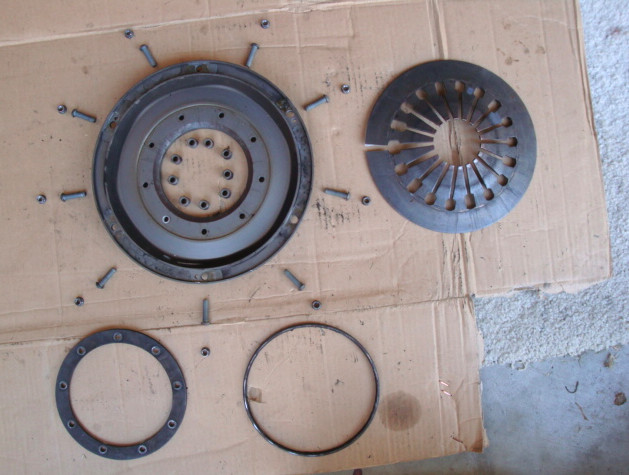
Finally an exploded view of the clutch.
And that kids, is how you take apart the dual disc clutch in your 348.
But wait!!!
There's MORE!!!
That's right boys, your friendly neighborhood Stooge is gonna show you how to remove the triple seals. No sense fixing the clutch, and then putting it back in with leaking triple seals.
Now, are we ready?!
I can't heeeeeear you.........
Are we READY?!
Here we goooooooooo..........
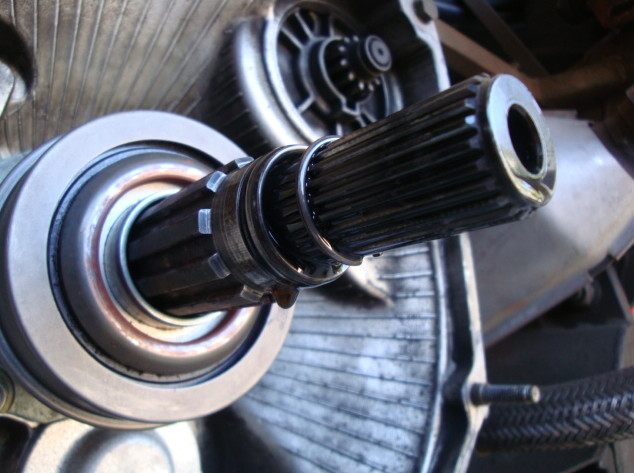
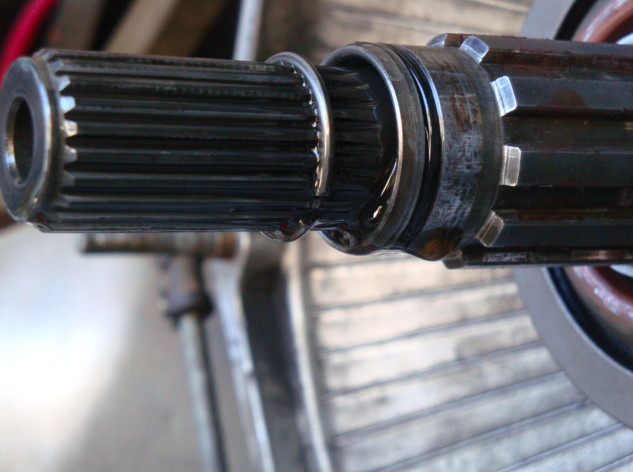
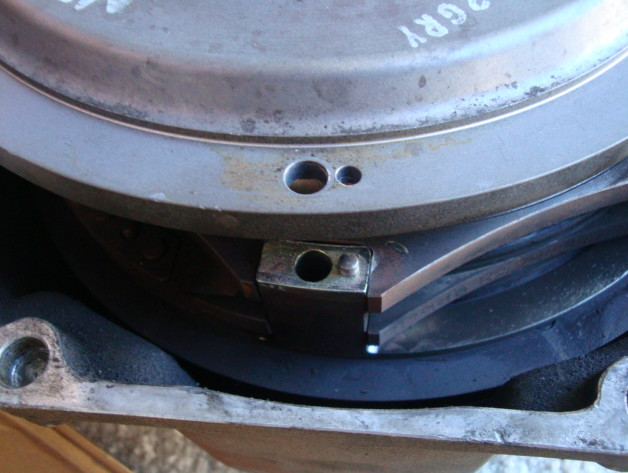
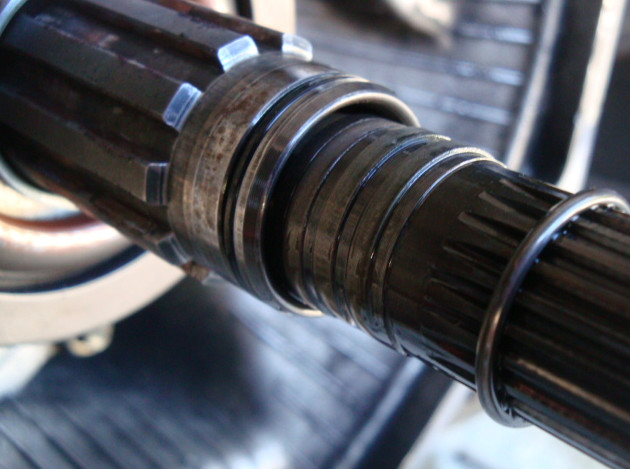
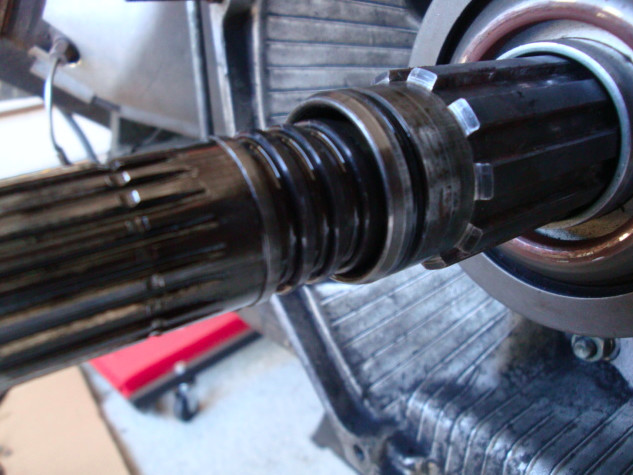
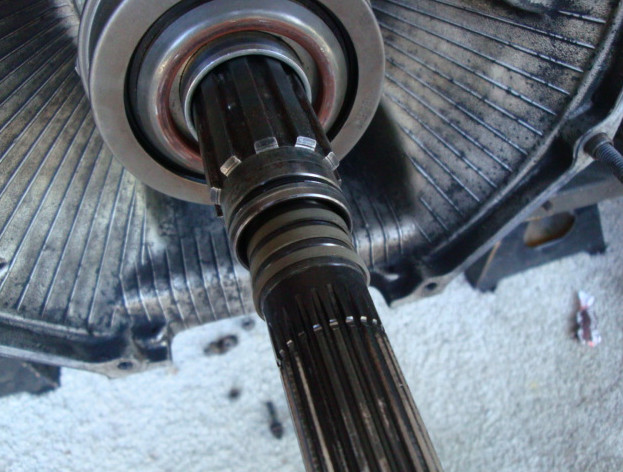
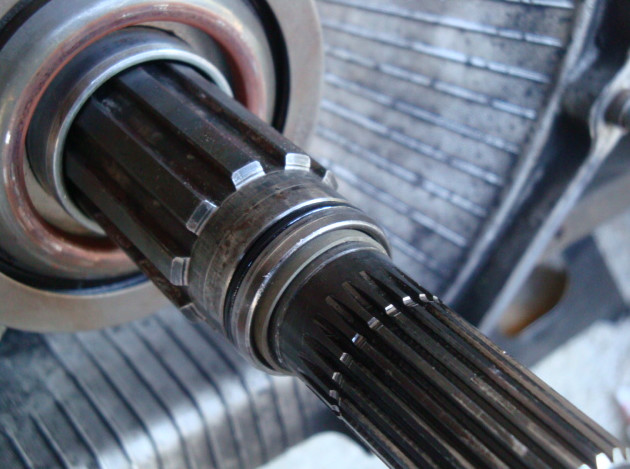
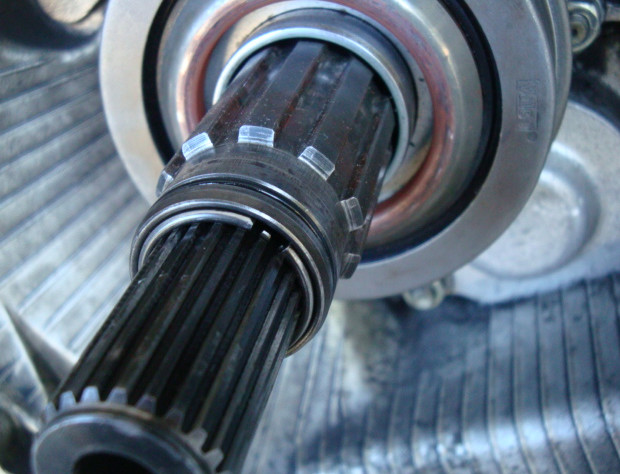
To get to the triple seals all you need to do is, grab hold of the out put shaft and pull it out. Don't worry about pulling it all the way out, because you can't. There is a bump on the shaft, on the inside of the gearbox, that doesn't let it come all the way out.
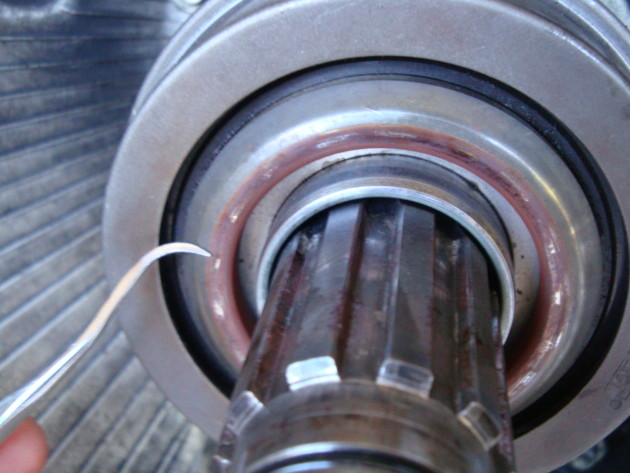
Here we have the triple seals exposed. Leaking little bastards that they are.
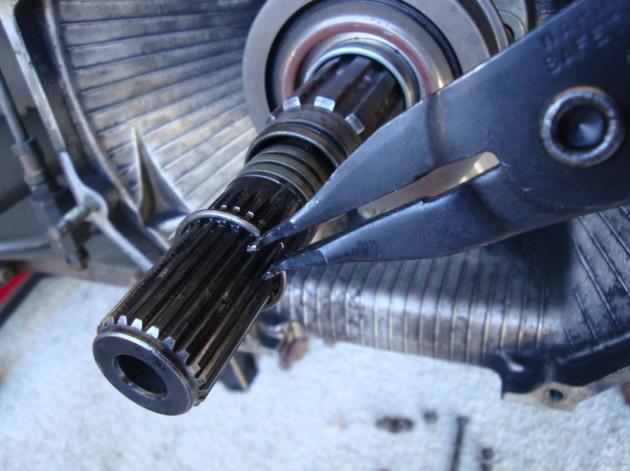
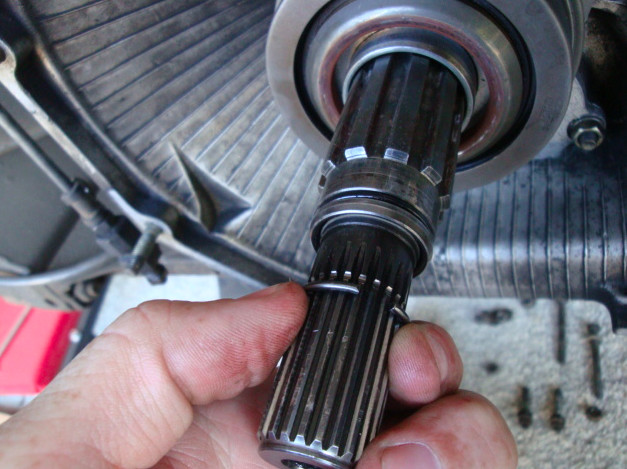
The first thing I did was to get the c-clip out of the way.
Using a spreader, I opened it up, and slid it off the shaft.
You don't really need the c-clip off to remove the old triple seals, but you will need it out of the way to put the new ones on. So I just go ahead and take it off now.
To get the seal off I used a pick to get under them, and lift it up.
Once I have it pulled up enough I slide the shaft of the pick all the way under the seal. Then holding the shaft of the pick, be careful not to poke yourself, pull the seal up to stretch it out. They are tough little bastards so a little bit of force is needed to stretch them out. Stretching them out makes it much easier to remove them, and who cares of they are stretched out, we're putting new one's on anyway.


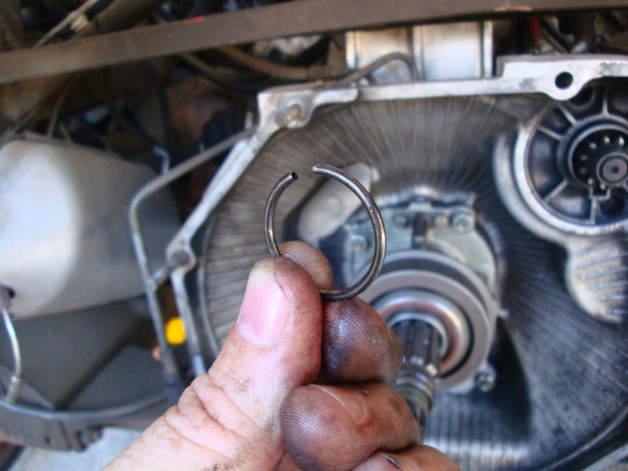
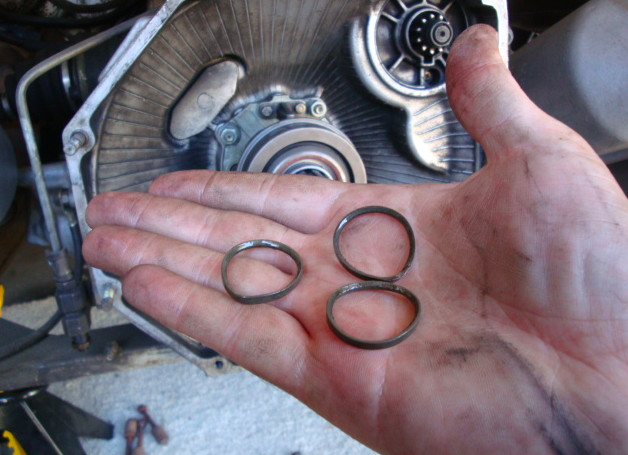
And here are the three little, leakyass, pigs removed.......the triple seals.
And the shaft sans the seals and c-clip.
There you have it kids.
How to remove the triple seals.
Isn't Stooge Time so much fun.
You know what?
I'm feeling like it's time for some MORE SHOW and T E L L kids!!!!!
Everybody sing!!!
It's Stooge Time
A fooking fun time
You'll have a great time
During Stooge time.
LOL!!!
Okay so.......
We have a busted pressure ring right. Well lets see how to take apart the pressure plate.
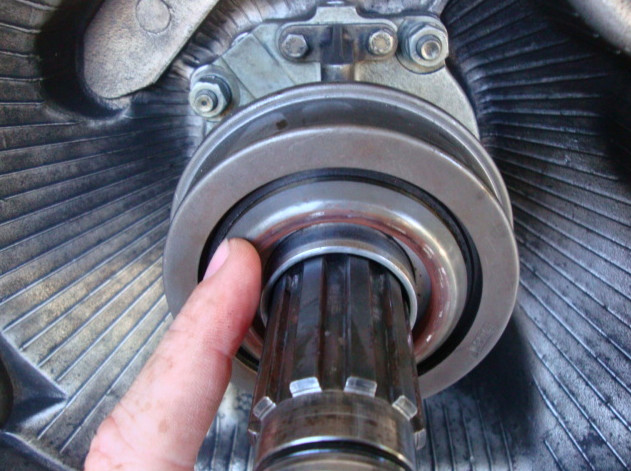
Since I had everything out of the way of the throw out bearing, I wanted to check how it felt.
Putting my finger on the bearing, I spun it to see if it felt rough. It spun just fine with no roughness detected.
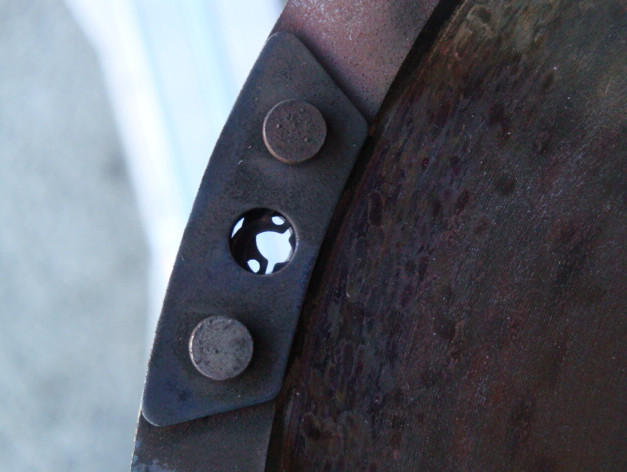
Here you can see the marks left by the fingers pressed up against the throw out bearing.
First we need to get us an allen socket into the back of the retaining bolt.
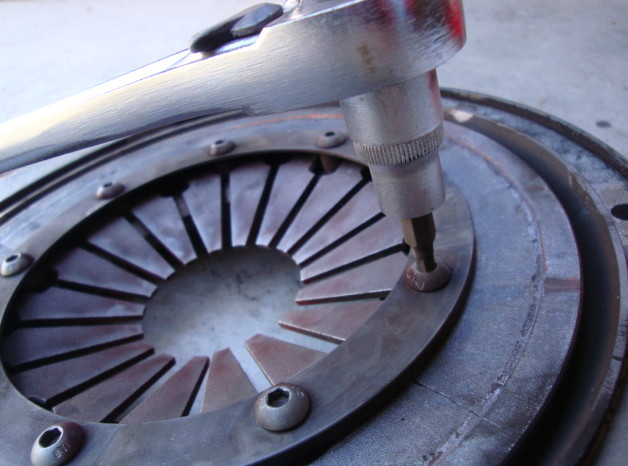
Then on the other side stick a socket on the nut.
Since I don't have a vice handy, I need to get one of those, I stood the pressure plate on it's side and gave it a sharp hit with my fist, to get the nuts to come loose.
Once you have all the nuts removed, lay the pressure plate on it's back so that you have to pull the bolts up to get them out. If you have it facing the other way , when you remove the bolts all the loose parts will fall all over the place, making it a pain in the ass to figure out were everything goes. So lay it on it's back and lift the bolts out.
Now that you have all the bolts out, and everything still in place , go ahead and lift off the top fulcrum ring.
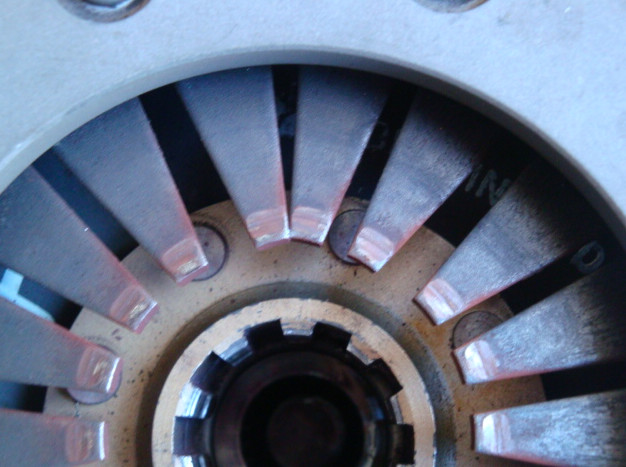
With the top fulcrum ring removed the diaphragm spring is next to come out.
Speaking of.....
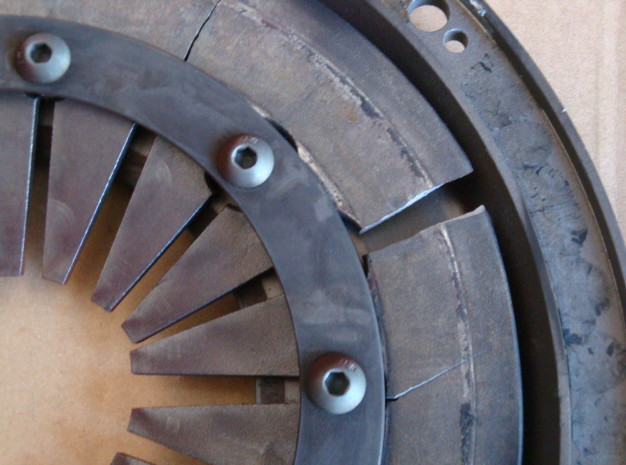
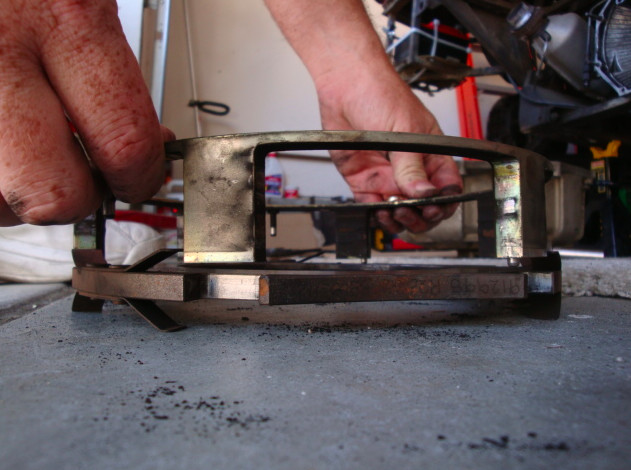
Check this thing out.
It is J A C K E D up big time.
Just look at that sucker. Busted in half, and almost completely broke off two more pieces. Seeing this it's no wonder why I had a hard clutch peddle, and couldn't get the clutch to disengage.
THRASHED!

With the diaphragm spring out of the way you can see the exposed bolts spacers, and bottom fulcrum ring.
Nothing is holding the spacers in place. Which is why I said you need to make sure you take the retaining bolts out of the pressure plate with it on it's back. Other wise these thing will fly all over the place.
Lift off the bottom fulcrum ring and set it aside.
Now I took off the bolt spacers and set them on the ground inside the pressure plate hole, and leaving the plate bare.
Finally an exploded view of all the goodies that make up the pressure plate.
We kids that's how you tear down the pressure plate. And......that's it for now.
I know, I know.
You don't want Stooge time to end because is so much fooking fun.
But Ernie needs to get on the road, to get his ass down to the clutch shop, to see what they can do. That and maybe have lunch with the other Stooges while I'm down in their neck of the woods.
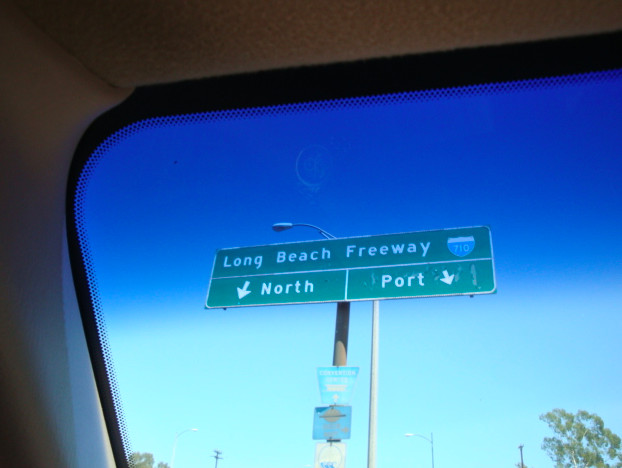
Took a little field trip down to the Port of Long Beach today, to drop things off at the clutch shop.
The guy helping me said he would see if he had something in the back, and if not that he would have to make one. yeah buddy, that's what I'm talking about. I looked up the part number on AP's website and came up with zip, even though the daggon number, and their name, is stamped everywhere. Even tried calling them in the UK and just got the machine. So off to Long Beach it was.

9-7-2010
Guess what Ernie has?
That's right boys. My pressure plate back from the shop with a brand new diaphragm spring in it.
I mocked up how the pressure plate sits against the throw out bearing for you guys.
The reason the clutch doesn't get released, when the diaphragm snaps the way mine did, is because.... the pressure from the throw out bearing, pressing on the fingers, is supposed to cause the diaphragm to flex in and out, but instead the ring just spreads open.
Think of it sort of like an apple juice bottle that has those tops that *pop* when the pressure is released. And you can then play with the top sort of like a clicker, pushing on the little pressure "button" on the top. Sort of the same idea with the diaphragm spring. So when it flexes in pressure on the clutch is released and you can change gears. But with the diaphragm broken is just spreads open instead of flexing backwards to release the pressure on the clutch.
Dang I sound like I know what I'm talking about. Hahahaha!!! Not too bad for a Stooge, huh?
9-9-2010
Well you are gonna really be pissed when I tell you how cheap it was for me to get a brand new diaphragm.
Ready?
For a brand spanking new diaphragm spring it cost me..............drum roll..........$125. That's right, one hundred twenty five smack-a-roonies.
Like I said, I'm not gonna be paying some retardedass price Ferrari wants to charge for a part that they DO NOT MAKE!
9-14-2010
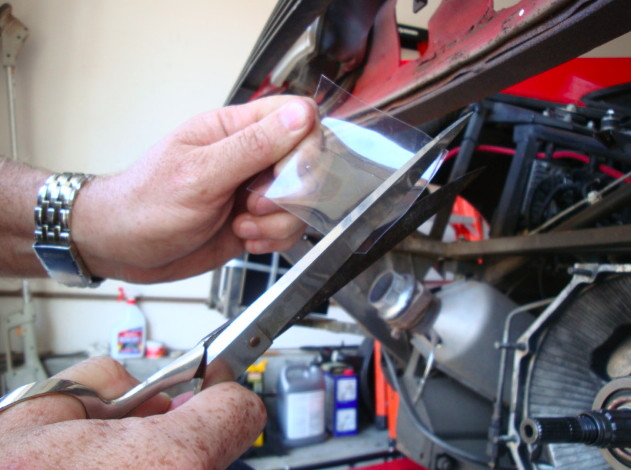
This go around I'll show how I used Ben's (notbostrom) neat little trick of wrapping the output shaft with some plastic.
First thing I did was get a plastic bottle that had nice smooth, round, plastic.
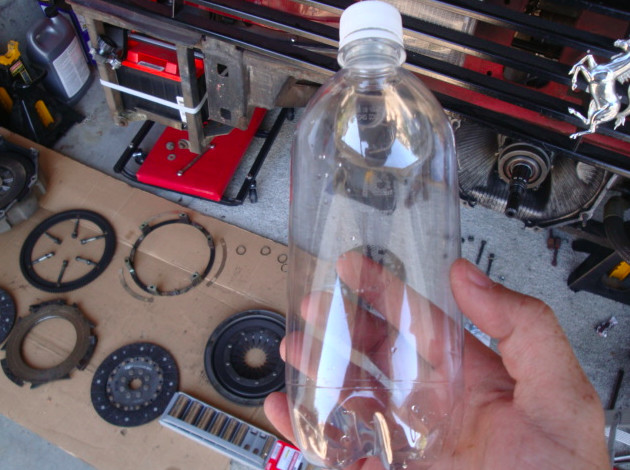
Then I cut out the middle section, and trimmed it to size. When you go to trim it, make sure it wraps all the way around the shaft, but that it doesn't over lap. You want the edges to just barely touch once it's wrapped around the shaft.

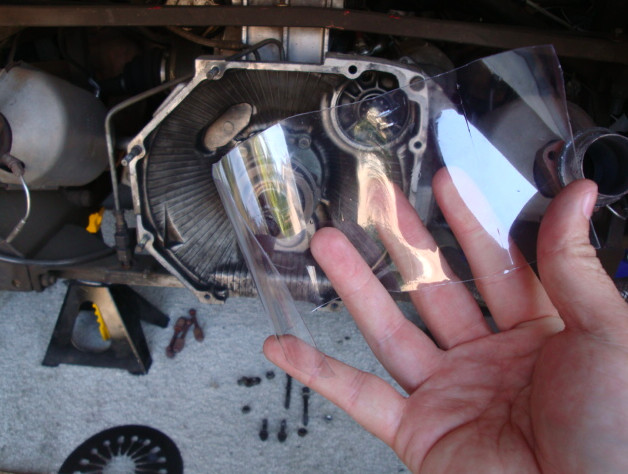
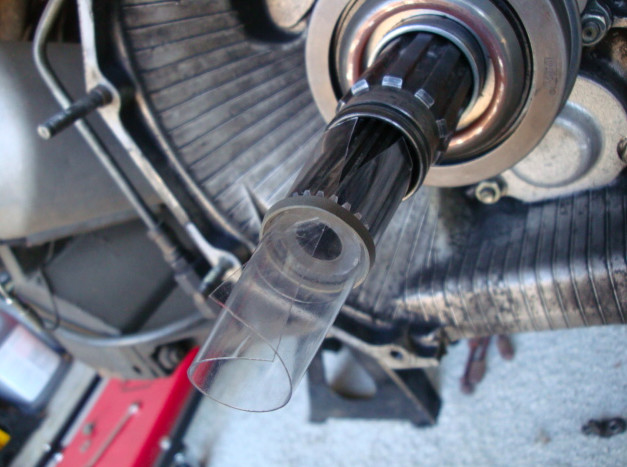
Now curl up the plastic and slide it inside one of the triple seals.

Now put it over the end of the output shaft.
You'll notice that the seal doesn't fit over the shaft, which is why we need to use Ben's little trick with the plastic, to help get it over the end.
Instead of getting frustrated trying to push the seal over the plastic with my fingers, I can up with this little do-dad. I trimmed off the rest of the bottle around the top and then used that to get the seal started over the shaft/plastic. Works great because is applies the pressure evenly around the seal.
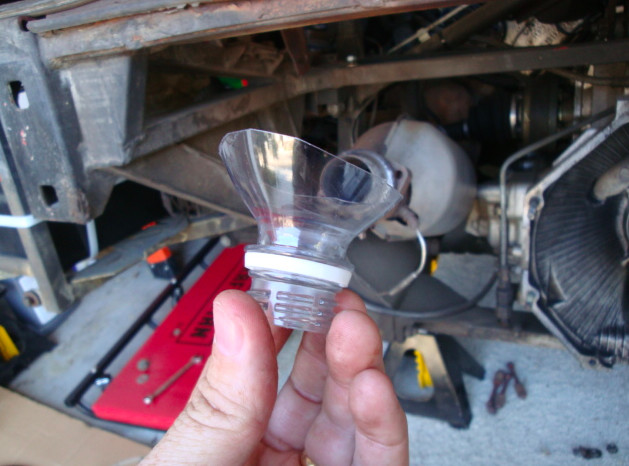

Once I got it started on with "especiale Ferrari tool #2054" I was able to then finish pushing it on with my fingers.
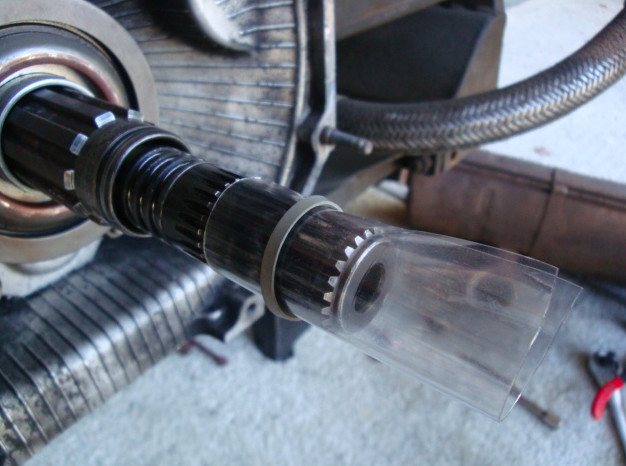
Make sure that you have the plastic pushed all the way on the shaft, once you get the seal on, so that the end of the plastic is right at the groove, on the shaft, for the seal.
Once I got it started on with "especiale Ferrari tool #2054" I was able to then finish pushing it on with my fingers.
Make sure that you have the plastic pushed all the way on the shaft, once you get the seal on, so that the end of the plastic is right at the groove, on the shaft, for the seal.
You will notice that the seals are stretched out a bit once you get them on, and that when you go to push them into the transfer shaft, they don't really fit inside. So don't try to force them in, because you don't want to deform the seal causing it to leak once you have things back together.
So what I did was, after I got each of the seal on the shaft and into their groove, I compressed the seal with my fingers, as I tapped the tip of the shaft with the bottom of my fist, until it went into the transfer shaft.

Once you have all he seal on, and in, you will want to put the c-clip back on and into it's groove. It helps to use the spreader when you are pushing the c-clip on.
Then slide everything in place.
And that is how you put the triple seals back on.
A big thanks to Brother notbostrom, for that nice little trick.
The next show will be putting the clutch back together. But you boys are gonna have to wait for that one.
9-15-2010
First up is putting the stack ring back on the flywheel. Set the stack ring on the flywheel so that the bolt holes in the stacking posts line up with the bolt holes in the flywheel.
Next the flywheel side clutch goes in.
Be sure the side that has "flywheel side" printed on it goes face DOWN on the flywheel, like so.
When you go to install the intermediate ring, you will need to have the holes in it lined up with this dowel on the stack ring.

But........
Here is the small detail that can get over looked.
I noticed this when I was putting the center plate back on and it didn't wanna fit. Well what i noticed was these small c-clips that were loose inside the holes for the separation springs.
make sure the holes in the c-clips are lined up so that the dowel can slide through them and the hole in the plate.
Now that the c-clips are all lined up go ahead and slide the center plate in place.
Making sure that the dowel goes through all the holes.
The bearing side clutch can now be installed.
Same deal as with the first clutch disc, but this time the face that has "bearing side" printed on it goes face UP in the stack, like so.
Now the top plate can get put on the stack.
When you are putting the clutch discs in, the inner grooves can get put in not lined up.
So when you are dropping the clutches in place try to eyeball line them up as close together as possible.
Now I had access to the Hill Engineering Clutch Alignment Tool. This thing is TOTALLY worth the money, and made the job of lining up the clutch discs VERY easy.
Leaving everything still unbolted slide the Hill tool trough the hole in the first disc. The gently turning it, while gently pushing, turn it until you feel in drop through the hole in the second plate lining the clutch discs up perfectly. Then leave it all the way in.
You need to do this because it makes the job of getting the entire assembly back on the shafts much easier, once everything is finished.
With the clutch discs lined up we can now put the shims back on the top plate.
But make sure you don't put the shims on the wrong way. The oval shaped hole does NOT go on with the shim facing the right. As you can see here, the small round hole will not line up with the hole on the stack post, if you try and put in on this way. So don't do it.
The oval hole in the shims goes on facing LEFT, with the curvature of the shims matching the curve of the clutch.
Leaving the hole in the stack post, and the alignment dowel in the oval opening, the proper way.
Like this.
NOW the pressure plate can go back on.
Make sure that you have the holes in the pressure plate lined up with the dowel on the post, then set the pressure plate in place.
Next the starter ring can go back on.
Now make sure everything is lined properly.
With everything lined up, go ahead and drop the retaining bolts in.
Since the pressure plate has a new spring diaphragm in it, and the separating springs on the intermediate plate, are keeping things spread apart, you are gonna have to put your weight in to, to compress everything together, and allow the bolts to thread up.
Once you have all the bolts started, you can tighten things back down. When you are tightening the bolts on the starter ring, do it in a "star" pattern.
Once everything is tightened down NOW you can remove the clutch alignment tool.
And everything is ready to go back on.
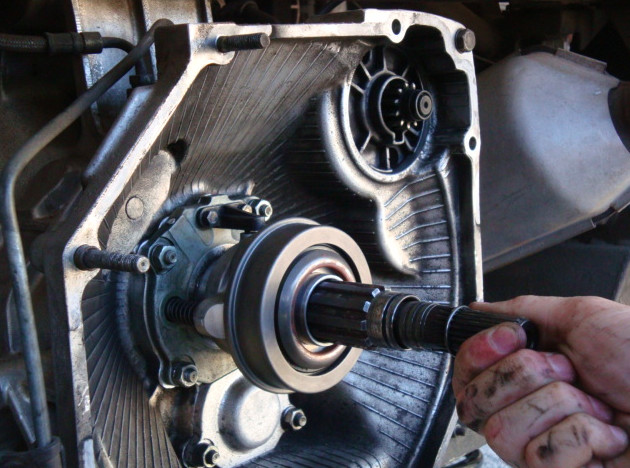
When you go to put the bell housing back on you will still need to line up the groove in the clutch plates, and the grooves on the output shaft.
What I did to help make this task a bit easier was to, put my hand on the bottom of the starter ring, and slowly rotate the flywheel as I applied pressure to the bell housing/pumpkin, until I felt it pop in place. It takes a couple of tries, but it will go back on.
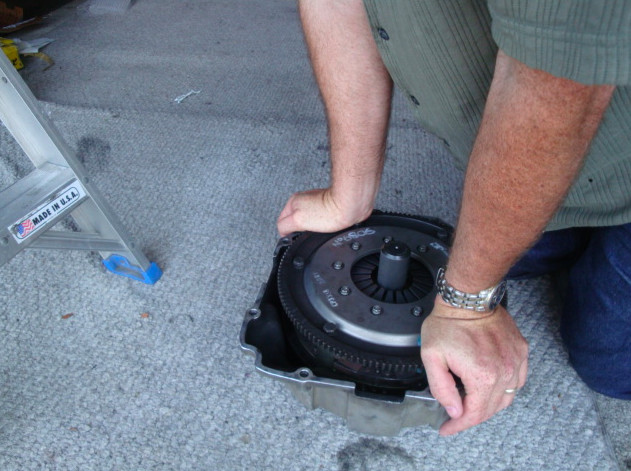
Here is it with all the goodies, back in the car, ready to go back down the road.
That is how I put the dual disc clutch back together, and in a 348.
STOOGE STYLE BABY!!!
9-25-2010
Well it's time for an update.
Since I've put the rebuilt pressure plate back in I have noticed a couple of things.
1) The clutch isn't as hard to press in as the old one was. It feels more like a normal cars clutch. The old pressure pate took a bit more force to get to disengage.
Which leads to my next observation.
2) At full rpm gear changes the new diaphragm doesn't grab as hard as the old diaphragm did. Before I could rev my car all the way to red line, do a quick 1st gear to 2nd gear shift, dump the clutch, mash on the throttle, and bark the tires. Now if I get on the throttle to fast I can feel the clutch slip. I can't just stomp on the throttle the instant I release the clutch. I have to let the clutch fully engage THEN I can stand on it.
So yesterday I called up the guys that did the pressure plate, and asked them if they had any stiffer diaphragm springs. I was told that they were looking into it, but the problem is there aren't very many pressure plate manufactures in the US any more, and it's getting harder and harder to source diaphragms.
So I guess I'm just gonna have to live with what I have for now. No more barking the tires for me till I can source a stiffer spring.

Great build!
Posted by Diggymart on 2/19/20 @ 6:30:37 PM